Browsed by
Category: Tutorials

Finally Mer-Felting! in Toronto Ontario Canada part 1

Finally Mer-Felting! in Toronto Ontario Canada part 1

Finally Mer-Felting! 

Monday, Oct 20th 2025.

Monday Morning arrived much too early. Instead of my original plan of donning my apron, a cherished reminder of my wonderful mother in law, and heading to the guild to work on the library, Glenn was loading a couple of suitcases and a project box into the car.  It’s going to be over the usual 5.5 hour drive, with a brief stop to feed the car and ourselves. We are adding a couple quick shopping detours once we get into the Toronto area (primarily, Board Game Bliss). So maybe it will be quicker if you meet me in Oakville? The hotel has a pool you could wait in, but its hours are limited, and it was really chilly the last time I was in it. (No wet felting in the pool while you wait!!!)

map showing root from Ottawa to Toronto ont. canada1.11) A map of  the edge of Ontario, between Ottawa and Oakville, to give you perspective of where we are going today

It was a long drive down, is it possible that either Ottawa or Toronto have moved farther apart?  By the time we got into Oakville, and found a spot to eat dinner, the Pool was closed. So, how about we meet on the Go Train platform just down the street from the hotel, and you can come into Toronto with me, it’s the 8:30 express train. Don’t forget your umbrella, the forecast is rain all day.


Tuesday, October 21st 2025

One of Glenn’s Brothers ( brother #4 of 5 brothers) is joining us today, having flown in from the States. I am sure you will like him, he is a math teacher and thespian.  We hiked down from the hotel to the Go station. Oh my! The Go train has a raised platform for wheelchairs and walkers to more easily get on and off the train. The Train worked beautifully and was very comfortable.  Unfortunately, when we got to the subway station, the lifts for the subway were not all working, so it took a bit of extra time to find the lifts that were and get back from the detour the helpful transit people had sent us on. Good thing the building we are looking for is not too far from a subway stop. We arrived just in time, instead of early, as Glenn’s brother thought we would be. (Avoiding stairs always takes much longer when using public transit.)

We were going to a posh law office in a very high tower, in a canyon of high towers, reflective glass and old stone buildings.

some of the landmarks i could see looking out the window i was sitting by 1.12) Some of the landmarks I could see

There were comfortable couches and snacks by the reception desk, and an open stairway in front of a tall window. This window alcove had 2 chairs and a few plants, and a fantastic view looking, I think, sort of south or southeast. (It was hard to tell on the 16th floor, all my normal landmarks are at ground level, and I never had a direct view of the sun. Later consultation with the map suggests I was looking west-ish.)  The Brothers wandered off to a room on another floor to do legal stuff. (I am not a beneficiary, I am not one of the 5 brothers, so I didn’t go with them. I am just here as Glenn’s Driver, moral support, and to do some felting.)  I gave up the too-low comfortable couch for the area under the stairs in front of the window with my box of felting supplies. I checked with the office manager that I would be out of the way there, and the huge window could prove interesting if the rain holds off longer.

interior desk, wating area and behind a hint of the open stairs.1.2) This is a nice office, I don’t want to be underfoot, and the lighting is better over by the window.

window in back ground with glass towers in for ground 2 plants and a chair with my project box of Mer-Felting stuff1.3) Settling into a corner under the stairs.

vew out window with buildings, Hudson bay, Old city Hall New city hall1.4) There were some iconic buildings in my view. The Hudsons Bay building, a church(out of shot to the left) and what I finally figured out was old Toronto city hall and New City Hall.

I spotted an odd building that may not have been a building. I have seen a program on a subway system, I think it was Boston, but it could have been New York (both were discussed in the program), they had buildings that kept their facades, but had been gutted to add ventilation systems for the subway tunnels beneath them. I think this may be one of those fake buildings. It looked very interesting. I would love to have had a tour of it!

old brick building with turbines in center of it.1.5) a shell of a building? 4 massive turbines stick out of the middle of what remains of the stone building.

As I was getting organised to start felting, I noticed I had more than just architecture to watch this morning. I have seen roofers working before, but it’s always from below (not a very enlightening perspective). This was a flat roof, too, so not something I have seen done in person before.  This will also give you an idea of the actual zoom on my camera, as I got curious about that, too.

1.6-1.8) Oh no, now I have made all the guild members very nervous!!!

While they are getting to work, adding plastic sheeting and rubber membranes to the sides, I should get to work too. As much as the Mer-boyfriend wants to do his own abs, I should really give him a hand (ok, literally). I am going to focus on hand and arm musculature today.

I started with forearms and strengthening the wrists. The density of the felt was too soft, and the wire strength was overpowering the wool felt through the full forearm. I want the arias just above and below the wrist to be much firmer so the wire will be persuaded that bending at the wrist is correct, while bending in the forearm is not. If you are making a figure that will only be in one position, this is not as big a consideration. Since I don’t know how they will eventually decide to pose,  I want them to have options.

Diagarm trying to show one way of trying to help the wire bend where you want it to is firming ether side of the joint and less firm interior felting at the joint.2.1) Diagram of wool density around a joint

Note: if you would like the surface over the joint to have the same superficial density as the surrounding felt, you can use a crown needle or use shallow felting to firm the surface, but leave the under layers less densely felted.

needle stuck in forarm extensor muscles2.2) working on the muscles of the forearms (the extensor group)

working on superior aspect of arm just above the elbow 2.3) working on the posterior aspect of the upper arm just above the elbow joint


It’s handy to have good myology (Muscles) and osteology (Bones) diagrams for this. If you don’t have an extensive selection of anatomy and myology books, Google can be very helpful with its search “Images” tab. Good research is part of the fun of felting!

Once I had firmed up the arms, I focused on his hands. I have the fingers wrapped and have added the beginnings of the thenar and hypothenar eminence at the base of the palm. The fingers can be tricky or fussy to work on. If you only work from one angle, it will flatten the look of the fingers, so working all the way around the fingers works best. Make sure that your needle has the first barb close to the tip so you don’t have to stab deeply to move the fibre. This is again a good spot to switch to a crown needle; it’s not as fast with only a total of 3 barbs, but it doesn’t need to go as deep to engage the fibres.

working the needle around the thumb reduces the tendency to flatten the digit by only working in one areabuiding up the mucsles at the base of the palm (thenar and Hypothenar emences) there is no exam at the end.2.4-2.5) working around the thumb

the Young Mer takes a brake on top of his project box2.6) Mer resting and having a break in his project box (needle in lat border of the palm).

I checked in on how the roof repair was going. I was trying to figure out if the gravel part was done or if it was yet to be done.

watching roofers lay out plastic on top of black layer, and wondering if the area with rock is finished or yet to be worked on.zooming in i can see the gravel is the top finished layer and it is yet to be added to the secion being worked on.3.1-3.2) watching roofers lay out plastic on top of the black layer, and wondering if the area with rock is finished or yet to be worked on. Using the zoom, I figured out that the gravel is the top layer.

The reflections are interesting with the stormy sky and landscape reflecting in the glass tower in front of me. The clouds have varying looks of impending downpour pour but so far, no rain has fallen. In the glass tower in front of me, I can see a landscape reflecting what is past the building I am in. As the light shifts and changes, the reflections shift too. It is distracting from my felting, and now I wish I were working on a landscape (don’t tell the young Mer, I will get back to working on him again!)

gray sky and building reflecting in glass tower in front of me3.3) Storm clouds and reflections in the glass tower before me.

If you look to the lower right side of the reflected building, you will see the landscape that captivated my attention. I am not sure if it was just the shifting lighting or if it was the segmentation of the image by the window frames. I spotted a brief sliver of light on the fall trees as it passed and disappeared.

close up of landscape reflected in glass with a patch of sunlight brakeing through the clowds3.4) The landscape reflected in the glass with a sunbeam piercing the clouds, highlighting a stretch of trees and houses.

The clouds cleared for a moment, a bit later, but were quickly followed by a thick grey miasma of impending wetness….

storm clouwds behind building but blue sky reflecting in glass clowds streach over the city and only a hint of blue sky left in the glass reflection3.5-3.6) It was particularly striking with the blue sky reflecting in the glass and the storm rushing in behind the building.

blue sky and white clowds reflecting in glass of tower3.7) The storm rushed past, determined to dump water somewhere else since the sky cleared and the reflections of clouds were fabulous

I next turned my attention to the old City hall (the new one is a half-circle tower, not nearly as interesting a building). The old tower and main building are dwarfed by the much taller buildings around it. Unlike the many new reflective towers, this building has ornamentation and detail to look at. I hope you are fascinated by architecture as I am and will be inspired. If not by the architecture, then maybe it will give you thoughts of who would live in a building with such interesting windows and what they should wear?  What would the gargoyles look like if they got up and flew off? Or, maybe the patterning around the clock face tower will inspire a vessel or scarf?

old city hall with new city hall in the back ground 4.1- old city hall disappearing into the new building surrounding it

copper roof and some of the window patterns in toronto old city hall4.2- just peeking over the building, the fabulous fenestration and detailing are just visible,

Gargoils jsut under clock face on tower one on each of the 4 corners 2 are visible in this shot4.3- Gargoyles!! Oh, the dentils in the roof and repeated under the gargoyle’s ledge! What is that pattern just under the clock? If only I could get closer…

detail of clock face and what i thot was a pillaster untill i zoomed in.4.5- Oh yes, I can get closer!

more decritive moteafs on a gable end of part of the roof4.6)- more patterning on this gable end, the sun with swords, circles with a bar and plain weave?

the light is deepinging the shadows showing more of the deail embelishment of the stone work and gargoil4.7-In the late afternoon, the sun came out, giving this raking light, creating depth and accentuating the details

light reflecting of nabouring glass town is cast on building and roof making intersting distorted patterns 4.81-  As the sun swung further around and pierced between buildings, it finally struck the glass neighbour of old city hall. Bathing the old building in reflected light and shadow patterns from its towering neighbour.

the shadows are darkening between the towers but the sky is blue with flufy white clowds. the relections on old city hall are continuing.4.82) Sunset is approaching, and the reflections off the glass tower onto the stone and copper roof are intriguing but almost lost amongst the urban landscape. 

young Mer showing progress on his hand. he is smileing and looks pleased.5.1)The young Mer showing the progress on his hands

close up of hands5.2) Hands can be a suggestion, or you can spend a long time adding knuckles and surface detail (ask Google to show you surface anatomy, and you should find diagrams of the superficial features)

By late afternoon, I had been switching back and forth, from felting to photography, as the light shifted and played off the reflective surfaces. That landscape I had been watching in the reflection of the building across from me occasionally had highlights of sunshine between clouds, causing parts of the landscape to be illuminated while other parts were darkened. It was very dramatic.

another late afternoon patch of sunlight hits the landscape behind the reflected building 6.1) Another sunbeam strikes the landscape reflection in the building across from me

The sun was getting lower, and I was hoping for a fabulous sunset.

the cast light is getting weaker but still creating intersting relections on nabouring buildings6.2) The reflections and cast light were getting interesting!

 Glenn was sent down by their lawyer (for brothers #2 through 5), to say I could go upstairs and join brothers 4 & 5, since a possible agreement had been found… but when I got there, ah, not quite yet. Glenn had carried my Camera, which accidentally stayed in the room with him, and I went to the hall by the elevators. There was a small table beside the door labelled mail-room and a perfectly placed pot light. So I unloaded my project box and got back to work. Unfortunately, I missed the sunset, since there were no windows in the hall. I did have a lovely chat with a lawyer (not involved with mediation) who was working late as well. I give her a quick demo-brake, explaining needle felting and the Missing Mer-teen dilemma and making a Mer-boyfriend to tempt her out of hiding.

The process ran into the evening, but I had an audiobook and was happily felting. Eventually, they were done. No one ever saw brother #1, but he must have been there somewhere. Brothers #4 & 5 and I all headed back towards the subway, the Go-train, and eventually back to Oakville. (Drat, it’s too late and the pool is closed again). (The floating would have been nice, but I am really not fond of the wetness of the water. Water would be much better if it was warmer and drier.)

Wednesday, October 22nd 2025

Very early in the morning, we said goodbye to Brother#4, as he headed off to the airport to fly back to the States. It was very good to see him. Hopefully, we will be able to visit the 3 brothers living in the States in the future, but not until the law applies equally, women regain their rights, and sanity returns.


We also packed up and contacted Monika, of the Olive Sparrow, to check if it would be ok to drop in on the way home. She is not too far off the Don Valley Parkway, south of the 401 highway. She would meet us in about 2.5 hours, lots of time to get to the other side of Toronto!!! ………..

We loaded the car with suitcases, the project box, and the Mer-Boyfriend looking out the back seat window and waving at passing cars (I did take the needle out of his fingers so it was easier for him to wave, if he wants to)  (to be continued shortly)

Remember, the sneaky comment button is still hiding at the top of the page as I am writing this, if you would like to comment or just say hi!

Further revelations on Onion Skins and book review on Pigments (plus new course announcement!)

Further revelations on Onion Skins and book review on Pigments (plus new course announcement!)

I’m hoping the featured image will make you curious!

Before I start into my post I want to mention my new course on wet felting which was recently launched with the Felting and Fiber Studio. It’s designed for felt makers who are new to using resists.

It’s fully supported by ‘how to’ videos and PDFs and we work with the simple circle. You will learn how to make a vessel and at the end I discuss with you the possibilities of how you can take it further.

So, you start by learning how to make something like this ….

Then I discuss a few variations that can be made with the circle and you could choose after the course, to make something like this ….

I discuss how to make this sculpture on the new course

This course is permanently open so if you fancy it you can register anytime. Curious? Then feel free to head over to https://feltingandfiberstudio.com/classes/online-course-wet-felting-a-vessel-using-a-simple-resist/ to find out more.

Promotion over! Thanks for your patience, Now let’s move on to my post.

Onion skins were at the centre of my last post – I talked about making pigment out of the dye. I mentioned that I would return and show you a little bit more of what I did with some of the dye. Here is the link to the post in case you missed it: https://feltingandfiberstudio.com/2025/08/18/is-this-compost-or-dye-material-actually-its-both/

I had set aside around half of the onion skin dye pot to try out on some fabric (I used the rest to make the pigment). I decided to experiment with a little margilan silk and some woven wool fibre. I mordanted these fabrics first, using an alum solution. The alum attracts the dye particles and the colour is less likely to wash out.

Margilan Gauze dyed with yellow onion skins.
Woven wool sample dyed with yellow onion skins


I love the vibrancy of the results. I would describe the wool sample as deep orange while the silk sample turned out more of a golden colour. It is quite the challenge to get the photo to reflect the true colour of the fabrics. I now need to work out what to do with these two fabrics. To be honest, there is not a lot of either and I don’t have a toning fibre to use behind the margilan – I think I will have to make up another batch of the onion skin dye.

Once I finished dyeing the few bits of fabric, I transferred the remainder into a 5 litre container. I basically forgot about it and only remembered it when I came to put together this post. So it has been sitting around for two months.

Now I need to digress a bit. Our lovely little pooch, Archie developed a lump on his elbow a number of months ago. We have been keeping an eye on it as his vet warned that it would become impossible to remove if it grows much bigger. (there would not be enough surrounding tissue to easily sew up the wound). As fate would have it, it grew and Archie went ‘under the knife’. He was discharged wearing his ‘cone of shame’ which we quickly swapped for an inflatable version – much more comfortable for Archie and for the humans too – less bruising on our lower limbs. The only downside was that the cushioning around his neck caused him to snore. He sleeps in the bedroom with us and this was cute for about five minutes….. The cone was tied with an elastic bandage. I was having fun playing with the weave and thought it might be fun to felt with.

Archie in his blow up collar and sore paws

I made a bangle. First I laid down the bandage and wrapped it around a resist which matched the length of the bandage. Then I laid down layers of merino fibre – 6 thin layers in total. I felted it to fit my wrist and shaped it. The whole purpose was to see how it would take the old onion skin leftover dye. I did a cold mordant – I soaked it in 10% of its weight in alum and left it overnight. I rinsed it out and popped it into the dye bath, slowly bringing it to the boil.

Here is the result. The colour is a lot lighter than its first run. That said I decided to speed up the process as the smell of the dye bath was pretty awful. In fact it was pretty disgusting. I endured it for around one hour and then my nostrils got the better of me. I poured off the majority of the dye bath and then left the bangle to cool in the rest. I also lit a scented candle (it really did take away the stink – good to know going forward!)

Bangle made with merino and elasticated bandage dyed with yellow onion skins

While I like the colour, I think I will use it as a base to play with stitches. So I may be back to you on that.

I mentioned in my last post that I had just ordered a book on pigment making and that I might review it, if readers would like that. I know I am stepping away slightly from textiles and felt here but it is possible to combine pigment and textiles (alcohol inks anyone?). I was feeling quite excited as I had ordered the book and it was on the cusp of delivery. I got a positive response so here it is.

The book is called ‘Natural Watercolor Paint Making’ and it is by the artist Joanne Green. Some of you may already follow Joanne on Instagram (#joanne_green_art). I love watching her magically transform plant matter into pigments and then reconstitute it into a paint which she uses in sketches of the plant which has formed the basis of the actual pigment. Very clever and a great pleasure to watch.

Cover sleeve of Joanne Green’s book

Joanne’s book is beautifully presented and very readable. It’s a bit like sitting with a knowledgeable friend having a chat over coffee. The materials and supplies list is very comprehensive and I found that there’s really nothing on the lists that could not be sourced. With regard to the topics covered, I think the easiest way to show this is by sharing the contents pages. As you can see, there’s a whole section devoted to step by step instructions on how to make the lake pigment from the moment you have produced your dye bath through to turning your powdered pigments into watercolours and how to store your new treasures. Joanne is living in Canada but I can easily access many of the plants she uses in her recipes in Ireland.

Source: Natural Watercolor Paint Making; Joanne Green

Photography (primarily by Canadian photographer Tegan McMartin) – is sumptuous and a pleasure to view. It’s interspersed with Joanne’s tiny watercolours that are a feast to the eyes.

Source: Natural Watercolor Paint Making; Joanne Green

I am so pleased that I made the leap and purchased this book. I found it easy to source too. If you are a fan of Joanne’s social media postings or are curious about producing pigments, then it is a worthy purchase.

Registration for the 3D multi-part resist workshop is now open.

Registration for the 3D multi-part resist workshop is now open.

Hi, I’m Ann McElroy. I have been doing in-person teaching for about 20 years now.  After hearing much demand for a workshop like this from people who do not have access to in-person teachers and much nagging encouragement from my fellow bloggers, I put this class together.  Doing multi-part resist is great fun, and there are so many possibilities for this technique. Registration opens today, and class starts Oct 17.  You can register here, just scroll to the bottom: https://feltingandfiberstudio.com/classes/3d-multi-part-resist/

Have you ever wondered about working with more than one resist? Have you tried one resist and found that only one is not enough? Do you want more? I can help! Why have a single resist when you could have a full book of them! This fun course will expand your felting horizons. This step-by-step course will guide you from building the multi-part resist to the finished piece and give you the skills to continue. Why use only one resist when you can use more?

This workshop is $60 Canadian, approx. $45 US, $37 Euro, $32 British Pounds, $66 Aus., $73 NZ.

The workshop will be open for 4 weeks: from October 17 to November 14, 2025.  Here is a link to the material list: 3D supply list.   You will likely already have most or all of this. Registration and contact information are at the bottom of the page. Registration will open on October 1 2025.

This course is designed for Felters who have felted over a simple resist before. An experienced felter may be able to complete this class within a single day; however, the course can easily be extended over multiple days as needed. You can stop at the end of each PDF and continue another day or time. Using a step-by-step guide, you will make a three-dimensional six-part resist. This type of resist is often called a book resist, as it resembles an open book with the pages splayed.

The workshop is accessible for four weeks and has four downloadable instructional PDFs. I will be available to answer any questions for the 4 weeks the class is open. You will also have access to community spaces where you can share progress pictures and connect with the teacher and other students.

Your learning goals

  • Learn how to make a multipart 3D book resist
  • You will learn how to lay out and manage your wool for a three-dimensional resist.
  • How to bring the wool and resist together in an organised and logical way. Including all the fiddly bits.
  • How to felt a multi-part resist, managing all the parts.
  • Learn three different methods of fulling and their advantages and disadvantages.
  • You will have the option to choose from various finishing methods.
  • How to use some everyday items to help with shaping and finishing.
  • Experimenting with different shapes.

By the end of the course, you will have a unique sculpture. Mastering the book resist technique, you will unlock new creative possibilities for complex sculptural felting.


This workshop is $60 Canadian, approx. $45 US, $37 Euro, $32 Pounds, $66 Aus., $73 NZ.

You will be billed/invoiced by PayPal, and the vendor name on the bill will be Shepherds’ Spring Farm. Class sizes are limited to 50. A supply list, a Class Website Navigation PDF, and an Adding Photos to the Class Website PDF will be attached to the PayPal invoice for your convenience.

Please remember that the course content is for your own use and should not be reproduced or transmitted in any form or by any means without obtaining my prior written permission. Please respect the copyright.

The workshop will be open for 4 weeks: from October 17 to November 14, 2025.

Registration is now open. Register here, just scroll to the bottom: https://feltingandfiberstudio.com/classes/3d-multi-part-resist/


Flour Paste Resist Tutorial

Flour Paste Resist Tutorial

I have been out of town and didn’t have time to write a new post. So I thought I would share a post from my personal blog that is a flour paste tutorial. I apologize for the quality of the photos. I wrote this post in 2011 and my photo taking was not really very good at that point in my life.

Put plastic over your surface on which you will be working. This is very messy so lots of plastic, much wider than your fabric. Pin the top edge of the fabric. You can see it in this photo but I have pinned the edge that is closest to the bucket of flour paste. Mix 1 cup cold water and 1 cup flour in a tub. Use cold water as to make the paste a better consistency. For this silk scarf, I used two recipes of flour paste. I forgot to take a photo before I put flour paste on but you get the idea.

I just pour the paste straight out of the container on to the fabric. Pour along the top edge where you pinned the fabric down. It takes quite a bit so pour generously (more than this photo).

Then use a squeegee or some flat tool to scrape a layer of flour paste over the entire piece of fabric. This process stretches the fabric and is why you only pin the top edge.

Here’s better photo of a generous pour of flour paste.

Once you have your entire surface covered with flour paste, pin the bottom edge and ends of fabric. Make sure you have covered all your edges well. I have this on my “new” print table that I made by stapling a large piece of black felt to the table. Therefore, I can pin right through the plastic and into the felt

If your table is too low, just add four pieces of PVC pipe. Works a charm to prevent your back from bothering when working.

Then let the piece dry for at least 24 hours. I had the fan going on this and it only took 12 hours to dry. It should all be the same color with no translucent looking spots when it is dry. If you look closely, you can see that almost all the pins have been pulled up due to shrinkage. If you don’t pin it down, the entire piece will curl up and be a big mess. Ask me how I know!!

This is how stiff it is when the flour paste is dry. This is an 8mm silk scarf – now turned into a flour paste plank

Here I am holding the end of the scarf. If you haven’t tried this technique, it seems really bizarre.

Next, you need to crack the flour paste. The more you bend, roll or push on the fabric, the more cracking you will get.

These are just a few photos showing the cracked flour paste.

Then you can either use fabric paint or thickened dye. I used Jacquard Textile paint mixed with half water and half paint. Paint over the entire surface making sure that your paint is covering all the flour paste resist.


Here’s a peak on the back after painting. This is about how it will look when you wash it out. If that isn’t enough crackling, carefully (you’ll get paint all over yourself) crack it some more and add more paint. Let paint dry for 24 hours. Most textile paints are supposed to be heat set but it doesn’t work to iron this mess. You could try it on the back but both times I’ve tried it, the paint was pretty well set after 24 hours dry time. If you’re using dye, batch like you normally do.

Then fill a bucket with cold water. You don’t want to put the water directly in the sink because you won’t want this flour paste/paint gunk going down your sink. I just rolled the scarf up into a roll and dunked it in the water. It starts loosening almost immediately and you can peel it right off. Just let the gunk settle to the bottom of the bucket.

Can you see the black stuff peeling off in pieces?

Here’s what it looks like.

Once you’ve got as much gunk off as possible, wash with mild detergent in the washing machine. Then iron and you’ll have a lovely crackled effect. I just love the look of these. I have to try some more with different colored paint. Don’t forget to pour the water and flour paste gunk outside. Do not pour it down your sink unless you have a crush on your plumber!

Here’s a few close ups. Can you see the discharged ammonite?

Here’s another look.

I get carried away.

Because I really like this effect. I certainly did not come up with this idea and I got all instructions from Jane Dunnewold’s latest book (this post was written in 2011). If you give it a try, let me know and show us some photos. If you have any questions, don’t hesitate to ask.

A little Progress on the Workshop and Some Nice Yarn.

A little Progress on the Workshop and Some Nice Yarn.

I have finished the first draft of the resist workshop. 6 pages, and I haven’t added any pictures yet. I printed it out, and I am working on the first sample. I will add notes to the draft and add in anything I missed. The first sample is a circle resist.

stack of wool resists
All stacked and ready to go

stack of resists and rubbing tool
Time to start rubbing

That is how far I got, one set of all the surfaces rubbed. I am going to have to find my studio microwave and set it up so I can reheat these when I get back to them.


The only other fibery thing I have done lately is spin on my drop spindle. I do this mostly when I go to guild socials. It’s a nice, portable way to work.

Here are some balls I made earlier,


The dark pink has some silk in it, I think it came from Louet a long time ago.  The light blue and purple is from a batt I bought at a fiber show. The other three I made on my blending board. They are meino and sari silk. I like the pops of colour and slight slubbiness it gives the yarn.

Now, I am working on a sample pack from World of Wool. I got it last year. I am just getting to it now. They no longer sell this wool. It is Merino and Stelina (metallic-coated nylon). The Stelina is very sparlkely.


I did the yellow first, mostly for a change. I don’t do much yellow. It is hard to get the sparkle with the camera but there is lots of it.  As usual, I found it stuck to several things when I pulled my laundry out of the dryer. It really does get everywhere.

That’s it for my fiberiness for the last little while. I hope everyone is coming out of the winter blues and into the joys of spring. I am looking forward to being able to sit in the garden, in the sun and enjoy my felting and fibers among the flowers and bird song.

April round up.

April round up.

April is now gone and May will hopefully bring more sun and more flowers.

I started the month with some felt stars. It was a fun little project and might work for a fast free workshop. Maybe at a guild social. You can read about how I made them here

wool and silk felted stars. Green and Yellow

Next was an eyeglasses holder for beside my bed. It was an interesting project with some strange wool. Here it is hanging up beside my bed. I didn’t realise how dusty the bookcase was until I took a picture. Then I had to dust and take it again. The things I do for our followers. LOL

wet felted hanging eye classes case.


I taught 2 workshops this month, Nunofelt Scarf and  Felt Birdhouse/Feeder workshop. We had a lot of fun. Here are the ladies with their finished scarves. Sorry, I forgot to get a group shot.

And the finished Birdhouse/feeders.

After teaching I decided to treat myself to a Workshop. I signed up for Helene’s Felt Spiral Workshop. I really enjoyed making my spiral. I learned a lot along the way. It is wonderful to see how different people do things. It would be wonderful if we all lived close enough to get together regularly.

I am full of ideas for more spirals now.

purple spiral movie

I couldn’t get the movie to work so here is a still.

With April finished I have another completed page for my slow stitch collection.  I decided to include a little needle felting this time. I included some flowers but also the solar eclipse we had here, a cloud and rain because we have had a lot of April showers and my purple umbrella to keep me dry. I really do have a purple umbrella. I added the Autism Awareness infinity symbol because it is autism awareness month.  Then I was left with an empty spot at the bottom and I couldn’t figure out what to put there. I did a special days in April search and on the last day of the month, I was reminded of the first day of the month and added the fake glasses nose and moustache for April Fools.

a piece on hand made felt with needle felt and stitched pictures for the month of April

and lastly, because it is spring this last week we have started having lambs.

Lambs and moms in a group pen

And these are my current bottle babies. Sven( thanks to Jan for the name) who no one would claim. He is doing a good imitation of a Valies Black Nose with his black nose and knees.  And Henna whose mother hates her( probably because she is really good at yelling at the top of her lungs for no reason) Once they are both drinking well and down one feeding per day ( they are on 5 times a day right now) they will go live in a lambing pen until they are a little bigger then they can join a group.


Bat on a stick…..

Bat on a stick…..

One of the things that I have enjoyed doing over the last few years, is watching and chatting during live YouTube felting tutorials from Sara (Sarafina Fiber Art) and Marie (Living Felt). I have been inspired by projects shown by both felters.

As you probably have noticed, when seeing my adventures with the four-person Mer-family and their Mer-family pets, I don’t always follow the instructions exactly as suggested. In fact, I tend to fall off the rails…., wander off into left field, or was that right field?… ok, I tend to get distracted part way through a tutorial and wind up doing my own possibly completely different thing.  I am not saying that is a bad thing. It can open new options and create something that is vastly different than the original tutorial goal.

For Sara’s Mermaid project (google You Tube “Mermaid Felt Along 1: Armature”, “Mermaid Felt Along 2 – Body Shapes”, “Mermaid 3: Wet Felted Tail” and “Mermaid 4: Finishing” to see what I was supposed to do), I deviated first by wanting to do a merman but felt he needed a family. Instead of using both wet and dry felting, I used only dry felting.  With the change of scale and shape, I needed to augment the armature strength. Lastly, I made them Fish-People (Pike, Koi, Shark, and Arctic Char) rather than the more traditional mermaid shapes Sara was creating. I created some accessories for them and more will be needed. For the Mers themselves, I wandered off into thoughts of what kind of family pets would a Mer family have.  So the addition of family pets was created, Miss Manta and Sharkette. This could continue to spiral outwards from the original tutorial with Mer-Nabours and other yet unthought-of Mer-friends and accessories! Years of enjoyment even for someone who really would rather not get wet.


Two weeks ago Marie, from Living Felt, out of Texas, sent me off on another spiral with her “Needle Felt Simple Animals: Bat, Owl, and Red Panda Forest Friends!”.  This is a very beginner-friendly project, with simplified shapes and lots of explanations of tight wrapping to build up the core understructure. She did examples of blending and layering colours of fibre. All three projects were extremely cute. I am not sure I do cute, especially extreme cute, well not as cute and friendly as Marie can do at least.

Marie started by using a wooden skewer to tightly warp her layers of core wool, creating the basic shape. This got me wondering about other skewer like objects that you could use which I had on hand *actually I looked as far as the shelf beside my desk to find 3 options. I had also purchased at the Almonte Fibre Fest in early September, some short fibre Maori batts, one of which was white and another was charcoal. I had wanted to investigate working with short, somewhat springy, fibre and this seemed to be an excellent opportunity.

1) White Maori Batt, wooden skewer, knitting needle, one mettle chopstick

I decided to try the chopstick. It doesn’t have quite as much grip as the wood, but it’s not quite as slippery as the knitting needle.  I like the slight taper,  it was comfortable in my hand and oddly like the single knitting needle it happened to be sitting in a cup with my pens, markers, small files and metal pick set (that was for cleaning my drum carder, I don’t know why it’s here) by my desk.


one mettle chopstick on white batt of Maori short stale lenght fiber 2) selected a chopstick and Maori batt

using a chopstick to wrap fiber around and build up the core structure.
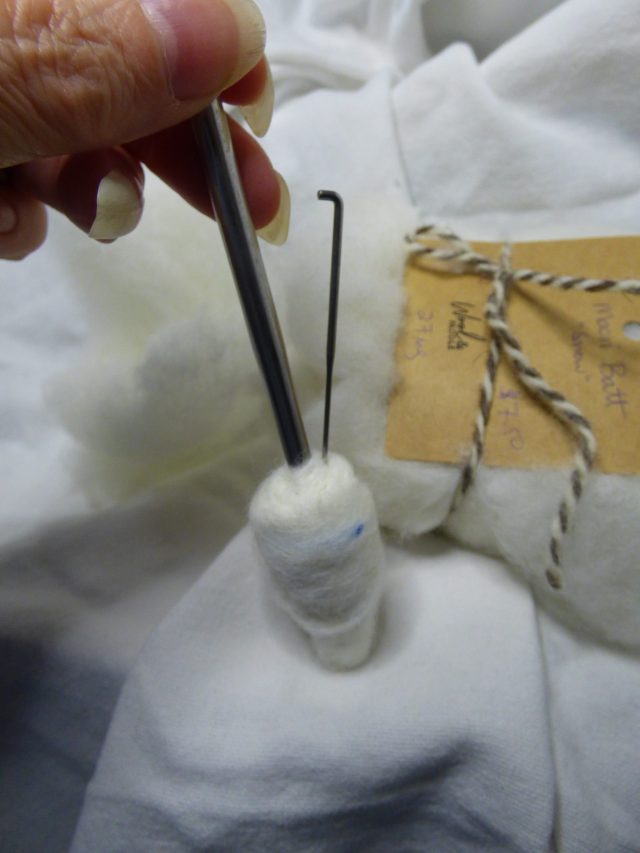
3) using a chopstick to wrap fibre around and build up the core structure.

Adding thin layers of roving, wrapping tightly and tacking down, then poking from the base to further firm core layer.

Tearing off thin strips from the batt then drafting them to a narrow roving. This shows the VM and makes it easy to remove.4) Tearing off thin strips from the batt then drafting them to a narrow roving. This shows the VM and makes it easy to remove.

I found the white short-fibre Maori batt had more bits of VM than most of my spinning fibre. It was not a large problem and easily picked out before wrapping it to the core. It compacted to a firm core shape and was easy to work with.

Looking at Marie’s bat she used commercial felt to make the wings. While extremely cute you can’t pose or position the wings. Ok, I am going off instructions already!  There are a few ways to add an appendage with wire to a body. This time, since I was adding a symmetrical structure, I chose to pierce the body with a floral wire (unlabeled but suspect it is 22g). I centred the body on the wire then folded each wire up at the point it pierced the body on each side. I then folded each half, in half, twisting to create the leading edge of the arm, leaving a loop to add the “fingers” at the end of each wing.

wire piercing body, center body on wire and bend the wires5) wire piercing body, centre body on wire and bend the wires

folding each wing wire in half6)folding each wing wire in half

Next, I needed to add the “fingers”  to the end loops.

wing one armature with fingers added and wire bent ready to add to bats right palm loop.7) wing one armature with fingers added and wire bent ready to add to bat’s right palm loop.

both wings have full arm armatures. note that the fingers have 3 different lengths.8) both wings have full arm armatures. note that the fingers have 3 different lengths.

I often make very thin wings for the little dragons I’ve been making. I usually wind up using a fine fibre combed top laid in thin wisps in various directions. I have also used hand-carded fibre such as on Mrs Mer’s Finns effectively.  I was curious how the short fibre of the Maori batt would work for a top coat as well as for thin wings.

The Charcoal coloured Maori batt beside the small white Maori batt9) The Charcoal coloured Maori batt beside the small white Maori batt

I started with wrapping the body and armature.

wing/ arm armature and body covered in the short staple Maori10) wing/ arm armature and body covered in the short staple Maori

It was a bit fuzzy, but with further poking the surface became smooth and firm.

At this point, I again became quite distracted with another thought. Those scrawny arms are not going to be able to move those wings!!! So I had to add deltoids and bicep muscles, now he could try out his arms as we went to enjoy hamburgers at the butcher shop in Bell Corners (he did not have any since he doesn’t have a mouth or eyes yet it could get messy.)

You Tube Video link  

11) Video: bat on a stick in KIA trying out his muscles before he gets his wing membranes

Ann checks out Bat in progress12) Ann checked how firm he was and laughed at his fabulous physique.  (don’t tell bat!)

I made a couple of attempts with just the Maori but was finding I was not getting as firm and thin as I would like, so added a longer fibre in a thin web to let the Maori attach to it. when I had a thin layer of felt  I carefully attached it to the fibre wrapping the wing armature. I bent the armature and then sculpted the wing membrane further.  Once I had the wings looking more wing-ish, I made quick ears and added them.

I decided I wanted a more three-dimensional face (oh no deviating again!) so added a small nose and eye sockets which I filled with small beads for eyes.

Marie’s Bat only had its stick stuck in while she was creating the core shape. It kept your fingers and the sharp end of the needle well away from each other. She then removed it and added the layers of colour to make her cute bat. I like the bat-on-a-stick look and have kept it so far. Bat on a stick may be a cool Halloween hair ornament or a felting supervisor in a demo basket.

I have not had time to finish off the last bits for Bat on a stick he still needs his teeth, I tried to make them with the Maori white but was not happy with the first attempts. Next, I resorted to wet felting but I was still not happy.  I have a couple more options to try to make tiny teeth. I am also considering feet or legs and feet, so I may be adding another part armature to finish him off.

In the meantime, I have been taking him with me to the OVWSG guild library. I am working through the last few years of donations, sorting ones to keep in the collection and getting the rest ready to sell. Bat has supervised as I wrote the database for the sale books. I am almost finished with the data entry for the books. The magazines that are extra I have sorted by title and year ready for shopping! (it was a big job)

box of magazines sorted by year 13)just a few of the magazines being prepped for sale.

He also watched as I had my last of 4 evenings of nalbinding workshops which has been fabulously fun. I now know I can’t count since I keep losing track of where I am in my increases for my hat. I am off to find a stitch counter so I have a hope of getting the mythical (in my case) flat starting disk to make my hat. For this workshop, I do want to follow the instructions. (I have had a blast wandering off instructions for the felting though)

Felt Bat on a mettle chop stick with articulated wings  14)Thumbs up!  Bat on his chopstick supervising from the shelf above the desk at the OVWSG Library.

Each trip to work on the library bat has accompanied me. He has found a spot on the shelf above the desk where he can sit in a clip on the extending magnet. He is giving me a thumbs-up on all the work! Even without his teeth or feet, he is very supportive.


I hope you too get a chance to watch some of the various online felt-alongs. You may also find inspiration in previous blog posts by all the fibre artists here. You never know what might inspire your next project, maybe you too will find a multi-year project! Or maybe just a quick little bat! (with or without a stick).

How to Make a Tiny Jellyfish

How to Make a Tiny Jellyfish

After seeing Mr. Mers pet jellyfish I decided he needed another one, a felted one in his creator’s favourite colours. I am sure you saw him playing with his new pet in Jan’s post. mr-mer-gets-a-new-little-friend-part-1/

First, you need to make a small needle felted disk.

Then peel it off. You can see how thick it is. It is fairly thick for the size but it could be thinner but doesn’t need to be.

Now what you want to do is turn the disk into a bowl shape. You do this by holding your needle almost flat against the felt and poking around and around the rim of the disk.

Soon it will start to form a shallow bowl.

Keep at it

And you will end up with a nice bowl. The perfect shape for a Jellyfish bell.


I forgot to take a picture of myself needling 6 small Blue Faced Leicester locks into the bowl so they would hang down the outside edge of the bowl. 4 would have worked but more than 6 I think would have been too much. After I poked them in I trimmed the outside of the bowl to get rid of the fuzzy bits they created.  It seemed a bit plain so I added the 2 blue lines around the outside to create a Blue Ringed Jellyfish.


I added a String through the top to act as a leash. Don’t worry it doesn’t hurt the Jellyfish.


Spinning Spirals and other topics.

Spinning Spirals and other topics.

A few years ago, while searching for an online textile workshop, I happened upon one that made me curious.  I was familiar with the tutor’s name, Ruth Lane, as her book “The Complete Photo Guide to Felting” was and continues to be one of my ‘go-to’ reference books.  Among its many attributes are two that I hold important, good writing and clarity.

At the time, Ruth was offering, among her courses, one titled   Nuno Felting with Paper Fabric Lamination.  This four week course is available under the heading Embellishing Felt With Surface Design Techniques – A Mixed Media Approach.

(https://feltingandfiberstudio.com/classes/embellishing-felt-with-surface-design-techniques-a-mixed-media-approach/nuno-felting-with-paper-fabric-lamination/)  Ruth lived up to expectations by providing concise instructions on her methods.  The smaller class size made the whole experience very personal and enjoyable.  It also provided a space where I, as a participant could interact easily with fellow students – it’s something personally I think important as sometimes on-line classes can leave me feeling quite remote.

I was absolutely delighted when Ruth asked me to write some posts for the Felting and Fiber Studio blog and when I finally decided to design and produce the online Spiral Workshop I was thrilled when it was accepted as one of the courses on the FFS workshop platform.  I feel so comfortable with the whole ethos of small class sizes and encouraging participants to engage with others if they so desire.

The Spiral workshop came about as a result of a challenge put to me by a fellow felter.  Once I had refined my technique I set about filming each step of the process.  I wanted clarity as, to a large extent, the videos needed to replace my physical presence in the learning space –  that said as with all courses offered by FFS, tutors are available to answer questions for the duration of the course.

Once the full course was recorded, I set about editing the material. This did not involve a lot of deletions.  Instead the videos were broken into smaller steps which would make particular elements of the process easier to locate for participants.  Each video has an accompanying PDF which again is broken into steps to match the videos.  These are available for participants to keep and the videos are available for the duration of the course (and a few extra weeks).

This will be the third run of the course which will start on 26th August.  Registration for it opens today (12th August) and numbers will be limited to make the experience more intimate.

Here are some photos of students’ work.  They are all so gorgeous and so different. I have included some of the reviews at the end of the video.


If you are interested in finding out a bit more, feel free to check out the following link:

HANGING FELTED SPIRAL WITH HELENE DOOLEY


Throwback Posts: How To

Throwback Posts: How To

Jan has still not got any power/electricity at her house so I am filling in with a post. We have a menu item for tutorials but not all our ‘how to’ posts are included. So I thought I would bring your attention to some of the past posts that are mini tutorials. Enjoy!

How to make a felted bangle bracelet.

How to make prefelt.

Felted Cat Cave

How to Ice Dye Fabric


Stitching a Felt Kindle Case

All about felting needles.

Making Felt Balls in Bulk

Influencing Shape with Prefelt

Textured Felt in the Washing Machine

Making a Felt Feather

Felting Soap

Dyeing with Avocado Pits

Tips on Beading

Color Mixing Wool

Bubble Hat

Batch Editing in Photoshop

Transferring Photos with Matte Medium

Felt Scrap Bowl Tutorial

Degumming Silk Throwsters Waste


I hope you enjoy all the posts and hopefully, there are some that you haven’t seen yet. I am sure that I probably showed a post or two that’s on the tutorial pages but I got carried away looking at old posts. It’s funny how you don’t remember what you posted about!