So the other Saturday saw me heading to tutor another workshop, and as I said in the title, it was my sixth. How lucky am I to have filled six workshops? when I set out I had no idea if I would get one student!
I took a picture of the lovely room we work in before everyone arrived. It is light and spacious. The tables are superb, they are three feet square and it is one per person. I would not want anyone to feel cramped. I do have a bit of a workout at the beginning of the day, dragging six of them together! Take a look how I had to tape the large plastic sheeting around the table leg in case anyone tripped on it as it flapped around the edges somewhat. I have to do a risk assessment at the start of the workshop to cover myself, telling people that scissors are sharp and not to put the soap in their mouths, I kid you not….
So let’s just dive into the pictures of the day.
I hope you agree with me that these ladies were a talented bunch! They were a joy to teach, and as usual we had a lot of laughs. I soon get the measure of people and if I think they are up for a bit of banter, then game on! At the end of the day, we are there to have a fun time and play with wool!
Additionally, I was asked by two of the workshop ladies, now friends, to teach them how to free motion sew the pieces made at the workshop. This happened recently, just a two hour class, and all went well, and they went away happy with their new knowledge.
I came across a couple of these pieces recently when I was packing up for a craft fair. It’s one of my favourite Challenges (My favourite was Ann’s Stewert Stephenson one) and these are some of my favourite pieces, so I thought I’d do a Throwback Post for anyone who missed it:
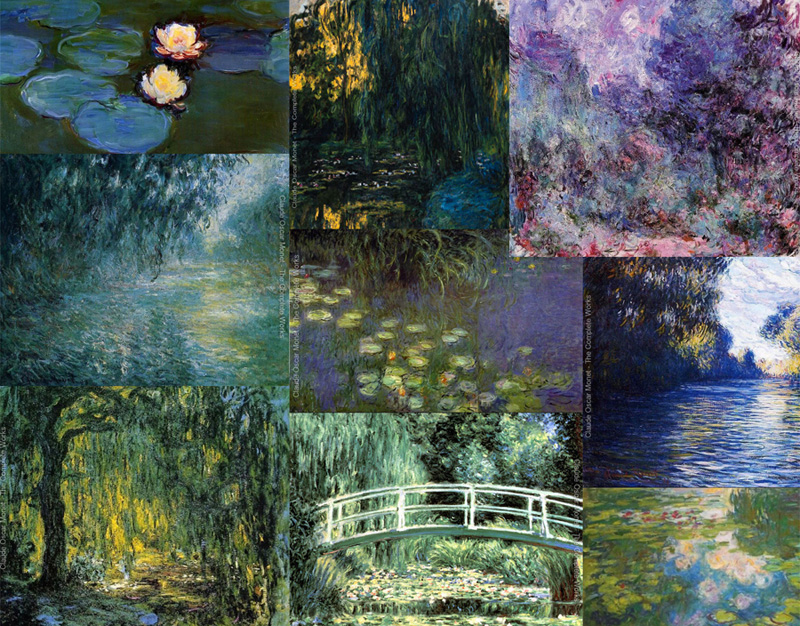
I didn’t get a chance to do any felting for a while until this week because we had a ridiculous heatwave here. I did manage to make a few batts for the Monet challenge though. After choosing some of my favourite paintings, or ones which I thought I might be able to use as inspiration, I made a simple montage:
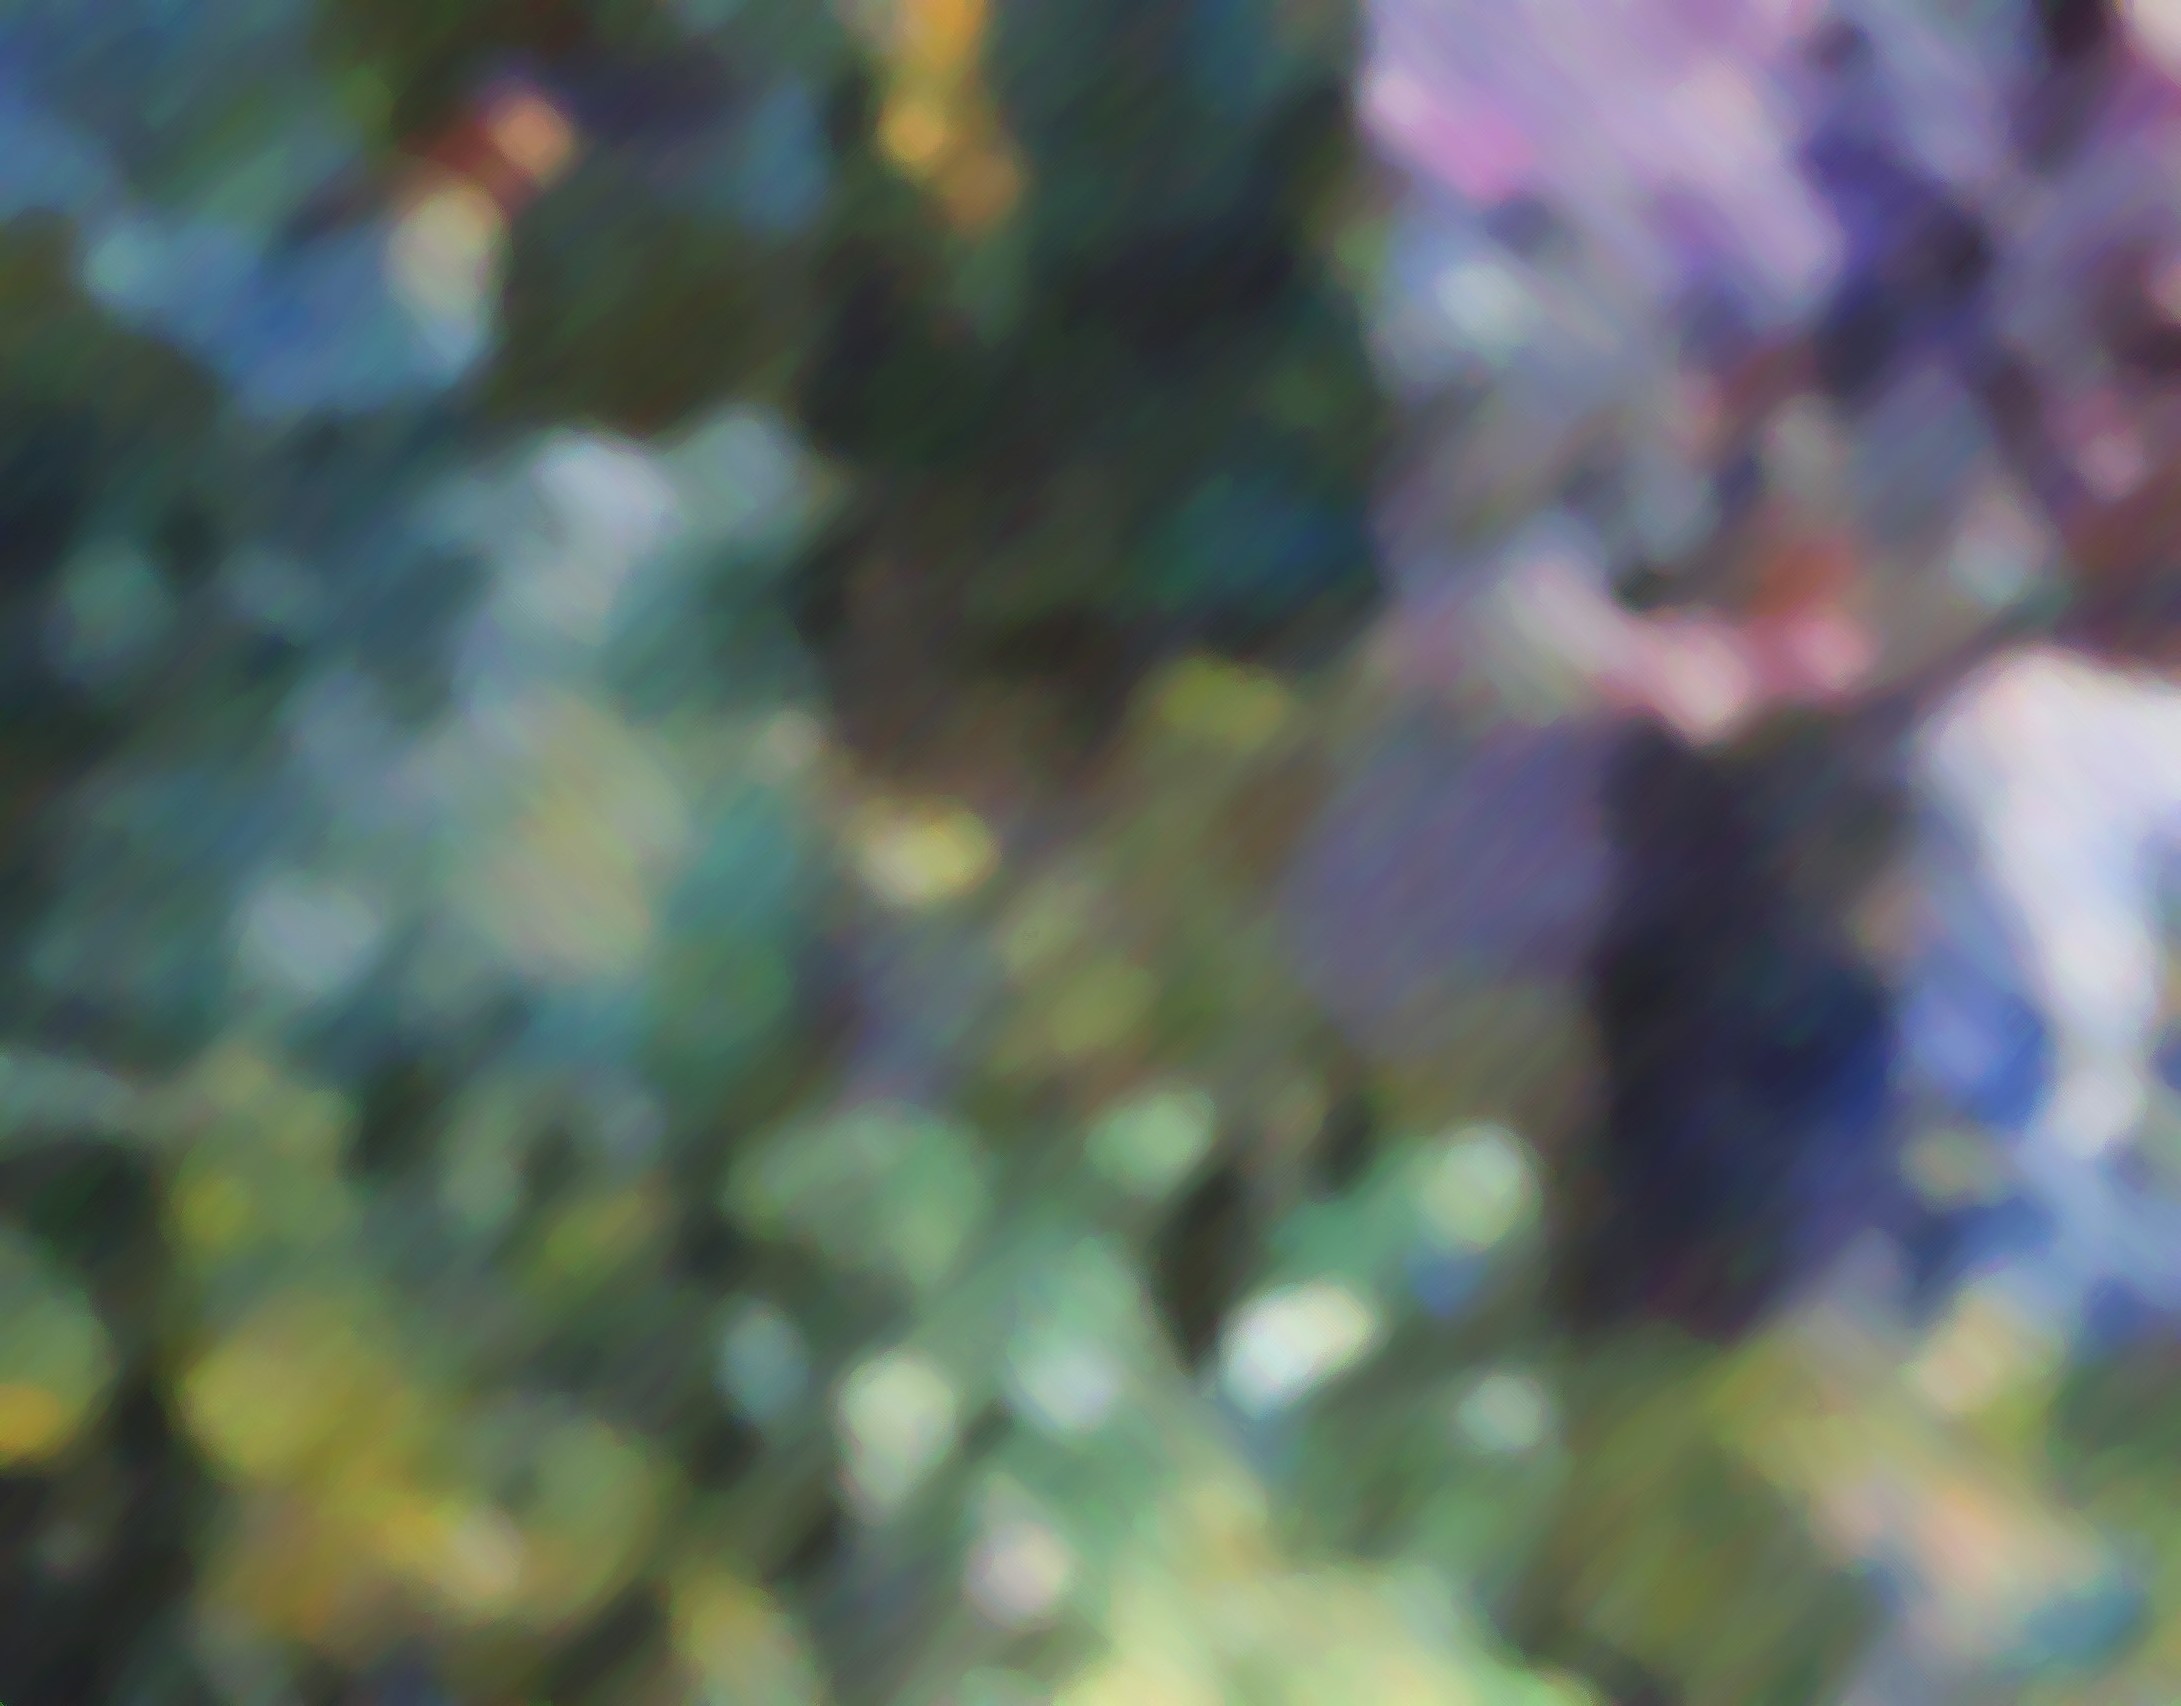
I then messed about with it in Photoshop:
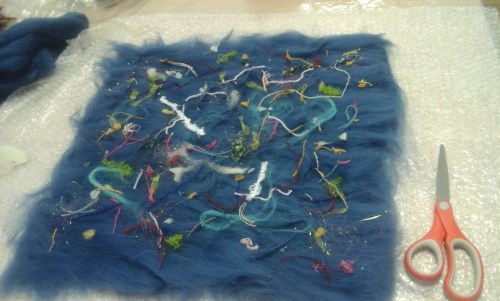
Using this for inspiration I made a couple of green batts; a purpley one; a purple and yellow blended one which looks kind of mustardy/mossy, and a mixed blue one. Looking at Monet’s style he mostly had a straight/dashy style, but some paintings or certain areas of paintings had a softer swirly style. For the first piece I made using the batts I laid out areas of different colours then added softer wispier swirls of wool and fibres:
I made this piece using the batts too. Neither of these first pieces copy Monet, they are just inspired by the colours.
I wasn’t very confident I could do an actual ‘copy’ of a Monet painting, but I thought I’d have a go of at least doing an impression of a Monet piece 🙂 I chose Morning On The Seine In The Rain.
I was actually quite surprised when this started to dry and it actually looked like something! I don’t know if it’s because I’ve stared at the original so much that I can see the similarity and that it’s meant to be it, but I’m pleased with how it turned out.
When I was fluffing up the fibres for the swirly piece, I thought I might have a go at needlefelting a piece too. Since I had all the colours out, and had really started to like it, I thought I’d do another based on Morning On The Seine In The Rain. I used a piece of thick commercial Merino prefelt as a base, and blended some texturey wools like Icelandic, carded lambswool and Devon longwool with Merino to get the colours and texture I wanted. I like the way this turned out too 🙂
If you ever want or need some inspiration to get your creativity flowing, click on ‘Challenges‘ in the Categories drop down menu on the right hand side. We have new ones every quarter, but you might find something you prefer, like this Monet challenge, in our archives 🙂
I needed to put “wire” on my fence posts so I spun a thin grey single. I took it right off the spindle and onto the fence posts.
I wanted some bullrushes mostly just because I like them.
I really liked them but once I added some sheep they looked much too small for where they were.
I really liked them but I took them off
Next, I added the wool to the sheep and some rocks for interest. Also some shadows so my sheep are not hovering.
I took my piece to the guild social and use one of Jans windows. This one has a 5×7 cutout. The picture is about 6×8 naturally. I tried it in different positions on the picture.
We decided to make a new mat. Jan cut it out of a piece of bristol board. She used to be a framer in your younger days.
Here is what it looks like. I am not sure about the frame but that can be changed.
The glass gives great reflections
I think a black frame but I don’t know about the mat. Now I will Wait for Lyn to give us the next quarters challenge.
I completed the second nuno landscape that I was working on. I showed you the first one here.
Here is the piece of silk that I used. I can’t even remember how this was created but it looks kind of like deconstructed screen printing, perhaps. But it looked like a tree trunk to me, as usual everything looks like a tree to me.
Once it was felted, I used the silk screen shown to print some leaves at the top of the trunk. I combined silk screen medium and acrylic paint to print directly on to the nuno felt.
Here’s the piece after I printed the leaves. I added a few light ones on the ground as well by just using a small portion of the screen at a time.
The edges of the silk were loose and I decided that I would go ahead and clean them up a little before I started any machine stitching. So I pulled the edges of the silk around to the back and hand stitched them down. The photo on the right shows what it looked like from the front after stitching the silk to the back.
Then I started machine stitching some of the leaves. I used several browns, several reds, orange and yellow thread. I didn’t stitch all the leaves because I wanted some of the leaves to look like they were more in the background. So they have less detail and less bright color to allow them to “fade back” and give more depth.
I then added dark olive and light olive green to give a little definition to the trunk and create a few roots.
And here’s the final piece entitled “From Tiny Acorns’. You click on the photo to enlarge it. I am happy with the result and I had better get started on finishing and framing some of these pieces so I don’t have to do that at the last moment. I am planning on these pieces being in an exhibition in August.
Some of you may know that as well as being a felter I have recently developed an interest in basketry. Given that I love making 3D vessels and sculptural felt, this is probably no great surprise!
My preferred method at the moment is random weaving, as I love the organic, freeform texture of this technique. After starting with cane, I moved on to work with paper yarn, which I like much better. I think my textile background has instilled a preference for softer materials! 😉
I can also dye the paper with indigo or other natural dyes, like this piece dyed with eucalyptus. And untwisting the ends of the paper produces some delicate feathery effects.
I had the idea of combining felting with random weaving after seeing a photo of a cape gooseberry.
I thought that if the orange fruit in the centre was made from felt, it would make an interesting contrast with the paper carapace. So I wove the paper case, leaving a hole at the top, and then inserted a small orange felt sphere and stitched the two together with very fine fishing line. I then finished the top with some twining and a little tassel.
Photo: Owen Llewellyn
I decided to develop this further into a submission for an exhibition with the theme of “fragility”. With widespread concern about the human effects on our fragile environment, I read that scientists at Kew Gardens estimate that one in five plant species are in danger of extinction due to activities such as intensive farming, deforestation and construction.
So the idea for my piece, called “One in Five”, was to make five stylised seeds combining felt and paper yarn, to represent the fragility of the environment in general as well as their own precarious existence.
The second pod I made was based on a sycamore seed. I needlefelted the two seeds first before wet felting them, and then wove the paper wings around them.
Photo: Owen Llewellyn
I used a similar technique for the third seed, which was based on a bean pod.
Photo: Owen Llewellyn
The fourth seed was slightly different – no random weaving was involved. Instead, I wrapped several strands of paper yarn together, feathered the separate ends, and covered the wrapped ends with felt to resemble a dandelion seed.
It was a bit tricky to felt around the paper without making it soggy and droopy. So I ended up applying some matt varnish to the paper to protect it before felting, which worked a treat.
Photo: Owen Llewellyn
The fifth and last seed was the most difficult. I wanted to make a spiky seed case, a bit like a chestnut, but it was tricky to work out how. I eventually made a random weave sphere and then looped short lengths of paper yarn all over it. I started feathering all the ends, but then decided that the overall effect was too much and that I should just feather a few randomly. So I had to reloop quite a few bits of yarn!
Photo: Owen Llewellyn
Having finished making the seeds, I had to decide on the best way to display them. They would obviously look better suspended rather than lying on a flat surface, but in one of the galleries where this exhibition will be displayed we cannot hang things from the ceiling.
One of the other advantages of felt and paper is that they are both very light materials – each of the seeds weighs only a few grams. So I thought I could somehow mount a branch on a wall and hang them from that.
I spent days looking for the perfect branch. Luckily, we’ve had a few blustery days recently, so there has been no shortage of branches, even on London pavements! I finally found one that’s not too heavy, is an interesting shape and has some lovely lichen.
So then it was off to a photographer friend, Owen Llewellyn, to take some pictures that would hopefully wow the selectors and persuade them to accept my submission. After experimenting with three different backdrops we finally went for a plain grey background, though there also some interesting experimental shadow pics!
Anyway, it clearly worked, as I have just heard that my submission has been accepted for the exhibition, which will be on display in London at the end of May and Birmingham in October. Phew!
We had a couple of new people join the wet felting group at the well being centre the past few weeks, so as usual, I started them off with a ‘beginner’s piece‘, which is my soft, wispy felt. If you’re new or haven’t seen me mention this, basically, it’s a 4 layer piece of felt, which is meant to be soft, and ‘scruffy’ and uneven, and piled with embellishments, and is designed so it’s almost impossible to make a bad piece! This is a red piece I made:
I think most of the fibres I used were Nylon:
This yellow Nylon was less ‘fluffed up’:
Some cotton scrim:
I made a blue piece the next time:
And most of the fibres on this seemed to be soy, and the two best pics were of the soy under cotton gauze. Grey under blue:
And a pinky grey under purple:
On Monday, I was the only one there, so I indulged myself and made a small mat/coaster for my best friend. I used wool tubes (or ‘kebabs’!) and filled in a rectangle on a template, then added Merino. Basically working upside down:
I like looking at these on an angle:
Even closer/more of an angle:
Have you made anything just for you or a friend lately?
So this week I managed to finished the hat in my last post.
I left you with this picture:
Next I covered it and rubbed it for a while. then rolled it up and into the dryer with no heat for 10 min. while I was waiting for that I started to lay out another hat. After the first tumble I took the hat out flipped and rotated it and rolled it up again. you can see the other hat I am working on under the bundle.
After a few turns in the dryer I cut the hat open and shifted it so I would not be felting in the seam crease.
I continued to roll it in the dryer shifting the hat on the resist each time. Once is had shrunk some, I continued to full it by hand. This is what it looked like still wet and in need of a rinse.
and this is after it has been rinsed reblocked and dry. not really much different. the close up picture is a truer picture colour wise. it is a light silvery grey with pink and grey accents.
I like it, it is simple but interesting. I think I will leave this one the way it is. the next on in this style may be more embellishment after there fact. I need to dye more silk hankies.
Here I have added a deep green perle cotton thread over the “branches”. I am continuing to use feather stitch in an uneven manner.
Next I added a lighter green perle cotton over the dark green. I want to leave some areas that show the background fabric through the tree as I don’t want it to be completely solid with stitches.
Next I used a lighter weight cotton thread probably about a size 12 or maybe even 16 but I can’t remember. It is a hand dyed variegated green. Click on any of the photos to see more detail.
And here’s a little closer shot. The trees kind of have a cedar feel to them. I am going to add more layers of the variegated green thread to make the trees a little fuller. Then I have to decide if I want to do anything to the trunks or leave them as they are. What would you suggest?
Undertaking this post I was in a place of total indecision….to tell you about my book binding exploits or report on a wonderful costume exhibition….I’ve decided on both. So before you read on make yourselves a drink, plump up the cushions and get comfortable.
Decorative papers for book binding….
A while ago I mentioned I was asked to teach a workshop. This was to be to my local textile group following our AGM and there would be no charge (unlike normal visiting tutor workshops), then I was advised there were likely to be around 30-35 people….!!! Knowing this well before Christmas I let a few ideas percolate through the layers and finally at the beginning of the new year I set to creating a few examples of books and decorative papers. I should explain here that I haven’t done any book binding (except for the stitched eco printed leaf book shown in previous post) for around 13 years so I had to completely refresh my memory.
I decided to make ‘leather’ paper (using tissue paper) and crepe paper dyed designs. I discovered this last one many years ago, by total accident after I spilled some water. Rather than start from scratch I dug out my teaching notes from 2003 (it pays being a hoarder and never throwing things out!)
I once taught adults with learning disabilities, so these notes were geared to their needs.
The colouring I used was food colouring (easy for anyone to repeat) and some left-over inks that I had, in total – red, yellow, orange, green, brown, blue and violet. The tissue paper samples ranged from white to pale grey and mucky yellow.
Not satisfied – a second application of colouring applied
Covered with the film to manipulate the colouring
The finished piece
Laying white copy paper directly on top of the tissue, and also on the turned-back film
I always try to maximise opportunities, so used the surplus surface colouring to make ‘ghost’ prints. These were easy to do and even when still damp can be over printed (with care) several times creating wonderful colour designs.
Ghost prints
Some finished leather paper samples, dried and ironed flat.
Crepe paper designs –
A blurred photo unfortunately, but I hope you can still make out the texture of the paper as I don’t know what it is called outside of the UK.
Again colours were limited to what our group had to keep costs down. The technique is very simple – cut pieces of crepe and sandwich between water sprayed paper. Obviously for this to work it is necessary to have non-dye fast crepe paper!
I personally love overlapping the pieces as the dyes bleed into each other.
From this technique there is also a fabulous by product….the actual crepe paper….the resulting pieces can be gorgeous
With the ‘un-arty’ scruffy wet crepe pieces I decided to scrunch, twist, roll and dob onto lining paper….the result was interesting….BUT……..the whole reason this works is because the paper is not dye fast. I had coloured fingers & nails for 3 days afterwards – so be warned!
Book binding….
The books – I made several small samples to stimulate ideas for ways to present textile works.
Accordian fold books – as the name implies the pages are continuous and can be coloured or plain, attached both ends or one end, folded to create pockets or cut on a slant. They can be bound in a folding cover hard or soft, or with individual front and back covers. The covers were bound using leather paper on used Christmas cards (cost saving) or other decorative papers such as a paper candy bag and floristry wrapping. If you look closely at the centre photo you can see the inside end paper is a ghost print.
A particular favourite
Stitched signatures – again as the name implies the pages are stitched in. These can be stitched on the inside or the outside allowing for embellishment with coloured thread or beads. The covers can be hard or soft. For the samples I used both using the crepe paper design pieces, coloured paper and envelope paper….take a look at the inside of envelopes and there are a wealth of patterns to be explored.
Crepe design paper used for the covers & ghost prints used internally
Pegged concertina – my name for this book type. A ‘spine’ is created by concertinering some card. Each folded section is then fed through a slit in the pages and held in place with a ‘peg’ (card, lolly pop stick etc) that is longer than the height of the spine. The covers are usually individual (front & back), the ‘spine’ being secured either on the inside or outsde.
Envelopes used to create patchwork covers
Left over paint, sponge applied to copy paper.
With so many (imagine 30 ‘students’, a large hall and newspaper all over the floor with pieces drying) I didn’t get any time what so ever to take photos of work in production so I can only show you the samples I prepared in advance.
The workshop was definitely a challenge on time and energy….although I knew every wrinkle and possible question, had prepared ‘stage’ examples (to prevent boredom watching glue dry!) and had broken the workshop down into various sections so as not to inundate folk with information I still also learned a lot, the important points being –
Don’t be too ambitious – I’d planned 3 books, in reality only 1 was manageable coupled with making the papers.
Remember folk struggle with measuring – I’ve spent a life time measuring at the drawing board and working with paper so for me it is second nature.
Keep the numbers low – the instructions, whilst simple to me, can be difficult to others which requires a lot of individual attention.
Would I do it again? Yes. I’ve been very diligant in keep notes of everything – from supplies keeping costs low to ‘what could I do better next time’ notes………I just hope it won’t be another 13 years!
Costumes
If you are still with me then I’ll tell you about a wonderful exhibition called Costumes, that I attended with my textile group.
The costumes were all loaned to the Preston Park Museum from Angels. Angels (the name is the original surname) is a 7th generation run family business creating, making and loaning costumes to the theatre and film industry globally. Based in London the warehouse has 8 miles of clothing storage rails and evidently anyone going to work there spends 3 months learning the ‘filing’ system before they start their work proper. They employ specialists in the field from costumiers, miliners, cobblers to wig makers etc.
As a group we were guided around the exhibition by the curator who gave us some wonderful anecdotes to the costumes. And – we were allowed to get inches from the fabric, much to our delight.
The original dress worn by Elizabeth Taylor in Cleopatra.
This is a replica of Queen Elisabeth II coronation dress for the film The Queen. When a TV series was subsequently made, the dress was already in existence and fortunately it fit Claire Foy who plays ER II.
Queen Elizabeth was played by Judi Dench. She appeared in this dress for only 8 mins and it weighs 28lbs!!!! It has metal that runs inside down the back to hold Judi and the dress upright.
As a group of textile enthusiasts cameras were clicking endlessly with this particular costume….the details were beautiful.
This dress was worn by Cate Blanchett. The museum have several medieval type mannequins with very tiny waists to display vintage corsetted garments….they used one for this costume but the museum staff couldn’t do this dress up! On close inspection none of us could believe the waist size.
Dresses for lesser characters in Beauty and the Beast
Tom Baker was the 4th incarnation of the Doctor. He was given ideas for his identity, but felt something was missing. He decided a scarf might work and gave his gran a bag of wool to make one. When he went to collect it he discovered that his gran had misunderstood and had used the entire bag of wool….his identity was born.
Harrison Ford’s costume – sadly no anecdote here.
Worn by Kate Winslett and Leonardo DiCaprio. Note the sailor’s jumper – the ‘White Star Line’ is backwards. The only place the filming could get a good ‘un-modern’ shot of the ship in harbour was the wrong way round to how it would have been setting off on it’s maiden voyage….solution – film it with the crew wearing backwards writing then turn the film over!
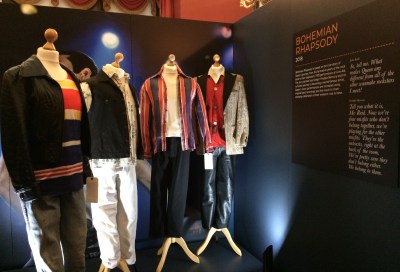
Bohemian Rhapsody was just on the point of being released when this exhibition was on. Angels surprised the museum by adding these costumes to the loaned collection.
And lastly –
Aidan Turner’s Poldark costume. I’m not sure if Poldark has ventured beyond our British shores so this may just apply to British audiences but the actor is….mmmmmmmm! He has appeared a few times topless and has a well turned out physique – evidently in addition to your normal make-up artists there are special artists to enhance six-packs….I never knew that!
The curator told us of a lady in a previous group who went up to the costume to ‘smell’ Aidan Turner. We are a group of mature ladies but we were like young star struck girls who all went up to do likewise. I can report that Angels sadly did too good a job of keeping their costume clean!
Preston Park Museum is small but the exhibition was great. Their next exhibition is Wedding Belles: 140 years of Bridal Fashion 12 March – 6 May 2019 if you are in the area.
If you have made it this far congratulations….I hope you have found something in my offerings to interest you….now you deserve another drink!
I did another little fibre experiment a couple of weeks ago. I hoped to have more photos, but the light hasn’t been great again this week. Anyway, this is what I tried out:
And this is one of the locks:
I used 23mic natural white Merino, and this is the finished sample:
This is a close up of the top left where I fluffed up the fibres:
And this is how the migration looked on the back:
This is one of the felted locks:
Sorry there aren’t more/better photos, but did you guess what the fibre is? It’s my friend’s hair who gave me the extensions! I clippered it for her a couple of weeks ago and decided to see how it felted 🙂