So what have I been up to lately? Well this and that! I finally joined facebook a year ago to promote my work and workshops. I also opened up my Etsy store, so I have been a bit busy.
I have been lucky to also receive a few commissions. A lady asked me to make her favourite, a dragonfly! Well it’s good to step out of your comfort zone and try new things isn’t it. Luckily it was well received and here it is finished and then a picture when Gloria framed it.
I have a few fairs coming up including a two day fair, so I need to up my stock. I really love making a wet felted picture and free motion sewing it. I didn’t have any sheepy ones so here is one in its fluffy stage and then onto the sewn version.
Because of the upcoming shows and dare I mention the C word – Christmas. I thought I would make a few similar snowy cottage cards, with the view to getting them printed onto cards as I have done in the past. I put them on my facebook page and asked people which one they thought I should use as the card. Votes where across the board, but I have chosen one. I won’t say which I prefer, but which one do you like?
Finally I have a little prize giveaway going on on my fb page. I want to get the following picture printed onto cards also, but I need a title! If you would like to contribute a title that would be wonderful. The persons who’s title I choose I will send a card to them, a small prize maybe, but it was made with love!
Quite a while ago now I posted a picture of a wonderful wool painting. I found out via the artist that is wasn’t a needle felted picture or a wet felted picture but a laid fibre picture. I admired the picture so much that I contacted the artist to ask more about this technique. This was the picture, you may remember it. It is called ‘Elements‘.
‘Laid fibre’ is exactly what is says, basically. The picture is totally created by laying the fibres onto the board and creating a picture. Then you simply place glass on top to hold it all in place. It may sound quite easy, but in theory it does have a drawback. When I and others create a wool picture, we may go on to free motion or hand sew it, or add all sorts of embellishments such as beads etc. The laid fibre technique makes you think a little further, you have to create the picture as a whole, as it cannot be added to in this way, as it essentially, loose fibres. I find it a very satisfying way to work, it feels very ‘calming’.
I have stayed in touch with Penny the fibre artist who inspired me and I am pleased to say we are now great friends. She lives in a rugged part of North of Scotland, Thurso. I am sure we will meet one day. She has been very generous with her tips to get me to this point of my creativity. If you would like to see more of her work, find it here:
So the other Saturday saw me heading to tutor another workshop, and as I said in the title, it was my sixth. How lucky am I to have filled six workshops? when I set out I had no idea if I would get one student!
I took a picture of the lovely room we work in before everyone arrived. It is light and spacious. The tables are superb, they are three feet square and it is one per person. I would not want anyone to feel cramped. I do have a bit of a workout at the beginning of the day, dragging six of them together! Take a look how I had to tape the large plastic sheeting around the table leg in case anyone tripped on it as it flapped around the edges somewhat. I have to do a risk assessment at the start of the workshop to cover myself, telling people that scissors are sharp and not to put the soap in their mouths, I kid you not….
So let’s just dive into the pictures of the day.
I hope you agree with me that these ladies were a talented bunch! They were a joy to teach, and as usual we had a lot of laughs. I soon get the measure of people and if I think they are up for a bit of banter, then game on! At the end of the day, we are there to have a fun time and play with wool!
Additionally, I was asked by two of the workshop ladies, now friends, to teach them how to free motion sew the pieces made at the workshop. This happened recently, just a two hour class, and all went well, and they went away happy with their new knowledge.
I have been felting since August 2016, which seems a long time ago, but then doesn’t at all when I say ‘I have been felting for two and a half years’.
I became addicted to wool after attending my very first workshop. There were just the four of us plus the tutor and we all piled into her small but perfectly formed studio. There was colour everywhere, it was wonderful. She had huge plastic boxes full of all kinds of wools. My absolute favourite was the wools hanging from a broom shank on the wall, cascading down like a beautiful vibrant waterfall, her colour palette. It was a fabulous day, fun, creative and calming. It pretty much took off like a rocket from there!
I began to crave the idea of running my own workshop a while ago. I had attended another felting workshop or two in the meantime, and I began to see the parts I enjoyed and the parts I didn’t. This spurred me on to want to give the kind of workshop I would want to go on.
I knew it wouldn’t land in my lap so I decided to get off my backside and make it happen. I wasn’t on FB at that point, I had evaded it as the internet ate too much of my time already, so advertising was going to have to be done. I did it the old fashioned way and put my own flyer together, and walked around the towns asking kind shopkeepers if I could display them. At least this way I was attracting local people. I had already sourced a wonderful venue. The queries started coming in, I was thrilled! In the beginning I even tried to fit in with everyone regarding a date! I am accommodating if nothing else!
Whilst I was doing this a newly opened tea room approached me and asked if I would host a workshop at their place, which I did of course. This was my first one and I only had three ladies which was perfect on two levels, the tea room was small, and I had never taught before, and I had never even spoke to an audience before!!!! So this was a perfect introduction for me, albeit nerve wracking at first!
The tea room workshop went like a dream, and I have since done three more workshops at a different venue to the tea room, one only a week ago, and I am fully booked for February and March. The last workshop we seemed to laugh the whole day and the creativity was superb, it was fabulous, I so love doing them. I meet some lovely ladies, some of whom I now class as friends. The nerves have gone. I also have three ladies coming back for another class, so I must be doing something right!!
Anyway enough with the chat, I will now add all my photos of the four workshops for you to look at, as I know how we all like photos! Here is my FB link too.
I attended this show two years ago, but last year it was moved to Thirsk in Yorkshire so I didn’t go as I didn’t think it warranted the travel. This year it was back close to where I live, so I decided to bowl along.
Looking at the website I think I counted around 50 stalls, including some of the usual fibre providers such as Adelaide Walker and The Threshing Barn.
I took quite a few pics for you all again. I always asked if I could take a photo, saying it was for a blog for this forum and they all seemed surprised but pleased!
First off let me show you this very distinctive lady – she had felted horns on her head in the form of a headband and when I started chatting I realised her rather fetching bright red specs were indeed one round one, and one square!! I think she looked fab!
Someone who does not take herself too seriously I would imagine, especially when you learn that her site is called Felting Bonkers! Here is some of the work on her stall, some of it was hers and some belonged to two other ladies. I loved this fox and rabbit.
Then I just meandered around taking pics for you all. There were some nice wall hangings.
Plenty of purchasing opportunities.
Only a few livestock at this show.
I liked these pom poms in a milk churn.
I left with a few goodies, well you have to really don’t you?! I think I did the whole show in an hour, compared to Woolfest in about 6-7 hours, but it is nice to support the smaller shows too, because if we don’t, we run the risk of losing them.
I recently made myself a felted cuff from a failed project (got to use them up!), and wore it at one of my craft fairs. Vivienne, one of the other stall holders took a shine to it and asked if I would make her one, so I did and here is the process.
Vivienne chose purples blues and pinks as the colour palette.
I started with two layers of Aubergine Merino, one of my favourite colours I thinks, such a rich deep purple.
I then added all the decoration, which was the above colours blended, and lots of silks and curly locks.
It was then wet felted.
Once dry it was then time to cut to size.
I then interfaced the back because I wanted to free motion sew it to strengthen it a little for wearing. Here is the back.
Here is the front.
I wanted to jazz it up even more by adding a few beads, so I pulled these out of my stash.
Here it is after beading.
I luckily had a piece of this lovely purple tweed fabric in my stash to use as a backing to cover up all the inside stitching.
I then cut it to size, added an elasticated loop and pinned it all together to sew.
Here is the back, quite neat eh??
Here is the front along with a button sewn on for fastening. I had previously asked Vivienne for her wrist measurement.
She seemed very pleased with it and put it on straight away.
Hello everyone, I know a lot of the readers of this forum may be experienced felters, but some of you may be turning to us after deciding to experience felting for the first time.
I thought I would provide a simple blog (so that also may mean short!!) to show that one of the many joys of felting is that the basic equipment does not need to break the bank when you are setting out for the first time.
As with everything in life, you can purchase things cheaply or you can pay much more. So let’s provide you with a list.
Protective cover for your table – if your table needs to be protected from water, you will need some kind of cover. I have a vinyl table cover sourced from a charity (thrift) shop. I have just bought a very good and cheap builders rubble floor protector from a trade supply merchant, the cost was just under £6 for 3m x 4m! – huge.
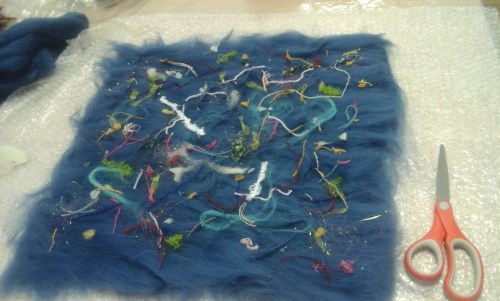
Bubble wrap – small bubbles, not the large ones. This is what you lay your work on prior to wetting down, bubble side up everyone!!, (to create agitation from underneath) and it is very cheap.
Tulle/netting – this is the material that you lay over your work prior to adding water and soap, you can also use curtain netting if you have any, but like bubble wrap, tulle is very cheap. People buy it to make fancy dress costumes. Sometimes one colour is cheaper than another colour, so buy the cheapest. The colour will not matter and it will not bleed onto your work. My tulle is a very fetching teal colour, and it wasn’t one of the more expensive colours.
Soap – I personally use Olivia Olive Oil soap, it is what I started with and so it is what I am used to. I do know that some felters use hand wash liquid, or dish washing liquid, I tried the hand wash once and found my work felted too ‘soft’, but please do experiment and find what works for you. At the minute I am paying £1.69 for 125g of soap, so not a huge amount, and it lasts a long time.
Water container – you can spend your hard earned money on a ball browser to sprinkle little droplets of moisture onto your work or you can buy a liquid laundry bottle. Use up the liquid to wash your clothes, rinse it out thoroughly with water, jab five small holes in the top with a knife, and voila! you have a water sprinkler. I find this works well even when I have very fine, flyaway work to wet down, put the tulle over and sprinkle away, my work rarely moves, maybe it dare not!!
Hand Carders/blenders – here is a fantastic saving, you can throw your money at a couple of fancy hand carders that do actually look lovely. I have seen them for sale up to £44 for the pair, WOW! or like me, you can buy two dog slicker brushes £3 each, (yes from a pet store!) and do you know what?, they blend the colours!! Ok they are smaller than the expensive carders, but it just means you have to blend a few times, not a great problem!
Sushi mat/Roller Blind – if you are wanting to shrink your work for whatever reason, maybe to fit into a certain picture frame or canvas you may need to roll it. I have a small sushi mat for small projects.
I bought this large window blind for shrinking the larger pieces, and cut off all the extra hanging cords, again, not at all expensive. I actually picked up another one in a charity shop the same. I was thinking ahead to a time I may run my own classes, to have a spare.
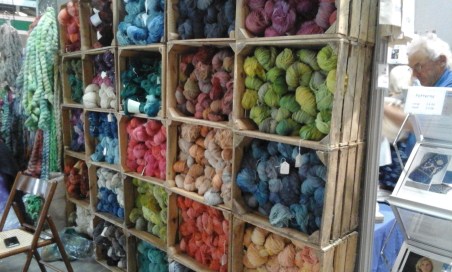
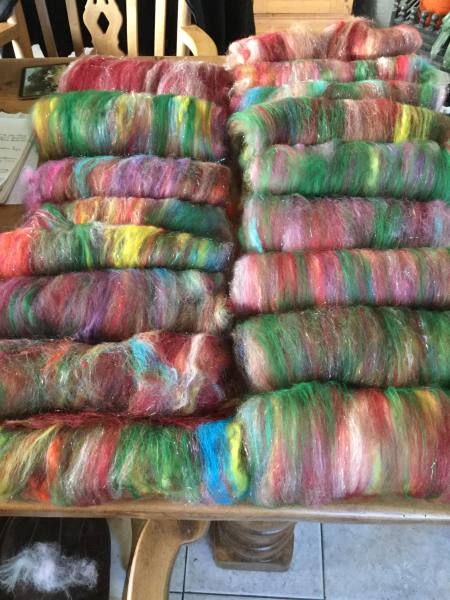
Wool – I am afraid this is where I cannot recommend cheaper alternatives, but that does not mean you cannot shop around for the best prices. I will list a few sites for you to look at, they all deliver worldwide.
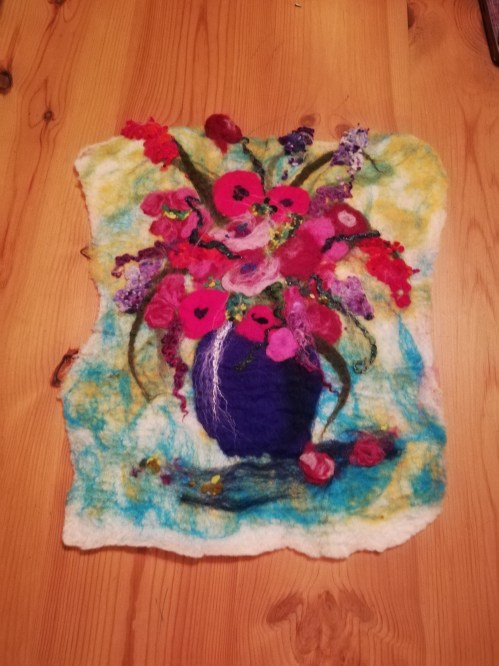
Before I go I would like to share this great ‘cheaper alternative’ that my husband came up with. I started presenting my work in mount and backboards (mat and frame), so I thought I would have to buy a print browser stand to display them at craft fairs. I looked on line and the wooden cradle type ones seemed to be around £30. I explained to my hubby what I wanted one for and he said you need a magazine rack……well take a look at this thing of simple beauty…..
Not only was it less than half the cost, but it is far better, in my opinion, than a wooden cradle type because as it is acrylic you can see all of the piece you are displaying, I love it! It is a table top item rather than floor standing. It is sturdy too, check them out if you ever need something for this purpose, you won’t be disappointed.
I hope I have helped a little with my cost saving suggestions, of course any savings you do make means you can spend more on lovely wools, a win-win situation!
Well another year has rolled by and it was time to immerse myself once again into the wondrous spectacle that is Woolfest here in the UK, held at Mitchell’s Lakeland Livestock Centre, Cockermouth Cumbria. I know, tough job but someone has to do it…….
A fabulous day was had spent amongst fellow crafters, fibre enthusiasts and livestock folk. There were 158 exhibitors this year, I think there has been over 200 in previous shows. There seemed to be many new demonstrations going on such as silk papermaking with found and gathered materials, lino cutting and printing on fabric and stitching on felt, braiding with a Manx loom, cutting hand woven fabric for garment construction, quick threading on the rigid heddle loom, broomstick crochet, speedy warping and Tunisian crochet. A lot going on, and a lot of things I have not the first idea what they are!!
I know how we all like photos so here they are, no real explanations, I just took what I thought would grab your interest.
The first picture is the show ring, where each breeder gives a talk about their particular livestock. I was particularly taken with the magnificent sheep that the lady on the left in blue was showing, a close up in pic two, and even better in pic three. Star of the show for me.
He was a huge gorgeous chap! The breeder Joanne very kindly told me he is a coloured Ryeland, a five year old tup that they use for their main breeding.
Joanne has said that the fleece is better for needle felting rather than wet felting, and here are some of her wonderful pieces.
Now we have a few more fibre providers!!
This next beauty had four horns, two on the top of the head and two curling around the face.
There was also some home grown, ethically produce angora rabbit fibre for spinning and felting, and here are the bunnies.
There seemed to be more beautiful garments and clothing on display this year, here are some pics.
Some beauties amongst those don’t you think?
I thought you may like to see this folklore spinning song I saw.
A few more goodies, yarns and some beautiful knitting bowls.
Fabulous fibres.
And of course the fleece crèche where you can buy your raw fleece and collect it at the end of the day.
This next lady is from the Eden Valley Guild of Spinners, Cumbria, demonstrating weaving.
So the time flew by as it always does when you are having fun, and before we knew it from arrival at 10.00, the clock had whizzed around to 5.30 without us noticing. However in this time I had ample opportunity to adequately purchase feed for the hungry beast that is my Stash Monster, we all know how they are happier with regular tops ups………! The offerings this time include Shetland, Gotland, Jacob, Suffolk and Cheviot tops, lovely buttons, Merino, Jacob x and Teeswater locks, silk boucle, silk laps, hand painted paper, nepps, small piece of tweed, pot of fabric dye and a wooden stamp, little sample packs of sari silk yarn and carded sari silk, big block of olive oil soap and white scrim….I think that is everything…….Believe it or not that was the epitome of restraint ! Stash fed and I can continue being a happy crafter!
I hope you have enjoyed reading about my day at the show. It was over too soon but it will return to delight again next year.
When I began wet felting, merino was the only wool that I had had experience with, and I wanted to try new fibres. I knew that there happened to be a working alpaca farm not far from were I live so I decided to pay it a visit after a phone call to check they take visitors. I met a lovely lady called Dawn from Knavesmire Alpacas in Haxby, North Yorkshire UK who is passionate about her alpacas and I thought Dawn and her family would be a nice blog to share with you all.
Dawn has 38 alpacas, 8 Suris and 30 Huacaya alpacas, comprising 4 boys and 34 girls. The British Alpaca Society (BAS) have 22 recognised shades from white, grey, browns, fawn and black.
Alpacas usually only have one cria (baby), if there are twins they rarely survive. The gestation is approx. 11.5 months. They self ovulate, so only come into season when being mated, so they can have cria anytime, so males and females are kept separate to ensure no winter babies. Dawn has one hermaphrodite, which is really rare.
They are fantastic mums and guards, keeping everyone safe from foxes. Dawn has always loved them and started with five for her 50th birthday.
Now onto the fibre bit!
Dawn spins, wet and needle felts, both with 100% alpaca and also blending it with other fibres. There are three cuts of fibre. The first cut is from the saddle area, usually spun as it is ideal to wear next to the skin (less or hardly any guard hair which gives it the itch factor). The second cut is the better fibre from the neck and top of the legs, sometimes suitable for spinning and ideal for needle felting. The third cut is the short fibres from the bottom of the legs and the second trace of the shears, only really suitable for stuffing.
Huacaya is the teddy bear of the alpaca world, the Suri have the long silky dreadlocks. There are only 10% of Suri alpaca compared with Huacaya, so it tends to be more expensive to buy (both animals and fibre).
Pics of fleece, yummy batts, hand dyed Suri locks and spun wool
Dawn made this shawl using baby alpaca locks on a fine merino and alpaca base.
Needle felted family and wet and needle felted impressive hat!
Animal heads, a rug and soaps – Love the rug Dawn!
Dawn also makes and sells these cute booties.
I think it is safe to say Dawn is kept busy!
She uses olive oil soap to wet felt the fibre, and Ecover for washing it because it is gentle and does not contain Lanolin. Huacaya are sheared every year, Suris once every two years. She said the fleece does not need too much washing, however the alpacas do love their dirt baths and rolling around on the floor! She says they are wonderful to keep, relatively easy and usually give birth easily too, and I know she loves them all!
My thanks to Dawn for agreeing to provide me with all the information and lovely photos.
If you would like to find out more or contact Dawn here are the links.
I took three tea cosies along to a craft fair I attended last year and I sold all three. They were two sheep cosies in natural wool (Corriedale) and the third was a blue Merino cosy.
I have plans to attend more fairs this year so I thought it was time to replenish my stock.
I had an ample amount of Duck Egg Merino from World of Wool, so I thought this would be my main body colour. I then chose the rest of the ‘pallet’ to compliment it, picking out white and blue silks, blue and orange nepps, and Clementine, Turquoise and Denim blue Merino. This was just a starting point, embellishments could be added or changed along the way. It is always work in progress.
I cut a resist from my favourite product for this kind of project and that is pond liner. The resist measures 15” along the bottom and 10.5” up from the bottom to the highest point.
Firstly I needed to make the loop that will sit on top of the tea cosy, as this has to be added part way through the laying out process. This is achieved by taking a length of the wool, this was about seven inches end to end, and adding a few of the colours that will be used on the main body to the middle section. It is important to keep the ends of the wool dry, so I wrap mine in cling film, roughly two inches at each end.
The middle of this parcel now has to be wet felted to create a small strong loop. Try to keep water away from the cling film sections. You have to start felting it with light hands or it will squash flat. I normally put a little water on my bubble wrap, rub the soap through the wetted area and carefully roll the parcel backwards and forwards very carefully until it forms a ‘skin’, then you can continue with normal pressure and felt it into a hard rope.
I weighed 100g from the ball of wool. At this stage you could split it in half to ensure both sides have an even amount of wool, but because I prefer to keep turning the piece over, I do mine by eye. I put down two layers, wet it all down, flipped it and did the same on the other side. Before adding the final two layers each side, I took the cling film off the loop ends and fanned out the wool. I then placed the fanned out wool over the front and back of the cosy ridge, and finished adding the final two layers of wool each side, adding more wool over the fanned out wisps of wool. You could also position the loop back to front on the cosy instead of side to side, as shown on my blue spotted tea cosy above. If you didn’t want to make a loop, you could wet felt a small ball in corresponding colours and then sew it onto the ridge of the cosy when it was dry. Both options work well. Here is a tip for the felt ball option. As you will be sewing from the inside of the cosy to attach the ball, and you will be bringing the needle up through the ball to secure it to the ridge, because you do not want to see your sewing thread anywhere on the ball, you could bring the needle and thread right out the top, slot a small bead on and take it back down and through again to secure on the inside.
I then added a design back and front using the other wools and embellishments and continued felting.
Once it passed the pinch test I cut it open along the bottom, took the resist out and fulled it. The opening always needs more attention after you have done this, cutting it straight and then re-felting the cut raw edge. A method I have adopted is to not pay too much attention to the opening until the cosy is dry (mine take a few days, even on a radiator) I then steam iron the whole cosy, re-wet the bottom and re-felt the raw edge.
Here it is finished.
I am sure it will keep someone’s tea warm for a while!
UPDATE – I took this along to a gallery and it sold at the start of February – very happy!