Canadian Arcott Ram #2 Part 1

Canadian Arcott Ram #2 Part 1

A quick review of the Acquisition

1-2 scenes from last week

I told you last post that I had re-bagged the two Canadian Arcott Rams. They looked quite well skirted but one seemed more careful with his personal hygiene than the other. I started with Ram #2 who seemed to enjoy his dust baths.

3 Ram #2 4 Ram #15 #2 unwashed sample

Getting on to the Washing

Glenn got one of the washing buckets out and I pulled out the strainer buckets and divided the fleece into 7 portions, 4 quite clean and 3 less clean.

 6-8 test washing of some of the cleanest looking parts of ram #2

This year I tried elevating the washing bucket so it was easier to lift and lower the strainer bucket within it. This was easier until it was time to dump the water out of the bucket. I lifted the strainer buck out and left it hanging to drip on one of the blacksmith hooks. That went well but as I started to tilt the bucket to pour out the dirty water it started to splash on the asphalt driveway. It was determined to get me wet with all the splashing! Luckily, I had thought ahead and worn my rain boots! So my feet remained dry but the lower part of my jeans may now need a wash (but with cleaner water this time)

  9-10

Glenn brought the RV hand washer and spin-dryer up from the laundry room (it just sat there over the winter)

11-12 Glenn Helps with the spin cycle.

After a quick spin, it was onto the drying rack.

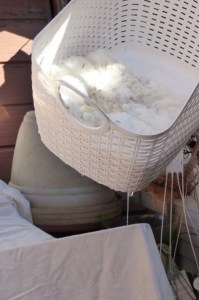
13 Now a pause, while the wool dry’s

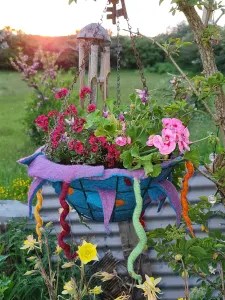
 14 Glenn takes time to smell the roses.

And now back to work. The test washing of ram 2  is ready to take a look at.

15 now it’s time to eat ice cream with strawberry and think of the different fibre preparations I would like to try with this fleece. let me go find my hand carders and my mini combs! (but after I finish the ice cream)

___________________________________________________________________

Ice cream break!

(its a long post with lots of pictures!)

___________________________________________________

Testing to find out the properties of this fleece

Now that we have the Canadian Arcott (Ram #2) cleaned let’s make a few tests to find out what this fleece wants to become! not all fleeces are good for all purposes, so we should get curious and try a few options. this will tell us more about this breed I have not tried before.


Hand Carding the wool Test

Let’s see what happens when we try hand carding. I have a few hand cards, I chose the ones I like the best with the curved backs and have a nice carding cloth. I got them second-hand and have not tried to figure out the teeth count I should probably figure that out eventually.

16-17 rolags from the Hand Cards

Yes, that feels quite soft and lofty but there is definitely some lustre too. This could be interesting as knit socks. If only I Knit!!

Carded spun sample

I used the carders, created rolags and used the Electric Eel Wheel 6.0 (EEW6) to spin the singles.

I plied on the spindle since I didn’t want to switch bobbins for a small sample

18-19 2 ply sample

20  I hung the wool to dry in the window. Even without sunshine, it dried quite quickly.

21 washed 2 ply woollen prep.


There is a bit of elasticity in the woollen preparation but not as much stretch as other fleeces I have spun. I think it would make a good blanket or throw if woven and used as warp or weft.


__________________________________________________________

Hand Combing the wool test

Let’s see what happens when we try the Roger Hawkins Combs.

22loading the comb

23 First Pass

24  Second Pass

25  Third Pass then Drafting off the comb and the comb waste

26

____________________________________________________________

Combed spinning sample

I then took some of the combed fibre and spun it on the Electric Eel Wheel 6.0 (EEW6) as I did with the carded sample.

27 EEW6 with 2 ply sample

It was easy to spin.  I plied on one of my drop spindles since I still didn’t want to change bobbins for the short sample I had created.

28  Washed locks, combed fibre and 2 ply yarn.

29 the unwashed 2 ply samples.

You can see the halo already. I will wash and dry the rest of the sample. I made a mini skein, washed it, swung it around the bathtub, whapped it on the side of the sink then hung it up in the window with a small weight.

30  Hanging in the window to dry. Unfortunately, this seems to have inspired darker skies and rain!

31

33 washed 2py combed top

When dry; the yarn feels coarser than I had anticipated. It is not as soft as a Merino, more like a Corriedale but with less elasticity. There is very little stretch in the yarn so I am now curious as to how it would work as a warp for weaving. This breed may be ideal  for warps.

Comparing the Woolen (carded) vs the semi-worsted (Combed) yarns. The Woolen does have more loft, bloom and halo and slightly greater elasticity. Both would work as weft but I suspect the Combed will be a bit better weft since it has less bloom or halo to interfere in the heddles.

Next, we will check out the felting properties of this sample of Canadian Arcott. We will use the comb waste to check its ability to be needle felted and some of the Carding to check if it will wet felt. Ann is thinking it will not. Let’s see what happens next week!


Finally Finished and Playing with Rocks

Finally Finished and Playing with Rocks

I have finally finished my pouch. Yay! I am not sure how big I want the individual spaces in the bag to be so I have just basted the divisions for now. If they are working fine I will sew them in permanently.


Here it is full of things. and some things that didn’t make it in. As you can see it’s not dedicated to one kind of thing. It’s a way to keep all the smallish stuff from filtering down to the bottom of the basket where they are hard to find.


and all rolled up.


Here is the basket. First I put the liner in. It’s a thick, fairly stiff fake silk scarf. I can’t imagine it was nice to wear which is probably why it was in the secondhand clothing store in the first place. It’s great for this job.


Adding everything into and onto the basket.

This slideshow requires JavaScript.


There was even room left to add my guild library books when I got back to the house.

I am sure you are all as tired f hearing about the basket organizer as I am so it is now time for something new and more colourful. I have been seeing felted rocks popping up on Facebook a lot. I figured they looked like a pretty obvious and easy thing to make, so I will give it ago. The first one I did use floor underlay resists.  I started with a pebble. I covered it completely in wool.


I cut out a resist a bit bigger than the wool covered pebble and then added the top put the resist on the top of the rock and folded the wool around. then I cut a bigger resist and did it again and marked the top. It was a bit awkward. I should have worked the other way up but where’s the challenge in that. LOL.


It fulled down quite fast.

time to start cutting, I rubbed each cut to heal it before doing the next cuts. I don’t think you can see it but the bottom of each layer is fully attached to the one below it.


I sat it on a green lid to dry, looks really striking there.


That worked quite well. Now for a different way.

For this one, I used plastic wrap to keep the layers separate. I cut a small hole in the underside so the layer would be attached to each other.


wool wrapped pebble


first layer wrapped in plastic


3rd layer

I wrapped the last layer in plastic I just rubbed it and rolled it around in my hands as if I was making a felt ball. I did it longer to make sure the inside layers were felted as well. While wrapping I lost track of the top and bottom. Naturally, I picked the wrong side to mark. I cut the first hole and it was attached to the one below so I kept cutting down to the pebble. I planned to stretch each layer, but with it being quite small there wasn’t much stretch or even room to get anything in between the layers to try and stretch.  so In the end I just fulled it tight around the rock.


Here is how they compared in size before felting


And how they compare with my hand to show the sizes


See Lyn, not felted rocks but felted rocks. Ha Ha Ha :O)

Slow Stitch Update and a Celebration

Slow Stitch Update and a Celebration

The last time I showed you my Autumn Nuno slow stitch piece was back in April and it looked like this:

I have been continuing to stitch on this piece for 15-20 minutes per day. I have been concentrating on the bottom left corner and bottom foreground to fill in the vegetation/foliage in those areas.

Here’s a close up of that area which has the first pass of seed stitch and just needs some of the lighter areas filled in a bit more. I also think I need to evaluate the values once I’m happier with the foreground.

And here’s what the full piece currently looks like. You can click on any of the photos to enlarge them. So progress is being made, albeit slowly. I’m still enjoying the daily practice of hand stitching, adds a little zen to my day.

One year ago today, we adopted this little guy from Mission Valley Animal Shelter. His name is Edgar and he was a stray so we don’t know his breed or his age, but he has added so much joy to our lives. I thought you might want to help Edgar celebrate his adoption day and see how he is living his best life.

Around the Web

Around the Web

This is post of links to interesting and or useful sites around the web.

http://www.soraiyu.com/work/index.html

https://www.facebook.com/Pulliswoollies

https://www.feltforarchitecture.com/portfolio


http://www.sheep101.info/sheepbreedsa-z.html


Surface Design Association


https://www.embroidery.rocksea.org/reference/picture-dictionary/

http://www.pburch.net/dyeing.shtml


http://www.martinacelerin.com/

https://www.facebook.com/sarahzonadesigns


Spin like your Scottish

spinning on a pendulum wheel


https://www.hernmarck.com/about

https://www2.cs.arizona.edu/patterns/weaving/books.html

https://www.carolingianrealm.info/PatternGenerator.php


http://www.knittingonthenet.com/stitches.htm

https://www.vam.ac.uk/articles/1940s-knitting-patterns


Summer Garden Project

Summer Garden Project

I have to confess this month, I am flying solo, because Alex has happily returned home to live with his housemates now that he’s had both Covid vaccinations.  I had planned for him to visit me last weekend, for him to join in the blog project, but my partner Pete went up to London recently to watch Swansea City Football Club in the play-off finals for the Premier Division!  As a result, I felt that it was too risky for Alex to come and stay, just in case Covid reared its ugly head.  So I’m afraid you’ve only got me this time!

Anyway, it’s that time of year when we all love to get out and about for some fresh air.  With lockdown affecting so many people’s plans for holidays and travel, many of us have turned to more home-based ideas to spend time in the fresh air.  We have spent a lot of time in the garden over this past year or so, and I thought it would be nice to combine ideas for the garden with wet felting.

Here are some photos of our garden, which just over a year ago, was a mass of overgrown weeds, bamboo and brambles!! I think it’s coming on really well.  Pete has worked a miracle and Alex has enjoyed learning how to garden and grow vegetables.

Summer Garden


So… I decided to make something that would be a pretty addition to our garden……. a liner for a hanging basket of flowers.

I started by measuring the diameter of the wire basket from rim to rim, including the depth.  It measured 21″ in total.  In order to allow for shrinkage, I made a rough guess and decided to make a circle measuring 30″ in diameter.  I decided that I didn’t want it too thick, so opted for doing two layers of wool batt, with a few decorations using Merino tops.

Before I started laying out my wool batt, I decided to make some spirals for the outside of the liner.  I though they would add a nice decoration, and would make the liner both colourful and hopefully attractive to bees!

Merino tops in assorted colours

Some of the merino tops were quite short, so I drafted them in order to make them longer.  As you can see by the pale green one, I need practice!!!

I wrapped the ends in some clingfilm, which I secured with an elastic band in order to keep them dry and prevent them from felting.

Next, I felted them in order to make my spirals.  I don’t know about you, but it’s hard to roll them in your hands as they are so slippery! So I managed to find that by rolling them gently on a towel, I got a much more even shape and they were easier to roll.

Next was to start laying out my wool batt.  Firstly, I did a layer of lavender coloured wool.  Once I had laid that out, I then added my merino snakes! I have to admit, at one point I did think this was going to end up looking like Medusa!

Fluffy tails

I fanned out the dry ends of my ‘snakes’ so they would be sandwiched between the two layers of wool batt.  Once I had all six snakes in place, I added my second layer of turquoise wool batt.

As you can see, I left a hole for you to see how thick I was laying the wool batt.  I have to admit, the blue looks more of a sky blue in the photos, but in real life, it has a lovely turquoise hue to it.

I added some merino coils on the top, so look like little flowers.  Then I started to wet felt the wool.  It took quite a while and I have to admit it was tricky at first, because my table was the same width as the diameter of the wool batt circle.  This meant that I had snakes trying to slither off in all directions!!!  But once they were starting to get trapped by the wool batt, they were a lot easier to handle!  Perhaps I was a snake charmer in a past life!

Anyway, I finally got there! I did not quite manage to shrink it back down to 21″ diameter, no matter how much I worked it and fulled it.  I did contemplate trimming the top back to the rim of the wire basket, but in the end I decided I quite liked it as from above, it looked like a large Petunia flower!  I cut six triangles out of the circle, so that it would sit better in the wire basket.

It looks like a spinning, spiralling cog wheel!

I was quite happy with the result…

I then made my snakes into spirals using pipe cleaners to shape them and left the whole thing to dry.

In the end, I also decided to use the triangles that I had cut out, by inserting them lower down into the wire basket.  I think it looks like an upside down jesters hat now!  I have planted it with a few flowering plants, and I’ve put it at the bottom of the garden.  This is where I put my special, meaningful things.  I like to think the fairies appreciate them!

Happy in its new home!

I hope you like my wet felted basket liner! I thought I would leave you with some photos of my midnight garden to finish off…

Midnight Garden


In Ottawa, Tis’ the Season of New Fibre Acquisitions!

In Ottawa, Tis’ the Season of New Fibre Acquisitions!

My first fleeces of the year were purchased today.  Even better, I was picking them up at the same Farmers Market where Ann sells delicious tarts, cookie, Bread and pies! The Market is set up so you go in a big circle with all the booths have space and a wide gravel path. This year there are more booths.

1-2 Barhaven Farmers Market

 3 Ross and Ann!

I bought Mom a couple of Chocolate chip cookies (they are her favorites) as well as Cookies and tarts for Glenn. More customers were arriving so I couldn’t stay and chat so it’s time to move on to the Fleece.

 4 Note the bag of fleece in the back left corner of the booth!

The fleeces I purchased were Rams who belong to a flock of about 300 sheep. The Ewes are gainfully employed as professional Lawn maintenance specialists, keeping the weeds trimmed under solar panels! I hear the burrs that were in last year’s fleece have been almost eradicated.  (I did not see any in the fleeces I got this year as I re-bagged them).

 5 This is a bit better view of the 2 skirted Rams.

 6-7 Distracted by small cool wild flowers beside the parking spot.

Now to get back to the important parts, these rams are Canadian Arcotts. This is a breed that you may have had  the opportunity to  have  fun with before. Its one of 3 breeds (Canadian, Outaouais and Rideau Arcott) developed by the Canadian government here in Ottawa.  The last part of their name, Arcott, stands for Animal Research Centre Ottawa.  The Arcott breeding program began in 1966 with the goal to create a breed which reproduced rapidly for genetic and other sheep research. The original mix of breads are listed as Finnish Landrace, Southdown, East Friesian, Suffolk, Leicester, North Country Cheviot, Ramnelet, Dorset Horn, Shropshire and Ile-de-France for the Arcotts.

1982 all three Arcotts were recognized as distinct breeds.  Rideau Arcott mature quickly  grows rapidly and often have triplets. Although they are primarily a meat breed, their wool is described as a medium quality and variable. The Outaouais Arcott are also know for fast growing and often having triplets. There fleece is considered variable and there was a mention of good for milking. The Canadian Arcott is considered as a good meat breed with fast growth.  The fleece was listed as Soft, lustrous 3-4 inches long and a 25 – 33 micron count.

I unfortunately do not have a photo of the rams who produced these fleeces. If this was in smell-i-vision you could experience the lovely sheepy aroma. Some rams are a bit aggressive aromaticly, but both of these fleeces have a more normal sheepy smell.

8-11  Fleece #1- Ram professionally sheered and well skirted. The crimp is tighter than fleece #2. The locks I used as an unwashed sample are about 3.5 inches long.

12-15   Fleece #2 – Ram professionally sheered and well skirted. Not as crimpy as Ram #1. The stale length is about 3 inches on the unwashed sample I pulled.

Both these look like they would make fun spinning fleeces and I look forward to sampling them for felting. I have not worked with a Canadian Arcott before so this will be both fun and educational. There will be samples to share but first I have to finish cleaning up the side yard so I have space to wash and dry the fleeces!

Coming up on Monday will be our guild A.G.M. We will also be having a fiber poker challenge. This year as well as Spinning and Weaving there will be a deck for Felting! I will tell you about that in a future post.

Have fun and keep felting, spinning, weaving, fleece washing! So much to do we need to make the days longer! Oh yes its summer, that will help!!


Olive Sparrow Giveaway Winners and Second quarter challenge, stitching all done

Olive Sparrow Giveaway Winners and Second quarter challenge, stitching all done

First things first:

The winner of the 100 grams of premium washed Teeswater locks is Sttamburo

The winner of the 150 grams of Swiss mountain batt in your choice of colour(s) is Darrel

Congratulations! Monica will contact you via the email you provided.

Now my stuff

My heat erasable pens arrived. They come as a pack of refills and some empty pens. I got one that came with 4 colours, white, red, blue and black. That should cover all possibilities.

I picked the white. I think red would have worked too.


Onto the last part of the design. Diamonds were a popular repeating pattern. I better check to see if this will work the way I think it will. I did not do my usual quick sketch but using a ruler. Are you amazed?

Yes, that should work fine, real diamonds and not just squares on point. Now let’s see if those pens work. A straight line to work form. I may stitch that in too. I wasn’t sure it was going to work, even smooth felt is very textured.  The tendency when a pen doesn’t write is to press harder. That didn’t work. A light touch was much better.


A couple of weeks has passed since I did the lines. I decided to use yellow for the lines.


I really like how the yellow looks against the green but it didn’t look complete so I added some red and black french knots in the middle


Next was finishing the sides. I decided to use double-fold bias tape. I like double fold because it’s easy to sew on invisibly. the bias I like to use with felt is a fleece bias. It blends with felt so nicely but isn’t as bulky as using felt. I had black and green that would work. I chose the green as it was such a good match.

If I had easy access to my machine I would have stitched the first side with it. You can stitch in the ditch of the fold and it’s invisible. That is the way I do it when I put a bias tape on the brim of a hat. As it was, I just stitched both sides by hand.


I think it looks good.


Next is sewing the pockets and filling them up. I should have that done by next time. I have almost a whole month to get it done and still be on time.


Twilight – Nuno Felted Landscape

Twilight – Nuno Felted Landscape

I recently sold several pieces of work at Bigfork Arts and Cultural Center in Bigfork, Montana and I took a new set of framed pieces down. But summer, the tourist season is upon us and I needed to stay ahead and create some new work. I found some pieces of hand dyed silk that I had in my stash and put a stack of prefelt and the silk together so they are ready to felt.

I started with this piece of silk which has been nunofelted to white prefelt. I fold over the edges and what doesn’t stick to the back with felting, I hand stitch in place so I have a nice edge. This piece is approximately 7″ x 11″. Once felted, I look at the piece from different angles and “find” my landscape.

Next up, I free motion machine stitched the background picking out the mountains in the background and some rocks in the foreground.

Next, I decided to add a foreground tree, my go to foreground. I used a variety of hand dyed cheesecloth layers for the main branches and trunk of the tree. But the result wasn’t what I wanted. The background didn’t have enough depth, I needed more change in value and contrast. So I peeled off the tree which luckily came up in one piece.

Then I used a thickened acrylic ink to add darker values and contrast to the landscape. That definitely adds more depth.

Now to look at the tree in place on the background. Much better! Now to stitch the tree. I tacked it down with hand stitching to keep the cheesecloth in place. You can skip that step but it is harder to keep the foot of the machine from moving the cheesecloth out of place. Once it was hand stitched and holding in place, I went back to the machine.

And here’s the finished piece. I am calling it Twilight as it reminds me of a sunset in the mountains. I’m happy with it and I’m glad that I took the time to add some depth to the background before I stitched the tree.

Sewing a pair of trousers

Sewing a pair of trousers

Lately, I’ve been keen on the idea of creating some staple wardrobe pieces to replace some older garments (*cough cough, Pandemic Body is larger*) and maybe have a go at creating a Capsule Wardrobe. If you’re not familiar with the concept, it’s when you have only a limited number of garments that you can mix and match to create new styles. The operative word here is “limited,” since the idea is to only have clothes you’ll wear and not clutter your wardrobe.

Enter the Arthur Pants by Sew Liberated. They are a wide, lose-fitting sort of trousers, very comfortable. I wanted to have pieces I could wear at home but still look good in outdoors. I’m a fiend for grabbing my pyjama bottoms when at home, but this hinders how quickly I can just nip out to the Post Office!

Whenever I sew a garment, I always like to create a mock-up to see about fit. If you sew, you’ll know pattern sizes don’t always conform to your own body and tweaks might be necessary. A mock-up helps me familiarise with the techniques the pattern requires, and I can see if I like how I look before cutting into the nice fabric.

Bathroom picture glamour

After creating the mock-up, I went on Instagram to ask for opinions. As you can see, not everyone was keen on the style! That’s exactly the type of honesty I was looking for. You see, I wasn’t too sure about the width myself, and having someone else confirm this for me really helped.

I tweaked the mock-up to make it smaller and, happy with the results, saw that I needed to change the sizing on the pattern to fit my needs.

I usually keep the original pattern with all the measurements and simply copy my size to use. This means I’ll be able to sew this for someone else in the future without having to reprint. The pattern piece on the left is the original one, the transparent ones are what I’ll be using. I had to shorten the legs (by folding) because this was meant for 5’7″ people, which is definitely not me – on the wonderful side, the pattern called for at least 3 meters of fabric and I only needed 2, with enough to spare.

Time to cut the fabric. Here you’ll see Marshmallow being “helpful.” It’s definitely true that if you leave a piece of paper in a stadium floor, eventually a cat will sit on it.

I was already familiar with what I needed to do, so the sewing should be smooth sailing. I hoped.

I did make a couple of mistakes, but nothing very serious. At some point, the pieces of fabric did start to look like trousers indeed.

I got pleats, I got a zipper, I got pockets – I’m very proud of myself.

Finally, I needed buttons. I narrowed it down to two styles and my other half made the final decision: the left one.

Of course the buttonhole foot on my machine worked splendidly when I tested it, only to turn demonic with the proper fabric. Luckily nothing got damaged or I’d have had a breakdown. I was almost done…

Ignore the weird background on the left, I tried to remove shoes with an app and it went wonky.

Voilá, a pair of comfortable trousers! I’m so happy with them, I’ve already started another pair in yellow linen.

So there you go, my first ever journey into making trousers, adding a zipper and pockets. Nothing exploded, my mental health is seemingly intact, so I guess all is well.

Finally, just for Ann, I have a photo of some cheese scones I ate a few days ago, because we had a chat about the difference between English and American scones 🙂 Yes, they were delicious.

Have you sewed anything lately? Share what you made in the comments section, I’m always keen to talk shop. Have a great week.

A Redshank and Other Felt

A Redshank and Other Felt

As shops, galleries and exhibitions start to reopen in England and I have quite a few sales & exhibitions coming up, I decided to make another picture based a local coastal bird.  I’ve seen quite a few redshanks recently walking along the shoreline and haven’t done a redshank before so I think that would be interesting.

I start by making some prefelt for the back and tail feathers in a muted pewter and white tone, plus some firm felt I will use for the orange/red beak and legs. (I forgot to take a photo of these.)

I have a composition in mind and I make a quick sketch to get the shape, stance and size of the bird then lay out the bird’s body using a base of white merino tops and the prefelt feather shapes.  There’s not much detail as I will needle felt this in later.  I haven’t tried this before but I needle felt in some of the feather detail part way through wet felting then finish fulling the bird.

I’m not sure what I was thinking (if at all) as I’m not happy with the loopy-ness of the needle felting or the direction of some of the feathers.  I park it for now and get on with the background. One of the many things I love about felting is that you can usually continue to work on it until you’re happy with the result.

Redshank body: wet felted with some needle felting added part-way through

Onto the background: I have bits and pieces of natural coloured prefelt that I cut into pebble shapes ready to form the beach.  The redshanks I’ve seen recently have been walking close to the water’s edge, either in the water or on the pebbles.  Thinking about the water experiments I did last year I lay out 2 layers of pewter-coloured merino for most of the picture with a white and rusty orange section where the wave and beach will sit.  I put long strands of blue tops in two colours running horizontally to represent the light reflecting off the water.  I leave a darker section near the top with some of the pewter wool laid at an angle as if there’s a small wave coming in there, though in the final picture you can’t see most of this because it’s behind the bird.

Next come the pebble pieces and finally the foreground wave, as it sits on top of both water and beach.  I haven’t tried using mohair for wave crests before so I run a wiggle of mohair tops along the water’s edge and onto small sections of the sea as if small waves are cresting there.  I’ve spent a lot of time looking at the water in my local sea / estuary so I know the colours and shapes well.  The water is often choppy like this with small waves.

Background layout, ready for wet felting

I wet felt the background then try out the bird body to see how they’re going to fit.

Background and Bird body – trying things out for size

I needle felt the redshank’s body onto the background then add the legs and beak which I’ve cut from the red/orange felt. Then I add the eye and fiddle for a while until I’m happy with the bird.

The final redshank picture ready to frame

The finished picture is about 50-55 cm square and will go into an oak veneer box frame that’s 64 x 64 cm. I took this photo in the evening, with electric light, so it’s a bit less yellow in reality.

As I didn’t take a lot of progress photos for my Redshank, I thought I’d add a few other things I’ve made recently. Like my felting friend Antje (who posted here recently) I took Judit Pocs’ milkweed pod workshop on 1 & 2 May. I direct dyed some 18 mic merino tops and some fine ponge silk for my pod.

It was a good workshop and I’m happy with the result. I got my dye ratios wrong which resulted in a lot of bleeding and dyed hands but thankfully it’s not a wearable so it shouldn’t now be a problem. I hope to use this silk pleating technique in future projects.

I realise the colours are very similar to the ‘hippy trippy’ Corriedale bag I was making when I last posted. It’s still work in progress but I’ve done some additional ink work on some of the silk patches and am part way through adding some stitching. I’m now adding some french knots in the rectangle near the top left. This combines some of the techniques I learned in Terri Berry’s bag class with some from Fiona Duthie’s Ink + Cloth workshop and my new venture into direct dyeing (using the Felting & Fiber Studio tutorial).

Previous picture on the left, current on the right.

As part of Fiona Duthie’s Paper + Fibre workshop I made a lamp shade (actually a sleeve that fits over a lamp). It’s interesting how the paper sections are barely visible when the lamp is off. I think I will make more lamps when I have time.

Finally, I’m making some smaller pictures to take the little beach hut gallery in Whitstable Harbour where I often sell my work. I’m in there from next Wednesday for 2 weeks. I’ve wet felted some mussel shells and am making backgrounds to set them into small box frames (without glass). They’re about 19 x 19 cm. Here’s one that’s nearly ready to go. The background is nuno felted with recycled silk and old curved lace. I just have to decide where to stitch the shell. What do you think?