
A Redshank and Other Felt
As shops, galleries and exhibitions start to reopen in England and I have quite a few sales & exhibitions coming up, I decided to make another picture based a local coastal bird. I’ve seen quite a few redshanks recently walking along the shoreline and haven’t done a redshank before so I think that would be interesting.
I start by making some prefelt for the back and tail feathers in a muted pewter and white tone, plus some firm felt I will use for the orange/red beak and legs. (I forgot to take a photo of these.)
I have a composition in mind and I make a quick sketch to get the shape, stance and size of the bird then lay out the bird’s body using a base of white merino tops and the prefelt feather shapes. There’s not much detail as I will needle felt this in later. I haven’t tried this before but I needle felt in some of the feather detail part way through wet felting then finish fulling the bird.
I’m not sure what I was thinking (if at all) as I’m not happy with the loopy-ness of the needle felting or the direction of some of the feathers. I park it for now and get on with the background. One of the many things I love about felting is that you can usually continue to work on it until you’re happy with the result.

Onto the background: I have bits and pieces of natural coloured prefelt that I cut into pebble shapes ready to form the beach. The redshanks I’ve seen recently have been walking close to the water’s edge, either in the water or on the pebbles. Thinking about the water experiments I did last year I lay out 2 layers of pewter-coloured merino for most of the picture with a white and rusty orange section where the wave and beach will sit. I put long strands of blue tops in two colours running horizontally to represent the light reflecting off the water. I leave a darker section near the top with some of the pewter wool laid at an angle as if there’s a small wave coming in there, though in the final picture you can’t see most of this because it’s behind the bird.
Next come the pebble pieces and finally the foreground wave, as it sits on top of both water and beach. I haven’t tried using mohair for wave crests before so I run a wiggle of mohair tops along the water’s edge and onto small sections of the sea as if small waves are cresting there. I’ve spent a lot of time looking at the water in my local sea / estuary so I know the colours and shapes well. The water is often choppy like this with small waves.

I wet felt the background then try out the bird body to see how they’re going to fit.

I needle felt the redshank’s body onto the background then add the legs and beak which I’ve cut from the red/orange felt. Then I add the eye and fiddle for a while until I’m happy with the bird.

The finished picture is about 50-55 cm square and will go into an oak veneer box frame that’s 64 x 64 cm. I took this photo in the evening, with electric light, so it’s a bit less yellow in reality.
As I didn’t take a lot of progress photos for my Redshank, I thought I’d add a few other things I’ve made recently. Like my felting friend Antje (who posted here recently) I took Judit Pocs’ milkweed pod workshop on 1 & 2 May. I direct dyed some 18 mic merino tops and some fine ponge silk for my pod.

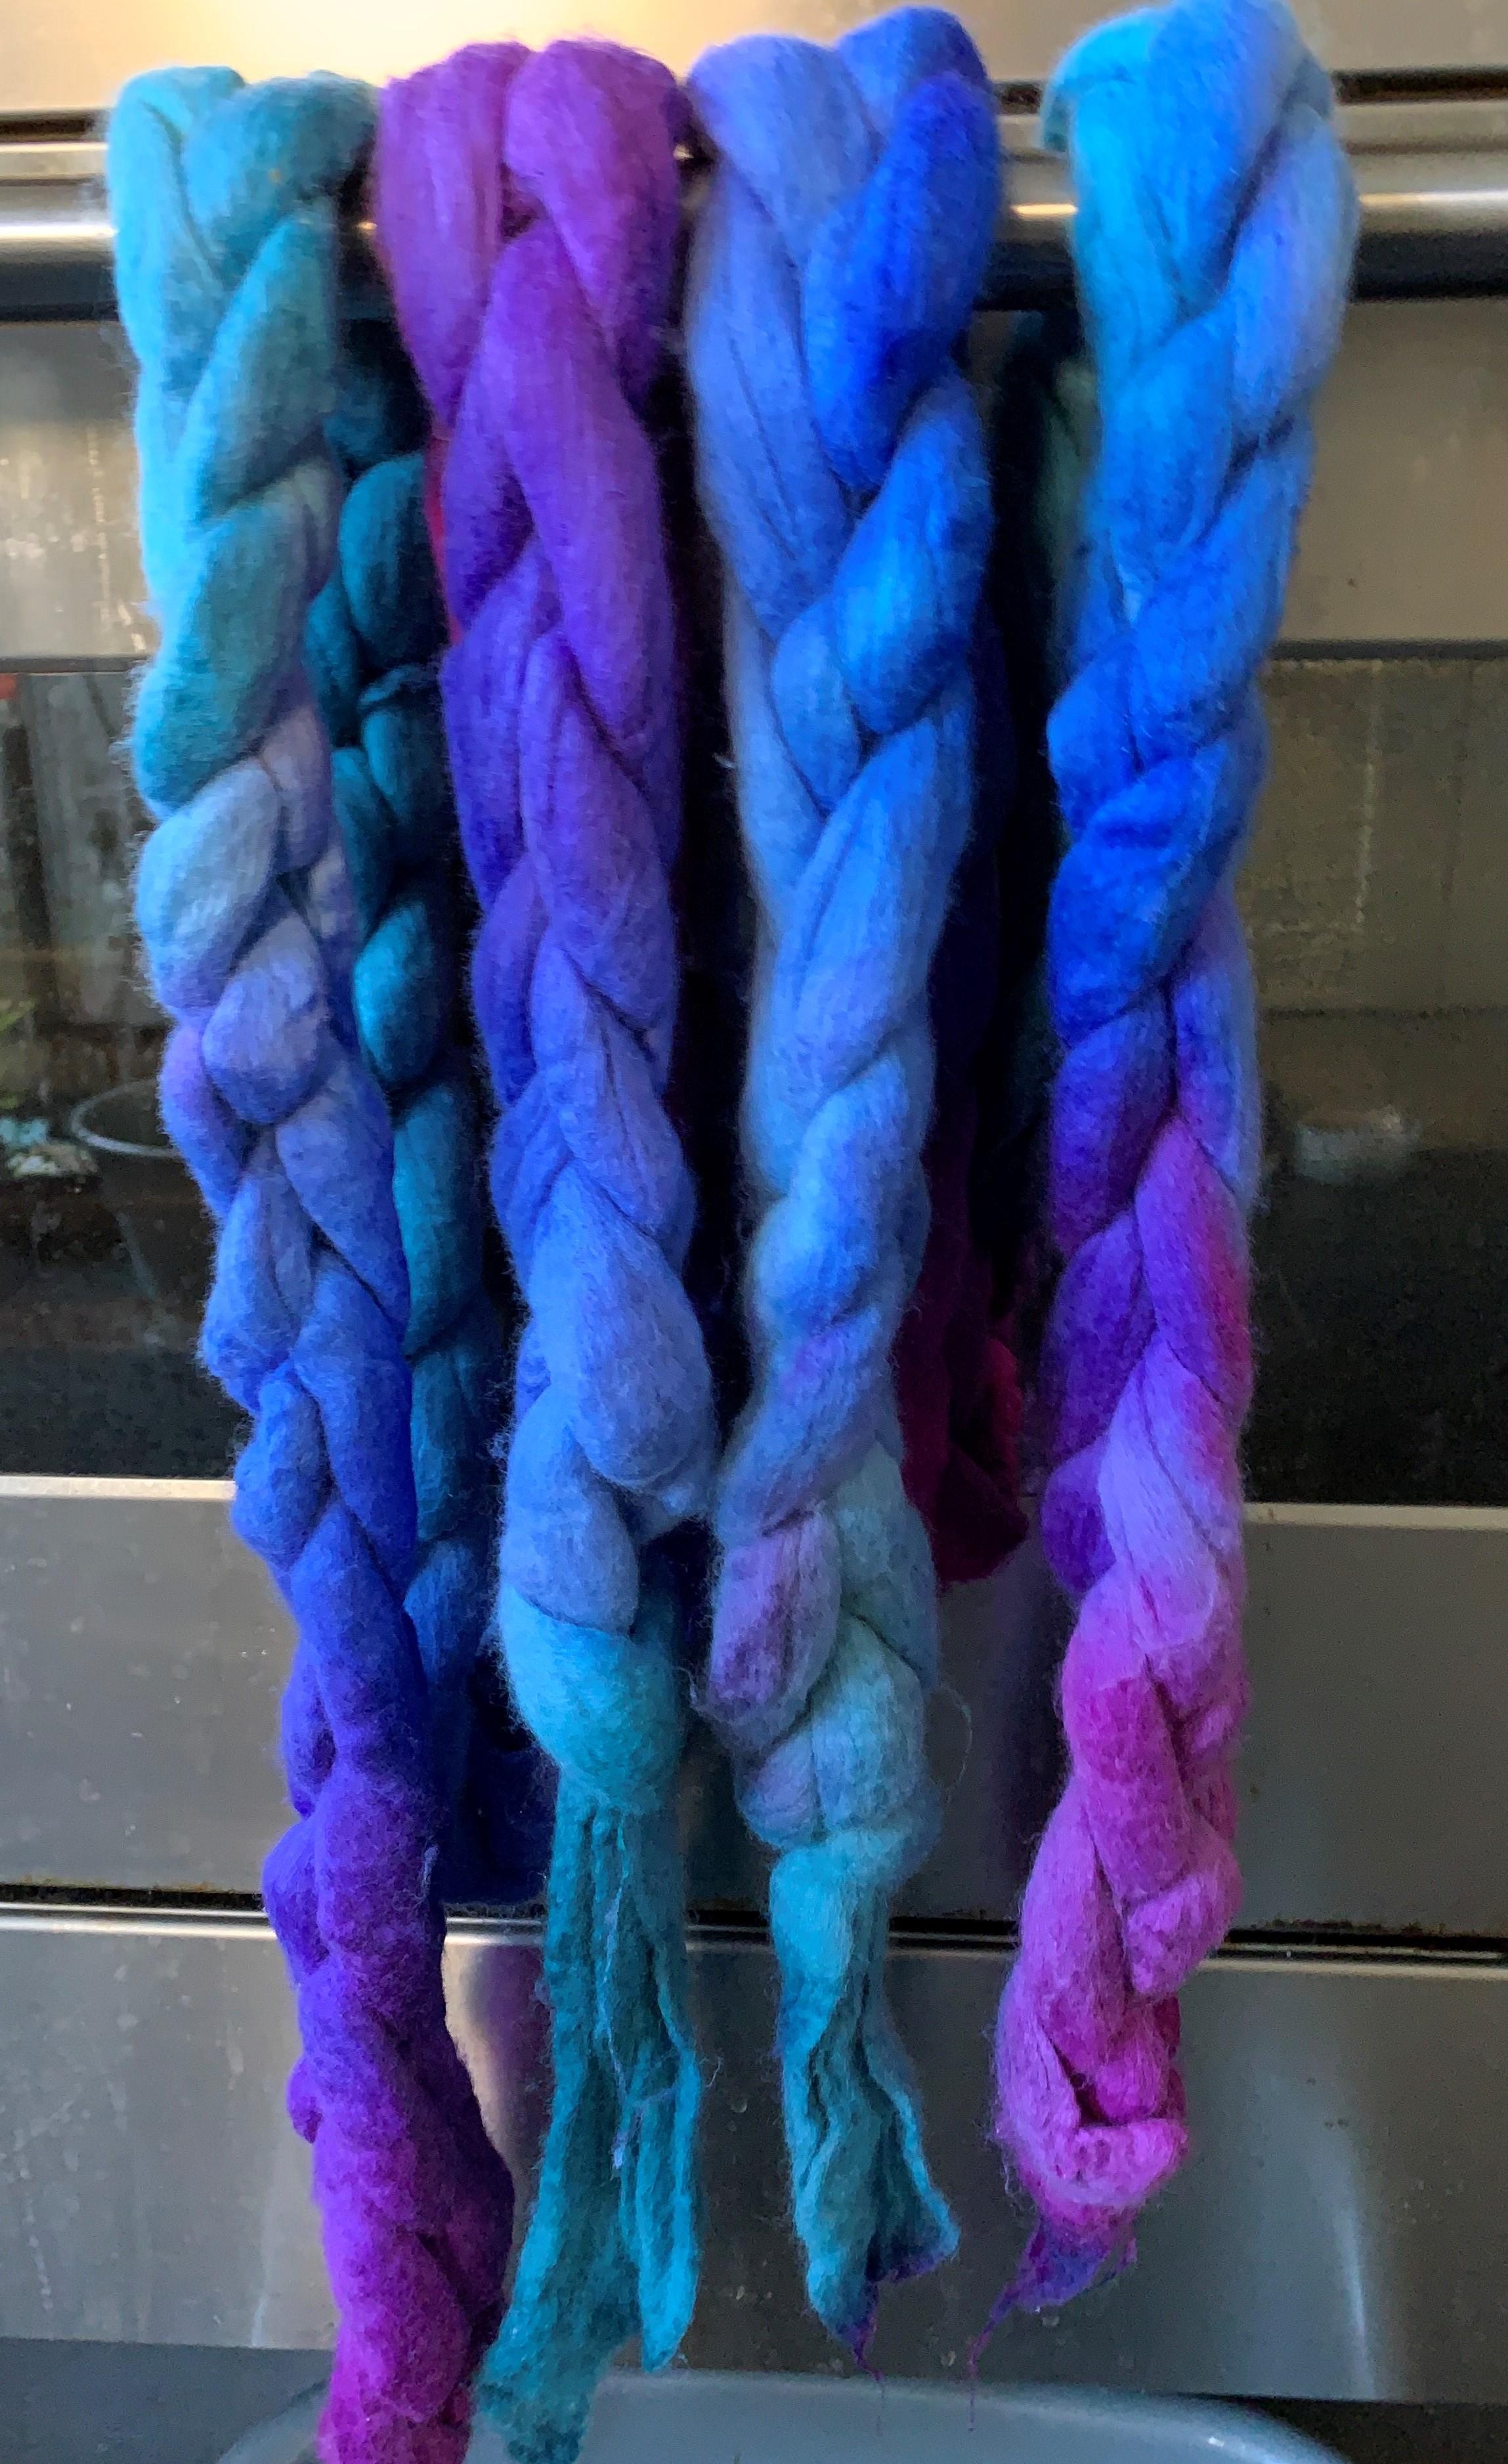
It was a good workshop and I’m happy with the result. I got my dye ratios wrong which resulted in a lot of bleeding and dyed hands but thankfully it’s not a wearable so it shouldn’t now be a problem. I hope to use this silk pleating technique in future projects.

I realise the colours are very similar to the ‘hippy trippy’ Corriedale bag I was making when I last posted. It’s still work in progress but I’ve done some additional ink work on some of the silk patches and am part way through adding some stitching. I’m now adding some french knots in the rectangle near the top left. This combines some of the techniques I learned in Terri Berry’s bag class with some from Fiona Duthie’s Ink + Cloth workshop and my new venture into direct dyeing (using the Felting & Fiber Studio tutorial).


Previous picture on the left, current on the right.
As part of Fiona Duthie’s Paper + Fibre workshop I made a lamp shade (actually a sleeve that fits over a lamp). It’s interesting how the paper sections are barely visible when the lamp is off. I think I will make more lamps when I have time.


Finally, I’m making some smaller pictures to take the little beach hut gallery in Whitstable Harbour where I often sell my work. I’m in there from next Wednesday for 2 weeks. I’ve wet felted some mussel shells and am making backgrounds to set them into small box frames (without glass). They’re about 19 x 19 cm. Here’s one that’s nearly ready to go. The background is nuno felted with recycled silk and old curved lace. I just have to decide where to stitch the shell. What do you think?


22 thoughts on “A Redshank and Other Felt”
The redshank is fabulous! So alive! He is so attractive that he should sell quickly.
The on/off photos of the lamp are interesting – you have 2 shades for the price of 1.
The milkweed pod is perfect and the colours are just right – they are a good combo and work well to define the sections.
Love the mussel shell on the background – clever idea to use lace – very difficult to choose a favourite position for the shell as all the positions look good – the bottom left maybe?
Thank you for your lovely comments, Lyn. I’m glad you like the redshank. I thought it was looking a bit unpromising at first but I’m happy with how it turned out. You may be right about the mussel shell. I’ve just made a different background for another shell so I might consult about the position of that one on the forum.
That redshank is wonderful! The legs and beak really bring him to life.the effect of the surf and the pebbles really bring depth to the picture. I also love the effect of the silk pleating too. In fact, I love all of the above!! Great post!
Thank you very much. It always surprises me how much the birds improve once they’ve got their eye, beak and legs! There’s always a confidence dip when I’ve wet felted the body and think ‘oh dear!’
I really like all of this work, and would love to have a go at that silk pleating. The bag is coming along beautifully. A position for your muscle? I think a diagonal placing is best, but think I prefer the top right. the darker end being higher than the white seems to balance it out. But like Lyn, I actually like all of the positions. Toss a coin perhaps?
Ann
Many thanks for your positive comments. I’m glad you can see the progress on the bag. It will always be a bit too ‘hippie trippy’ for my taste but I feel the stitching is starting to bring it together. I’d recommend Judit Pocs milkweed pod workshop if you can find the time and cash. It’s a lovely effect and she’s obviously spent some time developing the technique. I found the instructions clear and precise and liked her teaching style.
You have been really staying busy Lindsay! The redshank picture came out great and I’m glad it worked out to your satisfaction. I often think midway through a project that it will be a disaster but perseverance does usually pay off. Your pod turned out fantastic and I look forward to seeing how you will use the pleated silk in other projects. The bag is moving forward and even though it might not be your style, perhaps someone else will love it. The light in the lamp makes an amazing difference to the lamp. I like the effect. It looks to me like the mussel shell will work in almost any direction. I would just make sure that the negative space behind the shell is interesting/different on all four sides of the shell. Good luck with your beach hut gallery sales!
Many thanks Ruth. Insightful and positive as ever. The point about negative space is a good one and I will think carefully about it when I come to stitching the shell in place, hopefully over the weekend.
Really great to see that redshank (I had never heard of them… but recognise it as a seagull!)…I have not tried such pictorial work, but seeing it built up like that is really interesting.
Was good to see you and Chrissie at Judit’s workshop…I love the pleating, and her teaching style is very clear and precise! Have fun with your gallery…hope the sales make it worthwhile!
Ha,ha. Thank you Anna. Great to see you too. I promise it’s not a gull! Maybe one day we will be able to do a workshop in the same room again…..we live in hope.
Love the shells!
Thank you, Nancy!
Lindsay, seeing the development not just the finished picture, of the redshank is fascinating. You know my thoughts already but I will say it again – fabulous, so realistic. It is definitely watching my every move, whilst hovering on the pebbles. You have achieved so much ‘paused’ movement in it’s feet.
As I write this, the photos of your bag & lamp have not come through – so I await a DM on those please.
The JP workshop was good fun, it was lovely being with like minded folk albeit on zoom. And of course you smashed it with your colours.
Re the shell – having handled & seen them they are so true to life….great job.
In terms of position – I was on the beach yesterday coincidentally photographing the patterns around objects left by the retreating tide & from that observation alone would suggest top left. However from a design point of view I, like Lyn, think bottom left….as the curve of the shell allows the eye to then follow the curve of the lace, balanced with all the ‘splodges’ to the right.
You did throw us a bit with the bottom right shadow being in a different place Arr Lass 🤪😂
Thank you, Antje, very kind and always encouraging. Ha, I didn’t notice the shadow thing, I must have turned it round for some reason. That’s odd about the photos not coming through. I will send in a message. Thanks again for your comments.
Just to confuse you, I’ve had another look & also like the bottom right with the dark weighted to the bottom whilst the white of the shell highlights the white of the curving frothy lace edged wave.
Are you any wiser?
Yes! You don’t like the top right!!
You have been very busy, Fab bird, I am going to have to have a go at making a picture in two pieces, not a bird, maybe a sheep. Surprise. LOL. Love the lamp. I love how wool changes when you shine a light through it. The milkweed pod is really interesting, I think your colour is fab.
The shell, the only one I don’t like is the top left. it is pointing into the corner too much. I think the bottom left is best because the curve of the shell and the curve of the background seem more natural. Next, is which side of the frame is up and which is down?
Thank you Ann. Yes, felt and light is a really special combination that I’d like to explore more. I’d love to see a 2 part picture with sheep! I have now sewn the shell onto the felt and framed it and did go for something similar to bottom left. Seems we agreed. Thanks again for your comments.
Wonderful projects Lindsey! The red plank came around! Thanks for sharing.
Redshank!
Many thanks Marilyn. I will now think of it as a red plank every time I look at it! I do appreciate your comments x
I love the Redshank Lindsay. It has it’s own personality and is just so life like. I feel like I’m under surveillance – that eye! I get the same look from our resident robin.
I’m amazed how just a little blue in the background (I don’t do pictures) can add so much depth and movement to the water. Similarly the mohair.
Love the pod and the colour scheme and all your other work. Do you ever get a chance to sleep 😂