Browsed by
Author: welshfelters

Hello, my name is Lisa, and this is my son Alex, who has Down's Syndrome. We live in Swansea, South Wales in the UK. We started learning to Wet Felt when Alex moved back home during the Covid 19 pandemic. Alex has lots of health issues, and everyone thought he would be safer back home with me. So, we have been self isolating at home since March 2020! As we can't go out and about, or enjoy our usual activities, we looked for new hobbies to give us a new interest and pass the time. It all started when we got two new kittens to join our adult Maine Coon Cross Ember. We thought they would like a cat cave. But we decided to see whether we could make one and that was how we discovered felting! We have to say, felting has become our passion. It is something that Alex can do on an equal footing to everyone else, and he absolutely loves it! His first make was a large pencil case for his numerous collections of art pens. We've also made a scarf and lots of felted soaps. We've even tried our hand at needle felting gnomes. We've discovered it's a fun activity that we can do together. Real mum and son time!
What makes an Art Yarn Scarf into a Stole?

What makes an Art Yarn Scarf into a Stole?

I’ve been practicing my spinning skills for a while now, and although I have mastered the technique of spinning finer yarn, I have a true passion for the more bulky, art yarns.  I’m not a great knitter, I do occasionally enjoy crochet but I much prefer to weave.  When I first took up spinning, like everyone I found that my yarn loosely resembled an ‘art yarn’ more than a fine yarn. It lacked a sense of purpose and it didn’t have that look of “yes, I intended to make this”!  So my priority was to be able to spin an art yarn that looked like it was meant to be an art yarn!   However, at the same time, having read so many comments about people who can only spin fine yarn or art yarn I didn’t want to reach a point where I was only able to spin one or the other.  So I have tried really hard to chop and change my ideas, to try and avoid the pitfalls associated with spinning only one style of yarn.  I’ve also tried really hard to make an art yarn that looks like it is meant to be an art yarn.  I definitely think I am making some progress on this front.  Let me know what you think…


I started with a selection of merino wool top in various colours, including an orange, cerise pink and teal as a base for my art yarn.  I then decided to jazz it up with some beautiful turquoise bamboo, which I thought would add some sheen and lustre to the project.  Like all good art yarns, I wanted to add in some interest so decided I would use curly locks of various different colours.  Finally, to finish the interest side of things, I decided to include some recycled sari silk that was made up of different random colours.


To start off, I began to add the base merino to the carder.  Unfortunately, I have broken one of the belts on my carding machine – it’s the one that operates the smaller of the two drums.  But for this project, it didn’t really matter as I was not wanting a fully blended batt.  So I was able to add all of my fibre direct to the larger drum.  I did use my little packing brush to flatten it down as I went along.


You can see some of the recycled sari silk running through this photo.


In this photo, I’m adding sari silk again to the the mix.  It was helpful that it seemed to work using it like a bangle, wrapped around my wrist enabling me to place it where I wanted it.  If I hadn’t done it this way, it would have been hanging down and could easily have got caught up in the drum.


Once I’d finished carding a nice thickness of batt, it looked like this…


A completed wool batt   


I was happy with the way in which it turned out as I wanted to keep the definition and not have a muddy blend at the end of it.  But before I started making any more, I decided to spin it, just to check I was happy with the way in which the colours turned out.

These are some shots of the spun art yarn on the bobbin but only after I plyed it!  Unfortunately, I got slightly carried away because I was enjoying myself so much, I forgot to take any photos!  For the main art yarn, I spun this using a fine mohair yarn to core spin around.   I made a mixture of thick slubs and thinner spun yarn, so that when I came to plying I could make some nice twirly spirals to add interest.  When spinning the core yarn I also added in some random curly locks, which were all sorts of colours, that contrasted with the base colours I’d used in the batts.  I also added some extra sari silk into the spin at random points through the yarn when I felt it needed a bit of Va Va Voom!

I was quite pleased with the spin…but as I said, unfortunately I didn’t take any photos of the yarn before I began plying.  However, I did take a photo of one of the fat singles in teal.  I also spun some in orange but no photo sorry.

Fat single in teal
A fat single in teal merino. 

As you can see, there was quite a lot of twist in this as I was scared it would all fall apart when I was plying!


This was my first attempt at core spinning, so I was pleased to see it coming together as I intended.  I started plying the art core spun yarn with the fat single, and it looked promising…

As you can see, I'm using an Ashford Jumbo Bobbin with my Ashford Traditional Wheel.  

As you can see, I’m using an Ashford Jumbo Bobbin with my Ashford Traditional wheel.

I then transferred it to my niddy noddy.  I didn’t want to soak the yarn in case I damaged the slubby spirals, so decided to set it using a hand held steamer.  These are a few photos of the yarn on the niddy noddy.

  I tried to take different angles to show the range of effects.

All in all, I made two batts of art fibre, which were about 100g each that I used for the core spin.  I didn’t weigh the fat singles but by the end, I had four skeins of art yarn, weighing approximately 300g.

Looking at three of the skeins hanging up together, it looks quite ‘jewel’ like.  So pretty, I’m pleased with the colours…

These skeins look almost ‘jewel like’

I wanted to use my yarn to make a woven scarf.   However, I’m not confident enough in my home spun yarn yet to risk using it as a warp.  This was especially true as I was hoping to use this project for the blog.  I was mindful that the art yarn was going to be quite chunky.  I only had a 7.5  30/10 dent reed for my rigid heddle loom, which would have been much too small for the art yarn.  This was another reason I had to choose a different yarn for the warp.  Having used mohair in the core spinning, I toyed with the idea of using it as a warp.  However, I had read that mohair is very ‘sticky’ when used in weaving, so I did some research first before trying it.  I did find some advice that said you can use it, if you utilise a pick-up stick behind the heddle to help clear the shed.  The only way to know if it would work was to try it!  So, having looked at my reed, I decided that given the thickness of the art yarn I would only use every third reed.  That way, I envisaged that I would be able to space the warp out evenly when I when I separated each strand.  Also, it would allow more space for the art yarn to show in all its glory.

This is the warp before I started weaving.  As you can see, I decided to use three different colours of mohair, just to see what the effect would be…

  This photo show how fluffy that mohair  really is!

I started to weave with the art yarn, and to my surprise it was far easier to weave with than I had anticipated.  The ‘stickyness’ of the mohair really didn’t present any issues for me.   I think that because I had only warped every third reed, it didn’t have the impact it could have had, which was good.

I only took these two photos of the actual weaving process.  One thing that I discovered when doing this project, was that I don’t actually have the weaving loom that I thought I did.  When I first got this loom, as I always intended weaving with art yarn so I also purchased a freedom roller.  I didn’t want to have the restriction in length of weave that I would face when using really chunky art yarns.  Having never used the freedom roller before, I decided I would fit it onto the loom for this project as I really didn’t know how bulky the final weave was going to be.

However, when I got the freedom roller out and started looking at how it would fit on the loom, I soon realised that there was no way it was going to work!  I struggled to understand why, so I took some photographs of the freedom roller and my loom, and sought some advice on a Facebook weaving group.  It was only then, I discovered that my rigid heddle loom was in fact a samplet loom!!! I realised that what I thought I had ordered, was not in fact the loom I did order! School boy error on my part, as a complete novice!

In the end, all was good as it turned out, I didn’t need the freedom roller after all (she breathes a sigh of relief!).  When the project was finished, I removed it from the loom, and considered what to do with the ends.  The mohair was very thin and sparse, so would not make for a good fringe.  Having twirled the mohair into little tassels, I then decided to tie some additional curly locks to pad out the effect.

Here, you can see one end completed…

  When I tried on the scarf, I realised that I had made it a little too wide to make it into a comfortable scarf.  So it was at this point, I decided that rather than using it as a scarf, it would work better as a stole.  However, this now presented me with another need…

If I was going to use this as a stole, it would need to have some sort of decorative pin to hold it in place.  I didn’t want to have anything too colourful or fussy, as that would be lost in amongst the art yarn.  So I decided to make a wet felted butterfly, with wings that were primarily one colour, with some accents of a different shade.

Here is my blue butterfly…who does have an orange body, just to make the body stand out a little…. The wings and body are made from merino and the accents of paler blue, are made of the bamboo, which I fixed with wisps of the merino to felt them into place.  I decided  to leave the resist inside, just to provide a little more firmness to him.

  I did try to add some sequins as way of creating more sparkle, but as they were so small, I found them difficult to sew on (my fingers are not so nimble as they used to be!).  I tried gluing them in place, but that didn’t work either!  So in the end, I just left him as he was.  I do intend making him some antennae, but I haven’t had time to add those in yet.  He is attached to a large kilt pin, so he can be used to hold the stole in place.


I’m really happy with my first project, using my own spun yarn, hand woven, and completed with wet felted butterfly pin.  I’ve used three different skills in this project, and I’m really pleased with the end result.  I was surprised at how dense the weave turned out.  Having only used every third reed, I expected it to be much looser than it ended up.  Perhaps next time, I will try an even wider warp, using the whole loom and leaving a larger gap between the warp threads.  It’s all a learning curve, but for now, I am really pleased with the results.  It’s lovely and warm too!  I’m almost sad summer is on the way, but I’m sure I’ll get lots of use out of it next winter,


Fibre and Friends

Fibre and Friends

It’s been a while since I published anything, as I have been going through quite a difficult time.  But I was determined to finish the year with a blog, so this one is a bit of an amalgamation!  Way back in April, I was lucky enough to be invited on a day trip to Wonderwool 2022 by my friend Debbie.  I hadn’t even heard of Wonderwool when she invited me, but when she told me all about it, I couldn’t wait to go!!

For those of you (like me) who have not heard of Wonderwool, it is an annual wool and natural fibre festival that is held in The Royal Welsh Showground, Llanelwedd, Builth Wells, Powys, Wales.  It was first held in 2006, ‘to promote the market for Welsh wool and add value to product for small wool & fibre producers in Wales’.  The festival has grown over the years, and ‘covers everything from the start to the end of the creative process’.  There are exhibits of sheep, raw and hand dyed fibres, yarn, embellishments, equipment, dyes, books and also finished textile art, craft, clothing and home furnishings.   Basically, it’s a felt and fibre artist’s dream come true, where like-minded people can find almost anything they need, and it instills a feeling of excitement, much like a child in a toy shop (at least that’s how I felt!) Because of the covid pandemic, it hadn’t run for a year or two, but this year was to be the first event since the pandemic, so there was great anticipation of the resuming of this popular event.


Around the same time, I had been looking for a carding machine, as I wanted to start making my own wool batts to spin.  Just before my friend invited me to Wonderwool, I had found a lovely Pat Green Carder for sale on Facebook Marketplace, and I had decided to purchase it.  However, the lady selling it (Mary Rogers) lived in Birmingham, England, so I was trying to work out when I could make the drive up to Birmingham to collect it.  As it happened, Mary told me that she was planning to go to Wonderwool, and could bring the carder with her!  Fantastic, I thought… this is definitely meant to be!!  Don’t you just love it when things just fall into place?!


Having made all the arrangements, Debbie and I took the drive up to Builth Wells for the day, and boy, was I totally inspired!  When we walked into Wonderwool, I can honestly say my eyes must have lit up!  I really did feel like a child in a sweet shop!!  There was stall after stall of beautiful fibre, yarn, and all things sheep (not to mention other types of fibre, including alpaca, angora to name a few)!!  What struck me first, was the wonderful array of colour.  There were exhibitions of different fibre craft, demonstrations of spinning and weaving, with exhibitors from all over the UK.  We also had the chance to talk to a range of like-minded people, who were happy to share their tips and techniques with us.  Wow, what a wonderful time we had!


One of the exhibitors we spent time talking to, was a lady by the name of Edna Gibson, who explained that she had spent time living in Japan being taught the wonderful art of Kumihimo, an umbrella term for several kinds of Japanese braidmaking that were unknown outside Japan until about 30 years ago.  Edna told us that she was instrumental in introducing Kumihimo to the UK.   The term Kumihimo is a composite of two words, ‘kumi’ meaning coming together or group, and ‘himo’ meaning string, cord, rope or braid.  Whilst most of us will have  heard of Samurai,  I didn’t realise that the Samurai armour plates are laced together with cords, traditionally Kumihimo braids, which are also tied around ‘obis’, the sashes used on kimonos.  Edna explained that she was taught Kumihimo by a very skilled Japanese person, and brought her knowledge back to the UK.  The looms used for Kumihimo are known as ‘dai’ or ‘stands’, and are usually made from either wood or bamboo.  All the dai are set up with carefully measured threads (as many as 80 strands of fine silk are wound on each bobbin or ‘tama’).  The weighted bobbins are lifted and moved in specific repeated sequences  to produce each type of braid. Traditionally, silk was used to make braids but today, braiders also use artificial silk or rayon.

  This is my friend Debbie, with the lovely and very knowledgeable Edna.

This shows the two types of dai used.  Apologies for the poor quality of this photo, but it was taken from one of the information boards Edna had put up…

  The top photo shows braiding on a ‘Marudai’ and the bottom photo shows braiding on a ‘Takadai’.

Edna’s braiding…


As you can imagine, it was hard not to go on a full-out spending spree at Wonderwool!! There were so many beautiful fibres on offer, not to mention everything else!! I haven’t crocheted for many years, but was inspired by a beautiful pattern, by Janie Crow called ‘Mystical Lanterns’.  I ended up purchasing both the pattern and the yarn!  It’s a work in progress, but I’m enjoying the process!

These show some of the exhibits on show at Wonderwool.  Hopefully, my scarf will turn out as lovely.


There were so many exhibits and stalls, too many to include here, but this will give you a flavour of a few of the exhibits on show…

  To be honest, I was so busy choosing fibre to purchase, I didn’t take any photographs of the actual stalls!!


At the end of the day, I met up with Mary and her friend, to collect my drum carder.  It was lovely to share a coffee and a chat with her, and she was able to share the history of the carder with me.  We parted the day friends who share a passion for fibre, and agreed we would definitely meet up again at next year’s Wonderwool!  We shared a ‘selfie’ before we left…


As I mentioned, I haven’t posted for a while, due to going through a very difficult period in my life, which resulted in me not having the energy or inclination to do any fibre craft whatsoever, so I had not actually even tried out my new carder until quite recently.  But when I felt able to resume my spinning, I found it really helped me in a very mindful way.  I particularly found that spinning brought me a sense of calm and peacefulness, with positivity and joy.


My first project was back in October, hence the autumnal colours!  I put together a collection of merino fibre of different colours, with one part of bamboo in a dark shade.  I weighed the fibre first, as I wanted to make two batts of fibre that I could spin ready to weave with.


Having never used a drum carder before, this was all experimental but in the end, I was really pleased with how it turned out…

I didn’t want to blend the fibre too much, as I wanted to have the different colours come through when I spun it.  Also, I’d heard about people ending up with ‘mud’, so that was something else I wanted to avoid.  Having blended my fibre to reflect my need, I then proceeded to spin it….

This shows the difference when using a flash (on the left) verses no flash (right).

Once I had filled my bobbin completely, I proceeded to wind it into a ball, so I could ply it from both ends of the yarn.

This is the finished yarn, once it was soaked to set the twist, thwacked and dried…

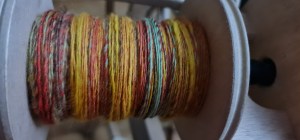
  I’m quite pleased with the results.  I also feel that my spinning has improved a bit since I posted on her last time!  I’m looking forward to weaving with this yarn over the Christmas holiday period.  Hopefully I will be able to show you the end product in my next blog!

Wishing you all a very merry Christmas and a happy, healthy 2023, from Lisa and Alex 🙂


My Spinning Journey

My Spinning Journey

I often wonder how people first get into fibre crafts.  Whether they learned them from a family member or fell upon them quite by accident.  For Alex and I, we discovered felting during lockdown, but as a young girl, I had the opportunity to try spinning in school.  Our needlework teacher brought her spinning wheel in for one lesson, to show us how to spin fibre into wool.  I was lucky enough to have a go, and I loved it.  Sadly, it was a one-off lesson that was never to be repeated, but the love of creating wool from fibre is something that has stayed with me all my life.  So having  tried felting, and then moving on to weaving, the natural progression was to think about creating my own yarns to use in weaving.  I started to search online for a wheel, not really knowing enough about them! I came across an advert for an ‘old traditional Welsh spinning wheel’.  As it was local to me, I went to take a look at it and immediately fell in love with it.  It was so pretty!!

I had done a little research, and knew to check that all the relevant parts were still attached, so when I looked at this one, I did a mental checklist and was satisfied that nothing seemed to be missing.  The older couple who were selling it explained it had belonged to the lady’s great aunt, and she had inherited the wheel but never used it.  In my head I though fab, I’ve found a little gem and decided to call her Angharad (a traditional old Welsh name).  However, when I started to look at getting it to work I realised that there were some anomalies.  For example, the footman seemed much too long and something seemed wrong with the way it connected to the wheel hub.  Also, there was no sign of wear and tear anywhere, and I also realised another big mistake….there was no way I was ever going to spin art yarn on a flax wheel, even if I could get it to work! But I could still see the value in spinning other fibres, so set about trying to make it work.  Eventually, I had to concede defeat and started looking for a different wheel.  By this time, I’d learned a lot more about what I needed my wheel to do, and set my heart on an Ashford.


Social media is a great place to find little gems (as well as the not so good!).  I eventually found an advert for an Ashford Traditional, that was built in the 1989/91 that was still unassembled in its original box!  So, it was a vintage, but like brand new.  The chap that was selling it (Bob Granger), was quite local and told me that he works out of Craig-y-Nos Country Park, and renovates spinning wheels!! So I seized the opportunity to tell him about my Welsh wheel, and he kindly offered to take a look at it for me!! I was so happy  to have found someone with the skills and knowledge, who was only in the next county to where I live!!


When I arrived, I was in awe of both the location and Bob’s knowledge.  Having purchased the new wheel, I left old Angharad with Bob, to see what miracles he could do to get her working.  But what a fantastic place to work!! I was totally taken aback by the beautiful location of Craig-y-Nos… What a truly amazing work-life balance to have…

This is the view from Bob’s workshop!

Having taken my new Ashford home, I decided that I would call her Valerie after my late Mum.  That way, every time I spin I will think of her.  I couldn’t wait to start putting her together.  I opened the box and checked nothing was missing, before I waxed all wooden pieces ready to assemble.

  I couldn’t have found a ‘newer’ wheel second hand even if I tried!


It even still had the original packer’s details in the box!  I wonder if she’s retired now…

Having assembled Valerie, I couldn’t wait to start spinning!  I think I did a good job of the assembly.

Sadly, Bob and his friend tried their best with Angharad, but despite shortening the footman, shortening the flyer and fixing the metal part that connects the footman to the axle, it still wasn’t viable.  To be honest, I don’t think it had ever been used!! It seems ironic that someone would go to the trouble of putting so much time and effort into making such a beautiful spinning wheel that would never work.  The bobbin was fixed to the flyer – although it would spin, you can’t remove it and it’s so small, it would hold hardly any yarn!  I now have to decide whether to keep the wheel for it’s beauty or whether to sell it on as an ornament! Pete is hoping that I will sell her as the house is fast being taken over by my hobbies!

This was my first attempt at spinning on Valerie.  My friend and neighbour Debi was kind enough to give me some Corriedale fibre that she didn’t need, so this was my first go.

As you can see, it’s quite ‘chunky’!

But to be fair, as I want to use the yarn for weaving weft, I can still use it.

My next spin was a merino wool which I decided would look interesting plied with the corriedale.

I was quite pleased with the end result…

  I tried some experimenting with the plying technique, to see whether I could make some interesting bobbly effects.  It’s all a learning curve!

I think my next attempt was a lot neater.  I used an art batt that I purchased, and tried my hand at making a thinner yarn this time…

Around this time, we went up north to visit Pete’s family.  I decided to take my spindle, to practice my drafting.  It worked really well in the car and it also gave me a chance to feed my new-found addiction to spinning!  I think I managed to spin a much thinner yarn and it’s all practice isn’t it.


I’m still picking up the spindle in between spinning on Valerie, and it’s now nearly full!

I have purchased a lovely book to help me in my quest to learn spinning.  I have to say, when it arrived, I was so impressed with it.  I was lucky enough to buy an unused second-hand copy, and it’s like new.  It kind of matches my purchase of Valerie.  Both previously owned by someone who never used them.  For a novice spinner like myself, I can honestly recommend this book by Sarah Anderson for its clear instructions with beautiful illustrations. But it’s equally good for experienced spinners who want to learn new yarn designs…

Here are some of my creations, I hope you like them!


I also invested in a cute little Niddy Noddy, to help me put my yarns into skeins.  I opted for the type that can be taken apart and fits into one of my many fibre boxes (see Pete, I am trying to reduce the space my hobby is taking up in the house!!) I also bought the extension for it, so I can make 1 or 2 yard skeins.  I got it from a great little Etsy shop called Hairy Dog Crafts and it works really well! I love the names on some of these shops!

Of course, no blog from us would be complete without the usual interfering cats.  To say they are still as fascinated by wool fibre goes without saying but I have discovered that for Eccles, it also extends to pictures… here she is having taken over my book!

And Elliot had to make his usual blog appearance of course…

But sadly, the little man somehow managed to open a sealed plastic box to retrieve my yarn.  I didn’t realise until I saw him acting ‘sheepishly’, and discovered my beautiful yarn under the dining room table looking more reminiscent of a birds nest than my lovely yarn!!!

I still can’t get over the fact he managed to open the box.  He is one very clever cat.  But I’m so glad I managed to save this other one before he managed to redesign it…                           

I still have a long way to go, but I’m enjoying the journey.  Alex came over this week, and he had a try at the wheel.  His little legs only just reached the treadle!  I think it will take him a while to get the hang of coordinating his hands and his feet, but I can see great fun for him in the learning process and together, we can enjoy playing with new designs we make to weave.


Weaving for the First Time

Weaving for the First Time

This is our first blog for 2022 and I can’t believe we are in February already!  Christmas seems ages ago now, but I wanted to talk about a gift that I had for Christmas.  I’ve been wanting to have a go at weaving, and have been looking for an excuse to splash out on a loom for quite some time.  But I was really lucky, because my partner Peter bought me one for Christmas.  Boy was I chuffed!! Having it as a Christmas present meant I didn’t have to explain why I was adding even more fibre equipment to my ever-expanding hobby!   Poor Pete, at this rate he’ll be baa-ing me from the house!   I knew that he was getting me one, as having tried to find his way around the copious models and types of loom, he thankfully realised that a surprise was probably not the best way to proceed! So I was lucky enough to get the loom I’d had my eye on for about 8 months, having settled on an Ashford 16″ loom as it looked to be a great starter model and the reviews were good.  Nothing to do with the fact that about six months ago, Pete offered to go and pick up a second hand loom I bought off Facebook Marketplace, that turned out to be a 16″ Vari-dent reed instead!! (It could only happen to me lol)


So, after Christmas, I couldn’t wait to get started on putting it together.  I’d watched YouTube tutorials, so had a pretty good idea how to put it together, but I also wanted to make my setup my own, by staining some of the wood a different colour.  I knew from a previous project, that if I diluted Cuprinol external wood paint, I could change the colour whilst still allowing the  grain to show through.  Having stained the stand the colour I wanted using a sponge as an applicator, I left those pieces to dry before waxing every piece of the loom and stand as advised.

Then the fun part – putting it all together.

I’m quite pleased with the final result, and I like some of the parts show the original colour of the wood.  I like that the stand is a different  colour from the loom.  But I found later on that I had not assembled the stand correctly, as the loom wouldn’t tilt downwards.  I found out that the diagonal struts supporting the loom should have been on the outside and not on the inside of the loom! Thank goodness for Facebook, where there are a wealth of knowledgeable people to ask for advice!!!


Once I had corrected the stand, I was ready to start weaving my first project.  Now anyone who knows me, also knows that I want to run before I can walk.  I had told myself that I needed to start with some basic wool, to practice with first.  Mmmm….that didn’t quite happen!!!!!!!  I was so enamoured with this beautiful hand spun Merino Sock Crimpy Yarn I bought from a local Welsh Etsy seller called Misguided Sheep, that I just couldn’t resist the temptation.  Risky I know, but I figured that if I really didn’t like the end result, I could always take it apart and start again!

  It’s so lush, I just couldn’t wait to use it!

For the warp, I dug out some lovely cotton yarn that I had left over from previous projects, which I had used to crochet babies’ hats.  I looked at the cerise pink yarn, and having tested it was strong enough, decided that I would use this for the warp.  I liked the contrast of this yarn with the Merino Crimpy yarn, and decided to experiment.

I didn’t take a photo of the cotton yarn to show you, but I did work out that the WPI (wraps per inch) was 20, to give you some idea of the thickness of this yarn.   I do have a photo of some of the hats I have made with this supply of yarn!


So – having finally managed to secure my loom at one end of my craft table and the peg at the other, I started warping my loom for the very first time!!!

I don’t think I did too badly for my first attempt.  I did have a panic at one point, as I thought I was doing something wrong when the yarn returning from the peg seemed to want to go above the warp stick sometimes and over the warp stick at other times.  But thanks for my friend YouTube, I realised that it is supposed to alternate between over and under each time you go around the warp stick!!!  Oh, the joys of self-taught crafts!!

The next step was threading alternate threads through the eye of each heddle reed.  The reed I used was the basic 7.5 DPI (30/10) one that came with the loom.

Once that was done, then I needed to tie the ends as neatly as I could to the front warping stick.

Yayyyyyy! I had done it!!!!  Now for loading my shuttle with my beautiful ‘Opalescence’ blended yarn!!

But before I did that, I had to work out how to transfer the wool from a skein! I’ve not used wool from a skein before, so this was quite a nerve-wracking moment for me as I had a vision of disappearing under bird’s nest of yarn but I managed to sort it out without too much effort, with the help (or potential interference) of Eccles (one day, I’ll be trusted to do a project without feline supervision!!!).

I found the loom useful for holding the yarn for me, much to the disappointment of Eccles, who only wanted to help bless her! (Likely story!)

So – once that was done, I was ready to start weaving…

I was quite pleased with the effect.  I love how the bobbly bits stand out from the rest of the weave.  The other thing that surprised me was how quickly the project progressed, far quicker than if I had knitted it.

I found it interesting how the bright cerise yarn changed the overall colour of the wool….

One thing I didn’t mention, was that Alex came home for Christmas, but unfortunately the day before he was due to return home, we both tested positive for Covid.  Thankfully, he sailed though it with no major problems, and the up side of covid was that by the time I managed to assemble the loom, he was still here to help me get started with the weaving!!  He really enjoyed learning to weave alongside me…

as you can see………. by the smile on his face!!!!

We were both really pleased with the final result, and we decided to have some ‘Welsh Felters’ labels printed, just for the fun of it, which I attached to the bottom corner of  the scarf!

We know it’s not perfect, but it’s not bad for our first attempt!! After Alex went home, I decided to have another go, and used the same type of cotton yarn for the warp and the same crimpy yarn for the weft.  But this time, I decided to try alternating two different shades of lilac for the warp….

  I love the candy stripes!!!

It’s surprising the difference it makes, just changing one component.  I think there is some improvement second time around, as the weave looks to be a little more even I think?

One think is for sure, we’ll be weaving more projects very soon!!!


Santa Claus is Coming to Town!!

Santa Claus is Coming to Town!!

Well it’s definitely that time of  the year, when are lot of us are all getting into the holiday spirit.   I’ve been making some needle felted gnomes and Santas, which have proved quite popular.  As I was making five Santas for my cousin Debbie, I thought I would share them with you.  Alex and I got into the Christmas spirit last year with Alex’s wet-felted Santa stocking so we thought it would be good to keep up the Santa tradition!


They are quite easy to make, but a word of warning….  KEEP THEM AWAY FROM CATS!!!!!!!!!!!!  To say I’ve had a few disasters would be an understatement.  Twice Elliot has managed somehow to get his paws on them and he managed to completely destroy one Santa and had me running around trying to catch the marauding feline, as he darted under the sofas, tables and anything else he could see in a bid to keep hold of his spoils.  To see him speeding through the house with a gnome in his jaws, looking like he’d caught the prize mouse was quite a sight.  I wouldn’t mind so much if I hadn’t already provided him with a range of felted mice to keep him entertained in the hopes he would leave my felting projects alone!! But unfortunately, one poor Santa has been completely stripped bare of his beautiful red coat and his beard, not to mention the state on the rest of him!  I still can’t believe this Ninja cat managed to get his paws on them, considering they were in a sealed bag, up on top of the highest of my stacked felt supply plastic boxes, literally 9″ from my ceiling!!  At this rate, I’m going to have to put them in a padlocked box!

I just had to share this….

RIP Santa!

And here is the culprit…..

You may recognise his mug shot from his last felting crime!


Anyway, back to the main topic for discussion, the needle felted Santa!  I used some off-white core wool to make the body.  It’s very narrow as you can see, so I had to roll it very tightly to make the body,  For the life of me I can’t remember what wool it is I’m sorry, other that to remember it was a batch of core wool I bought last year.  But it works really well for this kind of project, and it felts quite nicely into quite a firm ‘body’.

  Core Wool

Santa’s body

I made the body about 5 1/2″ long – but you can make them as big or small as you like.  I don’t tend to weigh the wool as I just ‘go with the flow’ but I would suggest that if you have to make a batch that are all the same size, you would need to be more precise with the quantities you use.   I like to firm up the underneath/bottom of the body, so that he will stand up on his own.  We can’t have Santa looking like he’s had one to many Sherries can we!!

Once I have the body made, I start on the hat.  I like to be quite ‘freehand’ with the hats as well as the coats!  Again I haven’t weighed anything, I just like to guess my way through the process.  I find that because I have such a busy life, it’s nice sometimes not to worry about being precise about things (as you can see!)  The great  thing I have found about needle felting, is that it is easy to add extra wool when you haven’t put enough or when you find a thin spot!


I literally just lay out a piece of wool batt roughly the size to fit around his head!  Then I get started felting!

I like to use a multi tool, as it felts quite quickly.

Then I start to wrap the wool around Santa’s head..

As you can see, there is a little white poking through, but this didn’t matter as I was able to fold the wool down over that part of his head, to make the tip of the hat.  I continued needle felting it into a rough shape that resembles a lop-sided bobble hat.

Here I’m starting to felt the tip of the hat into shape…

Once I’m happy with the shape of the hat, I felt it so the tip drapes down the side of the hat.  That way, I can attach a nice bobble on the bottom, using a small ball of the core wool again.  (I forgot to take a photo of me doing this bit!)


The next step is to give him a nose.  I use the same process as for the bobble, using skin coloured wool batt, and folding it tightly upon itself, to form a tubular ball.  I needle felt it until it holds its shape, before attaching it to Santa.

It’s quite a large nose!

To attach it, I like to poke through where the nostrils would be – that way, you can get it securely attached and create nostrils at the same time!

The last step is to make his cloak.  Like the hat, I was very laid back about the whole process, so didn’t weigh the wool and guesstimated the amount I’d need (not helpful I know but sometimes it’s so nice just to play with the wool and let it find its course!)


  Apologies for the blurry image!

As you can see, I felt away until I have a rough size that will wrap around Santa’s body.

The next step is to firm up the bottom of the cloak, wrap it around Santa and start giving his cloak a fur trim (enter the core wool again, which is great for this!)….


As you can see, I start the fur trim before I wrap the cloak fully around him – it’s easier to tuck in the loose ends of wool that way.

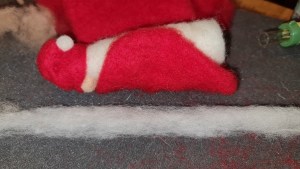
  I work the trim all the way around the cloak, and finally add trim around his hat.  It’s important not to ‘over-felt’ the trim, because you want it to look like fur rather than felt.


The final step is to attach his beard.  For this I’ve used some lovely off-white locks.  They look great as a beard.  I attached them by needle-felting them in underneath his snout! That way, they can be firmly attached but still free-flowing.

We hope you like our Santa…

Merry Christmas to you all, may you be blessed with a a wonderful, happy and healthy 2022.

Best wishes, from Lisa, Alex and our Christmas friends xxx

P.S. The gnomes are just as easy to make, using the same method as for Santa!


Autumn Pumpkin

Autumn Pumpkin

It’s that time of year again, when the long warm summer nights are fading and the nights are drawing in.  I love all the seasons, but the Autumn season is one of my favourites as I love the colour pallette nature provides, with its hues of amber, yellow, orange, red, brown and every shade in between.  It’s the time when the earth starts going to sleep, sound in the knowledge of new beginnings in the spring.


As our blog this time falls a few weeks before that famous holiday date at the end of October, we thought we would make something that people would have time to make before the holiday period arrives.  Hense, we made a pumpkin.   I apologise in advance that this blog is not unique, as others have done this before but our original plan did not seem such a good idea once the pumpkin was made.  I had planned to make one that could be used as a ‘trick or treat’ container.  But once it was made, I just wasn’t sure that it would be strong enough to hold up to my plan to cut a 3/4 circle for the lid and still hold its shape.  The idea was to find out who would be brave enough to slide their hand inside, to find out whether they were dipping into a treat, or a trick.  Although the pumpkin held its shape well, I did not feel it was quite strong enough to fulfil the purpose, so I’m afraid I chickened out because I didn’t have enough time to make a second pumpkin if it all went wrong!! But it’s still something I would like to do in the future, now that I know the strength of this 3 layer pumpkin.  So next time, I’ll make it with 4 layers!


I’ve made a small pumpkin before, using the method demonstrated by an American lady, in her weekly tutorials on Living Felt.  That turned out really well so I decided to use this method again, only making the pumpkin much larger.   I searched my house and garden for a circular template, and found a large green planter tray that I use to catch the water underneath some of my bigger pots.  It measured 38cm (15″) in diameter and was perfect for the job.


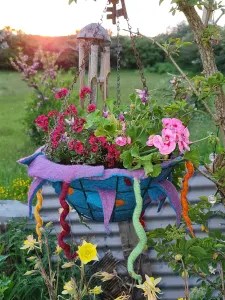
    Here you can just make out the planter tray, holding my palette of wool batts and merino tops.  Also, you can see my first born little pumpkin that I made last year!  He had to make an appearance (can’t have them feeling left out!)


I chose a two-colour wool for the outer layer, that was a combination of a yellow and red carded together.  For the inner two layers, I chose a lighter yellowy colour, so that the inside of the pumpkin would be paler than the outside.  (At this point, I was still planning to make the pumpkin trick or treat pot.)   The red and yellow mix for the outer layer weighed 1.3oz  and the yellow wool for the pumpkin flesh weighed 2.4oz, as I would need two layers of this colour.  The merino tops were for decoration and accent colours on the outside of the pumpkin.  I also wanted to add in some additional bits and pieces, to add interest to the surface of the pumpkin, so I collected some silk hankies that I already had in my supplies, and also some orange neeps and curly tops (which in the end I didn’t use in the wet felting process).

I love these colours!!!!!!!!!         


I then started making my resist.  Making the circle was the easy part, but I then needed to make eight petal-like protrusions, to form the lobes of the pumpkin.  My partner did look at me rather strangely when he saw me rummaging through the crockery looking for a suitable saucer-like object that would fit nicely for the job.  I eventually found a bowl that was a good fit, and used this as a template to make the lobes around my circular resist…


  As usual, Eccles had to get involved!  She is not a problem, but Elliot (her brother) decided to strike while I was looking for the bowl, and pinched three of the merino wool tops off the tray.  By the time I came back, I had three bird’s nests which I then had to card to get them back into some sense of order!  That cat has such a passion for wool, it’s unbelievable!   I don’t have a photo to show, as I forgot to take one but he really made a mess of them!  He also managed to pinch the little pumpkin out of its box where I had safely (or so I thought) hidden it.  I later found it under my dining room table, where he’d left it after playing with it!  I must be mad to have taken in another rescue cat, but she is adorable and I couldn’t resist!  Here is Penny!

I think you can  safely say she’s made herself at home!!!!!                                           


Anyway – back to pumpkins!  I then began laying out the fibre.  I started with the yellow wool batt, putting two layers on each side of my resist.  I added soap and water and covered with a mesh before gently agitating the fibres to start them knitting together.  After a little gentle agitation, I flipped the resist before  folding over the edges of the wool each time ready to start the next layer.

          from this…………………………………………………………………………………………………….to that…             


After putting two layers of yellow fibre on each side, it was time to put the red and yellow mixed fibre….

  Here you can see I have put one layer and flipped the resist ready to do the other side.  You can see the edges of the reddish fibre curled around the edges of the resist.

And now, the final layer…

I love the effect of the two-tone fiber, which shows well in this photo in contrast to the yellow above….       


Now for the fun part!!  Time to start the embellishments.  I used some of the wool top to accentuate the lines in between each lobe, and I wanted to try out some silk hankies to make some sheen on the pumpkin.  Here are the different designs I made on each side.  I wasn’t sure how dark to go with the wool top lines, so chose a brown for one side, and a redder colour for the other.  I went with an olive green for the silk hanky.


            I left ‘tails’ at the edges, so I could wrap them around the other side.


Now to start felting.  Recently, I purchased a sander because I do suffer a little with my joints.  I hadn’t tried using it yet, but thought I would give it a try on this project.  I would say at this point, that anyone considering the use of a sander in felting, needs to do their research.  I was quite scared at first, as electricity an water (as we know) don’t mix.  Also, some countries don’t have the safety systems built into their domestic electricity supply, so doing your research before embarking on using an electric sander is a must.  But having done my research and purchased my sander, I thought I had better try it out.  I only used it at the beginning of the process, and I was careful not to take the sander up to the edges of the resist, only using it in the middle and in between each lobe.  But it certainly helped considerably, and after I had finished the project, I didn’t feel my usual pain and fatigue, so that’s good!

  I can’t wait to make a scarf next!!!!!


After using the sander, I hand-felted the edges of the pumpkin, to make sure it was all nicely knitting together before I started rolling it.  Once I saw the felt was starting to shrink, I removed the  resist from inside  the pumpkin.  Easier said than done!! I didn’t want a large hole left in the pumpkin, but my resist was quite thick and firm, so it took some time to remove it as I also wanted to keep the resist for future use (I know, I’m a skinflint, but I’m also ecologically conscientious).

After the rolling was finished I fulled the pumpkin by throwing it a little until I was satisfied with the shrinkage.  Then it was time to rinse the soap out, give it a quick soak in vinegar water to restore the PH levels and I always like to give a final rinse in water containing a nicely scented essential oil.  I love to hold my small pumpkin and smell the fibre, as it often helps my emotional wellbeing at times when I am stressed.  Is that strange?! But it works for me!


After removing the excess water by wrapping it in a towel, I then stuffed it with a shredded bed sheet.  Wow – I was surprised to find I could fit a whole king-sized bed sheet in that pumpkin!

    and then I tied string in between each lobe, so accentuate the shape as it dried


Once it had dried, quality control arrived for his weekly Chinese Takeaway!  Alex checked my work and told me that he really liked the pumpkin.

By the look on Alex’s face, I can see I’m going to have to make another one because his sister Lizzy has been patiently awaiting a pumpkin for her new home!!


Once it was fully dry, I removed the copious amounts of shredded sheet from inside.  It was at this point, I had cold feet about cutting a lid in the top.  Although it kept its shape well, I was not sure how cutting it open would affect the stability of the structure so I decided at this point, just to stuff it and keep it intact.  I will try this idea another  time though, because I would like to make a felted ‘creepy hand’ to poke out from under the lid.  Seeing people’s reactions would be funny!


I decided to make the stalk out of needle-felted wool.  I chose different shades of green, charcoal grey and yellow to felt together to make the stalk.  I also put a pipe cleaner inside, so I could bend the stalk into the shape I wanted.  I also needle felted a leafy-looking base at the bottom of the stalk, just for effect and added some bright green curly tops to look like tendrils.  I did make a pumpkin leaf for it, but in the end I didn’t like it so did not use it.


I quite like the yellow accents on the stalk……..           


It didn’t take Elliot long to get involved!  But then again, he’s the right colour isn’t he?!!


And here’s a photo taken in natural light for colour comparison……


We hope you like the pumpkin.  Happy Autumn!!

Lisa and Alex


Upcycling a Feline-Destroyed Paper Lantern!

Upcycling a Feline-Destroyed Paper Lantern!

Many years ago, we bought some sweet paper lanterns, that we have used a number of times for birthday parties or other fun celebrations.  They always looked warm and welcoming as the sun set, giving a lovely glow hanging from the gazebo.  As we always loved the look of them, I decided to hang them up in the conservatory so we could use them all year round.  Great idea….but….having little furry felines in the house, they thought it would be great fun one day to play football with them!  Sadly, a number of our sweet little lanterns went from this….

……to this!!!!   

As a person who hates the thought of adding plastic to landfill, and always wanting to recycle or upcycle anything and everything; I decided that I would attempt to create a wet-felted version of the paper lantern reusing the plastic components and light.

I recently treated myself to a lovely little book by Mette Ostman, which beautifully explains how to create round open vessels using a resist.  When I was reading the book, I realised that I could use this method to make a ball, that I could hopefully turn into a woolen equivalent of a paper lantern.  I say “hopefully”, because as a complete novice, nothing I create is guaranteed to work!!!!

Just to add…I was hoping that Alex would be here to help me create this month’s masterpiece, but unfortunately my partner has been feeling a bit under the weather and so I made the decision not to have Alex over this week, just in case.  But fingers’ crossed, next time he will be able to felt and create to his heart’s content.

So…I needed to think about materials and design.  A while back, I purchased some viscose in some beautiful colours.  I hadn’t plucked up the courage to use any yet, so I thought this might be the ideal project to give it a whirl.  I wanted the lantern to look attractive, whether or not the lights were on and thought that the viscose would give a lovely sheen to the surface, that would catch the light and make the lantern radiate and shimmer.   Having measured the original lanterns, I wanted the finished ‘ball’ to measure around 20cm diameter (when flat).  Allowing  for roughly 1/3 shrinkage, I considered following the plan in making the resist 30cm.  But in the end, I made it slightly larger (31.5cm), but kept the total wool weight at 45g, in order to make the felt thinner.  I will admit, this was pretty much guesswork, as I’ve never attempted a lamp before and I didn’t really know how thick the felt could be, yet still be able to allow the light to shine through the felt!

The proportions of wool that I used, were an inner layer of off-white wool batt weighing a total of 25g.  Layer two was pale pink merino, weighing 20g and for the final outer layer of viscose, I put together 10g each of green and turquoise.


As you can see, my white wool was in a bit of a jumbled mess so I decided to card it before using it to enable me to have a little more control over how I laid the wool down.

I began laying the white wool as finely as I could….

  and then wet, compressed & flipped it over..         

After layering and wetting the second side, I began laying down and wetting the pink wool..

  as you can see, with the pink wool I put two very thin layers, crossing each other in different directions.  I repeated this on each side before adding my final layer of viscose…

With the two colours of viscose, I mixed them by drafting them together about four of five times to achieve a merging of the two colours, but not so much that they totally blended together.


     From this…


to this     


I wanted to create some blending of colour, but still allow you to still see patches of each individual colour.   At this point, I was very much using guesswork as I have never made a lamp before and I’ve never used viscose!!!!!!!!  Those of you who felt a lot will probably pick up that I overdid the viscose!!! But it’s all a learning curve hey?!!

Having ensured that all layers were thoroughly wet and compressed, I then started to felt.  I began very gently, in order to allow the fibres to begin merging together.

I will be totally honest with you, i did not have a clue how much light would be able penetrate through the felt.  I was faced with a dilemma…to little wool and viscose, and the lantern won’t hold its shape.  But too much wool and viscose, the light won’t show through!  So this was very much was an experiment on multiple levels for me!

I spent quite a long time working the wool through a layer of bubble wrap before I reached the point where I could start rolling the felt.  It seemed to take forever to felt, but I’m guessing this is something that happens with viscose?

However, I was really pleased with how the viscose was taking shape!

I love the streaky effect I was starting to achieve…

  Do you think if looks rather planetary??!!!

After much felting, rolling, removing the resist and fulling, it was time to allow it to dry.  When I removed the resist, I cut the tiniest hole I could, because I didn’t want to risk ending up with a hole that was larger than my plastic components!  I had quite a struggle to get that resist out, but I won in the end!  I then inserted a balloon and inflated it, before beating the ball with a spatula to even out the surface.  I’m afraid I forgot to take a photo of this part of the process, but it worked because the surface was quite smooth by the time I finished, as you can see from the photo above.  Looking at it, I wish I’d known about felting when my youngest son was little because he was totally in awe of the planets and star gazing…I would have loved to make him a whole planetary solar system!!!

Once it was dry, it was time to start assembling the project.  The light box was in two parts.  The light and battery component, with a lid that fixed it in place through the paper.  Now all I needed to do was clip it together either side of the felt.  I made a hole for the light bulb to be inserted through, and two smaller holes to allow the lugs to penetrate the wool and clip onto the lid, which I put inside the ball.

You can see the light poking through inside the lantern.

And here, you can see the battery component that lies the other side of that light bulb!


The top proved to be a little bit more tricky to incorporate….  There were parts of the lid that had little lugs that held the handle in place.  That was easy, as I could poke them through the felt.  But that only meant two sides were attached!  So in the end, I got my needle and thread out, and sewed some snap fasteners to the top of the felt.  The other part of the fastener, I glued to the inside of the plastic ring.

  Here you can see the glued snap fastener!  Sadly, I was too enthusiastic to try them out, and ended up using them too soon, resulting in managing to pull them off and having to  re-glue them!!!!!!!!  Patience is a virtue!!!!!

And this is how it ended up…..

…and from the other side of the world….

To me, it looks like an alternative version of the Earth!  I’m please with the sheen I got from using the viscose.  To be honest, I’d be quite happy to have this hanging from my gazebo just as a decoration…

But…the million dollar question is, does it work as a lamp??!!


Well…to be totally honest with you, I definitely think I overdid the viscose!!! The photo of it as a lamp, shows it in a much better light (pardon the pun!) than in real life.  In the photo, you can see more light showing through the viscose fibre than there actually is.  When I make the next one, I think I will alter the proportions of the wool and viscose to be more wool, and use the viscose more sparingly to form more of a pattern, rather than as an overall coverage.  But I will say that I like the daytime version, where it makes for a decorative ball!  It does hold its shape, but I think I might opt to make it thinner next time and try using some sort of stiffener to ensure it is still able to hold its shape.  That way, I think I will get a better result for use as a lantern light.

Overall, I am quite pleased with the results considering there were a number of ‘experiments’ going on here!  As a novice, I have learned a lot and think next time, I should achieve a better result.  But at least it wasn’t a total disaster!!


Summer Garden Project

Summer Garden Project

I have to confess this month, I am flying solo, because Alex has happily returned home to live with his housemates now that he’s had both Covid vaccinations.  I had planned for him to visit me last weekend, for him to join in the blog project, but my partner Pete went up to London recently to watch Swansea City Football Club in the play-off finals for the Premier Division!  As a result, I felt that it was too risky for Alex to come and stay, just in case Covid reared its ugly head.  So I’m afraid you’ve only got me this time!

Anyway, it’s that time of year when we all love to get out and about for some fresh air.  With lockdown affecting so many people’s plans for holidays and travel, many of us have turned to more home-based ideas to spend time in the fresh air.  We have spent a lot of time in the garden over this past year or so, and I thought it would be nice to combine ideas for the garden with wet felting.

Here are some photos of our garden, which just over a year ago, was a mass of overgrown weeds, bamboo and brambles!! I think it’s coming on really well.  Pete has worked a miracle and Alex has enjoyed learning how to garden and grow vegetables.

Summer Garden


So… I decided to make something that would be a pretty addition to our garden……. a liner for a hanging basket of flowers.

I started by measuring the diameter of the wire basket from rim to rim, including the depth.  It measured 21″ in total.  In order to allow for shrinkage, I made a rough guess and decided to make a circle measuring 30″ in diameter.  I decided that I didn’t want it too thick, so opted for doing two layers of wool batt, with a few decorations using Merino tops.

Before I started laying out my wool batt, I decided to make some spirals for the outside of the liner.  I though they would add a nice decoration, and would make the liner both colourful and hopefully attractive to bees!

Merino tops in assorted colours

Some of the merino tops were quite short, so I drafted them in order to make them longer.  As you can see by the pale green one, I need practice!!!

I wrapped the ends in some clingfilm, which I secured with an elastic band in order to keep them dry and prevent them from felting.

Next, I felted them in order to make my spirals.  I don’t know about you, but it’s hard to roll them in your hands as they are so slippery! So I managed to find that by rolling them gently on a towel, I got a much more even shape and they were easier to roll.

Next was to start laying out my wool batt.  Firstly, I did a layer of lavender coloured wool.  Once I had laid that out, I then added my merino snakes! I have to admit, at one point I did think this was going to end up looking like Medusa!

Fluffy tails

I fanned out the dry ends of my ‘snakes’ so they would be sandwiched between the two layers of wool batt.  Once I had all six snakes in place, I added my second layer of turquoise wool batt.

As you can see, I left a hole for you to see how thick I was laying the wool batt.  I have to admit, the blue looks more of a sky blue in the photos, but in real life, it has a lovely turquoise hue to it.

I added some merino coils on the top, so look like little flowers.  Then I started to wet felt the wool.  It took quite a while and I have to admit it was tricky at first, because my table was the same width as the diameter of the wool batt circle.  This meant that I had snakes trying to slither off in all directions!!!  But once they were starting to get trapped by the wool batt, they were a lot easier to handle!  Perhaps I was a snake charmer in a past life!

Anyway, I finally got there! I did not quite manage to shrink it back down to 21″ diameter, no matter how much I worked it and fulled it.  I did contemplate trimming the top back to the rim of the wire basket, but in the end I decided I quite liked it as from above, it looked like a large Petunia flower!  I cut six triangles out of the circle, so that it would sit better in the wire basket.

It looks like a spinning, spiralling cog wheel!

I was quite happy with the result…

I then made my snakes into spirals using pipe cleaners to shape them and left the whole thing to dry.

In the end, I also decided to use the triangles that I had cut out, by inserting them lower down into the wire basket.  I think it looks like an upside down jesters hat now!  I have planted it with a few flowering plants, and I’ve put it at the bottom of the garden.  This is where I put my special, meaningful things.  I like to think the fairies appreciate them!

Happy in its new home!

I hope you like my wet felted basket liner! I thought I would leave you with some photos of my midnight garden to finish off…

Midnight Garden


Rainbow Baby Mobile

Rainbow Baby Mobile

We have a new grand baby in the family, so we thought it would be nice to make a gift for her.  So Alex and I had a think, and came up with the plan to make a baby’s mobile.  Now we don’t know about you, but we absolutely love rainbows.  Their colourful display are enough to brighten anyone’s day.  As the baby’s Dad is from Wales but they live in Yorkshire, we also thought it might be nice to also incorporate some Welsh driftwood into the project to represent the baby’s Welsh roots.

When thinking of the design, we also thought we would add some clouds, to give context to our rainbow, but being quite novice felters, we opted to do needle felted clouds, so they would appear light and fluffy.  We started by making a template to represent the base of the clouds, as when we look up into the sky, clouds often appear to have a flat base, with plumes of fluffy clouds above.


We wanted a rough design to follow, so that we ended up with a cloud the size we wanted.  We needle felted some cloud shapes out of an off-white wool.  Unfortunately, it didn’t have a label for us to identify the type of wool!!  Once we had a layer of cloud, we could then start to build upwards…

Cloud base

We continued to make small clouds, which we then added to our base…

Building up the cloud

Alex had a go at needle felting once it was assembled.  There was less risk of him stabbing his fingers by this stage!!

Alex having a go

We decided that it would be lovely to have some lights inside our cloud.  We bought some battery operated LED lights, which were small enough to fit inside.  We bought off white, warm white and multicoloured, but in the end decided on the multicoloured lights to reflect the rainbow colour scheme!

Battery operated LED string lights

We pushed some of the lights down into the base layer of cloud, and hid the rest in amongst the top layers of cloud.

We have lights!!!

But we needed to have access to them in order to operate the light switch and be able to change the batteries.  So we left an access hole in the top of the clouds…

Access point

The next step was to make the felted balls.  We used 3 grammes of wool per ball and tried a few different methods.  Firstly Alex had a go at hand felting them, but as he doesn’t know his own strength, it was difficult to keep them circular!

Hand felting the rainbow balls

So we then tried using a salad spinner to gently tumble them…

Alex enjoyed this bit!!!

But although this worked quite well, they still looked like they needed some more felting so we tried bubble wrap to cushion the pressure of hand felting…

This worked well!

Success!! We ended up with some really well felted balls that were fairly round and even…

Raindrops!!

Having finished both the clouds and the rainbow, it was time to start assembling our mobile…BUT….disaster struck!!!  When we went to pick up our rainbow of balls, we were missing a green one.  Now where could it have gone to?? Two minutes before, it was right beside us and now it had vanished.  We started to look everywhere and after about 20 minutes of moving furniture and searching three rooms, we found it…..

Our beautiful little green ball was now a jumbled mass of scarecrow-looking mess!!!

How could one little ball end up so big and fluffy?  I even weighed it to check it was the same ball but yes, it weighed 3 grammes, the same weight as the original.  There was only one explanation…..

Here is the culprit!!!!!  Elliot!!!

Not content with the numerous homemade felted mice he has been given, Elliot was determined to get his claws into the rainbow.  We should have known, as he spotted them in the making!!!  So – we then had to make another one to replace it, which set us back a few hours while we waited for it to dry!  But in the end, we were able to assemble our felted rainbow mobile and Alex is very happy!!!

The finished mobile

And the lights look amazing!!!

Our rainbow cloud

We would like to try this project again, but using wet felting for the cloud.  It will be good to compare the two.  It was a fiddly project to make, including trying to balance everything to ensure that it hung straight!! But all in all, we are very pleased with how it finally turned out.  But I think next time, we will be hiding the raindrops from Elliot!!!


Children’s Felted Soap

Children’s Felted Soap

Don’t we all wish we could be children sometimes? The freedom to be creative, taking inspiration from anything we see. Maybe that’s what is so appealing with an art such as wet felting. It gives us all the opportunity to create!

Alex and I were talking about nature, and reflecting on a project we did in the summer when we turned golf balls into ladybirds (or ladybugs as you may call them). It was then that I got thinking about how many children love ladybirds! We had been thinking about our next felting project and we thought it would be fun to incorporate ladybirds into the mix! Felted soaps are really easy for children to make, there are so many different ways you can be creative. So – we thought about combining felted soaps with our favourite little creatures….ladybirds!


Red and Black Wool Batt and Soap

In order to prepare the soap, I trimmed the hard edges using a potato peeler. I find these really good for this job, as you can cut a thin slither of soap without digging into it too much. We like to collect the soap chippings, which we then add to our bowl of hot water. We use this for the felting, and the scented water adds to the scent of the felted soap.

We chose to use wool batt to make our felted ladybirds as we already had this at home. I would also like to try making them with Merino wool, to see if they come out softer. We used 3oz of red wool first, which we wrapped around the soap to make the ladybird’s body. The black wool was put aside for later, when we came to needle felt the spots!

The soap is all nicely wrapped in it’s warm woolen jacket!

Once we had wrapped the soap in the red wool, we put it inside a cut off pair of tights to keep the wool in place when we started to felt it. You might notice our two soaps are different sizes. That’s because one contains a baby soap, which although it was the same make as the larger soap, it was slightly smaller.

And then the fun starts! We begin wet felting our soaps.

I like this part Mum!

You can see by Alex’s face, he really enjoys this activity! The only thing I had to watch is that he got a little overzealous and I had to watch we didn’t end up with a squished ladybird!!

Felting the soap

We felted away for about 10 or 15 minutes. After a while, we removed the tights and felted direct with our hands. We also tried using some mesh and also some bubble wrap to help things along.

And then there were four!

After the soaps had dried, we needed to add the spots and faces. We used the black wool batt for this. We think they came out pretty well!

Alex is very pleased with his ladybirds!
Two little ladybirds

For time constraints, we only managed to decorate two ladybirds in time for the blog. But we are looking forward to making some more. We also plan to make lots of other soaps, both for adults and children. They make lovely gifts for friends and family!!


%d bloggers like this: