Browsed by
Category: Felt bags

Making Some More Little Bags

Making Some More Little Bags

I haven’t had much time to felt and today I finally got some time to start some new little bags.

The last time I made little bags I forgot to add the spikes that end up as the closures so I made a bunch of spikes to be ready this time. Now to remember to make the rings for the bottom.

I make these bas self lining by putting fabric next to the resist. This creates a nuno felt lining and I don’t have to do it later. I licked this silk scarf a friend gave me for it’s nice bright colours and interesting dye pattern.

The other thing adding the nuno lining dies is add strength allowing me to make a thinner, less bulky bag. I set up 4 resists because if you are going to rub and roll some felt you might as well do make it worth while.

Here are the 4 bags ready to be put together. I try not to match the linings to the bag colour to much so it doesn’t disappear when I am done.  I may have to switch the 2 middle ones.

At this point I had to stop and switch the laundry and got distracted with other things so I haven’t made it past this point today. You will notice that I have forgotten the rings at this point but I have a chance to fix this when I get back to them. It is not to late …..yet. Next time I will hopefully have some progress to show you.

Ann


A Sweater Story…..Can You Help?

A Sweater Story…..Can You Help?

At the start of February last year I posted that I had had a go at felting a sweater with designs on turning it into a bag.  I had purchased it in a charity shop for the princely sum of £1.  It had a lovely cable pattern to it, and it reminded me of the sweaters my Mom used to knit for people for some extra money.  I remember being in awe that she could complete a sweater within a week,  not being a knitter I assume now that this is not really an awe inspiring thing after all……..the wonderful innocence of youth!  When they were finished she would put them under the seat cushions on the sofa for us to sit on and ‘press’.  She tried to teach me to knit but I don’t know whether it just didn’t sink in or I was too young to be bothered, I think it was probably the latter…….

The sweater went in on a 40 degree wash, just to be cautious, and it didn’t felt enough, so I did a second wash at 60, still not good enough, so it went in again at 90, luckily it had felted sufficiently at that point as I didn’t really have anywhere to go from there!

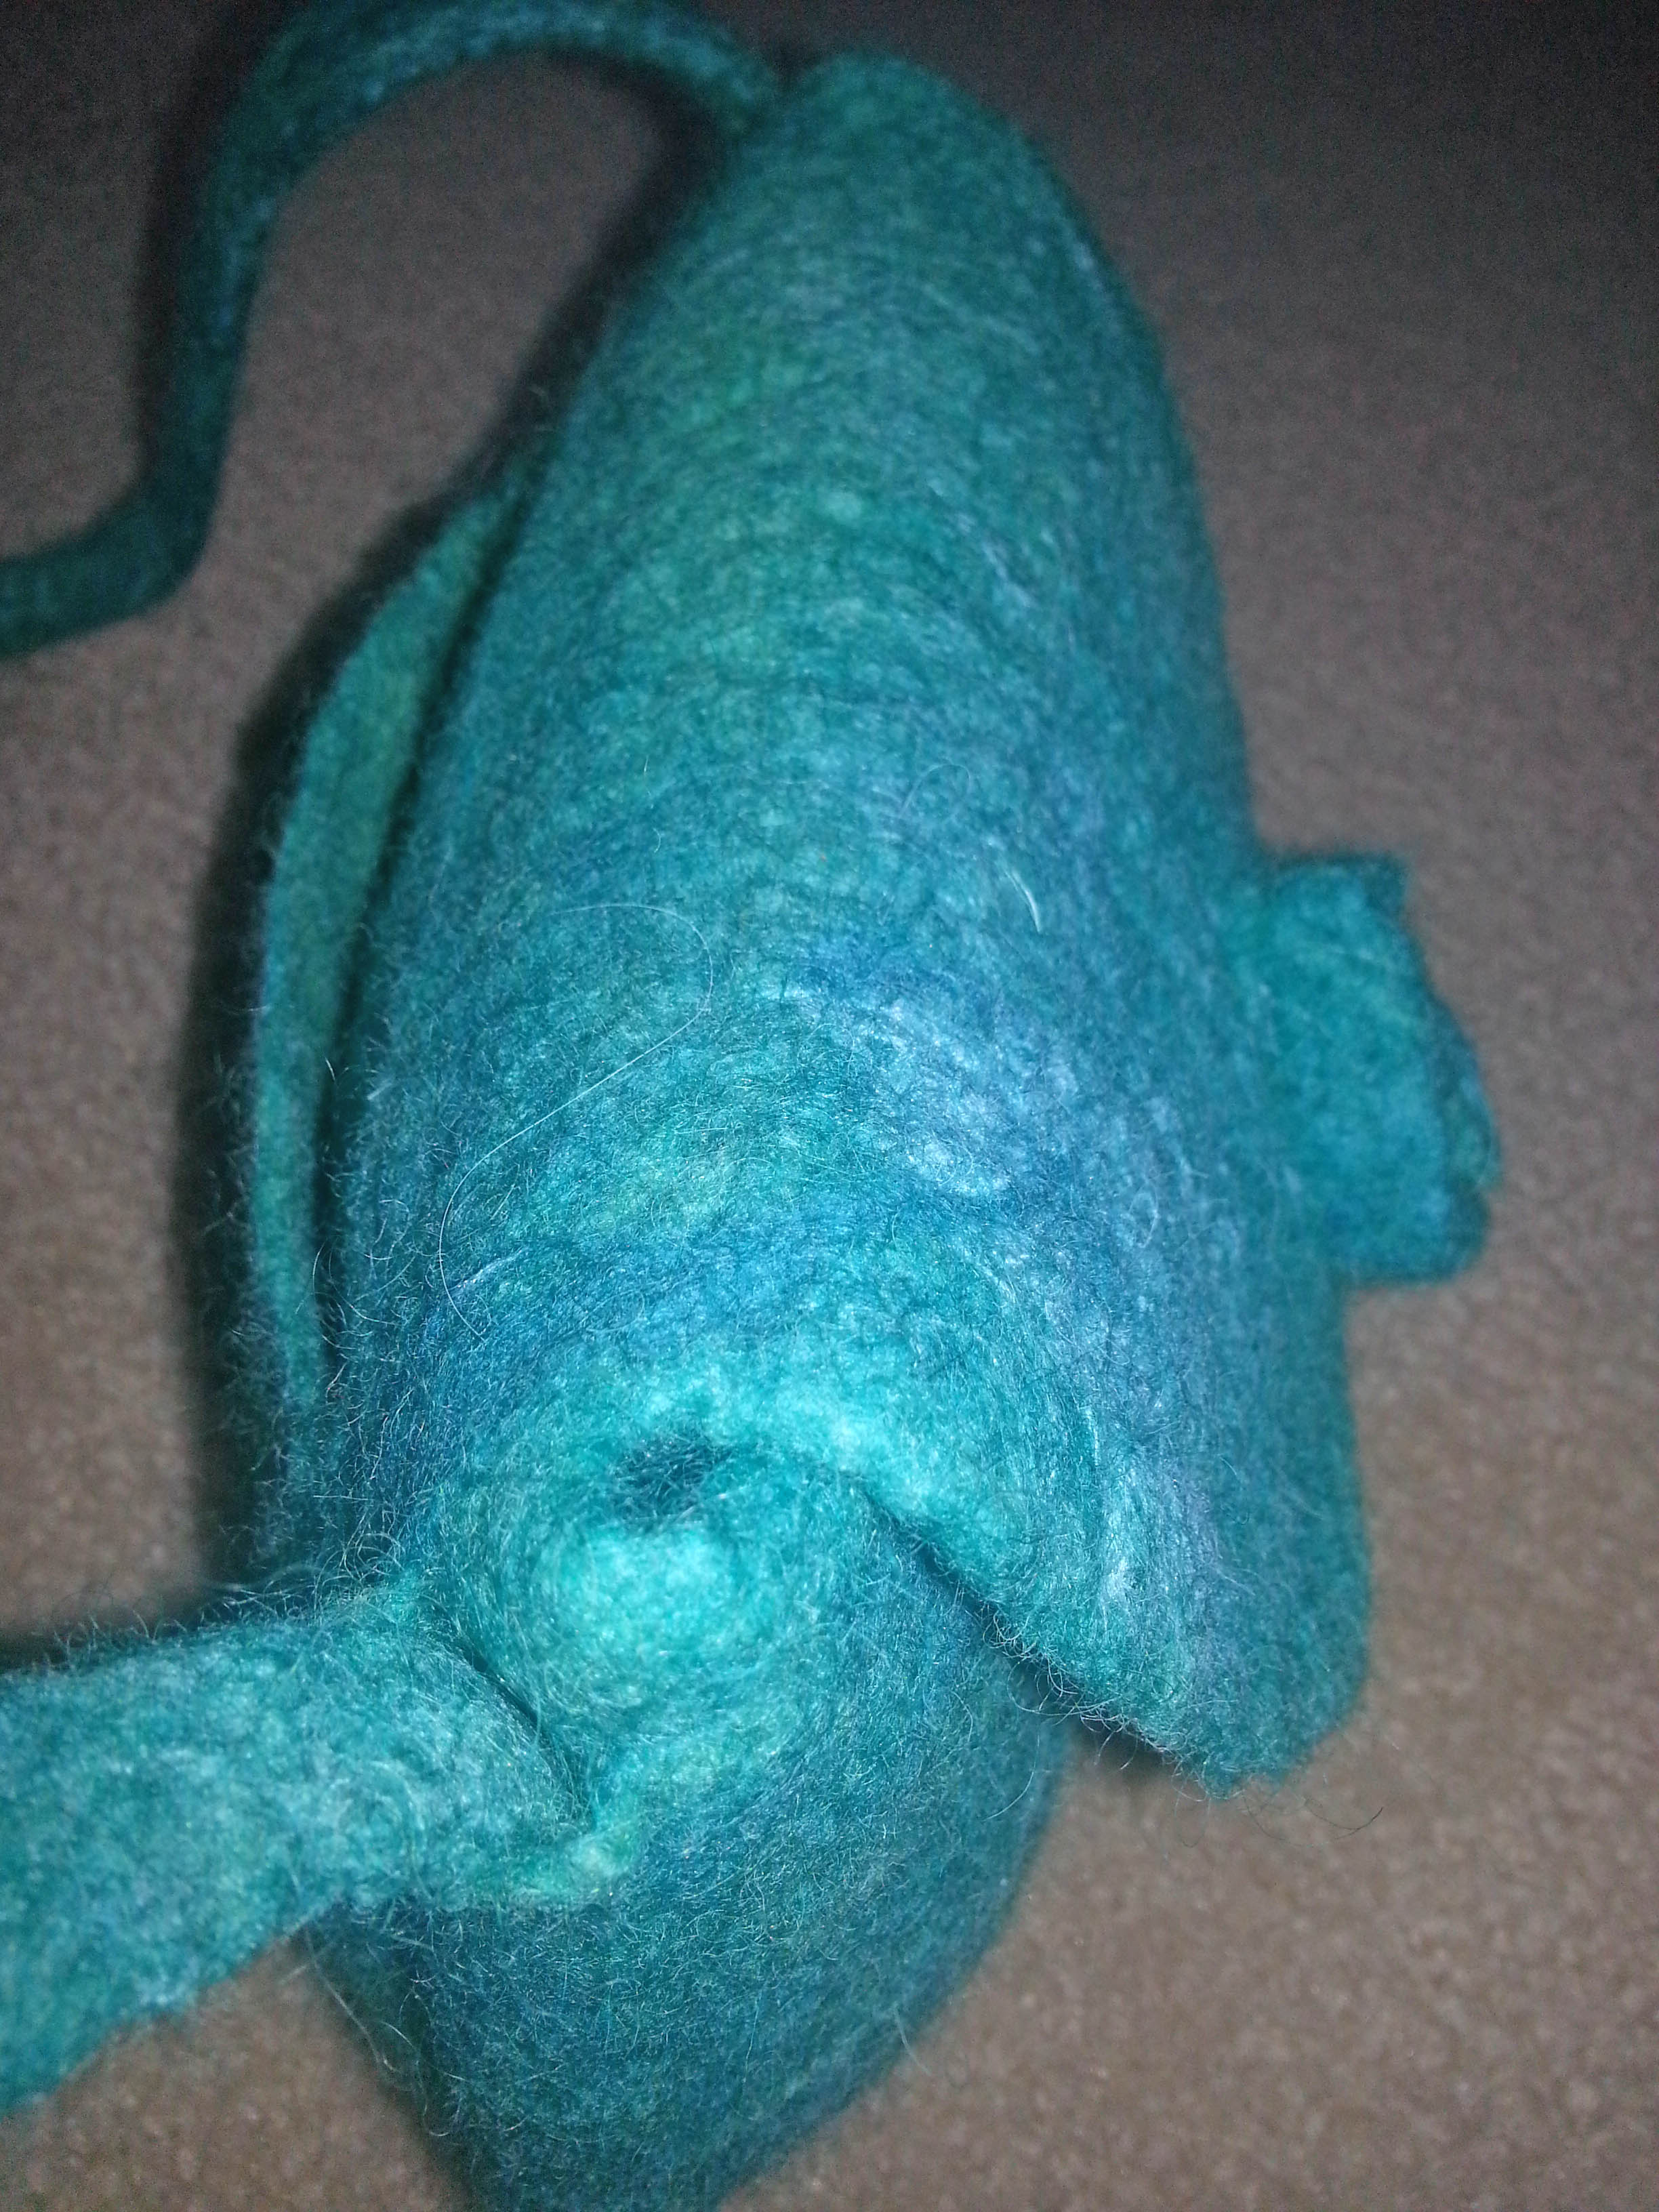
So then I had a felted sweater and I couldn’t figure out how to re-figure it into a bag shape.  Luckily I have a friend who is more of a sewer than me and she helped at this point, by cutting it in the correct places to maintain the pattern in a symmetrical way, and sewing it up using un-ravelled wool from the arms.  She also made a clever deep internal pocket by utilising one of the cuffs.  I am sure I would have just hacked at it randomly, she thinks deeper and in a more practical way than me.

20180124_142655

I wanted the bag to be an over the shoulder, sitting on your hip type of length and unfortunately the arms were of no use for this.  I came up with the idea of a bead/felted ball type of handle and sourced these lovely wooden beads online, and made forty felted balls, I think I used Corriedale wool.

BEADS AND BALLS

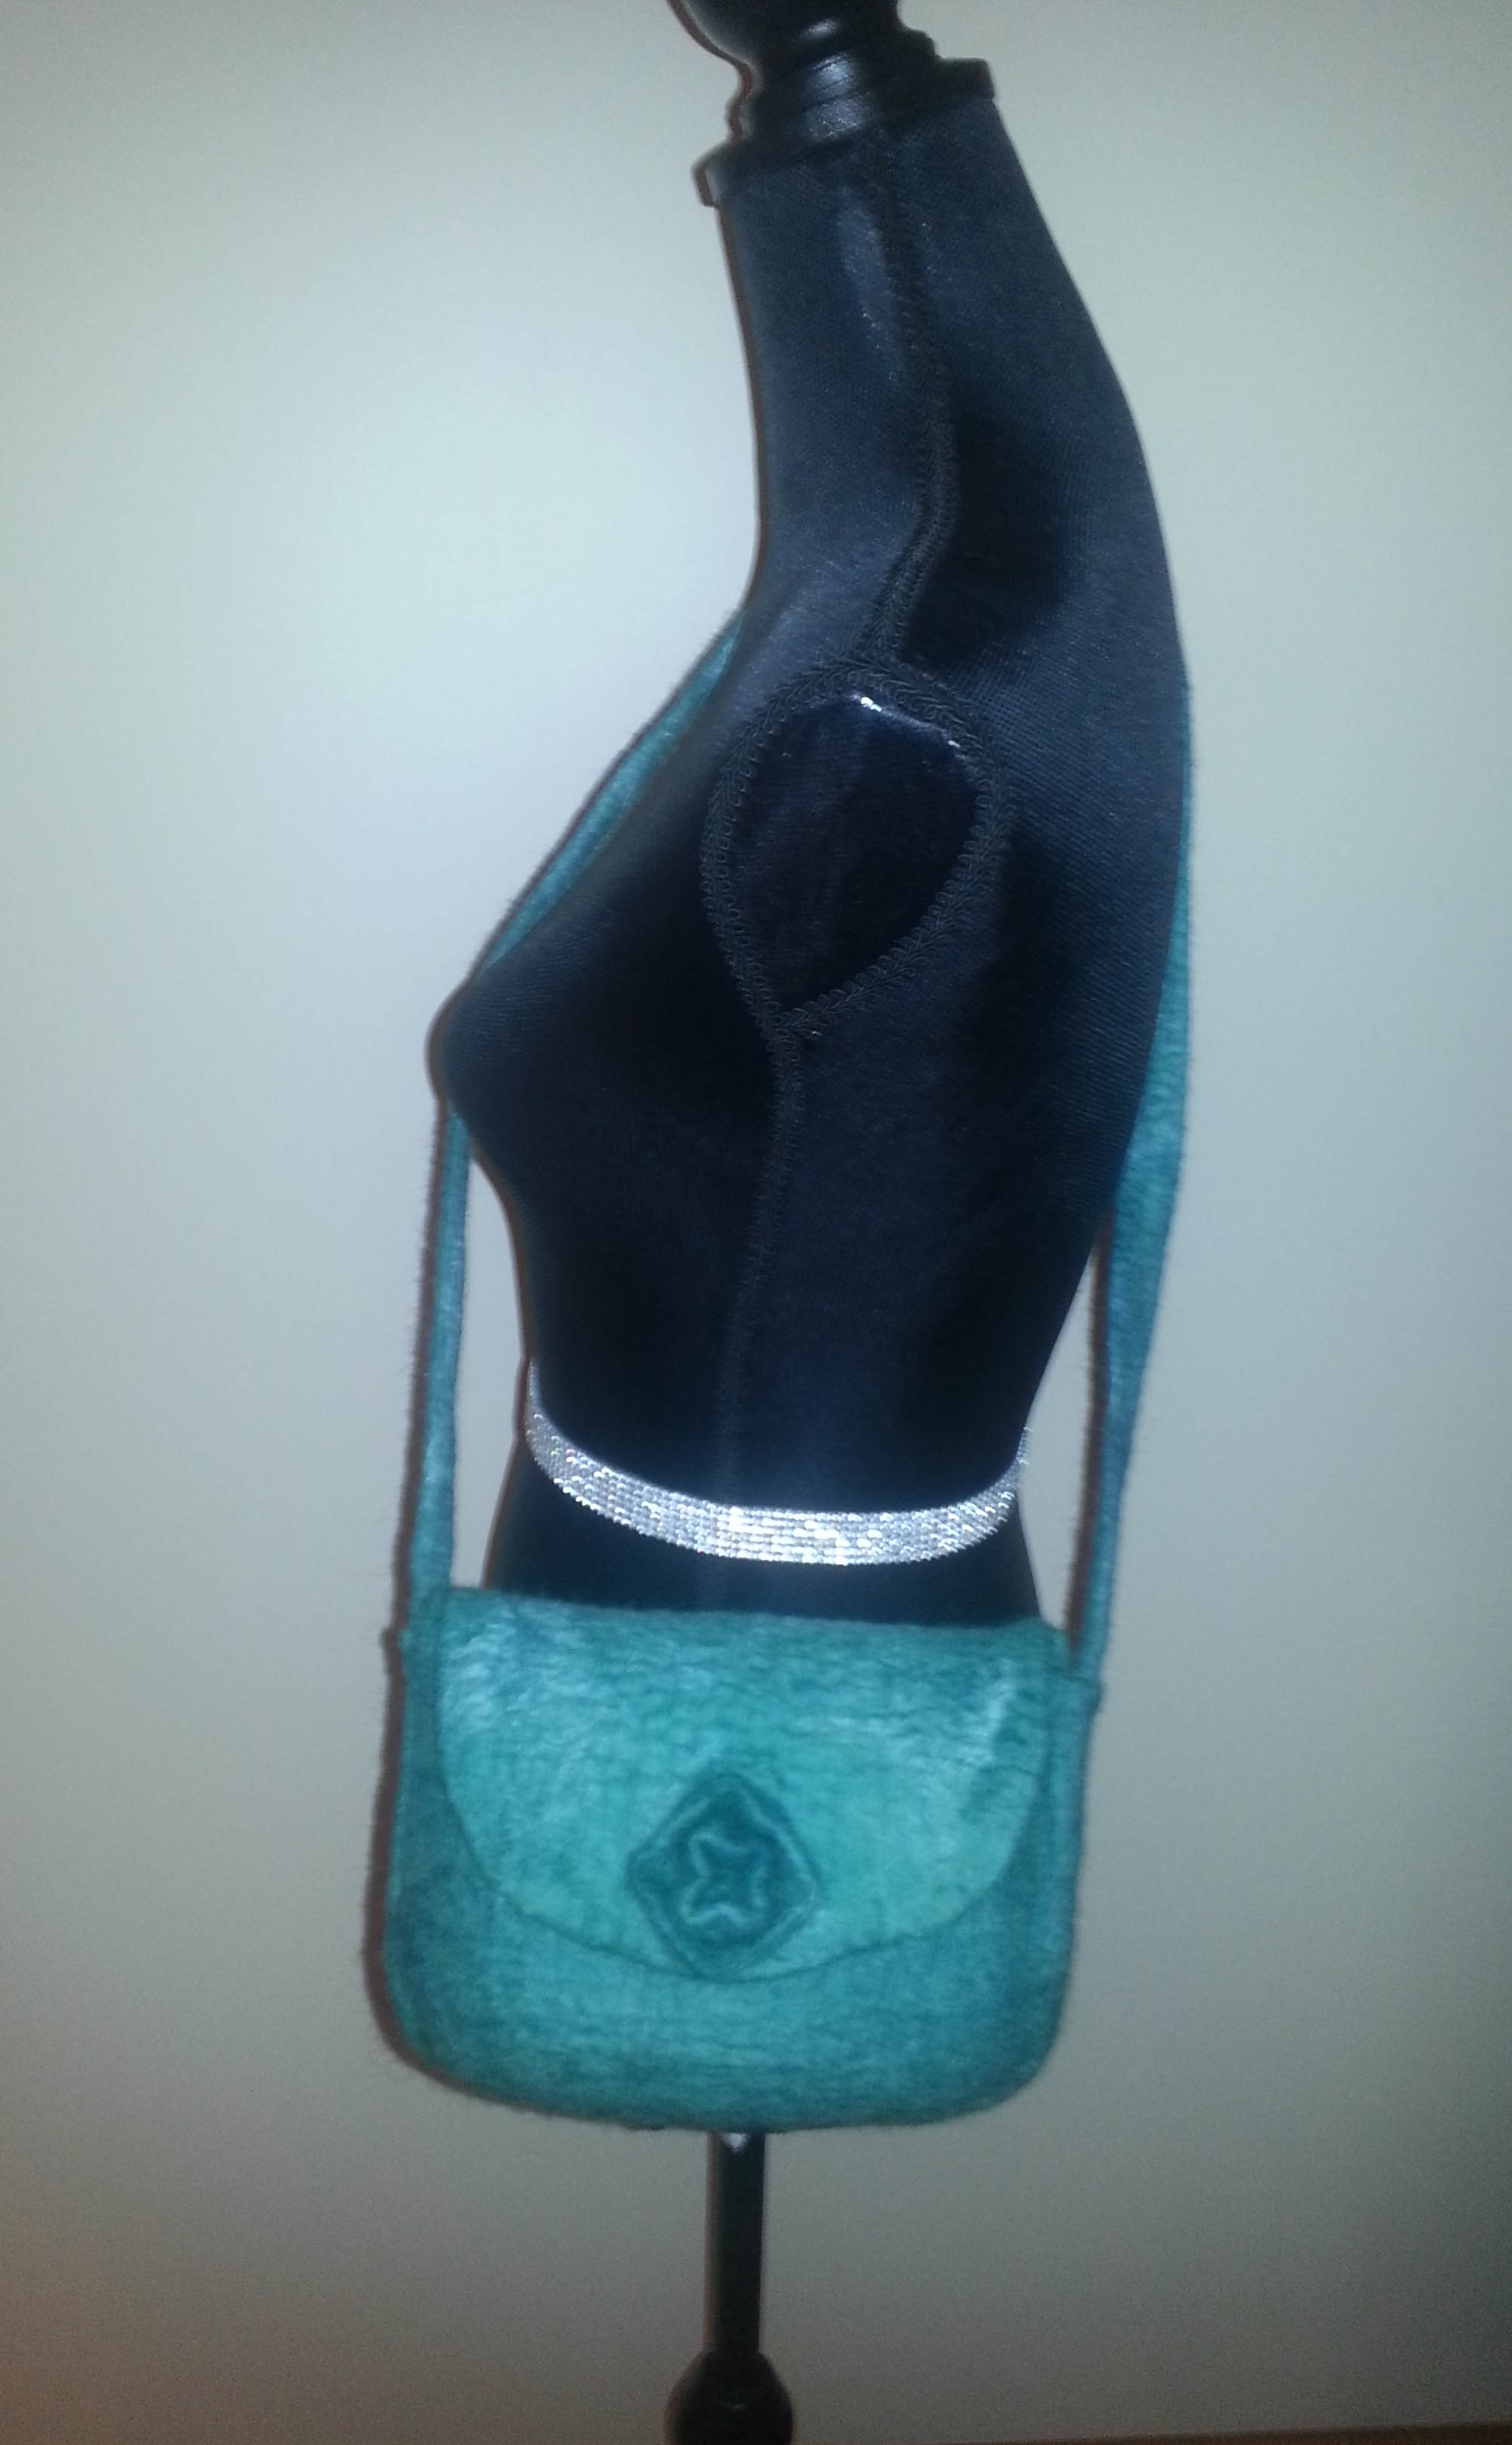
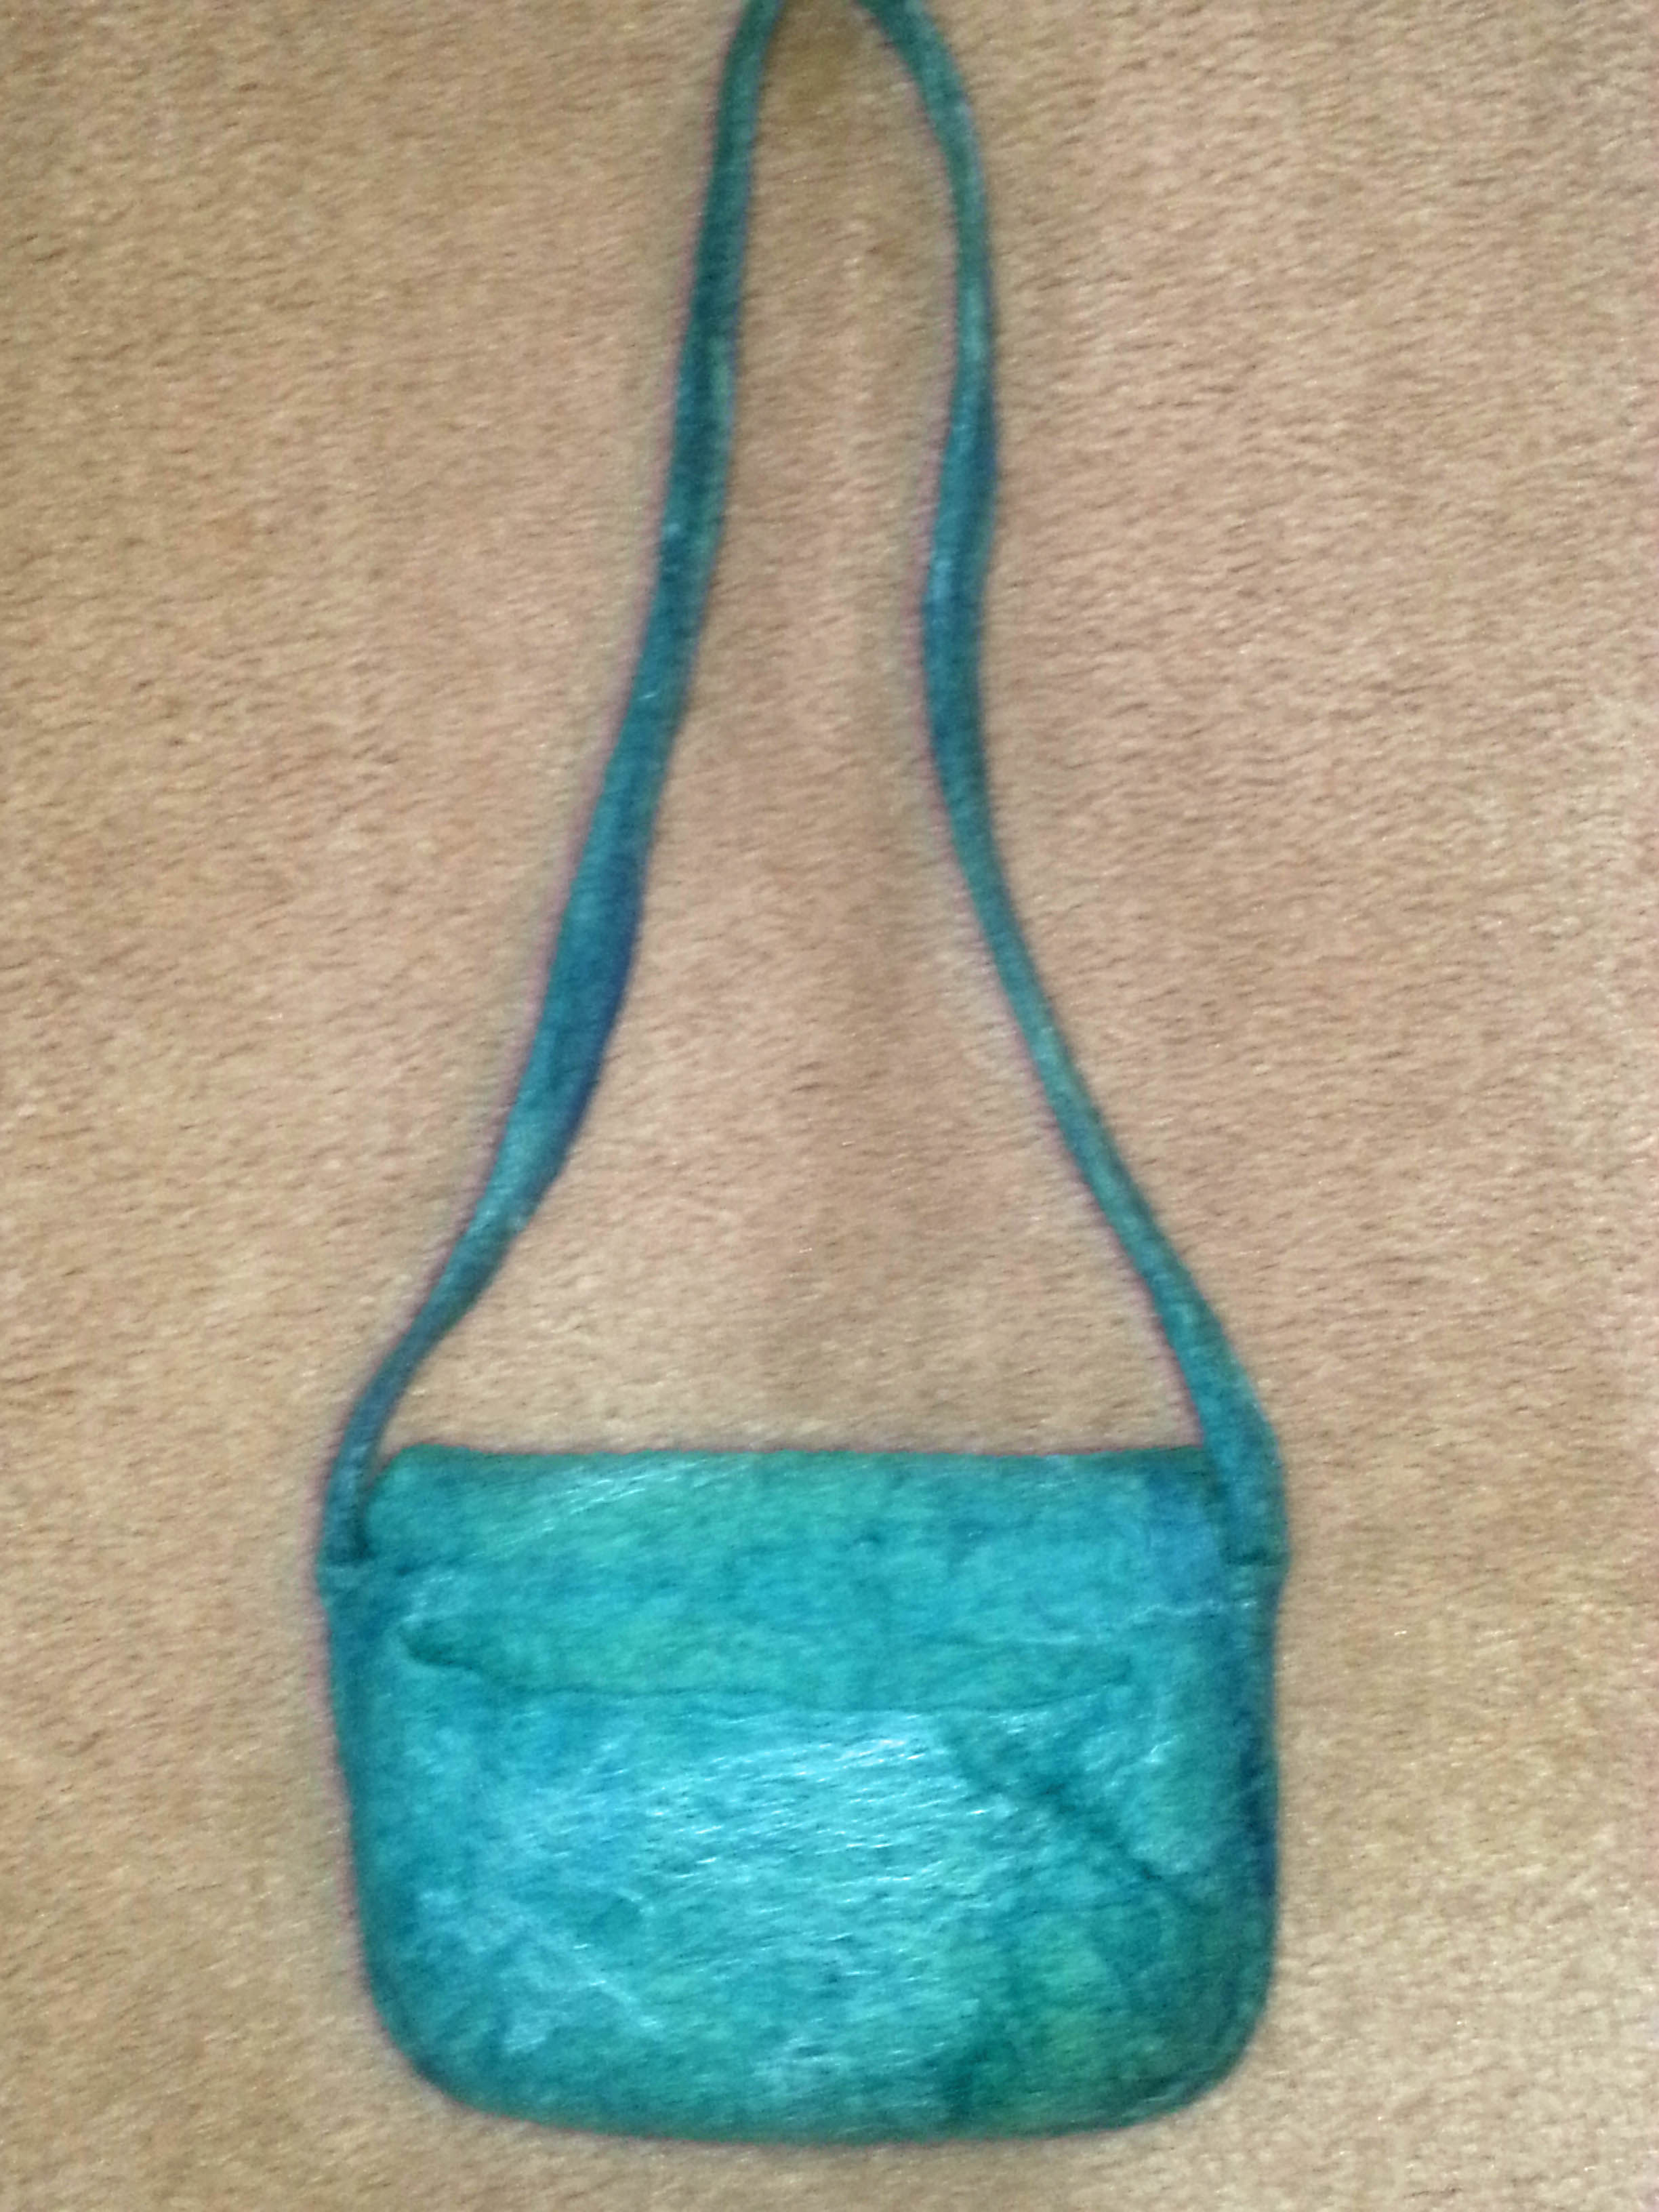
I had made the balls pretty tight, so it was a bit of a struggle to push a long, strong needle through them all, using wool salvaged from the sweater.  I didn’t line it as I wanted to see the cable pattern on the inside too.  Here is the outcome.

20170201_083442

Or I should say, it was the outcome for a short while…………I used it a couple of times then one day I had just arrived at a car park, I put the bag over my shoulder and SNAP! one of the lengths of wool sewing all the beads and balls together broke, and there I was scuttling around the car park trying to retrieve my wooden beads that were rolling in every direction! laugh? nearly!!

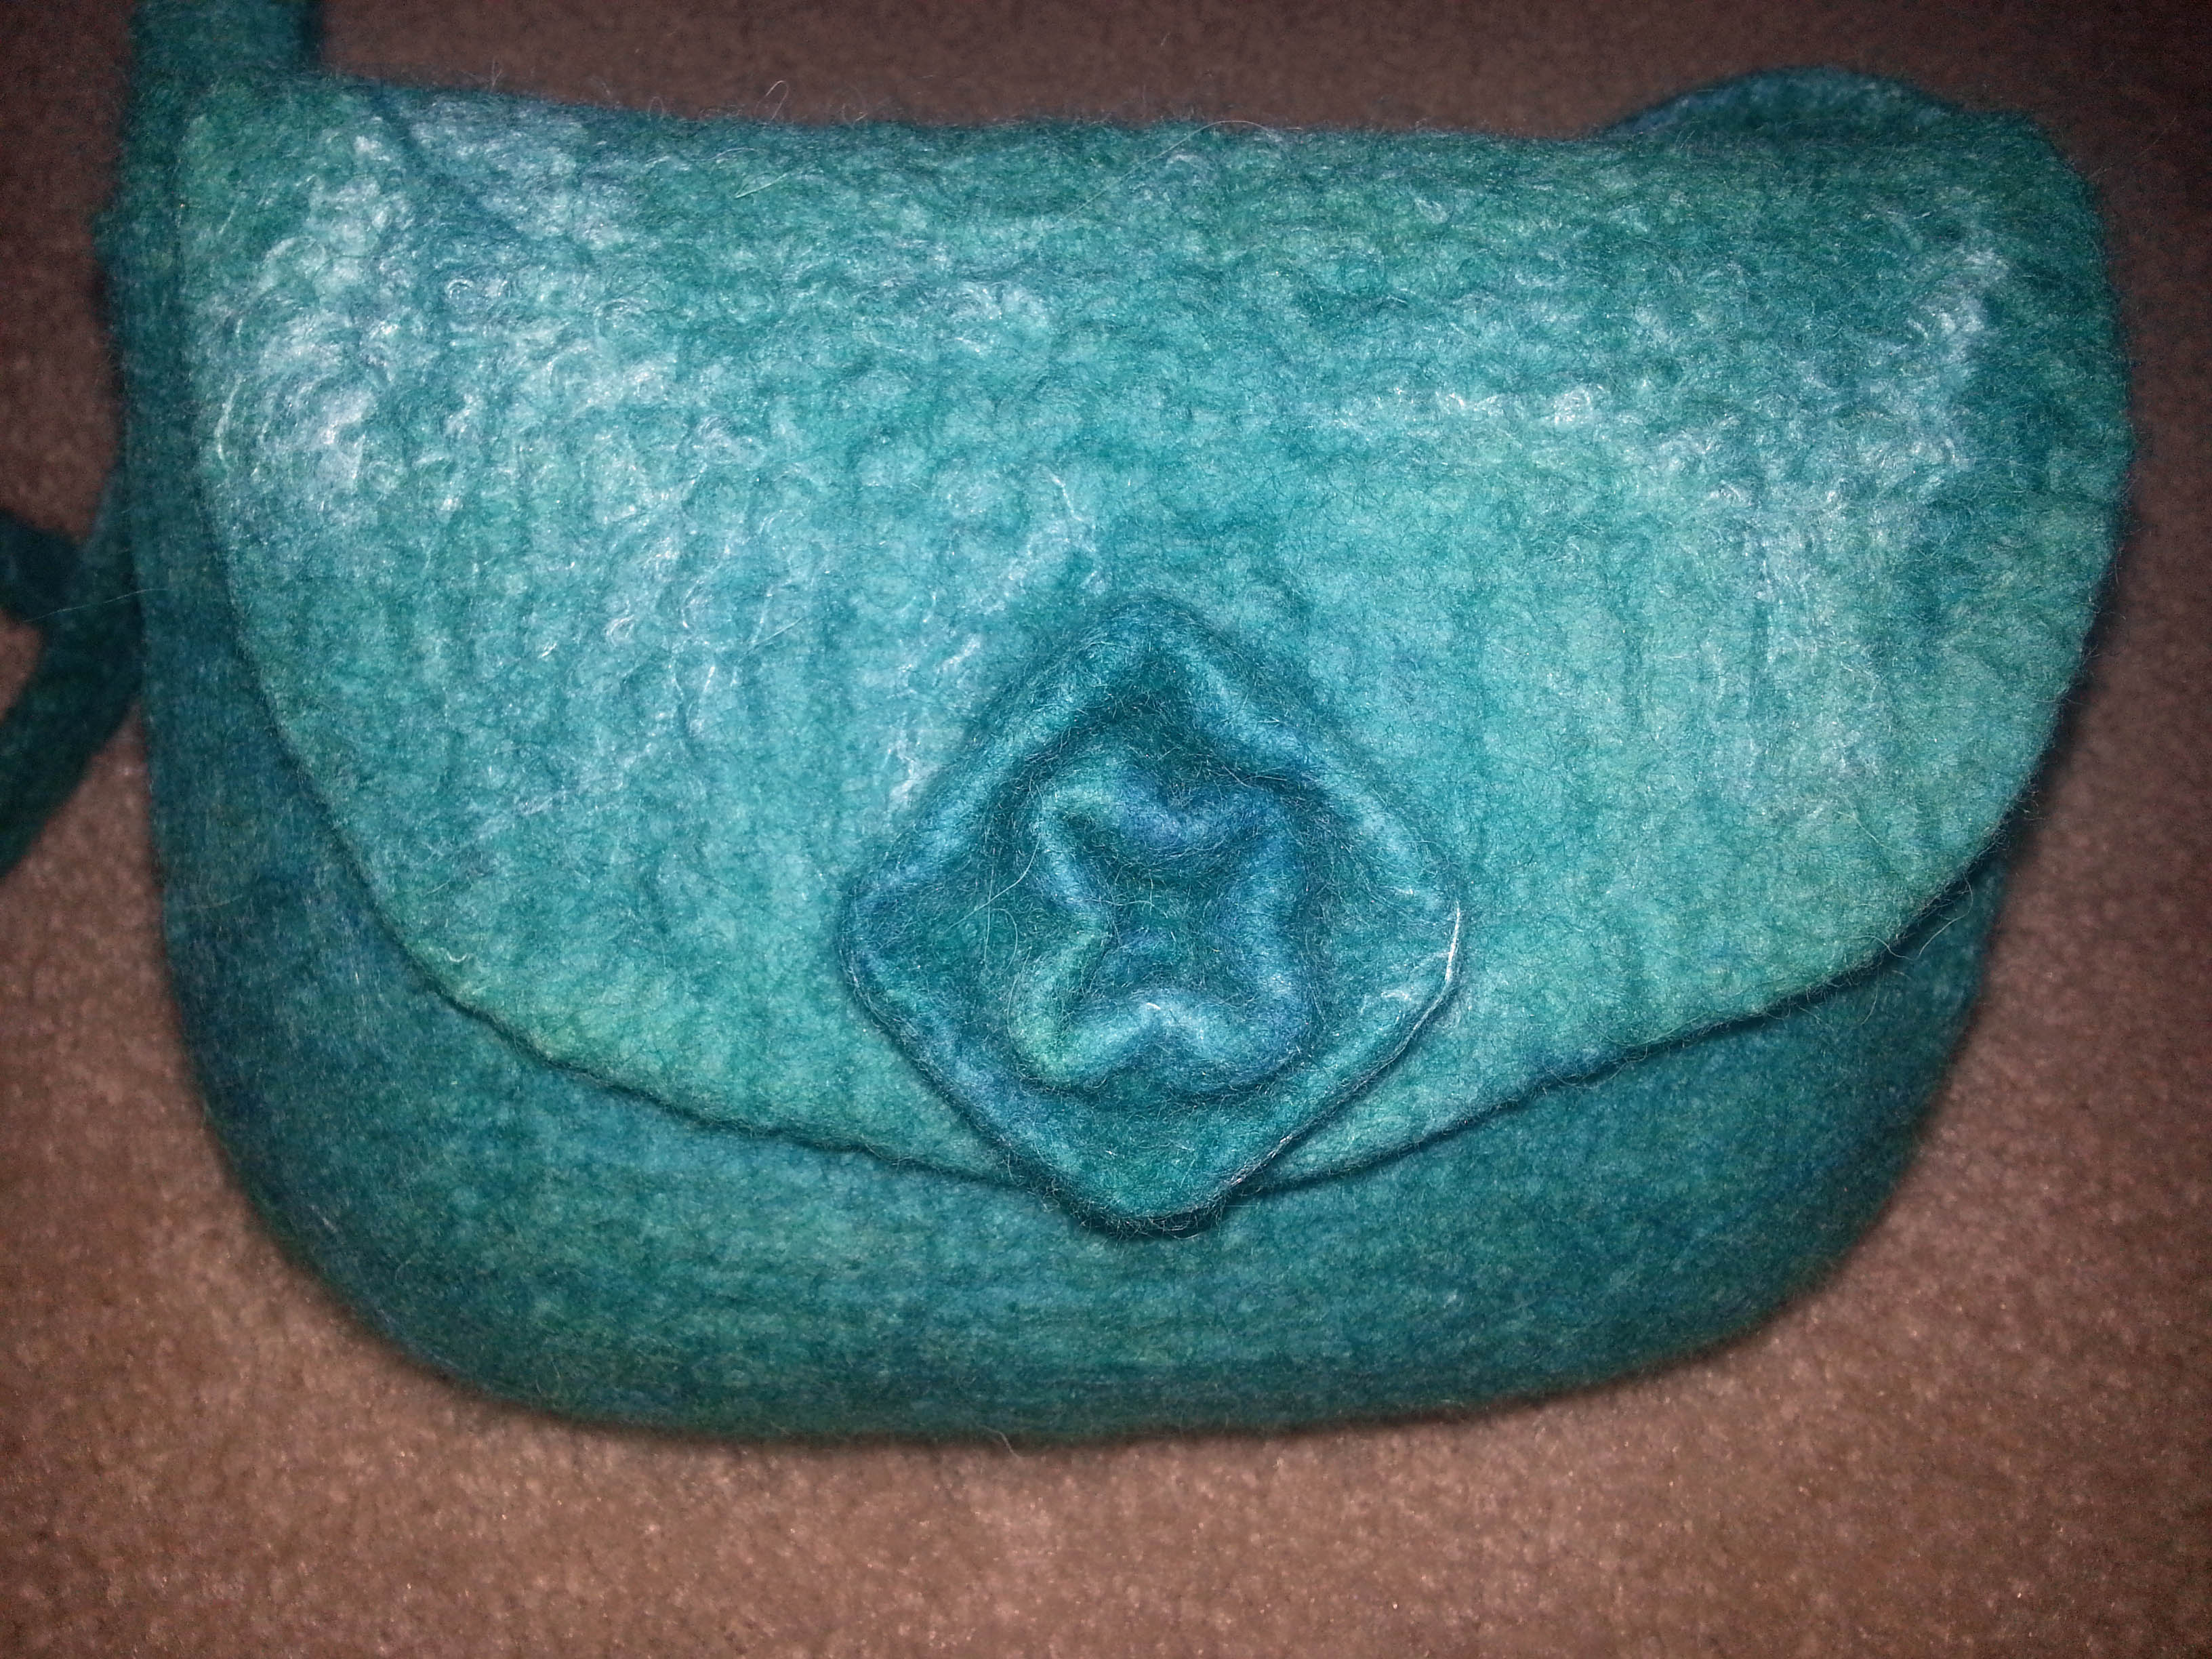
Now this is a sweater that has felted beautifully and I do want it to live life as a bag so Plan B is necessary.

I did like the felted balls with the addition of the beads.  However, if I am being really honest, the design didn’t sit the best on my shoulder……I really wanted a handle to compliment the soft, natural colour and pattern of the bag.

I thought maybe of producing a length of felt and encasing it in a pretty fabric, as I did here for my flower meadow bag that I made a while back.

20180124_140711

20180124_140732

Or perhaps I could use a twisted cord such as these but in a much better colour.  These examples are white with a blue fleck, black and a nice cobalt blue.  Or maybe two twisted together for thickness ?

20180124_142103

If I could knit, one solution would be to buy more wool and create some handles that way,  but this is not an option unfortunately as I do not have the desire to learn.

Those are the only ideas that I have come up with this far, so it’s over to you please, do you have any bright ideas to make my ex-bag into a loved bag again?

What would you do?

A Couple of Felted Pouches

A Couple of Felted Pouches

This week I decided to make a new pouch for my business cards. The one I am using now is getting  a little ratty looking from being in my purse for several years.

I didn’t take any in progress photos. I wasn’t really thinking about it, just enjoying the process of making something.

This is the first one, front and back and closed. It turned out well but I tiny bit smaller than I wanted.  Not bad considering I didn’t do any measuring I just cut out a resist and started.

Here it is on the resist so you can see the shrinkage

And a pictures of the nuno felt designs.

I made the second pouch bigger. I wanted some ruffles along the sides so added extra fiber there sticking out from the side. I didn’t make the extra wide enough and it almost disappeared. It is a tiny bit ruffled but not great.

and on the resist.

And a close up of the silk roses, I think I will shave them, they are a bit fuzzy.

Finally both of them with a ruler to give you an idea of size. one is about 6 and the other about 8 inches

I have a thought of making them to sell. I thought maybe I would put a grommet in the back with a carabineer clip in it. I am just not sure they will sell at a decent price. Do you like the idea? What do you think people would pay for them?


Another Bag and More Unfinished Projects

Another Bag and More Unfinished Projects

If you’re anything like me, when you get the sewing machine and felt and/or fabric scraps out, you end up with stuff absolutely everywhere and a huge mess to tidy away afterwards which takes so long you start to consider whether you really need to use that room again or if you can get away with shutting the door on the mess forever. I usually try to make the most of it and do as many sewing projects as I can all in one go and live with the mess in the mean time. After making the satchel type bag, I had some good sized off cuts left over so thought I’d make myself another bag. This one is ‘passport bag’ size. This is what it looks like from the front with the flap closed:

OLYMPUS DIGITAL CAMERAAnd this is what it looks like with the flap open – I used magnetic closures again:

OLYMPUS DIGITAL CAMERAAnd this is what it looks like on the back:

OLYMPUS DIGITAL CAMERAI used quite a few of my recent nuno felt pieces, but also a few from ‘the box’ including the piece I used inside the flap which was a piece I made years ago with lots of different pieces of silk. I’ve got a few more half finished projects too, this next one will also be a piece for Ann’s 2nd quarter challenge, because I’m changing a piece of soft scruffy felt I made a while ago:

OLYMPUS DIGITAL CAMERAAnd this is a bird pod I started at the well being centre a few weeks ago. I need to shape it and full it:

OLYMPUS DIGITAL CAMERABack:

OLYMPUS DIGITAL CAMERAMaybe when I get my new spinning wheel (oh, yes I am!) I’ll make a matching cord to hang it 🙂

A Trip to Visit a Felting Friend

A Trip to Visit a Felting Friend

This week I spent some time visiting my friend Maureen of Dreamspin Fibres.  It’s nice to felt with a friend.

I decided to make a project bag for a spindle, so long and thin. I used this lovely rust, terracotta and brown variegated wool.

wool for spindle bag

Here I am laying out the wool. I did 4 layers.

spindle bag laying out wool

After 3 layers I added some thick felt for some texture.

spindle bag laying texturespindle bag laying texture plus wool

Then some leaves in various colours of prefelt. One was a solid colour and 2 were multicoloured off cuts from some prefelt that Maureen dyed. I cut the handle and flap out of the top and cut the bottom off so I can make the bottom nice and flat. I will sew in another piece of matching felt.

spindle bag leaf embelishments spindle bag cut open

And here it is drying. I think it will make a great spindle bag.

finished bag

Next time I will have more pictures of what we made, but for now its late on Thursday night and it has been a long day with driving home so I am off to bed.


Prep and Finishing

Prep and Finishing

This last little week hasn’t been a felting week its been a preparation and finishing week with an emphasis on preparation. I carded up all my dyed balls of merino. You can see all my sheep on the top shelf.

caded wool on drum carded wool on shelf


I added the sheep to my little bag, it needs to be reblocked from having little balls of wool in it and hanging out in my purse for a few weeks until I got round to doing the sheep

sheep bag


and doing some doodling in my sketch book, I would like to do more felt art work.

sketch collage

The other thing is I have been  thinking or things that might sell in the summer. I made some felt laundry balls and some tea cozies and bags that might go well in the summer. What do you make for warm weather sales?


Project Bags and Tea Cozies

Project Bags and Tea Cozies

This last little while I have been making some project bags. I made a flat rectangular style using prefelt. I wrapped some prefelt around the resist. You can see I split the edges of the prefelt and cut one layer away so that the overlap would not be thicker than the rest of the bag.

overlaping prefelt ready to felt prefelt bag

Everything is prefelt except the stripes. They are an unknown wool roving I bought because I liked the colours. I put a stripe inside too so the bag will be reversible.  The finished pictures shows how you can use migration to your advantage. When I was about half way through fulling I cut a slit in each side for the handle. I healed the cut edges with some soap and finger rubbing. I stretched the hole upward to get the shape I wanted. I am pleased with how it turned out.

prefelt bag 1This side used dark green and white prefelt

prefelt bag 2This side used all black prefelt.

I also made 2 nice round bags with a built in strap. This pictues shows the bag with a balloon blown up inside it and the panty part of some panty hose stretch over it to hold it well while it is fulled to about the half way point. At that point it is nice and round and just needed to be shrunk more.

grenn bag on balloon

Once I was finished fulling it I rinsed it out and then blew another balloon up inside it to make sure it dried nice and round. I did a smaller blue one as well. Both were covered in one layer of silk hankie. The green one also had a silk hanky flower on it.

green bag dry blue bag dry

They need their closures. I haven’t decided what yet.

The other thing I made was a couple tea cozies. sorry for the picture quality but I couldn’t get it to show better despite trying several things on the camera and computer.

teacozies

The cat needs some whiskers. The flower is a made with a silk hankie.


Small Bags

Small Bags

I have been listening to audio books on my phone. It’s a great way to “read” a book and still get some work done. The problem was that I am moving around. In and out of the kitchen or one end to the other of the studio and kept moving in and out of hearing range. I decided I needed a little bag so I could pop my phone in it plug in my ear phones and no more problem.

I made 3 little bags . Sorry I took no pictures of them being made.

This one I used oval shaped beads with and orange stripe for the petals of the flower. When I cut the holes to reveal the beads I cut one of them to large. The bead was staying in but only just. So I got out some orang embroidery thread and put some stitches all around to secure it. I did the rest so it looks like I did it on purpose.

green bag web greenbag stitching web

This one I want to embroider but haven’t decided how yet.  Maybe a couple of rows of yarn stitched along the edge of the spiral. The pin is just holding the flap shut for the picture

purple bag web

This last one I plan to either needle felt or embroider on some sheep.

sheep bag web

It will make a nice match for my name tag and my business card holder. The strap on the card holder is some of the first silk I ever spun. It whole bag is looking a little worn. It has been living in my purse for most of 10 years so I shouldn’t complain.

name tag web biz card holder web

I haven’t figured out what to do about straps for the bags yet. Felt ropes or some sort of webbing or woven strap. I don’t want it to cut into my neck when I am wearing it. What do you suggest?

Felted Knitting Bag

Felted Knitting Bag

I was asking people on face book what they make to sell in warm weather. One suggestion was a knitting bag.

I used the flat resist method and cut the handle and flap form the top of the resist.

yarn bag

After cutting the handle and flap I blew up a balloon inside it and wrapped it up and let it bounce around the dryer for a while.

yarn bag ready for a tumble

Next I cut the J. Thinking of the bag like a portable knitting bowl. Then another tumble.

yarn bowl J cut yarn bowl another tumble

I wanted to bind the edge. I tried leather but that wouldn’t work at all. Then I tried some bias tape. That worked better but not great. It was ugly but part of that is the bad sewing too.

yarn bowl binding attempt

I took that off and used a blanket stitch. that worked much better.

yarn bowl  finnished

I don’t like the way the jay effects the shape or the way it hangs open. Not bad for a first design. I will make some changes in the next one. I will make the handle longer so I have a bigger flap. I will make a smaller slit for the yarn to come out of the bag.  I realised with the bag having a flap over the top to stop the ball bouncing out I don’t need to make a J at all. I did see a bag with a grommet in the back near the bottom that looked very neat and tidy but if you use a hole you can’t take the yarn out of the bag without breaking the yarn. Ideally a little U shaped metal frame that could be squeezed shut around the felt (similar to when you put snaps onto a bag) would be best but I haven’t found anything like that. Purse frames work like that; you slide the felt into the channel of the frame and squeeze it shut and it grabs the felt or in some cases you sew the frame on. The problem is I just want a small U shaped piece. I always seem to be looking for things that don’t exist


From Batts to a Handbag

From Batts to a Handbag

After my four days of dyeing experiment, I carded a bunch of batts with the different fibers I had dyed.  I decided I wanted to do something a little challenging using the batts. So, after doodling around with a few ideas I settled on a handbag using a couple of the techniques I learned in Fiona Duthie’s Surface Design Class.

I didn’t have a pattern. So, I used the general shape of the purse I carry now and added 30% for shrinkage and made a template. It took a lot more planning than I had anticipated so I got very engrossed in making sure I had everything organized and followed each step in the right order. Unfortunately, I worked intuitively and forgot to write down the procedure and take pictures at each step.

I wanted to use fiber for the shoulder strap, but I also wanted it to be strong and not stretch.  I made the shoulder strap first using a tightly woven scrim cut with the grain between layers of wool.  I left long ends unfelted and wrapped plastic at the ends to try to protect it from the water, not that it helped. This would be the part I would felt to the bottom and sides of the handbag so it would be all one piece.  Then I  used a dowel to roll the strap until it was partially felted.

handle end rolling handles


Here is one side of the purse with scrim lining between the wool layers, resist and a resist for one of the inner pockets. I wet one side then proceeded to lay out the other side working backwards from inside out. Laying out more pocket resists, the back and back pocket. I know that sounds strange, it was a little mind boggling.

layout

The decoration for the flap had to be done first before attaching it to the bundle to felt. The middle was felted by hand and the circle of fiber around it was left unfelted in order to add additional  fibers to felt into the bundle.

decoration

The handles were laid out on the bottom and the sides then worked on the sides first to ensure they held together during the felting process.

It was quite a thick bundle and once it was felted enough, I cut out the resists and continued to full and shape it until it sat up by itself.  When dry, it had that “thud” of being completely fulled.

hangingcloseup front Three inside pockets.

insideOne back pocket.

top view

backI wonder if I could duplicate this again?  Maybe if I do I’ll write a tutorial.  The one thing I would do differently is to put the shoulder straps on the inside of the bottom and sides rather than outside.  That would be another challenge. What do you think?