Browsed by
Tag: wet felting

2nd Quarter Challenge Piece Finished

2nd Quarter Challenge Piece Finished

I finished off the natural vessel I showed felted, but not shaped or fulled, a couple of weeks ago:

It’s made with various wools, I took a range of naturals to the well being centre and I think the first two (inside) layers are Portuguese Merino from a batt, and the next two are brown Finnish. I took lots of locks in too, mostly Swedish breeds/crossbreeds from Zara in lots of shades, but I might have used a few BFL locks too:

If you saw my post last week, you might be interested to know how the thing which looked a bit like a pizza base turned out. This is my entry for Ann’s 2nd Quarter Challenge, which is “using fabric as a surface design instead of a base”, but Ann then added “As an extra challenge to you it can’t be a sample and it can’t be a book cover” 🙂 Luckily, I’d already had an idea which would fit the challenge, since we’d been doing ‘extreme nuno’ and vessels at the well being centre, I’d planned to combine the two at some point, and Ann’ challenge gave me the push to do it.

I cut out a template, sort of bowl shaped, but not for any reason, I just wanted something big and not square. Then I started adding strips of white fabrics to it: synthetic chiffon, muslin, scrim and cotton gauze. I then added fine layers of Rambouillet. The photo I showed last week was where I’d wet it all down and had started to felt it. This photo is of the piece felted, you can see the resist starting to curl from the shrinkage:

As soon as I started to full it on the bubble-wrap it really puffed up!

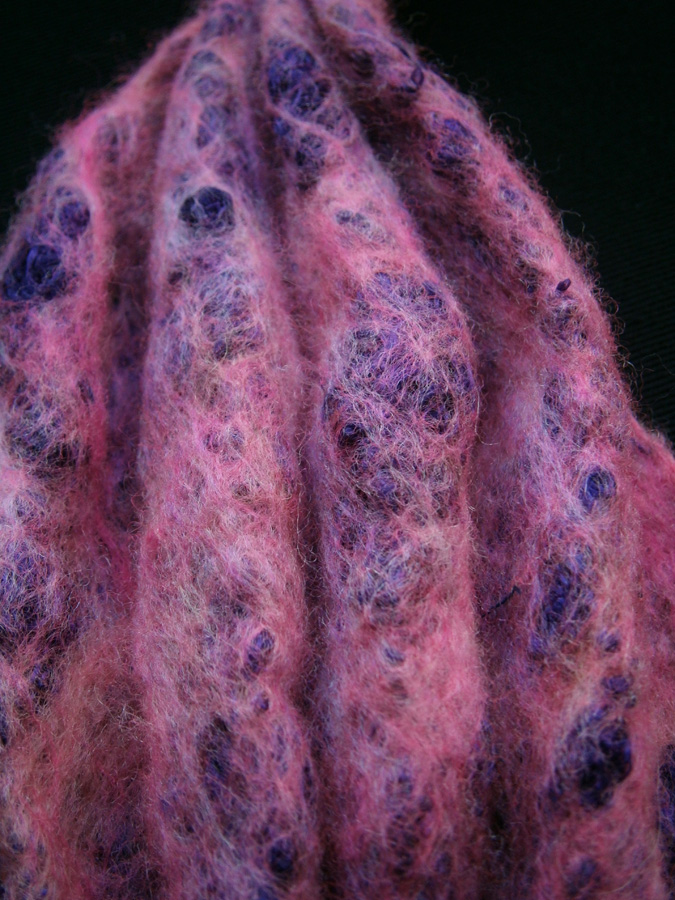
I removed the resist and carried on fulling, I turned it the right side out, and realised I’d accidentally made a felted cow stomach!
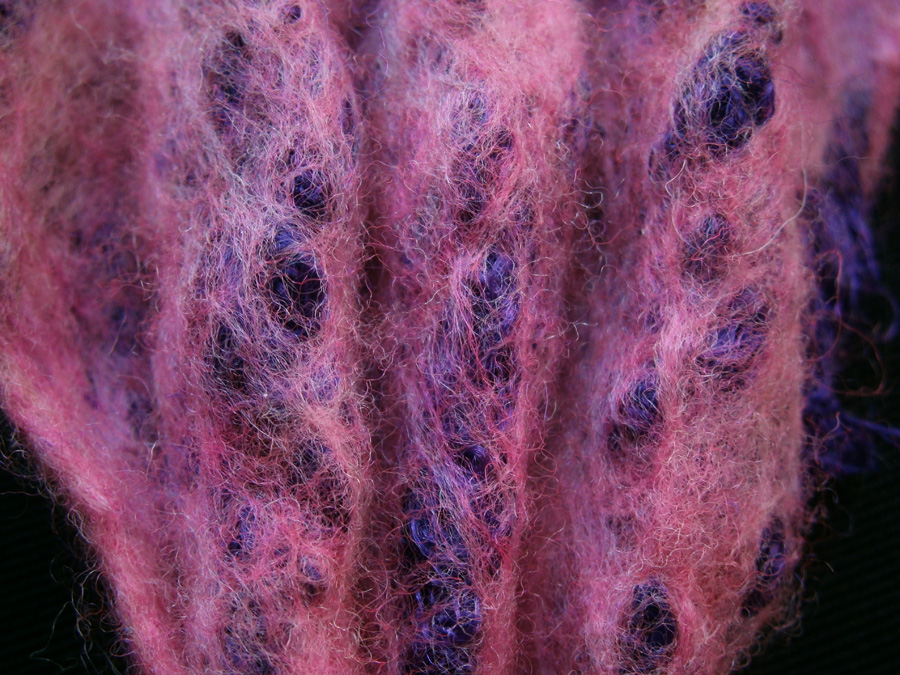
Close up:

I did a bit more fulling and tried it on a balloon to shape and removed it see if it was fulled enough:

It wasn’t, so I did a bit more fulling, , this isn’t the best photo, but you can see the shrinkage, it started out the full height of the netting:

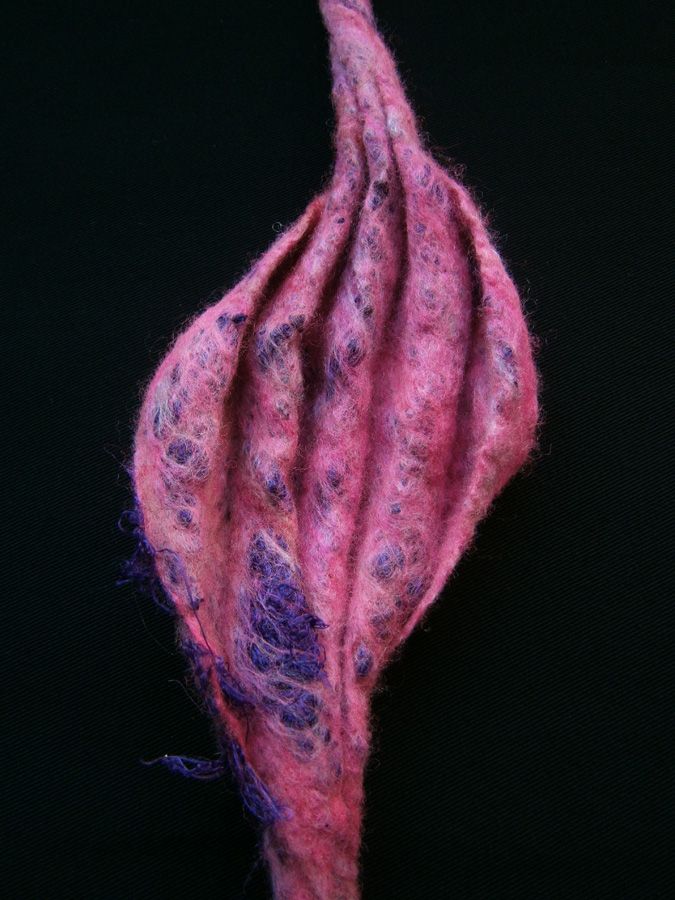
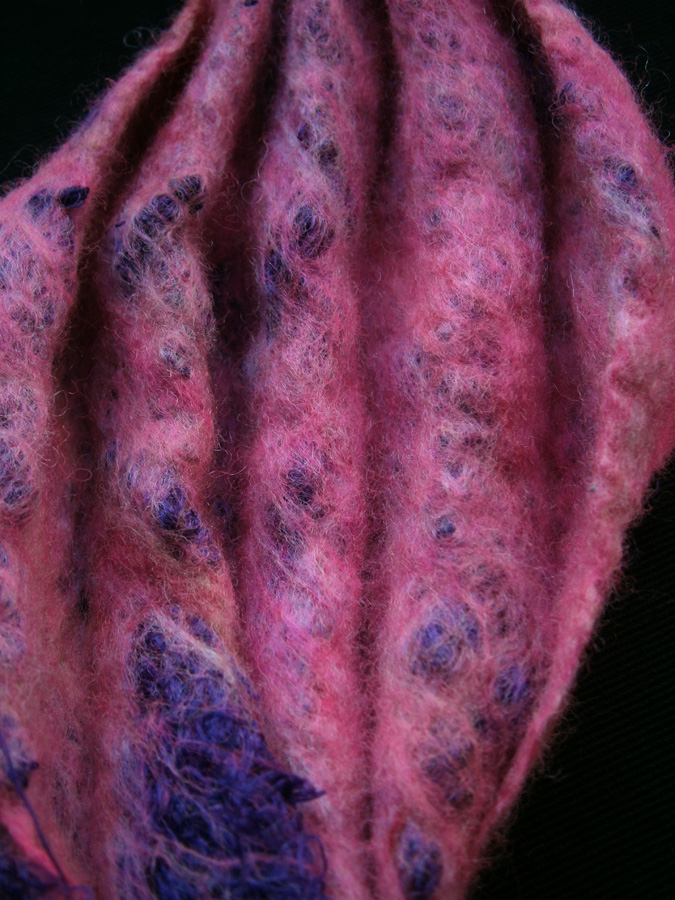
I rinsed it and left on a balloon to shape and dry. This is how it looked finished:

Another side:

This is some nice ruffley chiffon on the bottom, between some Cotton Gauze and cotton scrim:

The chiffon ruffles up so nicely:

This is an area where I overlapped different fabrics:

And, since the thought behind the idea was that it’d make an interesting lampshade, here it is on a lightbulb (btw, if you tell someone to look at how cool something looks on a lightbulb, warn them when you’re going to take it off, apparently some of us forget and ‘blind people for hours’!)
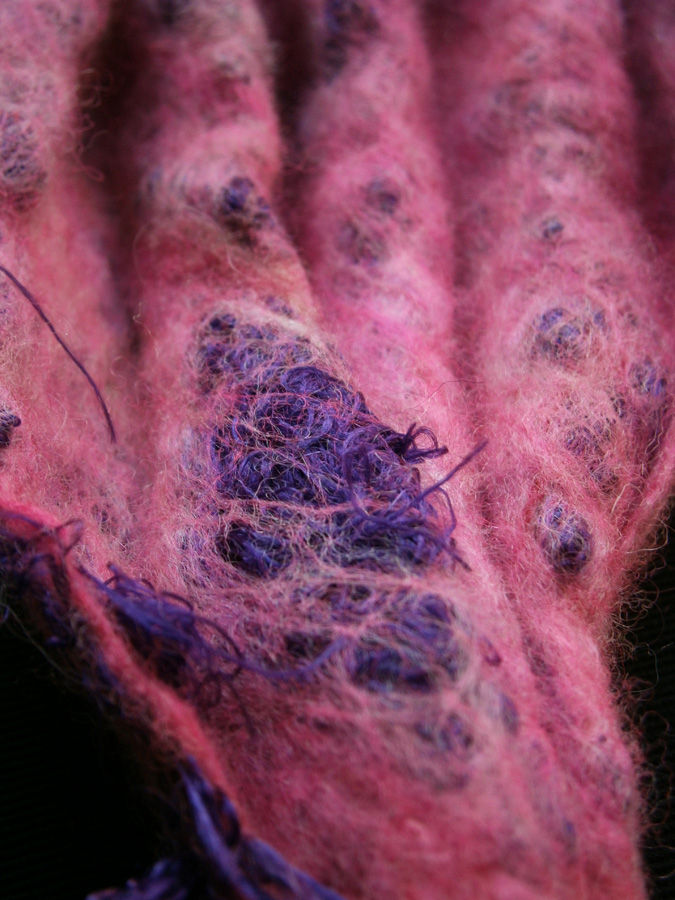
Close up:

Different angle:

So, did I fulfill the criteria, Ann? 🙂

Snow and Ice – Guest Post Carole G.

Snow and Ice – Guest Post Carole G.

This is a guest post by Carole G. one of our forum members. You can follow her here: 

https://www.facebook.com/BagsaLicious/

https://craftybeetle.wordpress.com/

During a recent very cold winter with thick ice and deep snow, I was inspired by the start of the melting process on a stream – the ground was frozen, the rocks covered in snow but little by little patches of water were starting to appear under the thick ice and white snow. It was the magic of the slow melt that influenced this piece of felt work.

I started off with a blue layer of felt and built on it in white, my fibres included merino and silks. As I wanted patches of blue to show through I let the background blue peep through in places and added runs of blue into to the top layer of white.

Here is a close up of the fibres showing how the silk adds a new dimension.

I partially felted the piece then stitched buttons in by pulling the loosely felted fabric over the buttons and sewing them in at the back of the fabric. I continued wet felting until I was happy that the button shapes were sturdy and then removed the buttons to leave stone like shapes in the piece.

And this is how it looked as a whole piece.

Although happy with the effect I felt the piece needed sparkle it needed the magic of the snow and ice so I embellished with beads both matte and sparkly and added stitch to create this ice and snow piece.

You can follow my creative meanderings on both:

https://www.facebook.com/craftywomanScotland/

https://craftybeetle.wordpress.com/

First Quarter Challenge 2018

First Quarter Challenge 2018

A few weeks ago I showed some printed fabric transfers I’d applied to muslin. Or tried to apply-I lost the instructions so they didn’t all turn out very well! I trimmed them down and nuno felted them recently for the First Quarter Challenge. The first one was a small image of a face, I used some Skudden wool for this sample:

It attached well, and evenly:

It wasn’t a great photo to use, and got distorted with the shrinkage, but I think other designs or images would work well. On this close up you can see the difference between the plain muslin and where the design is, and how you can still see the weave at least in the blue part. It shows how much the Skuden migrated too:

The other transfer I tried was one which had printing mistakes on, and also I tried to remove the transfer paper too soon, so the coating was left on in most parts. I used Rambouillet top for this sample (first time I’d used it and I love it!) This is the whole piece:

I think there were only tiny corners of letters which came out properly, so it was just varying degrees of coating left on. I think this is one of the thinner patches, the space between the letters is wide enough to see the coating and where it ends on the fabric:

There was lots of the coating left on here:

From this angle you can see how the part with the most coating on didn’t attach at all, like most people predicted:

This is a photo of the back, which also makes it obvious where it attached, and didn’t:

And just because I loved it so much, here’s a close up of the tiny crimpy texture of the Rambouillet felt!:

And finally, no, this isn’t a pizza base I was making, it’s actually part way through making a piece for Ann’s Second Quarter Challenge, which I’ll show you finished next time 🙂

Latest Makes

Latest Makes

I got a really cool embroidered cushion cover years ago (probably over 15, thinking about it) and the back kept splitting at the seams. I mended it a few times, but it was past repair so when I went to the fabric shop recently I had a look for some fabric to replace it. I found a really nice abstract plant/paint splash design, though that’s not so obvious from the small cushion back:

It doesn’t exactly match the front, but now I have a reversible cover! This is the front:

We had a ‘play day’ at the well being centre the week before easter. I’m sure I work better the less thought I put into something! I just grabbed a couple of colours of Merino and a few wool ‘kebab’ tubes from the bag someone else had got out. I honestly don’t think I could have made a nicer piece if I’d planned it!

This week most of us did some form of nuno felting. A couple of us did a bit of ‘extreme nuno’, laying out various fabrics, then 4 really fine layers of Merino, and bingo-wing-busting amounts of rubbing until our pieces are roughly a quarter of the starting size! I need to stop using so much blue, it is a nightmare to photograph, but this is my finished piece:

I loved the ripples on this red fabric:

I can never resist using a bit of scrim and synthetic chiffon for these pieces:

This was from some fabric donated by Judith or maybe Terri, a nice shiny piece of viscose:

I’m not sure what this fabric is, one of our members brings us lots of offcuts to use. I like the way it just crumpled:

And this is the back, there was quite a bit of texture, but I liked how there was a lot of definition from a piece of organza which had kind of bent out of shape:

If you missed it, Ann’s 2nd Quarter Surface Design Challenge is Nuno Felting, so have a look here and join in 🙂

Throwback Post: Felt Picture

Throwback Post: Felt Picture

Sorting through a pile of paper templates recently, I came across one I’d drawn for a felt landscape picture before I had a laptop to work from. And funnily enough, my sister has been thinking of getting this piece framed, so here’s a throwback post from August 2015, and if you have any suggestions for framing, which will protect it from moths, please let me know!

I had an idea over the week to do a piece of felt for my sister to say thanks for helping me at MakeFest. I saw a photo she took and thought that would make a great piece. I haven’t told her or asked her, so I probably shouldn’t post the photo without permission, but I made a simplified version on Photoshop as a guide:

field field picI don’t have a computer downstairs (or working printer) so I didn’t have a photo to work from, but I did draw a guide 🙂

OLYMPUS DIGITAL CAMERA

I marked out the bands on a template and did the first layer, I’m afraid some of the photos aren’t the best, it was dark and I had to use flash at times:

OLYMPUS DIGITAL CAMERAI then started on the second layer:

OLYMPUS DIGITAL CAMERAI thought it was looking alright until I got to the bright yellow patch near the bottom, it’s a field of bright yellow rapeseed flowers, and I really wanted to capture the almost bubbly look it had. I blended Nylon and silk throwsters and Bamboo, and it looked great, but made the rest look really flat:

OLYMPUS DIGITAL CAMERASo, then I had to go over all the areas with more texture. I blended shades, mixed in fibres, fluffed it all up and filled in the rows:

OLYMPUS DIGITAL CAMERAI realise now if I’d taken photos of the blends etc, I could have used this for the 3rd Quarter Challenge 🙂 My favourite part is the bottom, it was a hedge with lots of colour to it, mostly greens, but the new growth had shades of red. I used lots of different shades of nylon staple fibre for this.

OLYMPUS DIGITAL CAMERAI added the details on next: hedges, trees, telegraph poles:

OLYMPUS DIGITAL CAMERAFor the trees I used black viscose top, I pulled lengths off, fanned out the top, then gave it a twist to make the trunk and branches. Then I added fluffy wisps of blended wool.

OLYMPUS DIGITAL CAMERAWet down:

OLYMPUS DIGITAL CAMERAFelted and still wet:

OLYMPUS DIGITAL CAMERAA few bits of yarn I used for tracks didn’t work, so I removed them. Here it is dry:

OLYMPUS DIGITAL CAMERAThe back looks good too:

OLYMPUS DIGITAL CAMERAIt’s completely the wrong shades, the original photo is more ‘acidic’, but I liked how it turned out. I’m not sure it’s my sister’s thing though so it might be back to the drawing board there 🙂

Collage And A Case

Collage And A Case

When I’d had a tidy up over new year, and made enough space to get out all my offcuts, I chose some pieces for a new collage book cover. I made a start on attaching the pieces to some thin fabric, which I think is some kind of interfacing.

When the pieces are such irregular shapes, or at unusual angles it’s really hard to position the pieces so there isn’t one of the same or similar colour touching! I think I have enough bright colours to finish the piece, but wondered if some added texture might work too. Luckily, I have the nuno strips sampler from a few weeks ago, and another I made recently:

Even though I love this texturey scarf, I don’t think it’s suitable for a book cover:

I’m in two minds about this one, it’s not as ‘loose’, but still has potential to catch on something:

Last week at the well being centre, we were doing simple resists again, for our newest member. I was going to do the ‘usual’ simple case one which is about 22 – 30cm x 8cm (depending on whether a flap is wanted or not). But, since we both like drums, and she’s a really fast learner, I thought we’d be a bit adventurous and use a 61 x 6.5cm template to make drumstick cases. They both turned out really great, this is mine:

The drumsticks fitted snuggly and securely. They’re perfect … for new sticks, but after I used my sticks for only the second time this week, they looked like this:

Wool and fibres don’t make me cringe, but the sound of rough drumsticks dragging on felt is not pleasant! Luckily, because the cases weren’t very wide, we ended up with uneven shrinkage, and they shrunk less along the length of the case, and I cut a few inches off the end of mine. And it works just like the cardboard sleeve the sticks came in:

And I can slide it off the smooth end, no scratchy wool noises!

Techniques for Intermediate Felters Class-The Afternoon

Techniques for Intermediate Felters Class-The Afternoon

Last time I talked about the first half of the class, class-the-morning  In the afternoon they did one large sample of many things. They used foam tubes and lots of inclusions. There were two resists sticking up and spikes They added some silk and cotton squares, yarn,  some scrunched up silk and a silk flower.

See the cool little rolling tool I got recently. It’s a little massage roller. This was it’s first try out. It worked really well. I have some other kinds ordered so I will do a post about them later.


Here are a couple of shots of me teaching. The left one is talking about adding some scruched up silk and the right one I explaining how you make one of the resists into a flower.

Here Carlene and Jan are showing thier pieces at show and tell at our guild meeting.

and a close up are Carlene’s

We didn’t have enough time to do everything I wanted to do, so at the end I was doing quick how to’s.  The pine needle technique two ways  and I also explained book resists.

So now it’s a matter of deciding what to take out and what to add in for the next time I teach it. There was not enough time. I think adding an hour to the class would be good. I think I will drop the nuno part of the sample to make sure we got to the pine needle part. I am not sure about the book resist. It may take to much time. What would you want to see in an intermediate techniques class?


Techniques for Intermediate Felters Class- the morning.

Techniques for Intermediate Felters Class- the morning.

On Saturday I was teaching Techniques for Intermediate Felters.  It is a sample class.

First we talked about how felt shrinks and then  did ruffled edges.

As an aside it was Jan’s ( top right) birthday and the class was one of her presents.

Only two finished ruffle pictures thanks to two of the students.

After ruffles we did cracked mud. They did a double sample. One side was done with painters tape and one was done with floor underlay with holes cut out. On Lauren’s piece here you can really see the tape and the underlay.

I wanted them to see how even the thin underlay makes it much harder than the very thin tape.

Some needed a little more fulling at this point but were progressing well. We were on to lunch and then more techniques. I will tell you about the afternoon next time I post.


Recent Things

Recent Things

We’ve had some new members join our wet felting group at the Well Being centre this year, so I’ve been making ‘beginners’ pieces with them the past few weeks. One I always enjoy doing is a Nuno strip sample piece. I try to pick some fabrics I’ve not used before and like to pick an unusual one which looks like it’d never work, but I know from previous samples that it does. It’s usually one of the weird scarves I’ve picked up at a charity shop, and I chose my favourite ruffled loopy one this time.

The fabric I hadn’t used before was a piece of lacy fabric which I think was previously a blouse. It’s not that obvious it was lacy, but you can tell a bit better from this close up:

I usually start off absolute beginners with a soft wispy piece because it helps to learn to control pulling off the wool tops, but one of our new members joined while I was sorting out supplies so didn’t have them all at the centre. We had a practice run of pulling off the tops, and she did it well so we made a simple landscape which we usually do on week 2. I usually stick to a simple design for this to make sure it gets done, has a good outcome, and I don’t have to answer a million different questions: 2 layers, green for grass, blue for sky, add some embellishments for clouds and flowers, then felt. But there were only a few of us, and I could work 1 on 1, so I went with her ideas and just showed her how to realise the ideas, so we each made a kind of farmer’s field picture:


I usually end up with odd random things on mine, because I use it as a demo piece if someone isn’t sure, which is why it looks like I have discarded kids’ toys lying about (viscose nepps) and some half dug out potatoes (cotton nepps)! We used some pencil roving waste too, we both used a length of natural brown to make a ‘wall’, and I added some variegated green to see how it’d work for a hedge. I’m not sure it looks very hedge-like, but it did get a nice ripple to it, you can see the brown piece a bit clearer on the close up and see that the blend we used just above is actually made up of yellow and purple:

Our new member’s landscape piece turned out so well that we moved onto using resists the next week, some other members mentioned before New Year that it’d be good to do vessels again and maybe more resist work, so for new members to build up to and give a refresher to others, we made a simple piece with resist strips. Some of us put fibres or fabrics under or on top of our resists for extra effect, and embellishments on the top. I used the lacy fabric from the nuno sample piece, and a nice pink wool lock:

You can see more of the laciness on this piece:

Some of the fibres from under one of my strips:

Those nuno sample pieces always come in handy for when I’m planning a collaged felt project:

Because we all know the first rule of tidying up has to be getting everything out to make a mess again!

Throwback Post – Texture

Throwback Post – Texture

We were talking about doing some ‘throwback’ posts this year, and while I was giving the site a bit of a tidy-up and adding a new 3D page over the New Year, I came across this one of mine from September 2014, and thought it’d be a good one to start with. Do you ever revisit your old work and get inspired with new ideas?

A while ago I bought a weird fluffy, knitted, tubular scarf from Poundland to try felting with. If you ever buy one, make sure you cut it over a bucket or newspaper or something to catch all the bits! I laid out a couple of layers of very wispy pink Merino tops left over from a book cover I made last year, then I added the piece of scarf, and 2 more wispy layers of wool tops. It didn’t take long to felt. This is one side of it:

OLYMPUS DIGITAL CAMERAThis is the other side:

OLYMPUS DIGITAL CAMERAAnd this is what it looked like holding it up to the sky:

OLYMPUS DIGITAL CAMERAI don’t remember how long after, but I decided the scarf sampler might make a nice sculptural piece similar to one I’d made before. I didn’t make it in exactly the same way, I concertina’d it and stitched in place, then twisted and felted and fulled more. This is the top:

OLYMPUS DIGITAL CAMERAClose up of the ridges:

OLYMPUS DIGITAL CAMERASuper close up of the texture:

OLYMPUS DIGITAL CAMERAThis is the back:

OLYMPUS DIGITAL CAMERAA close up of the back:

OLYMPUS DIGITAL CAMERAAnd a super close up of the texture:

OLYMPUS DIGITAL CAMERANow, what do I do with the other 8 square feet of fluffy knitted stuff? 🙂