Browsed by
Tag: second quarter challenge

Some inspiration for the second quarter challenge.

Some inspiration for the second quarter challenge.

As most everything I have for felting is packed in boxes at the moment, I thought I would share some of the pictures I’ve taken around the farm for inspiration for the second quarter challenge. Usually, I take landscape-type pictures, most often with sheep in them or pictures of flowers, fungus or moss. I tried to be less organic this time.

These are parts of a rusty trailer. the first three are the fenders and the next ones are the decking. I particularly like the rusty bits.

These are some chairs we have the plastic ones had blown over in the wind and the undersides were quite interesting and dirty. How do they get so dirty underneath?


This is a stack of metal chairs waiting for warm weather.

Here are a few more metal bits I found around on a walk with the dog.

The bottom of my daughter’s canoe was good for a couple of pictures, an old label and scratched-up paint.

Many years ago we had a fenced yard. There is one small bit left that is slowly going back to nature.


A fence post in the field


And I couldn’t resist some moss and a cool rotting log.

Hopefully, I have inspired you to take some different pictures and not made you nod off. You can use one of these for inspiration if one catches your eye. We would love to see it. you can share your inspiration and your finished work in our gallery by using this form. https://feltingandfiberstudio.com/community-photo-submissions/


Olive Sparrow Giveaway Winners and Second quarter challenge, stitching all done

Olive Sparrow Giveaway Winners and Second quarter challenge, stitching all done

First things first:

The winner of the 100 grams of premium washed Teeswater locks is Sttamburo

The winner of the 150 grams of Swiss mountain batt in your choice of colour(s) is Darrel

Congratulations! Monica will contact you via the email you provided.

Now my stuff

My heat erasable pens arrived. They come as a pack of refills and some empty pens. I got one that came with 4 colours, white, red, blue and black. That should cover all possibilities.

I picked the white. I think red would have worked too.


Onto the last part of the design. Diamonds were a popular repeating pattern. I better check to see if this will work the way I think it will. I did not do my usual quick sketch but using a ruler. Are you amazed?

Yes, that should work fine, real diamonds and not just squares on point. Now let’s see if those pens work. A straight line to work form. I may stitch that in too. I wasn’t sure it was going to work, even smooth felt is very textured.  The tendency when a pen doesn’t write is to press harder. That didn’t work. A light touch was much better.


A couple of weeks has passed since I did the lines. I decided to use yellow for the lines.


I really like how the yellow looks against the green but it didn’t look complete so I added some red and black french knots in the middle


Next was finishing the sides. I decided to use double-fold bias tape. I like double fold because it’s easy to sew on invisibly. the bias I like to use with felt is a fleece bias. It blends with felt so nicely but isn’t as bulky as using felt. I had black and green that would work. I chose the green as it was such a good match.

If I had easy access to my machine I would have stitched the first side with it. You can stitch in the ditch of the fold and it’s invisible. That is the way I do it when I put a bias tape on the brim of a hat. As it was, I just stitched both sides by hand.


I think it looks good.


Next is sewing the pockets and filling them up. I should have that done by next time. I have almost a whole month to get it done and still be on time.


Second Quarter Challenge Part 1

Second Quarter Challenge Part 1

The second quarter challenge is to be inspired by the 1920’s and I decided to look at some art deco designs for inspiration. What I noticed most was repeating patterns, many with floral themes. During this research time, I was also inspired by a recent post by Ildi K. and thought I might want to give her technique a try. So why not combine these ideas into one project? Then I remembered that I had already done some design work based on Montana wildflowers in my Level 3 Art and Design class. Maybe I could use some of those floral designs and create my own “art deco” pattern?

This is a Mariposa lily. It blooms in June or July here.

These are some quick sketches using that flower shape but creating a simplified design that was more abstract.

I used the final design in several ways on paper. I could have just used one of these as my final design but I had noticed that many art deco repeat patterns were in squares or triangles. I thought perhaps I could fit the flower portion of the design into a triangle.

So on graph paper, I created a triangle pattern and fit the flower into it. What a jumbled mess! Obviously, I don’t create repeating patterns much. It’s way too busy for me. But perhaps if the triangle lines were more visible?

So I darkened the lines of the triangle and I liked this better. I think it would be better with a blank triangle in between the floral design but I left it as it was.

Now if I was going to do this in felt, I needed to enlarge the design. So I expanded it by 200% on my copy machine and then just used one portion of the design. Next up was to figure out a color scheme and see if I had the correct materials on hand. I thought I had some unspun yarn in my stash but I was wrong. I felt that would work best for the outlines so I have to order some before I can get started on the felting portion of this challenge.

Have you created something based on the Roaring Twenties? We’d love to see it over on the forum.

Second Quarter Challenge – Mark 1

Second Quarter Challenge – Mark 1

So we are just starting the 3rd month of the second quarter challenge and I have a finished piece. Everyone, please clap because I actually finished it in May, very early for me who usually finishes the challenge after the next one has started. Here’s the challenge if you need a refresher.  2020-second-quarter-challenge

Last time I teased you with the beginnings. No one could guess what it was. Grey didn’t seem to be a very summery colour. Well, I made a basket. I had seen a few online and thought that’s a good idea. I liked that they looked rustic and functional rather than pretty. Best laid plans of mice and men as they say.

I started with a pattern. I wanted it to be big enough and I thought an oval would be the best shape to start with.

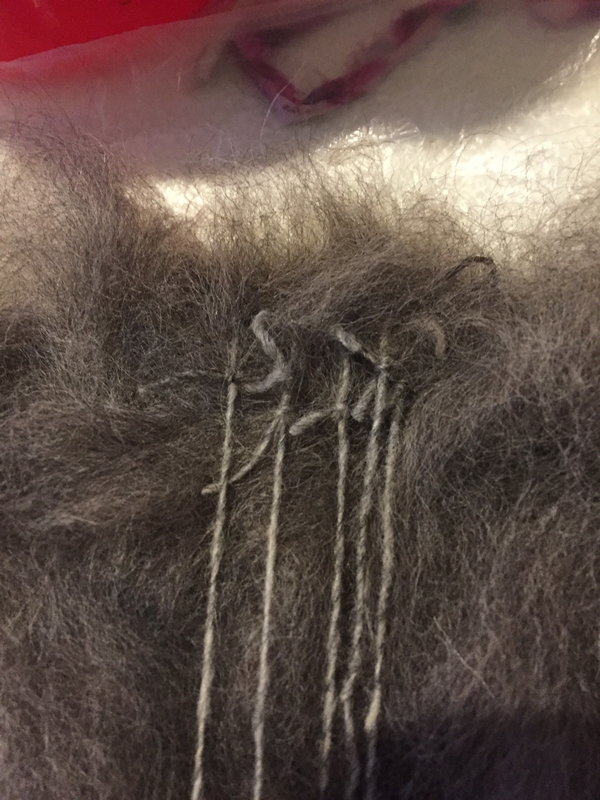
I wanted a sturdy basket so I used 160 grams of Finnish wool. In retrospect, I think another 40 grams would have been better. I thought the handle and where it attaches will take the most strain so I added 5 strands of Briggs and Little sport singles between the second and 3rd of the 4 layers. This sort of thing is always much fiddler than I think it will be.

I added 3 lines of the Briggs and Little to the outside.

After rubbing and rolling and for a while it was time to cut the handles.

I measured to get the handle in the center and made a template but then not thinking I cut the whole piece out. I had intended to only make the horizontal cut. I cut both before remembering that was not what I had intended. Oh well, I can fix that later.

The shrinking went very well. At first, I thought the ends dipping down would be a problem and I tried to stretch them up but after shaping it I realized it was a good thing as the middle shortens as you open it up. I already knew that I just wasn’t thinking it through, probably because I was still mad I cut he 2 side tops off.

When it was dry I pinned the two cut off peices back onto the handled.

And used the machine to sew them back on.

Next, I wasn’t fussy about the edge of the basket so I used some fleece, double-fold bias tape around the edge. I had some grey in my stash so that worked out.

As I feared the red stripes all but disappeared. This is the best place they showed, not very impressive.

So, I went and got some of the yarn, the red and some yellow and stitched on 3 stripes. You can see the old red stripes more in the picture than you can in real life. I think I would just do the stitching next time. It is much easier really.

For the handle, I rolled up one side flap, then wrapped the other side around it and stitched it in place. It feels sturdy and comfortable in your hand.  I used the red and yellow yarn around the handle to make it more visually appealing. If you wanted the stipes to say exactly in place you could catch the underside of the handle as they go round.

Here it is in its entirety. I am still not thrilled with it but my daughter really likes it so it is probably just me. It is growing on me. I know what I will do with the next one to make it better, besides paying attention and not cutting off parts that I want to stay on.


Second Quarter Challenge with Differential Shrinkage

Second Quarter Challenge with Differential Shrinkage

I needed to figure out something for the second quarter challenge and I wanted to continue my experiments with differential shrinkage. So I decided to combine the two projects. I had also read somewhere online to check out Soosie Jobson’s Youtube channel as she had some good videos about differential shrinkage. I’m not sure why I hadn’t thought about working inside out with this technique but it really helped.

I started with the resists made from floor underlay foam on the left. I wanted a spring/summer sunny look for the second quarter challenge so I chose yellow to red and a bright yellow green. I used hand dyed mixed 56’s wool. The photo on the right shows the diamond shaped resist covered with 8 layers of green wool.

After laying out the 8 layers of wool, I wet it down and then flipped it over so I could cut the diamond shape out of the green wool. I created four of the green shapes and place them at even intervals over the large round resist. The photo on the right shows the bottom with the solid circle in the center.

These two photos show the top with the ring in the center. You can see how the points of the diamonds overlapped the ring slightly so I trimmed those ends off so there wasn’t extra bulkiness around the ring.

Next I laid out the top wool, 2 layers, all laid in a concentric manner around the circle. I wanted a gradation of color from yellow to red, so the yellow to orange is on the top side. The photo on the right is wet down and you can see the thickness of the pie shapes and ring showing through.

Then I flipped it over and smoothed the edges over the circle. I did end up removing a bit of the extra orange wool in places.

I then laid out 2 layers of red orange to red wool in the same manner as I did the top side. It’s hard to tell in the photo but there is a gradation of color. Now on to wetting down and felting.

Here are the two sides after felting. I felt by rubbing and don’t do any rolling. I like to be able to feel how the wool is reacting under my hands and also to make sure that the edges around the resist are not forming a ridge.

I then cut out a small disk of yellow felt from the center top. I healed the cut edges by rubbing with soapy fingers and then removed the resist. I then turned the entire piece inside out so that the green was on the outside. This took a bit of patience and maneuvering. Then came the fulling and shaping.

And here’s the result. I did shave the entire vase to get rid of the fuzzies.

I decided to call it a Poppy Vase so I thought poppy seed heads fit perfectly. So hopefully, this will count as a personal item that I can use in the summer time!


Second Quarter Challenge Almost Finished.

Second Quarter Challenge Almost Finished.

I will show you how things have been going with my second quarter challenge piece. If you missed my last instalment it is here. seascape-progress

I finished adding the green for the vegetation.

Next I worked on the flattened serf

First I tried this,

But no, and then this,

I might have been able to make this work by adding something to the edge of the wave but I didn’t like it

And finally I went back to silk throwsters waste. I also broke the water edge up into 3.

Next moved on to the foliage. I added green stitching here and there to give it a more vertical look. It doesn’t show much but does add to it. I added some handspun yellow that a friend Bernadette made up for me on the spur of the moment when I was moaning about not having the right yellow.

After this it was just a matter of adding more stitches. I did add more of the yellow to mingle them more and stop them being a line across the picture.

This is where I am, stitching away and I still need to add a little dark wool between the planks of the path. I had forgotten about that until seeing the pictures. They are more defined in person.

I was going to just keep going with the stitching.   The picture if you recall is quite plain but I was finding it boring, and to uniform in proportion. It needs something else. I wondered about a railing. Not this railing I think, it looks like a Japanese character (badly build temple maybe) or something.

I think I will finished the stitching  even if I add something else. Anyone got another idea? I have seven more days to be finished in time.


Second quarter Challenge, Nuno Felt Surface Design.

Second quarter Challenge, Nuno Felt Surface Design.

The second quarter is already here, I am not sure how that happened. I think using fabric as a surface design instead of a base is a good idea for the second quarter. Use cotton or silk or rayon or what ever you like to make some surface designs. You can make texture or pattern.

Try a mosaic? (I think one is Zed’s)

or making a picture? I made this to practice machine embroidery on.

Layer some silk

How about some texture?


Or let your imagination sore, have fun with it.  You can post your experiments good and bad over in the Felt and Fiber Studio Forum. http://feltandfiberstudio.proboards.com/thread/3708/2018-second-quarter-challenge


Second Quarter Challenge Part 2

Second Quarter Challenge Part 2

My second Quarter challenge is all finished. Better late than never.

After fulling the pot the design was almost completely gone.

I Got out my handy dandy disposable razor and gave it a good shave to get rid of the fuzzies. The design magically reappeared. A tiny bit of sun came out for the pictures. It has been raining and raining and raining here so not great pictures.


I finished felting the relief picture. The inside yarn didn’t feel a secure as I wanted so I went all around it with a felting needle before deciding how to reveal the encased yarn. I had originally planed to cut the darker green away but thought it might more like it occurred naturally if I shaved it.

I wanted it to look like a piece of something, a tablet or piece of cloth that had been dug up or found in grave goods.  The colour is closest on the right hand one. the background is dark mass green and the picture is a lichen green. I tried to fix it but it just made it worse. I like it. I think I will frame it as is.


Second Quarter Challenge Finally Started

Second Quarter Challenge Finally Started

Today is July 3 and finally, yesterday, 2 days late, I got started on the challenge I set: https://feltingandfiberstudio.com/2017/03/31/second-quarter-challenge-3/ I haven’t finished but I did start two pieces.

The first is a vessel. I haven’t made one in ages and thought it would be fun. I really like  a cat motif that came up when looking at the time period I had picked.

I used grey Finnish wool. I had two balls bought at different times and they were slightly different colours and textures. I used the courser wool inside and the softer silkier wool on the outside.

For the vessel I just started with a big circle resist. then added some think wool for the cat shapes.

I used a different colour for the ears and then added some wisps of Fin to help secure it.

I have rubbed and rolled it and I am now in the middle of fulling it.

The second one is the same cat design but in a relief picture. I tried some Mauri wool I had. It feels like a medium wool. I came in small, sort of batts. I don’t know why it wasn’t either roving or a proper batt but I pulled it apart and layered bits until it seemed even. I decided to leave the edges rough so it looked more like a piece of broken pottery or mosaic.

I used some really thick rug yarn thrums that I was given years ago to make the cat. I then covered it in more mauri wool and made sure it was pressed down around the yarn. It is at the rolling stage.

That is as far as I got with both of them. You will have to wait until next time to see how they finish up.


Second Quarter Challenge

Second Quarter Challenge

I can’t believe it is  April first tomorrow and time for the second quarter Challenge. We are doing Art periods this year. I decided to  do Celtic art. Well then I started looking and of course it is not that simple. I decided to go with Early Celtic art, a  term used for a  period, stretching in Britain to about 150 AD. The other name for it is  the La Tène period (broadly 5th to 1st centuries BC) this is a period when there were not so many “Celtic” knots and more people and animals in the art along with many swirls. I think of Celtic as being Irish but it starts over in Switzerland and spread out from there. I think, if I am reading it correctly, it’s the romans that squashed it over towards Ireland where it survive because the romans didn’t make it there.

This is a good reference http://www.ancient-celts.com/ancientvsmedievalart6.html these pictures came form this site.

I haven’t had time to make anything yet myself but I do love swirls and spirals.

Wikipedia has a lot more information that I won’t rewrite here for you. https://en.wikipedia.org/wiki/Celtic_art There are links to more information if you want the history part. And her are more pictures to inspire you  art link . I hope you enjoy creating in this style. Please post your creations over on the forum. We like to see what everyone is doing, beginners and  experts alike.


%d bloggers like this: