I started thinking about Ann’s challenge right after it was announced in April but this is the first time I have been able to start working on the challenge actively. I wanted to try several different ideas I had for nuno that I hadn’t tried before. One was to try a cut prefelt shape sandwiched between two pieces of silk, the second was to try using rows of cheesecloth attached by felting and the third was to use locks as embellishment on nuno felt.
 I started with the largest piece that will be used on a project for an exhibition planned in October. This is the back side of the silk where I used preyarn to give a branching effect.
 I then flipped the silk over and applied merino wool mixed with a variety of other fibers including silk noil, cashmere, angora, tencel, flax and banana fiber that I had carded into batts over the last month.
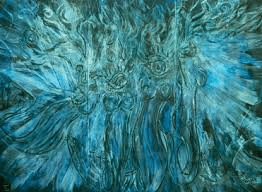
 Next came the locks which I added randomly over the surface. These were hand dyed Wensleydale locks and they are pretty coarse so I was wondering how they would migrate through the silk. I used 5mm silk gauze that I had previously hand dyed.

Here are the end results. I got lots of texture which I really wanted.
 This is the back side. You can see where the locks migrated through in the spots that look more yellow. No problems migrating through the silk.
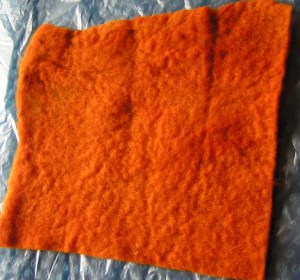
 My next attempt was with the prefelt. Here is the shape that I cut out and I used some silk I already had. I did think to myself, this is 8 mm habotai silk and I don’t know what kind of wool is in the prefelt as I made it several years ago. Will it work? You should always listen to yourself.
 I covered the prefelt with another piece of silk and then felted the piece by rolling. The fibers were migrating but not very quickly and not evenly. I kept working at it but it was slow. Next time I do this it will be with 5mm silk gauze and merino prefelt.
 Here is the result. I got a lot of ruching which is expected with 8mm habotai and all of the prefelt design is not attached. It would have worked better if I had listened to that little voice that warned it might not work.
 Next up was the experiment with cheesecloth and prefelt.
 The prefelt was another left over piece with unknown wool content. Here’s the cheesecloth. It’s 90# so pretty close weave for cheesecloth.

I ripped it into strips.
 Laid it on the prefelt and then added a little bit of wool on the base of the cheesecloth that I wanted to felt in.
 I then wet that section down and covered it with plastic.
 Then I added another layer of cheesecloth and a bit more wool. Wet that layer down, covered with plastic and repeat.
 These are all the layers ready to start rolling.
 In the middle of felting, I did check the layers and did a bit of rubbing over the added wool.

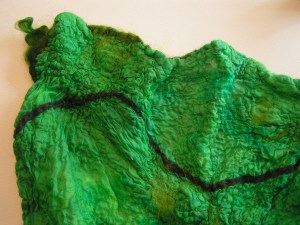
And here’s the result. Layered cheesecloth in rows that have been nuno felted in to the felt. They are very sturdy and you can’t pull them off.
 Here’s a side view where you can see the felt on the bottom. This would certainly have been simpler if I had just sewn the layers of cheesecloth down with the sewing machine. I’m not sure what the benefit of felting them would really be. But I guess on a three-dimensional piece that could not be sewn. it might be useful.
I enjoyed these experiments and have to think up some more ideas. I do have another idea floating around using Zed’s idea of nuno and resists that she showed earlier. Hopefully, I’ll have some time to try that idea out as well. Have you done anything for the nuno challenge? We’d love to see so please post it to Flickr or the forum.