Browsed by
Tag: natural fibres

Threads and Yarns

Threads and Yarns

Around this time last year I was still doing the Take A Stitch Tuesday challenge. I struggled with it, and didn’t always enjoy it, but I did like what I produced when I used some felt offcuts from a piece I’d made with natural wools for placemats and coasters. I used my own handspun thread to sew the stitches. This is one I made using chain stitch, and this is one using cretan stitch. I hadn’t used my threads in a while, but recently I’ve been inspired by my flickr-friend, Marchi Wierson, a sculptural fibre artist who uses a variety of techniques in her work, such as wet felting and crochet, and loves working with natural wools and fibres. Her recent vessel commission and some gorgeous natural fibre yarns had me rummaging through my wools and fibres and getting my spindles out to spin more thread and yarn. I decided to use three shades of Shetland Wool.

shetland
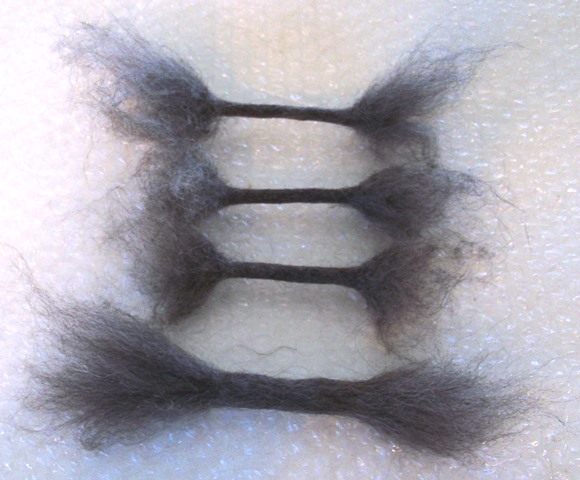
I pulled off some of the tops from each shade.

tops

Then I looked through my embellishment fibres for some I thought would make a nice match. I chose Soybean top, viscose top and flax.

fibresI added some of each fibre to the Shetland tops.

fibreThen I blended them by hand.

blend
I got a couple of my spindles out, this is one I made and painted a few years ago.

spindle
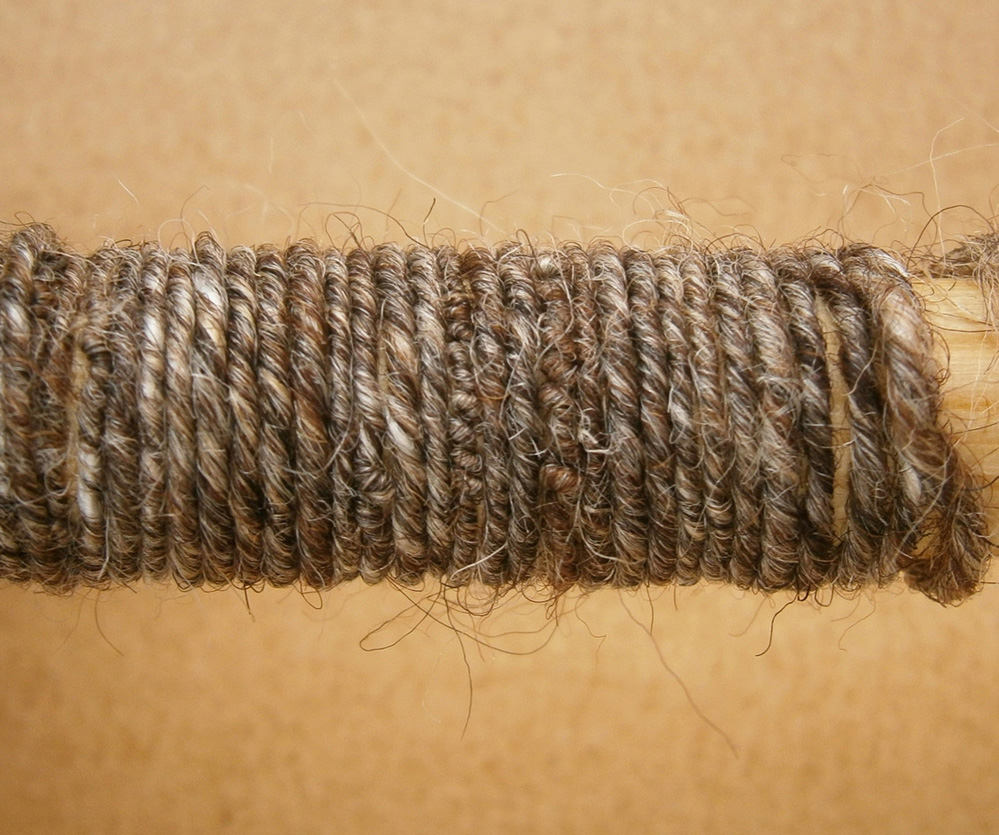
I made a small amount of thread, though even a small amount of wool and fibres goes a long way when spinning thread. This is it wound around the spindle.

threadThen I blended up some more Shetland and fibres and spun a thicker yarn. I will probably use the yarn in a wet felting project, though I have used them for needlefelting before.

OLYMPUS DIGITAL CAMERADo have a look at Marchi’s photostream if you have time, her work is amazing and inspiring 🙂

You might have noticed a few changes to the site recently. We’ve been updating it and adding more photos to the galleries. We’ve also added a new page for Fabrics, and Ann’s ever popular Cat Cave ‘how to’ is now listed on the Wet Felting Tutorials page.

Remaking my Boots

Remaking my Boots

If you remember I am taking a felt boot class. http://feltingandfiberstudio.com/2013/02/12/felt-boots-progress/

The boots looked pretty good when done but I wasn’t happy. I kept putting of finishing them and so I sat down and had a good look at them to see what I didn’t like. Well, the way the resist is made just didn’t work. I ended up with the extra to account for your calf in the front not the back. So when you put them on you end up with a big fold in the back of the ankle.

gray felt boots wrong

Also because you make the tongue first and then wrap it around the front of the resist it gets felted in at an angle and that doesn’t change as you felt so when you pull the tongue up along the front of your leg you get a big fold that would be uncomfortable.  Her boots look fine and I haven’t seen any questions or complaints on the class blog so maybe if you don’t have big calves you don’t have this problem.

I decided to make another pair. I cut the resist at the ankle and turned it around. I also added a little more in the depth of the foot. I think I would rather trim it than only just have the fit.

boot new layout

I have finished the initial felting. Now they just need some more time and elbow grease to finish them. Theses ones are in a natural brown Finn wool.

Around the web

Around the web

felting around the web 4

http://www.megacrafty.com/2011/09/tip-easy-way-to-make-felted-balls.html

Inger’s Watermelon Slippers

stitching around the web

http://thatfuzzyfeelingsblog.blogspot.co.uk/2013/01/my-new-sewing-machine-progress-report.html

Chain Stitched Jupiter Embroidery

Mr. Finch’s Stitched Moths, Animals and Other Insects

Knotted Feather Stitch Elephant

spinning around the web

http://www.liveinternet.ru/users/2964668/post113681387/ mostly Russian distaffs

Felt Boots Progress

Felt Boots Progress

I have managed to  finish the first stage of my felt boots. They are now felted. You saw the tongues already. http://wp.me/p1WEqk-16m.

Next I had to make the loops so I will be able to lace up the boots.

loop barbells

First you make short ropes with fluffy ends

loops felted together

Then you have to felt them into another piece of felt. then I can cut them out to sew them onto the boots.

Then onto felting the boots.

resist on top

You do not wrap all the sides around the resist.

insert tongue

You have to insert the tongues.

boots cut apart

Here they are cut down the middle and you can see me working the back so there will be no ridge.

one boot shrunk

Here is one after fulling bedside the unshrunk boot.

finished stage one

and both boots done, on top of one half the resist.

leaves

I have started to make the embellishments.

Have you tried anything new lately?

Two Tongues Made

Two Tongues Made

This week I feel like the worlds slowest felter. I managed to get the two tongues for my boots made and that it. They look huge when you start but when your done they are the right sized. The final shrinking does take some work but these are boots so they need to be sturdy.

tongue before and after

One of the reasons I haven’t had time is the lambs. This little guy is called Mr Boots. He is one of a set of quadruplets. He was the first born and got cold while his 3 sisters were born. He was 4 pounds when he was born and looked like a lamb shaped chicken wing, all skin and bone and no substance. He ended up in the house in a dog cage in my living room. It’s a good thing I am not house proud. He is filling out and has a really good set of lungs.

boots

These are his 3 sisters under the heat lamp staying warm. They are doing well and no longer need the lamp.

Mr Boots sisters

We are heading in to some warmer weather this week so things should be a little easier all round. I hope that I have more to show you about boots in my next post.

My Project for the 4th Quarter Felting Challenge

My Project for the 4th Quarter Felting Challenge

I decided not to wait until the last min to do my challenge piece this time.  The forth quarter challenge is weather. http://feltingandfiberstudio.com/2012/10/25/weather-challenge/ This piece I did on a piece of black silk chiffon. It’ s meant to be framed. I was going to use this for my exchange gift but then thought It wouldn’t be fair so send something they then had to frame.


The picture on the right is of the snowscape and several other things rolled up. I am messy. You can see the water on the table from me wetting down and it pouring off the corner. It’s OK though I have cement floors and a center drain.

Needling on some of the snowflakes that did not stick during rolling. I think I made the little balls to tight.


The finished picture from the front and back. I like both

I have a second entry on the same theme I will show you in a few days.

Felt Bubbles

Felt Bubbles

A while back I went to a felting friends for a few days fun.  She showed me how to make bubbles and cut them  open to great effect. Here are the pictures of what I did.

First of course I laid out some wool to felt. But these are samples so plain felt won’t do . I added silk threads and a silk square and some silk roving and other wools to see how it would all go. This is the underside.

This is what the top side looks like

Then of course there was the usual rolling and fulling.

rolling rolling rolling

Here they are all finished and ready for the marbles.

The next step is to put marbles in while it is still damp. You pull the felt tightly around the marble and secure it with an elastic and now it is a bubble. We used the elastics they use to put braids in horses tails and manes because they are small, stretchy,  strong and cheap.  You put in as many as you like and what ever sizes you like. You can also use felt balls. the felt balls are good if you want to leave them uncut. Marbles are to heavy for that.

Here they are all tied up.

Felt with marbles tied in to make bubbles

Here they are cut.  I cut the tops off , I cut x’s and star patterns and some I tuned inside out. if you cut more off you see more of the inside and you can stretch them flatter too.

Bubbles cut open

You can see how the underside becomes the inside of the bubbles. These samples started out about 6×8 inches and the finished pieces are about 1.5 by 2.5 inches. They take up a lot of room. I only have 2 of them left my friends dog ate one. I think I will glue them to some leather and make broaches out of them. They are lots of fun to do. I made some wrist cuffs with this method and I will blog about them next week.

Dyeing Some Waste

Dyeing Some Waste

Dyeing some waste.  Throwsters waste that is and I suppose it must have been trash at some point or they wouldn’t call it that. Throwing is was they call reeling silk for thread and this is the left over little bits.  I have a batch of white and needed some colours for a project.  The pictures of wet silk an bags did not turn out but I have some nice pictures of the end.

I dyed small amounts in plastic sandwich bags. First I placed each blob of waste  in a bag and added some soapy water to get it wet. I let it sit to soak while I got the dye ready. I used MX dye as it would be the fastest and easiest. I poured of the extra water out then poured in the dye,  just enough to get it all wet. I squished it around in the bag to make sure it all got dye.  No worries about felting the silk, a nice change from dyeing wool.  I did the same for all the colours and let them sit for 10 min. I added a solution of PH up and water. Buying the pool chemical is the cheapest way to buy Sodium Carbonate, especially at the end of the season.

I made a solution and poured in enough to cover the silk. I let it sit for about half an hour then drained and rinsed the silk. Here is what it looks like drying on my front porch.

Throwsters Waste Drying

Not so great looking. I had squeezed all the extra water out of them. However after they were dry I fluffed them up and they look like this.

Fluffed up
Second Half All Fluffed Up

As you can see fluffed up they barely fit on the same drying rack in 2 batches. My project didn’t work out, the waste I used  on the surface sank into the courser wool I was using and disappeared so I have nothing to show you right now. I am planing to use some more on hats so I will do a post with them later.


Dyeing Silk with MX Dye

Dyeing Silk with MX Dye

I dye my own silk and one of the ways I do that is with MX dye. MX Dye is a fiber reactive dye and works on cellulose or plant fibers like cotton , linen and hemp. It also works on silk. As far as I know silk is the only fiber that you can use both weak acid dyes that are for protein fibers and the MX dyes on.

Scarves blowing in the wind.

I like to use the low water dye method. With this method you use a jar and just a little water. What I do is scrunch or twist or pleat up my silk to be dyed. In this case they are all about 2 feet wide and 8 feet long. Then you pack it into the bottom of a jar that is big enough to hold the silk and the dye (1/2 a cup) and the fixative (1/4-1/2 cup).  It is important that it be a snug fit for this method to work.

I mix up 2 colours of MX dye in 1/4 cup of room temperature water. Pour them over the silk in the jar one at a time making sure they silk is covers with liquid. If it floats as you can see a couple of my jars did you need to carefully weight them down with something non metal. Metal will effect the dye. Once the dye is in the jar you don’t want to disturb them. You don’t want the dyes to mix completely and give you a solid colour.

dye in jars

I am very impatient. So I usually go do something else for 20 min to an hour then I come back and add the fixative. With MX dye you have to raise the PH to get the dye to stick. The cheapest thing for this is PH up from the pool store.  You can use washing soda( not bicarbonate of soda) or order it from your dye supplier but pool chemical is cheap especially at the end of the season. I add a tablespoon for each cup of water including the mix water. Stir to dissolve and then pour it into the jar.  You should leave it for an hour to react but I am impatient as I said and usually dump everything out after about 20 min. Rinse the silk in cold water then hot soapy water then one more cold. Here are some results.

I am sorry the pictures aren’t better but the wind wouldn’t cooperate.  They were dry in about 10 min. If you want really good detailed instructions I would read about it on Paula Burch’s site. http://www.pburch.net/dyeing/lowwaterimmersion.shtml

What I am working on.

What I am working on.

A while back I showed you some multi coloured batts I made from all my leftover bits.  I felted 2 of them with the intent of making some tablet and ereader covers. I haven’t made the covers yet but I have felted them. I only have a picture of one.

blue/green batt before felting
Blue green batt felted up.

I also made this nuno piece. I didn’t like the blue wool much and its been hanging around a while. It was wool dyed to exhaust a dye bath. so I put this nice piece of  to colour silk on top and nuno felted it. I think it will make a nice bag.

Before felting
After Felting
Close up of texture.

I will be going to a medieval fair later this summer. one thing they need is a way to hide their modern electronics but stay in costume. one traditional piece that they can ware is a belt pouch. I am working on making them. I sewed them with my machine but to make them look period correct I need to add stitching to cover that up the machine stitches and I want them to be strong and not stretch out of shape if people over fill them.

Group of belt pouches.
This is the back where you can see the slits for your belt and the stitching to hide the modern sewing machine stitches.