Browsed by
Tag: hand stitching

Bags of Inspiration

Bags of Inspiration

Having just read Kiki’s tutorial  https://feltingandfiberstudio.com/2023/11/19/left-overs-yessss/ on using up prefelt scraps, it occurs to me that I may not have mentioned something we used to do at our Guild (Dorset Guild of Weavers Spinners & Dyers) mainly to raise funds for the Guild but also for fun.

When I attended the Stitch and Creative Crafts Show at the Bath and West Showground in Shepton Mallet (Somerset, UK) back in 2010  – I saw a stand selling (for £8.00 each) bags containing 35gr of silk fibres, yarns, fabrics scraps, carrier rods and cocoons in various colours, left over from old projects which, when put together, made a fascinating collection for future projects.  So fascinating that I bought three of them.

They must have made quite a bit of profit on them because they appeared mainly to be the “waste” from artwork.

At that time (when I was part of the sub-committee organising the Guild’s Exhibition and Sale of Work) we were looking for a Guild Project which could be part of the exhibition or something hopefully to help raise some funds.  Well, I thought, our weavers must have lots of off-cuts of hand woven fabric, not to mention warp ends.  Then there were the spinners who would have odd bits of spun and unspun fibres of all types and colours.  We also had members who were dressmakers, beaders and embroiderers, and a soft furnisher, who were bound to have the odd bits and pieces that they didn’t really need.  So, with the blessing of the committee,  I put it to the members in the next newsletter that if they would donate to the Guild any odd bits of fibres, yarns, threads, warp ends, bits of fabric, beads, button, feathers, felt, cords, braids, tassels, sequins, sequin waste, ribbons, silk flowers and any other bits and pieces they could think of, we could make up some “Bags of Inspiration” and sell them to members of the public at our open days and outside demonstrations.  (I don’t know about in the rest of the world, but in the UK the word “bags” means “lots of” as well as “containers”, so the punning name “Bags of Inspiration” seemed apt.)

We used A4 sized polythene bags (which I was able to buy quite cheaply from our local green grocer) with an A4 sheet of card inside for stiffening, and I made up some stickers with the Guild’s logo on and a brief description of the contents, and posters also giving details of the contents.

Image of a poster detailing contents of a Bag of Inspiration
Bag of Inspiration Poster

We arranged a few bag making days at a pub in the village where our then President lived.  She had persuaded them to let us use their skittle alley at no charge, and we had a great deal of fun making up the bags and tucking in to “refreshments” from the bar and kitchen.

The members who came to these, brought with them all sorts of goodies which we spread out on tables, so that we could make collections of pieces which seemed to go with each other.  Those who didn’t think that their colour theory was good enough, could pick out a picture from a selection of magazines and have a go at matching colours from this  It was amazing how compulsive making the bags became.  You could pick up a piece of fabric that looked so dull and dreary and be amazed how it perked up and positively shone with life when paired with different fabrics, yarns, trimmings etc.  You just couldn’t stop picking up likely bits.  The difficulty was keeping the weight of each bag between 80gr and 100gr, so we quite often ended up making up at least 2 bags with similar contents.

image of tools and accessories for making up Bags
Equipment & Extra “Bits” for making up Bags
Prospective contents of a Bag of Inspiration - fabrics, yarns, fibres etc.
Prospective contents of at least one Bag of Inspiration

We put a price of £3.50 on each bag and they went like hot cakes – we sold out on their first appearance at our exhibition and sale of work.  Embroiderers and mixed media artists in particular liked them.

After a couple of years, we didn’t get so many volunteers to make up bags but we still had mountains of “stuff”.  So we added another string for our open days – Pick and Mix Your Own.  I had remembered that Woolworths (now there’s a blast from the past) used to have a counter full of different sweets and you could take a bowl and pick and mix what you wanted, and in the process buying a lot more than you would have if just buying a ready filled bag.

Boxes of different sweets to be picked and mixed
Pick and Mix Sweets.

It worked with our stuff too.  We gave the visitors the polythene bags and they could wade through all the bits and pieces picking what they needed, and we weighed them when they’d finished, charging £3.50 for 100gr.

We had had a lot of fibres donated so we started making up what are now called Art Batts and selling them as “Batts of Inspirations”, but because we were mainly selling these to Guild spinners and felt makers, they didn’t do quite so well as they were mainly able to make their own.

In all we made around £1000.00 for the Guild in the four years we were doing this.  Eventually though the members got fed up with spending time on making up the bags and the whole thing was shelved, as the Guild seemed to be relatively well off at the time.

Some time after that I took the idea back to myself and I was making up Batts to sell at Guild meetings, using luxury fibres as well as merino and synthetic fibres.  I made up some bands to fix around the Batts detailing the various fibres included in each.

This slideshow requires JavaScript.

I was also making up and selling Bags, mainly at a Needlework Festival in Dorset where most of the vendors were selling materials and equipment for crafters, as well as various craft fairs and so on.

This slideshow requires JavaScript.

I was getting the odd question like “they’re lovely but what do you do with them?” and  “can you make a bag out of what’s in here?”  So I made a sign from images of items that I’d made myself over the years and that helped.

Image of items made with contents of Bags of Inspiration
Some of the things I’ve made with the contents of BoI over the years

However, once Covid started causing problems, my selling opportunities dried up.  I had been intending to try selling Bags and Batts via my website, but it was very difficult and too time consuming to photograph the Bags so that the contents were visible, because of reflections on the polythene bags.  So that sort of died a death too and I’ve now shelved that project, and am using the bits and pieces I’ve collected over the years on theatrical costumes and props.

Perhaps some of our readers’ organisations, like Ann & Jan’s OVWSG, might use this idea to raise funds?

Finishing Nuno Landscapes

Finishing Nuno Landscapes

I am feverishly working away trying to finish up some landscapes and get them to the framer. I suddenly realized that it’s November and I needed more work to sell for the holiday season. I have always had good intentions of finishing pieces, getting them sewn to the backing fabric and laced to a board when I complete the piece. But somehow, those good intentions are paving the road to procrastination. Here I am again, finishing all the landscapes at once.

I went to the fabric store and found some fat quarters that worked with the various colors. I then hand stitch the nuno piece down to the fabric and lace it around a piece of matte board. Here is “Twilight” on it’s backing board ready to be framed.

This one I chose black fabric for the matting and laced it on to the matte board with a very minimal edge. I only want a tiny bit of black to show. This one is called “Serviceberry” at the moment unless I come up with a better name.

Believe it or not, I have finally decided that my slow stitch project is complete. I stitched it down to some brown fabric but I haven’t gotten this one laced on to the matte board yet. This one is called Autumn Impressions.

For those of you who wanted to see what the original fabric looked like, here it is.  Definitely a bit of a change!

The last one is the green nuno felt that I showed you recently. I finished stitching and decided it was complete. I have it on a dark green fabric background but haven’t stitched it down yet. Hopefully, I will get these finished up this week and get them to the framers by Friday. That’s the plan, anyways.

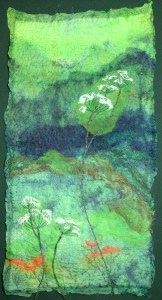
And here’s a close up of the bottom so you can see the stitching around the poppies. I still haven’t decided what to call this one yet. Several suggestions were made last time and I decided I had to research whether the plant I was thinking of was really Queen Anne’s Lace or whether it was Hemlock. It could be either. So then I kept thinking of titles such as Lethal Serenity, Poisonous or Peaceful?, Deadly Tranquility etc. So I will keep thinking on what it should be called as I finish stitching it down and lacing it.

OVWSG Fibre Poker Felting Challenge

OVWSG Fibre Poker Felting Challenge

You’ve seen the piece I was working on for this.

I still have not decided what I what to do. It was suggested that using some stabilizer on top might help keep the stitches on the surface and not have them sink in and look quilted. so I thought I would make a new background and give the stabilizer a try.

I picked some colours and carded up a little bat to use to felt a new background.

When it was finished I thought it looked like the water in Monet’s pond. I decided to add a waterlily. I looked up some google and traced the outline onto some was away stabilizer.

For thread, I decided to use some maybe real and maybe artificial silk. some of it says silk on it and some Artsyl rope. I got this thread in a barely started embroidery kit at a garage sale. I don’t know how old it is but the company that made it stopped manufacturing silk in 1911. It does seem to have continued to sell thread and ribbon but I don’t know if they also sold artificial silk. I haven’t burn tested it.  I don’t mind if it’s artificial, it’s pretty.


The thread is “2 ply” in appearance but each ply is made up of 5 individual threads. I used one ply for the outline and 3 of the smaller threads for leaf definition.

Onto the petals

As you can see my stabilizer started to fall apart. I am sure it’s because the underlying piece is so soft and squishy, it tears. I had the reference picture so it all worked out.  I pulled most of the tattered bits away. the last thing was the yellow center.


And after washing away the rest of the stabilizer. Not too bad if you don’t look too close. that should be just about the actual size of the piece.

I was happy with it even if it was a little plane. than after sowing it to some friends on Zoom, they suggested a dragonfly or some bead water drops. I didn’t feel like making a dragonfly so I decided on fish.

I added 3 koi fish around the lily. I think it worked well. I decided against the water drops because it’s an outline. Seeing it as a picture I can see I need to rub out the needle marks.


I enjoyed making this piece and the stabilizer did help keep the stitches on the surface so that was a good idea. I want to try the other kind of stabilizer. The stuff that looks more like plastic wrap. After chatting with a friend we think perhaps a layer of the plastic stuff and a layer of my stuff might work best. Now I just have to find some of the plastic stuff.

Autumn Nuno Slow Stitch Update

Autumn Nuno Slow Stitch Update

It’s amazing how my slow stitch project is moving along and almost complete. Twenty to thirty minutes of stitching per day definitely works for me and even though I have been working on this project for a long time, it has been a fulfilling project. I have enjoyed seeing the piece slowly fill in with thousands of stitches.

Here’s where I was the last time I showed you the piece in mid June.

I added a lot of foreground stitching. The bit on the top left shown here is still a little pale for me. It jumps forward in front of the foreground bush in my eye. So there will be a little more stitching there.


I added some running stitch in the distant trees with a “grey” thread. It leans very heavily to purple but really works well to give these tree trunks a bit more definition and to move them further into the distance.

Here is where I am now. It’s getting very close to finished. A few more areas of darkness perhaps. Lindsay asked me a while ago how I decide when it’s finished. What I do with a piece like this is to get to the point where I think it might be finished and then I hang it up on the wall in my studio so I can study it. I look at the piece from different distances and different angles. I give it some time to “rest” and then I add what I think is still needed based on the assessment I have done. Or I pronounce that it’s finished. What do you think?

Slow Stitch Update and a Celebration

Slow Stitch Update and a Celebration

The last time I showed you my Autumn Nuno slow stitch piece was back in April and it looked like this:

I have been continuing to stitch on this piece for 15-20 minutes per day. I have been concentrating on the bottom left corner and bottom foreground to fill in the vegetation/foliage in those areas.

Here’s a close up of that area which has the first pass of seed stitch and just needs some of the lighter areas filled in a bit more. I also think I need to evaluate the values once I’m happier with the foreground.

And here’s what the full piece currently looks like. You can click on any of the photos to enlarge them. So progress is being made, albeit slowly. I’m still enjoying the daily practice of hand stitching, adds a little zen to my day.

One year ago today, we adopted this little guy from Mission Valley Animal Shelter. His name is Edgar and he was a stray so we don’t know his breed or his age, but he has added so much joy to our lives. I thought you might want to help Edgar celebrate his adoption day and see how he is living his best life.

Update on Nuno Felted Landscapes

Update on Nuno Felted Landscapes

I started working on some nuno felted landscapes in April. It has been stop and start on getting them completed. But I thought I would give you an update on the results so far.

I showed you Flathead Lake at the end of April. I got a few comments on perhaps adding more stitching to the trees. It took a bit of contemplation about whether I should add more stitching. The main reasons I decided to go ahead and add some stitching is to bring the trees more into the foreground and to hide some of the horizontal stitching that I did on the lake area.

I used a #12 variegated cotton thread and free motion stitched the branches. I do like the highlights that it added and it definitely helped cover the horizontal lines of “lake stitching”. Now I need to find a “matte” fabric and get it ready for framing.


This is another background. I decided to hand stitch this one. I’m not sure why since it is the biggest one. It should take me quite a while especially since I have become disenchanted with it. I was working on it steadily but that has gone by the wayside.

Here it is after stitching the distant pine trees.

Then I stitched more foliage and aspen trees. I am using seed stitch and using a variety of colors. I was thinking it was similar to impressionist paintings with little dots of color. I think painting is significantly faster than stitching. So this is definitely a slow stitch piece.

Here’s a closer look at the stitches. I think I got discouraged because I still had so much to fill. I will be adding some different stitches into the foreground but I have to get the further distances completed before I can start on the foreground. What do you do when you get discouraged in the middle of a project? I have been working on other stuff, so it isn’t that I am not doing anything. But this one is not very appealing right now. Any suggestions?

Shades of Green – Nuno Felt with Applique

Shades of Green – Nuno Felt with Applique

In my Level 3 Stitch class, we are working on applique this session. After creating an applique using silk organza, I decided I wanted to see if I could combine a nuno felted background with silk organza applique. I thought the texture of the nuno would contrast well with the smoothness of the silk organza.

I created the nuno background with some deconstructed screen printed silk and a piece of white prefelt. I stitched the edges of silk that didn’t adhere down completely on to the back of the felt to give a neater edge (right hand photo). I also shaved and removed any large white pieces of wool on the surface of the silk. This piece immediately made me think of the woods, now on to the applique.

I used the background to help figure out the tree shapes and placement. Here is the silk organza trees laid over the background.

I basted the trees in place and stitched with tiny stitches trying to avoid fraying the silk organza as I went. The photo on the left shows the piece partially stitched with the basting lines still in place on the right side. The right photo is when the trees were completely stitched down. I used a stab stitch and machine weight thread.

Here’s a close up of the tiny stitches. (Click on any photo to see a larger version.)

Next, I started working on the path. I wanted to have a vague path but not something that overpowered the rest of the composition. So I used a variety of green threads with running stitch to create the path. But in the midst of stitching, I kept finding my eye drawn to the black dots over the bottom portion and then in a straight line up into the sky. What to do?

I considered adding stitching to diffuse the black dots but decided in the end to cover them with a paint pen and markers. I have no problem mixing my media, so I used a white paint pen and then covered the white with green marker. I definitely think that helped to take that line of dots away and emphasize the path more. I also added a bit more darkness with black marker so that there wouldn’t be such a straight line of “ground” at the base of the trees.

Next was the decision, leaves or no leaves? I tried a bunch of different types of fabric and ended up using black and green tulle cut into pieces with a layer of green sheer pieces over that. In this photo, the leaves haven’t been stitched down.

Here is the completed piece. It is hard to see the subtleties in a photo but I am pleased with the result. It reminds me of walking in the woods at dusk as the shadows deepen and perhaps you can hear the owls saying good evening.


Nuno Felting Landscapes

Nuno Felting Landscapes

I have started creating some nuno felted landscapes so that when the world returns to “normal”, I will have work that I can take to different galleries to sell. These are created with hand dyed silk (5 mm) and white merino prefelt. Some of the silk I used this time was dyed by my friend Paula Rindal. She gave me her silk when she decided to stop felting. Thanks Paula!

This is one of the pieces of silk from Paula. I see an autumn landscape developing from this piece. I don’t always have a plan in mind until after these are felted. Then I look at the piece from all angles and decide what I “see” in the piece. Then I progress from there. This one I am planning on hand stitching.

This piece was one of my hand dyed pieces of silk. I haven’t quite decided on this one yet but it might be mountains in the distance with Montana wildflowers in the foreground. I might use a combination of machine and hand stitching.

Again, another one of my hand dyed pieces of silk. I think this might be a lake with mountains in the distance, perhaps machine stitched?

This last one I based on a photo I took of the Whitefish river. I laid the pieces out based on the photo and then it will be all machine stitched. You can see I have started by adding background trees. I forgot to take a photo of this one before I started stitching.

So what do you see in these? It’s always interesting to me that people see different things in an abstract background. What would you create out of the top three backgrounds? I will be showing you the progression of each of these as I work through them but I’d love to hear your thoughts.

Ponderosa Pine Bark Applique

Ponderosa Pine Bark Applique

If you have been following my posts for any length of time, you will know that I am a lover of trees, leaves, bark and anything forest related. For my Level 3 Stitch course, I have been working on a variety of types of applique. So I wanted to try a combination of felt and applique to create a bark piece.

Specifically, Ponderosa pine bark. We have many of these trees on and around our property and I love taking photos of the bark as well as collecting the pieces of bark that this type of tree sheds on a regular basis. The pieces always remind me of puzzle shapes. Lyndsay wrote recently about creating bark and I was inspired by her piece. But I wanted to include applique in my bark. So it was time to try a sample or two.

I laid out black wool as the base. Then I added a cut up strips of felt that were in my box of samples from some of my online classes. I decided to use a variety of thicknesses and colors of felt to see the differences when felted. I then added a brown/tan felt over the top. I just used what I had on hand. I did make a smaller sample later to use for sampling stitch ideas.

Here’s the piece after felting. The variety of thicknesses in the underlying felt pieces actually helped make the piece seem more natural. The variety of colors also worked well.

This photo shows you what the real bark pieces look like. I laid them out on the wool for inspiration. I have a big bag of these bark pieces. It was tempting to either glue or stitch them in place. That would still be applique, right? 😉

One of my original thoughts was to use complementary fabrics or sheers in orange and blue to create a more colorful effect. I tried a variety of these ideas but I wasn’t satisfied with the results. This idea would have worked better if I had included orange and blue in the felt base. So other samples may be forthcoming.

This is my small stitch sample. I used every square inch of it to try out different ideas. You can see that I tried machine stitching down the orange/blue samples but I didn’t like the “pillow” looking result. I tried some raised chain band to hold down the fabric but that didn’t actually hold the sheer fabric well. The fabric kept fraying under the stitches and pulling loose. I then tried some brown and neutral colored silk fabrics using different hand stitches. The assignment was to be a combination of machine and hand stitching. The machine stitching was done between the thicker felt strips in a dark brown. I decided that the final hand stitching would be small straight stitches and a few French knots.

I forgot to take a photo after I completed the machine stitching. This photo shows how it looked after fusing down the pieces of silk. I used a powdered fusible just to get the silk to hold in place. Then on to the hand stitching. I ended up using wool lace weight thread. Unfortunately, I didn’t have any that was dark enough for the darker value needed. So I used a heavier wool yarn for the darkest value.

Here’s the finished piece. Next time, I think I will try nuno felting the silk in place. I’m not sure it will look as “peeling” as the laid on silk does though.  But that’s what further experiments are for, right?


25 Million Stitches

25 Million Stitches

A couple of people have introduced me to the project 25 Million Stitches. After taking a look at the site and seeing the work being created and the vision behind it, I thought all of our readers might also be interested in the project. The site has a lot of information so make sure to look through all the pages. Take a look at the 25 Million Stitches website.

Here is what the project is about in the words of 25 Million Stitches administrators:

The world is in flight. 25 million people* across the globe have been forced to flee their homelands as a consequence of genocide, war, poverty, natural disasters, targeted violence, and other grave threats. They leave behind everything they’ve known and possessed in order to live; they face immense struggles, misfortunes, and perils on their journey; and, through it all, survival, much less successful resettlement, remains but the slimmest hope.

Please join this project to hand-stitch 25 million stitches: one stitch for each refugee. How does making 25 million stitches help refugees? We believe that this project is a way for us to engage with this global crisis instead of ignoring it. And even though no single stitch can fully represent an individual, the act of stitching and the resulting work will help bring attention to the scale of the crisis. Two objectives of the project are:

  1. To engage as many people as possible to raise awareness of the global refugee crisis and

  2. To amass 25 million stitches to visually represent the sheer volume of this astronomical figure of refugees.

This is a community art installation. We are asking volunteers to hand stitch on fabric panels. We now have over 1,400 participants from 44 states and many countries overseas. However, another 1,000 panels will be needed to be stitched to add up to 25 million stitches. This huge community art project will come together into a single striking fiber arts display. When the panels are returned to us, we will assemble them in a grand installation of everyone’s personal expression of solidarity and support for the refugees. Once woven together with other lovingly contributed panels, each contribution will be a part of a tapestry of profound community support ⁠— but we can’t do it without your participation!

Take a look at the panels that have been created so far here.

Here is a rendition of what the inaugural show might look like. The rendition is by Joe Weber. The first show is planned for June 2020

at the Verge Center for the Arts, 625 S Street, Sacramento, CA
June 5–August 15, 2020
Opening Reception: Friday, June 5, 5–7 pm

I also wanted to share with you the 25 Million Stitches pieces by people that I know. Josie Dakers-Brathwaite, one of our forum members, recently shared on Instagram that she got together with a group of stitchers to work on their pieces.

Here are Josie and some of the group. They look like they were having great fun. This photo was contributed by Lenny Van Eijk, thanks Lenny!

And here are some of the works in progress. The photo on the right was contributed by another of Josie’s friends, Sarah Fader, thanks Sarah! I hope that we’ll get to see the finished pieces as well!

This is a work in progress by Penny Peters. This is just a portion of the design, this is about a third to half of the full panel.

Sally Glutting, in my art group, also created a piece for the cause. The photo above is Sally’s stitched piece that she is contributing to 25 Million Stitches.

I’m not sure that I currently have time to create a piece for this but they are looking for more participants. If you’re interested, check out the information on their website. If you have created a piece for 25 Million Stitches, we would love to see it. Share it with us on the forum.