Craft Basket Makeovers – part 1
A good few years ago now, after I had acquired and learned how to use my spinning wheel, I was casting around for some means of storing the associated equipment in a reasonably respectable way. The wheel and associated bits lived with us in our living room and needed to be tidy.
Quite by chance I came across a shop selling off cheaply a large deep cane laundry (I think) basket. It was only going cheap because one of the handles was broken and it had no lid. The much reduced price compensated for something which was no problem as far as I was concerned.
I used to work in Maidstone (Kent) and nearby there was a lovely shop called C&H Fabrics (sadly no more) which sold both dressmaking and curtain fabrics and haberdashery. I could never bypass their remnant section – they almost always had something good and large enough to be really useful. I managed to purchase several large pieces of curtain fabric of a design which was really “with it” at the time (most rarely for me, I am usually following several years behind fashion fads). This was during the time when Macramé made it’s first appearance and I was very “into” this. So I removed the remaining cane handle and instead added two twisted cord macramé handles.

Then I set to and lined the whole of the basket using the curtain material, making sure that there were pockets around the sides of sufficient size to take threading hook, spare bobbins; flyer; carders; ball winder and my Neatsfoot oil – my wheel had a leather connection between the treadle and the footman – the bits that actually drive the wheel, and the neatsfoot oil is a good natural conditioner for leather and ok for oiling the metal parts. The rest of the associated bits – fleece, box of carded rolags, tea towel used as a lap cover, cord for tying skeins and niddy noddy would just sit in the middle.
Now I needed a lid for the basket to keep the dust out (our bungalow was very dusty because part of it was still a building site). So I cut two circles of the fabric and a circle of wadding. I attached the wadding to the wrong side of one of the circles, by machine quilting around the pattern/motifs printed on the fabric. On the other circle, which would be the underside of the lid, I added a zipped pocket. I then finished the lid by stitching the circles right sides together with another length of macraméd cord attached to one side. Then, after turning the circles the right side out, and hand stitching the turning gap, I attached the other end of the cord to the basket. The lid sat on top of the basket with everything safely inside; well except for the niddy noddy which was too tall and had to stick out of the side, so it made do with a length of cord to attach it to the basket. My brother in law had made the niddy noddy for me, having already made one for my sister. It is purposely on the large side because each circle of a skein wound on it would be 1 yard long. This made it easy to calculate the skein’s length.


The fitted out basket sat comfortably by my chair and spinning wheel while I was working at home, but was a bit big to take with me when I went to my spinning group each week. Luckily my sister, having visited the Willows and Wetland Centre on the Somerset Levels, gave me a large basket which she had bought there. The Levels is a large flat low lying area where Withy Willows have been commercially grown for basket making for at least the last 200 years. In fact willow baskets and other items have been made there since pre-Roman times. If you are interested there is more information on the area here: Somerset Levels (As an aside, Glastonbury Abbey, also referred to in the link, used to own much of Sturminster Newton where I now live, despite Shaftesbury Abbey being much nearer to us and owning most of the rest of the surrounding land.)
But I digress. The basket which my sister gave me was intended as a picnic basket. It was short and wide and it’s carrying handles positioned so that it was carried flat.

It was just what I needed to carry tops (roving?) and spinning equipment when I was away from home. Of course it needed to be fitted out with pockets to keep everything tidy and safe. I had sufficient fabric left of the remnants used for the large basket to make them match. I lined the base of the basket adding pockets at one end for flyer and bobbin, lap cover and oil. I didn’t want to spoil the look by using the plastic box for my rolags and by then I had learned basket making courtesy of the WI. So I made a basket to fit, lined it and made a lid with more of the fabric. The lid of this little basket was quilted in the same way as the lid of the large basket, and also attached with macramé cords made from fine crochet cotton, with a wooden toggle closure.

By this time I was also “into” Tunisian Crochet. I had been making ordinary crochet items for as long as I could remember but fell for this new (to me) technique. So in addition to storage for threading hook, personal bits, glasses etc., I needed storage for at least one Tunisian crochet hook – this looks like a knitting needle, but instead of a point it has a hook. I also needed somewhere safe to put large sheets of paper patterns, as I tend to use diagram type patterns and they take up a lot of room. So I set-to to line the lid of the basket with just one layer of the fabric, but with pockets, short & fat and long & thin attached. I sewed this onto the inside of the lid but left one of the shorter ends unattached so that I could tuck paperwork etc., inside.

Incidentally, the sharp eyed amongst you may have noticed that odd bit of hooked wire tucked away in the longer tube/pocket and be wondering what it is. It’s a do-it-yourself lazy kate – a device for assisting with plying yarns from one, two or more separate bobbins. An old shoe box (or a basket) and this bit of wire are all you need, poke the wire through one end of the box, slot the bobbin(s) on and poke the wire through the other end of the box. It’s not the best way to do it, but if you put some tension on the yarn by passing it from the bobbin around the wire once before taking it to the wheel for plying, it works.
Oh and a quick boast – can you see the handle of the threading hook poking out of one of the lid pockets? The handle was actually a light pull which I had made while having a go at wood turning some years earlier, and the hook is only an unbent paperclip – but it works ok too.
So that was my basket set up and ready for journeys. Oh yes, the niddy noddy. That was too big again, so it had to sit on top.

Eventually the cane hinges of the lid, and the cane closure wore out so they were replaced with macramé cords.
Some time before I moved from Kent to Dorset in 1999, I wrote an article about these baskets and submitted it, with photographs, to the Journal for Weavers Spinners & Dyers as I thought it might be of interest to them. Apparently not though; I eventually received a letter returning the photos (but not the article, so I’ve had to rewrite it!) and saying “… the Editorial Committee … felt that the article was rather too indirectly concerned with weaving, spinning and dyeing ….” Oh well!

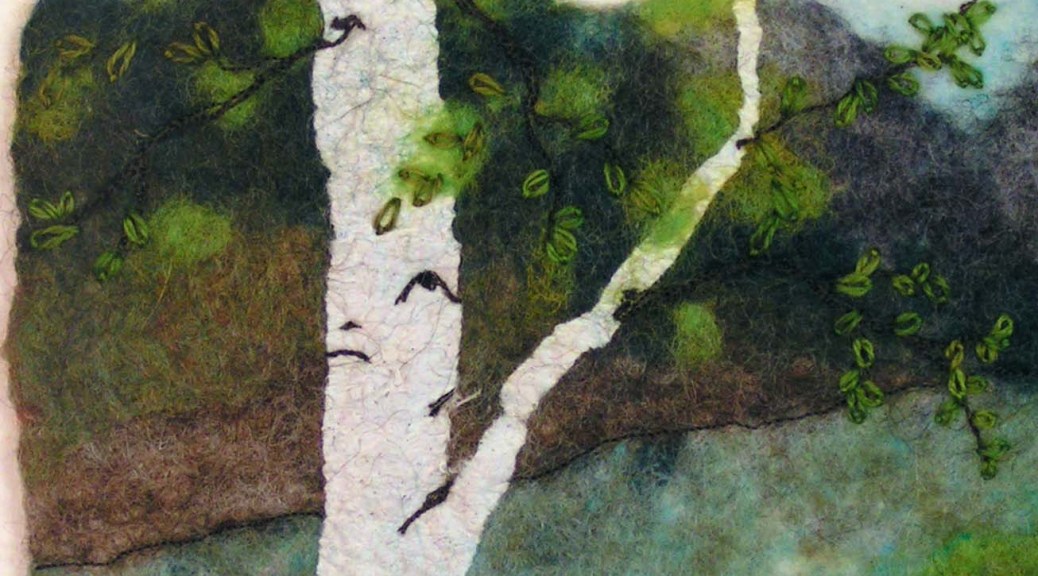
 comparing size.
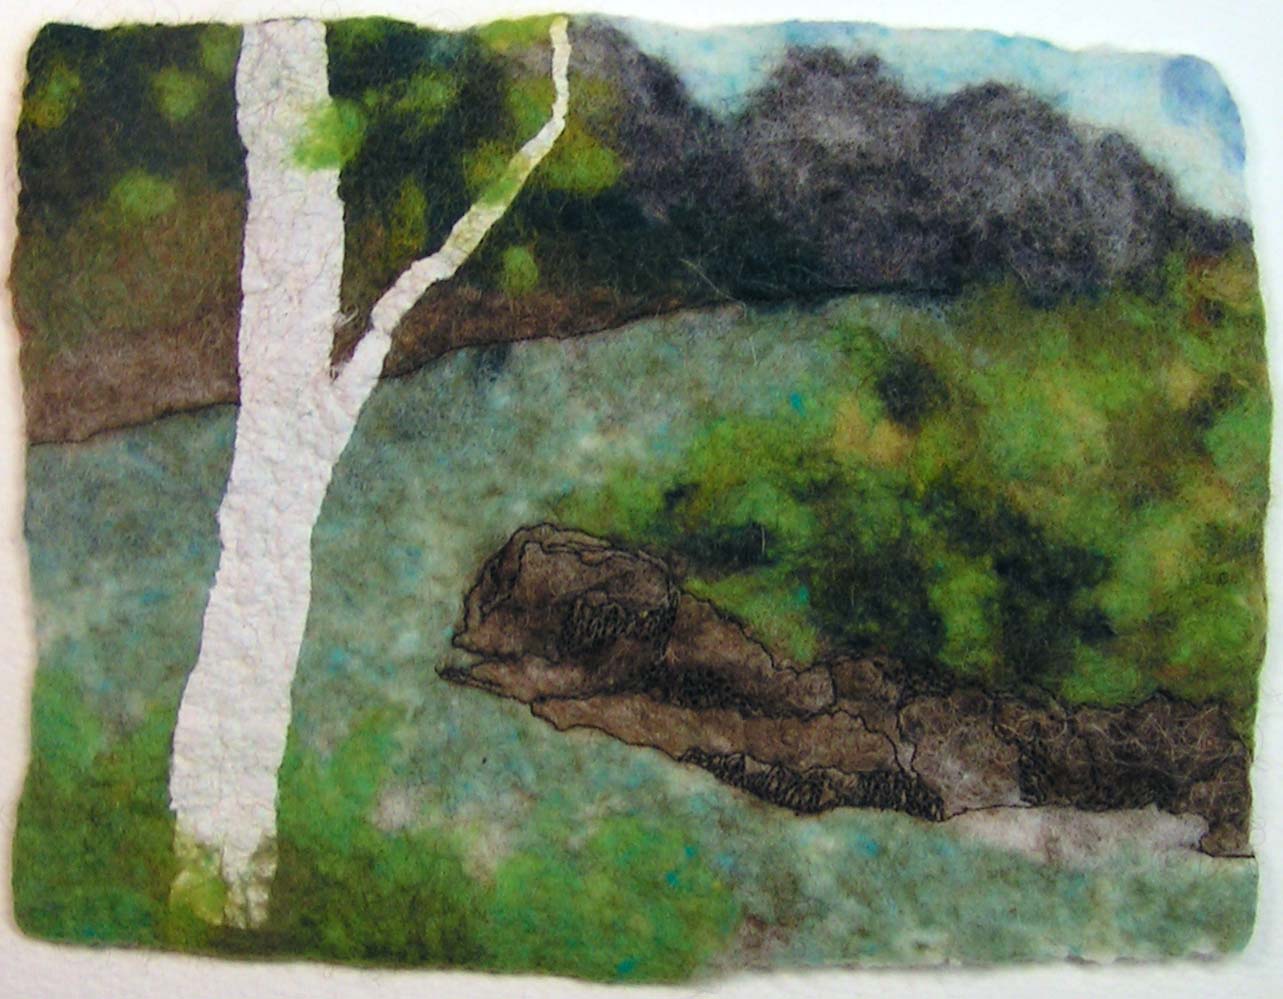
 2) Manta and blue whale
 3) The 5 Kiss clasp clutch or purse hardware I already have.
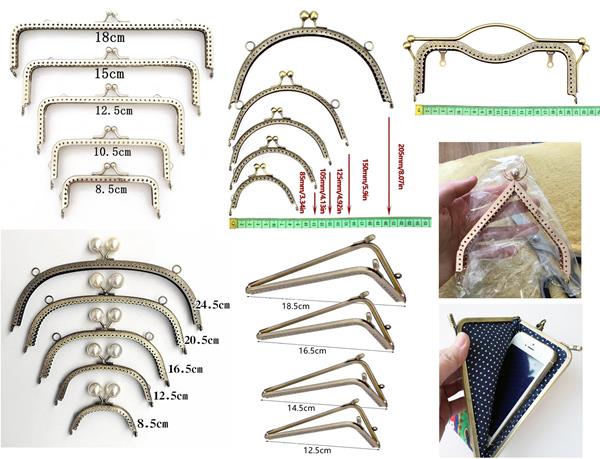 4) Some of the shapes and sizes of kiss clasps
 5-6) fake Leather Dinosaur bags; Stegosaurus, Triceratops, T-rex
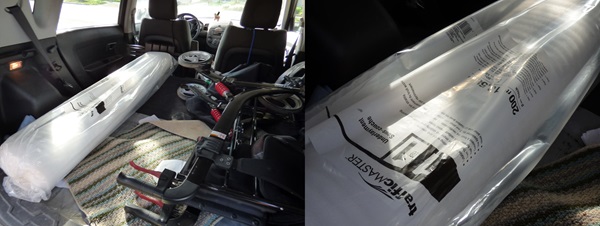 7) Flooring Underlayment comes in a large role, 2mm thick and 200sq feet.
 8) shots from my front garden


 1) Just inside the village of Upper Canada, that is the sawmill over to the left.
 2) The map of UCV showing the main spots we wanted to make sure to see.
 3) Large mounds of fleece (possibly raw behind the rope and washed closer to us), on what might be skirting tables
 4) Washing tubs were located on the other side of the room from the tables with fleece.
 5) dye kettles sitting upside down along the foundation of the woollen mill
 6) Water powered industrial loom with a fly shuttle
 7) This is the fulling machine. Notice the rows of teasels to raze the fabric’s nap.
 8) The teasel row close up
 9) This blanket has been rubbed by the teasels, which brings up the nap or fuzziness.
 10) At the farthest end of the building was a display of dried teasels and oilcans. To the right, hidden behind the timbers, is the intake of water to power the mill.
 11) The intake for the water that runs the mill. I didn’t see anyone to ask how they kept the water from getting past the wood and flooding the lower level of the mill.
 12) All the machines are belt driven in the mill.
 13) Our second stop, the blacksmith shop
 14) Working over the anvil, the blacksmith is making the end of what seems to be a pin with a handle. This end will have a faceted face to add a bit more decoration as well as be functional.
 15) It was a well-equipped blacksmith shop, having 2 anvils (similar in weight to Glenn’s) 2 swage blocks, and there is a foot vice attached to the work table just left of the picture.
 16) When he had the pin end made he sketched out the handle that would be attached to the pin.
 17) He used the pin to check the size of the handle to be added to the pull pin. He has already flattened one end of the bar and punched a hole through it (to attach it to the pin.)
 18) McDiarmid house built in 1864, 2 story log hewn house.
 19-20) Shirley talking to visitors
 21) Tape loom, drop spindle and nitty noddy in front are some of the natural die samples.
 22) this is one of the Views on the way to the house of the dressmaker. (Old farm building with log rail fence and man in 1860 attire in the foreground.) We saw a number of different log rail fence styles and I wish I had taken the opportunity to catalog all the variations.
 23) The dressmaker’s stone two-story house and side yard those trees may be apple trees.
 24) The dressmaker, with a display of some of her wares on the table before her. There are bonnets and a crinoline in the corner cabinet behind her.
 25) This is a device that sets Crimp in fabric. It is usually used in pairs, one is heating while the other is in use. It requires the fabric to be damp as it runs through to set the ridges.
 26) Handmade Dorset buttons are examples made over rings and one over a wooden base.
 27) Buttonhole scissors, Has a notch and screw between the grips, to set the length of hole required for the button. I might like buttons better if I had such high-tech scissors.
 28) At the livery barn, the working UCV horses live for the summer. This one is being harnessed to pull a barge.
 29) Another way to get to see the village is by wagon with seats pulled by horses. Two more of the villages Canadians are providing the horsepower.
 30) As you can see Canadians are not huge horses being built more on the small but strong theme.
 31) Here he is pulling the towrope while showing off, some Canada geese from the shoreline path.
 32) The barge with the rudder in the back is filled with tourists. The horsepower is on the shoreline with the tow rope. Across the river are some very not 1860s houses on the American side of the water. I bet they have a fabulous view of the Canadians’ side and all the historical happenings.
 33) Shark boy was studying the map but luckily does not have the appendages or height to operate the vehicle and leave without us. (There I finally have a felting-oriented picture!)