I have finally completed my winter birch landscape that I have been slowly working on. You can see the prior posts here if you missed them. I had about determined to skip adding any extra snow in the foreground but then I decided I should try a sample of needle felting the snow.
And, surprise, surprise, it worked better than I thought it would. So I added a bit of snow and then needed to figure out the distant red twig dogwood bushes. (You can see the snow in the final photo.)
First I tried using a marker on my sample to see if I could get away with something easy. The thinner marker made a very light line and the heavier marker was too heavy. Plus, using a marker on nuno felt gives a very uneven line. On to the next idea.
Next, I tried needling the wool thread into the sample background. It didn’t feel like there was much difference between the stitched bushes in the foreground compared to the needled line on the top left.
I decided I would try a cotton machine thread (30 weight). The stem stitched sample on the left shows two different colors. The redder color is straight off the spool but I wanted the thread to be a bit darker and variegated. So I colored the thread by hand with a black marker. The photo on the right shows the thread before it was darkened (left side) and the thread on the right side of the photo has been darkened with a black permanent marker. It worked perfectly although it’s a little messy on the fingers.
So here’s the finished landscape. I used the machine thread for the distant red twig dogwoods and you can see the small amounts of snow that I added. I’m happy with it but I will put it on the design wall to look at to make sure it’s finished. Then I will need to choose a “matte” fabric and get it ready for framing. I’m thinking of calling the piece “Winter Color”. Or I could stick with “Winter Birch”. Which do you prefer?
I’ve been practicing my spinning skills for a while now, and although I have mastered the technique of spinning finer yarn, I have a true passion for the more bulky, art yarns. I’m not a great knitter, I do occasionally enjoy crochet but I much prefer to weave. When I first took up spinning, like everyone I found that my yarn loosely resembled an ‘art yarn’ more than a fine yarn. It lacked a sense of purpose and it didn’t have that look of “yes, I intended to make this”! So my priority was to be able to spin an art yarn that looked like it was meant to be an art yarn! However, at the same time, having read so many comments about people who can only spin fine yarn or art yarn I didn’t want to reach a point where I was only able to spin one or the other. So I have tried really hard to chop and change my ideas, to try and avoid the pitfalls associated with spinning only one style of yarn. I’ve also tried really hard to make an art yarn that looks like it is meant to be an art yarn. I definitely think I am making some progress on this front. Let me know what you think…
I started with a selection of merino wool top in various colours, including an orange, cerise pink and teal as a base for my art yarn. I then decided to jazz it up with some beautiful turquoise bamboo, which I thought would add some sheen and lustre to the project. Like all good art yarns, I wanted to add in some interest so decided I would use curly locks of various different colours. Finally, to finish the interest side of things, I decided to include some recycled sari silk that was made up of different random colours.
To start off, I began to add the base merino to the carder. Unfortunately, I have broken one of the belts on my carding machine – it’s the one that operates the smaller of the two drums. But for this project, it didn’t really matter as I was not wanting a fully blended batt. So I was able to add all of my fibre direct to the larger drum. I did use my little packing brush to flatten it down as I went along.
You can see some of the recycled sari silk running through this photo.
In this photo, I’m adding sari silk again to the the mix. It was helpful that it seemed to work using it like a bangle, wrapped around my wrist enabling me to place it where I wanted it. If I hadn’t done it this way, it would have been hanging down and could easily have got caught up in the drum.
Once I’d finished carding a nice thickness of batt, it looked like this…
I was happy with the way in which it turned out as I wanted to keep the definition and not have a muddy blend at the end of it. But before I started making any more, I decided to spin it, just to check I was happy with the way in which the colours turned out.
These are some shots of the spun art yarn on the bobbin but only after I plyed it! Unfortunately, I got slightly carried away because I was enjoying myself so much, I forgot to take any photos! For the main art yarn, I spun this using a fine mohair yarn to core spin around. I made a mixture of thick slubs and thinner spun yarn, so that when I came to plying I could make some nice twirly spirals to add interest. When spinning the core yarn I also added in some random curly locks, which were all sorts of colours, that contrasted with the base colours I’d used in the batts. I also added some extra sari silk into the spin at random points through the yarn when I felt it needed a bit of Va Va Voom!
I was quite pleased with the spin…but as I said, unfortunately I didn’t take any photos of the yarn before I began plying. However, I did take a photo of one of the fat singles in teal. I also spun some in orange but no photo sorry.
A fat single in teal merino.
As you can see, there was quite a lot of twist in this as I was scared it would all fall apart when I was plying!
This was my first attempt at core spinning, so I was pleased to see it coming together as I intended. I started plying the art core spun yarn with the fat single, and it looked promising…
As you can see, I’m using an Ashford Jumbo Bobbin with my Ashford Traditional wheel.
I then transferred it to my niddy noddy. I didn’t want to soak the yarn in case I damaged the slubby spirals, so decided to set it using a hand held steamer. These are a few photos of the yarn on the niddy noddy.
I tried to take different angles to show the range of effects.
All in all, I made two batts of art fibre, which were about 100g each that I used for the core spin. I didn’t weigh the fat singles but by the end, I had four skeins of art yarn, weighing approximately 300g.
Looking at three of the skeins hanging up together, it looks quite ‘jewel’ like. So pretty, I’m pleased with the colours…
These skeins look almost ‘jewel like’
I wanted to use my yarn to make a woven scarf. However, I’m not confident enough in my home spun yarn yet to risk using it as a warp. This was especially true as I was hoping to use this project for the blog. I was mindful that the art yarn was going to be quite chunky. I only had a 7.5 30/10 dent reed for my rigid heddle loom, which would have been much too small for the art yarn. This was another reason I had to choose a different yarn for the warp. Having used mohair in the core spinning, I toyed with the idea of using it as a warp. However, I had read that mohair is very ‘sticky’ when used in weaving, so I did some research first before trying it. I did find some advice that said you can use it, if you utilise a pick-up stick behind the heddle to help clear the shed. The only way to know if it would work was to try it! So, having looked at my reed, I decided that given the thickness of the art yarn I would only use every third reed. That way, I envisaged that I would be able to space the warp out evenly when I when I separated each strand. Also, it would allow more space for the art yarn to show in all its glory.
This is the warp before I started weaving. As you can see, I decided to use three different colours of mohair, just to see what the effect would be…
This photo show how fluffy that mohair really is!
I started to weave with the art yarn, and to my surprise it was far easier to weave with than I had anticipated. The ‘stickyness’ of the mohair really didn’t present any issues for me. I think that because I had only warped every third reed, it didn’t have the impact it could have had, which was good.
I only took these two photos of the actual weaving process. One thing that I discovered when doing this project, was that I don’t actually have the weaving loom that I thought I did. When I first got this loom, as I always intended weaving with art yarn so I also purchased a freedom roller. I didn’t want to have the restriction in length of weave that I would face when using really chunky art yarns. Having never used the freedom roller before, I decided I would fit it onto the loom for this project as I really didn’t know how bulky the final weave was going to be.
However, when I got the freedom roller out and started looking at how it would fit on the loom, I soon realised that there was no way it was going to work! I struggled to understand why, so I took some photographs of the freedom roller and my loom, and sought some advice on a Facebook weaving group. It was only then, I discovered that my rigid heddle loom was in fact a samplet loom!!! I realised that what I thought I had ordered, was not in fact the loom I did order! School boy error on my part, as a complete novice!
In the end, all was good as it turned out, I didn’t need the freedom roller after all (she breathes a sigh of relief!). When the project was finished, I removed it from the loom, and considered what to do with the ends. The mohair was very thin and sparse, so would not make for a good fringe. Having twirled the mohair into little tassels, I then decided to tie some additional curly locks to pad out the effect.
Here, you can see one end completed…
When I tried on the scarf, I realised that I had made it a little too wide to make it into a comfortable scarf. So it was at this point, I decided that rather than using it as a scarf, it would work better as a stole. However, this now presented me with another need…
If I was going to use this as a stole, it would need to have some sort of decorative pin to hold it in place. I didn’t want to have anything too colourful or fussy, as that would be lost in amongst the art yarn. So I decided to make a wet felted butterfly, with wings that were primarily one colour, with some accents of a different shade.
Here is my blue butterfly…who does have an orange body, just to make the body stand out a little…. The wings and body are made from merino and the accents of paler blue, are made of the bamboo, which I fixed with wisps of the merino to felt them into place. I decided to leave the resist inside, just to provide a little more firmness to him.
I did try to add some sequins as way of creating more sparkle, but as they were so small, I found them difficult to sew on (my fingers are not so nimble as they used to be!). I tried gluing them in place, but that didn’t work either! So in the end, I just left him as he was. I do intend making him some antennae, but I haven’t had time to add those in yet. He is attached to a large kilt pin, so he can be used to hold the stole in place.
I’m really happy with my first project, using my own spun yarn, hand woven, and completed with wet felted butterfly pin. I’ve used three different skills in this project, and I’m really pleased with the end result. I was surprised at how dense the weave turned out. Having only used every third reed, I expected it to be much looser than it ended up. Perhaps next time, I will try an even wider warp, using the whole loom and leaving a larger gap between the warp threads. It’s all a learning curve, but for now, I am really pleased with the results. It’s lovely and warm too! I’m almost sad summer is on the way, but I’m sure I’ll get lots of use out of it next winter,
One of the things I’ve noticed from being at felting workshops is how predictable we tend to be when it comes to choosing our colour schemes. Whether we’re making a wearable, a bag, a vessel, etc whatever it is the majority of us will reflect that colour back in what we are wearing or the accessories we carry on that day. Before a class begins we can mostly tell at a glance who will be working with reds, who with greens, who with neutrals, etc, etc.
Personally I’ve always been drawn to neutrals, working with fibres in various shades of grey and beige with a small amount of accent colour, usually yellow or green. Unsurprising then that my wardrobe also tends to be filled with neutral colours. So what happened when the Waltham Windmill group launched their latest theme “Making Waves”? I could have followed the theme while sticking with my neutral pallet but for some reason I found myself wanting to work with blues, and not just as an accent but as the main colour. What I hadn’t realised until this last week is that blue hasn’t just found it’s way in to my studio but, without making the connection, it’s also started appearing in my wardrobe and I really hadn’t seen that coming!
The shades of blue Making Waves vessel
Within the groups theme we have free reign to make whatever we want plus we’ve agreed a number of specific items we will each make, one of them is a jelly fish. Having done a bit of research into the many and varied species of jelly fish I came across the spotted Blue Jellyfish which is native to UK waters. My first thought was to create a “wet look” using Merino fibre covered with lots of viscose which would create a sheen and then I would free motion stitch the spots. That was quickly replaced with the idea of making my fish from sheer fabrics…..I seem to have accumulated lots of sheers and only ever use tiny amounts so this would be a perfect opportunity to use up some of my stash. After rummaging through a huge sack of fabrics, almost losing hope of ever finding the colour I needed, I came across a small piece of blue and another of turquoise, just enough to do the job…..so much for stash busting!!
The remnants of fabric, and the size of my embroidery hoop, determined the size of my jelly fish. I’d got some of the wash away stabiliser left over from a project I did a few years ago so that would be useful for stiffening and shaping the jelly fish.
I had enough blue fabric to cut out two circles plus one slightly larger from the turquoise. I also added a small white circle of fabric underneath thinking it would highlight the spotty area. Next I cut up some scraps of felt for the spots and arranged them on the blue discs before covering with the turquoise sheer. This sandwich was then put in the hoop and I machine stitched around the spots…..or at least that was my intention! Unfortunately I struggled to see where some of the felt was so it’s a bit hit and miss but it was near enough!
After removing it from the hoop I washed out some of the stabiliser retaining a good bit of the glue on the fabric to enable me to shape it over a plastic bowl. I didn’t think to photograph the drying stage so the next image shows it dry with the unattached tentacles cut from tulle and sheers.
The final step was to wet felt a blue “inner”, with additional thin felt tentacles, sew the fabric tentacles inside it and insert into its casing.
The finished spotted blue jelly fish.
I’m quite pleased with the finished result and this particular area of the exhibition should be interesting as we’ve used lots of different styles and techniques between us.
Another piece I’ve made for the theme is a felted sculpture inspired by a spiked shell, I’ve simplified the shell shape, lengthened the spikes and it’s currently hanging on my wall but it doesn’t feel finished. I think it maybe needs more colour variation and possibly a few embroidered barnacles…..what do you think?
Spiked shell inspired sculpture
Speaking of which, I’ve always had a fascination for Barnacles and can’t resist collecting them when I find them on stones and shells. These marine crustaceans are related to the crab and lobster and tend to live in shallow and tidal waters, typically in erosive settings.
There are around 1,000 different species and, as adults, typical barnacles are covered with calcareous plates and are cemented, head down, to rocks, shells, pilings, ships’ hulls, driftwood, or seaweed, or to the bodies of larger sea creatures, from clams to whales.
They feed by reaching into the water column with eight pairs of thoracic limbs called cirri which are long and feathery. The cirri extend to filter food, such as plankton, from the water and move it towards the mouth as you can see in this video. (Follow the link and scroll down to Ecology)
Barnacles on rusty metal
I’ve always liked this photo of barnacles on a rusty piece of metal which was taken on a visit to Ullapool harbour so I’m experimenting with different fabrics, including cotton and Tyvek, to make a barnacle inspired wall hanging. So far I’m leaning towards the Tyvek fabric.
Cotton fabric barnaclesTyvek fabric barnacles
Something else I think will lend itself to the theme is dendritic printing. I love the vein like patterns, very reminiscent of coral, which can be created by pressing acrylic paint between two sheets of glass or plastic and then printing with it. I’ve been trying this out on different surfaces including paper, Lutradur, chiffon and cotton.
The most surprising result was a the print on felt, I was amazed at the clarity of it and I can see this being developed further with added stitching.
Working on ideas for felted sea anemones
There are so many possibilities within this theme that my mind is working overtime and I’ve a few other projects on the go right now. One of them is this small 20cm dia embroidery being worked on an eco print cotton fabric……note the lack of blue!
Another is a 95cm x 54cm background I made a couple of days ago throwing everything I had to hand in to the mix! There’s Bergschaf, Merino, Viscose, Silk, chiffon, synthetic net, slubs, knitting yarn, etc. I see this being an ongoing project for quite a while….something I can build on, picking up and putting down over time, adding stitch and texture until it feels finished.
At our next meeting, this coming Friday, several of us will be creating wet felted fish which we are all excited about. I will show you how those turned out and give an update on the other projects in my next post. Now………where did I put my blue cardigan?
Lately I always seem to have several stitching projects going on at the same time and I have found it helpful to use one basket per project to store my threads, etc. in. I have a friend that makes lovely pine needle baskets and I have mainly been using them. But lately I seem to have more projects going at one time and found that I didn’t have enough baskets for all of them! I found myself going around my house emptying the contents of other baskets so I could use them for my projects. (This of course, led to another issue about where to put all the stuff I was taking out of those baskets!) I guess that tells you how crazy things are at my house!
When I was at a retreat in February, one of my friends was making fabric covered rope baskets for her projects. She also likes to have all her project’s supplies in one spot, and she likes to be able to easily move them from place to place as well as have the option of stacking them. My thoughts kept going back to her baskets as I kept running out of storage for my things.
Over 20 years ago I took a class at my local quilt shop and made a fabric covered rope basket. It’s been sitting in my closet all these years waiting for me to attach the handle. It’s kind of big and funky but I love the colors. I think I planned on using it for my knitting projects. I could still do that, but I decided to use it right now to store my wool socks in. I don’t need the handle attached although I guess I could still do that. (Maybe in another 20 years??) I am also kicking around the idea of deconstructing it and making 2 or maybe 3 more usable size baskets out of it.
This one is 9” tall and around 12” in diameter. I think I was having too much fun sewing it together and didn’t know when to quit!
These are still all my favorite colors!
The way the rope was covered in that class 20 years ago was not how I wanted to make a new one. Back then, we wrapped folded fabric around the rope and straight stitched it to the rope which was a nice feature as there were no raw edges visible. Today that seems like a lot of prep work that I really don’t want to do. My friend was just wrapping approximately 1” strips of fabric around the rope and zigzagging the covered rope pieces to each other. Much faster process. I’m all for getting things done faster! These baskets are a great way to use up fabric scraps or fabrics you wondered why you bought them in the first place.
I followed the tutorial from my friend’s website Create Whimsy and tweaked it to my needs.
I had a jelly roll of 2 1/2” fabric strips sitting around that I was never going to use for a quilt. I tore them in half and started wrapping my 20 year old leftover rope and zig zagging them together.
I wanted the bottom of the basket to be at least 6” wide and the sides to be around 2” high. I wasn’t sure how much rope I would need to make the size I wanted. (I ended up having enough rope left to make a smaller basket if I want to.)
I was happy with my first basket even though I wasn’t crazy about the fabric used for it to begin with. Those big white blobs are the selvedges. I decided I didn’t like how they appeared, so I started cutting them off as I introduced new strips. I like how the stars on the fabric appear as bits of white. Overall, I’m quite happy with how this turned out! It will be very usable and will definitely not be sitting in my closet for the next 20 years!
I also had some fabric covered rope left over from my 20 year old basket project so I thought I’d see if I could make a basket out of it.
It was interesting to see how different the two methods of covering the rope were when zigzagged together. I think I like the newer method of just wrapping the fabric around the rope and not caring about the raw edges or the joins. It’s kind of fiddly but looks just fine to me after stitching. The “prewrapped” rope had lots of puckers to it, the wrap as you go method coiled together with a snugger fit.
Here is the finished second basket. It definitely had a looser feel to it although it is still sturdy enough for a project basket.
Here’s a peak at my little menagerie of baskets, including my two newly made ones.
It was fun to make them, and they sewed up rather quickly. If you try one, I’ll forewarn you that you’ll go through quite a bit of bobbin thread. And they are kind of addicting to make.
I also found two felted bowls in my closet that I had made years ago. (Wonder what else is in that closet that I could put to use today?) They were knitted to begin with, and they were my one and only foray into felting. This one was under consideration for becoming a project basket, but it’s too flimsy. I am now using it for my thread bits. Perfect use for it!
I’m enchanted by lichen. Also, by moss, fungi and forest floor wonders, although to a slightly lesser degree. Sit quietly next to a tree, some old wood, weather-worn stone or metal and look….really look……..you can easily be transported into a micro magical world of different shapes, texture and growth patterns, not to mention the incredible subtlety of colours.
Close up of moss & lichen on wooden garden bench
Just as we have omnivores, vegetarians and vegans etc, curly hair, straight hair or….no hair 😉, in the lichen world there are 3 main types – foliose, fruticose and crustose. The last two are almost self-explanatory – fruticose, bearing fruiting bodies whilst crustose is….well, crusty! This is an extreme simplification….so any lichenologists reading this (yes, I learnt there are such specialists, along with funginerds or funginuts), please – don’t shout at your screen!
Common orange lichen, Xanthoria parietina
Why do I love them?
Lichens are our pioneers. Generally, they are the first to settle anywhere, growing in so many different substrates and habitats including in some of our planet’s most extreme conditions (artic tundra, mountains, hot deserts, after fire destruction, even toxic environments) some even grow inside solid rock (!!!) and they cover about 7% of our planet’s surface.
Six lichen photos by Richard Droker
Lichens are symbiotic so if they live on a plant, they only use it as a base rather than stealing nutrients. They can be used for food, dyes, and medicine and, due to their long life-span and slow regular growth (the world’s oldest living organism, Rhizocarpon geographicum, ‘map lichen’ is thought to be 8,600 years old) some lichen species are used as a means of telling the age of rocks. The oldest lichen fossil dates from about 400 million years ago. Generally, growth is extremely slow, with most crustose lichen growing only 1-2mm in diameter per year! There are about 20,000 known species and can be regarded as self-contained miniature eco-systems that often thrive in communities.
Wow – as humans we should be learning so very much.
Colours, depending on special pigments, can vary from reds, oranges, yellows and browns or bright green to olive grey and black. Then there is another whole overlay of colour depending on whether the lichen is wet or dry.
Four Lichen photos by Richard Droker
I’ve been fascinated for years with the amazing beauty of lichens and thought I’d finally do something about it.
So, I’m currently working on a personal project – translating what I see, and perhaps feel, into mixed media/textile creations. There are so many extremely talented artists, worldwide, who are recreating realistic representations particularly in textiles (Amanda Cobett is one such artist), that I’d fail miserably if I went down that route.
My sketches of interesting patterns from lichen etc
My goal is to ‘see’ either from life or research online photos (Richard Droker, above, is just one of the many amazing photographers worldwide) and interpret my findings using what I have to hand around me. At this point I need to add, that I’m a firm believer in the Spirit of Mottainai – the idea of respecting resources and not wasting them.
View down one side only of a wool shop in Germany, with shelves stacked full of so many wonderful yarns
Yes, I will buy new supplies (I’m always being seduced by luscious yarns – who isn’t! – as evidenced by a recent trip to Germany), but I also want to repurpose and re-use where possible. I simply couldn’t throw out an extremely, seriously (you get the message!), wear-challenged sofa cover….it offered far too much potential. We won’t talk about where it will be stored!!!
Worn, thready, fabric stiched onto a contrast fabric snippet
I want simply to evoke the magical landscapes I see. Mmmm….’evoking’,’ Mottainai’, ‘re-purposing’….I didn’t set out to write a mission statement….😜
An interplay of fabric pieces, including a very thready worn-out sofa cover & paper, all heavily hand stitchedLichen, dry, on various gathered fallen twigsTwig with common orange lichen or yellow scaleClose up of 2 different tree lichens, dryHeavily branched lichen on a wooden garden bench
My poor EPH (Ever patient husband) dare not throw anything out. I often see a clutter of spent, used items (garbage in other words), on the kitchen work surface….
’What the devil?’
’I didn’t know if you needed them?’
Guaranteed the one item he does throw away was the very item I particularly wanted! Oh yes, my hairdresser, shop keeper and even our car mechanic haven’t escaped unscathed!
Bags & bags of experiments, all stored in boxes.
My experiments involve sewing both by machine and hand, crocheting (I dislike knitting intensely), ironing, printing, playing with liquids for chromatography, burning (many methods & always next to the sink – I value my house too much!), bending metal, soldering….in other words – I’ve been wracking my brain for every technique I’ve ever used….over very many decades!
I’ve also, mischievously (there’s always one!), taken the opportunity during our local textile group’s workshops to further my exploits.
Two cut lino designs, one of lichen the other of tree barkThree colour-blended prints from the bark designOthers thought the bark design looked like a landscape with the sun More prints. Two are very feint but will be useful at some point.
Some experiments fall in line with Thomas A Edison’s theory – “I have not failed. I’ve just found 10,000 ways that won’t work”.
Wool & carded wool tops needle felted together – not a good result
Having studied a great many lichens online, I tend to see something destined for the bin & then think ‘ah ha – that reminds me of….’
So herewith a few other experiments to date….
Photos by Richard Droker of Peltigera lichenFruit protection cardboard trays cut and manipulatedWet waste paper pulp poured & dried over a branched twigDifferent structures of lichen, dry, from curly broad leaf to fine wire. Aall branched and bushyA collection of lichen inspired paper experimentsSuphur yellow crustose lichen on a metal garden chairSplotches, that have merged, of creamy white edged grey crustose lichenOverlaid coffee stains on packaging paperCoffee stained paper with silver flecks ironed off wrapping paperCromatography and burned edgesCromatography paper pieces some marked up with pen & inkCrustose lichens on a tree trunk looks like a map of countriesFlat scrunched plastic bags filled with various bitsFine yellow almost powdery lichen with mini droplets of bright orange jelly spot fungusPlastic milk bottles cut to produce various shaped pieces3D plastic milk bottle pieces wrapped with yarnFlat irregular shaped donut pieces from plastic milk bottles wrapped with yarnIntergrated hummocks of wet moss on a roofVariety of random shaped hummocks of yarn
I also need to explain at this point that whilst I do have patience, I like the creation of individual elements to be the most effective and speediest….for me!!!! This involves challenging myself to find an easier method to achieve the same result – ie trying to create 3D mounds to represent moss, I tried several old techniques including velvet stitch and Victorian tufting, but my patience was not of the centennial variety. So, I thought long and hard and devised a method using the sewing machine and hand stitching. EPH reckons I only need a few more to make our new carpet!
Miniture hummocks of green moss growing on a brick pathA collection of gentle rounded hummocks of yarnA tree stump covered in moss, showing its growth structurePlastic packaging manipulated to emulate the structure of moss
The challenge also includes remembering to keep detailed notes 😉
Notes & samples of experiments
All I need now is ‘time’ to put my experiments to good use….it is on my wish list!
I hope the next time you look at any lichen you will delve below the surface. Let us know of your findings.
I wish to show you my last abstract piece: I am quite proud of having included free crocheting and free knitting bits and of having gone bigger than my usual size, all things outside of my comfort zone that were inspired by other artists’ and crafters’ works.
“Good girl bad girl” abstract felt painting, around 80 x 50 cm.
It was about experimenting with felt without the distraction of colour, and I decided to use undyed or white and whitish materials, so as not to distract my eye from the final purpose. This made me think about “lack of colour” and “white” in terms of emotions and morals: how you are not supposed to show a lot of true emotions if you are a “good girl”, how the colour white has been linked to “good” in certain cultures, how silence and demure behaviour (not showing your colours) had been linked to “good behaviour” in such cultures.
So, this has made me think about what “good girl” and “bad girl” meant when I was growing up, and how problematic those concepts have become for me in time (and have been even then). This led to me choosing specific fabrics and fibers, and techniques to add to the piece. So, I guess, concepts and techniques called one to the other from the beginning of my project and I can’t say which came first, if ideas to express or techniques to try.
I thought of the piece as layered, as our life experience and identity are layered, and being a “good girl” or “bad girl” is not something straightforward either. So, firstly I made a layer of felt to go over a pre-felt background.
But how to make the surface layer? I remembered about the layout for cobweb scarves that had been suggested in the Felting and Fiber forum, the one that is made by tearing a long length of merino tops and then carefully teasing the whole length open: I wanted holes and different thickness on my surface layer of felt, so I went for that type of layout for it and it worked very well.
Laying out my natural white merino wool on for the cob-webbish upper layer
How the cob web layout progressed
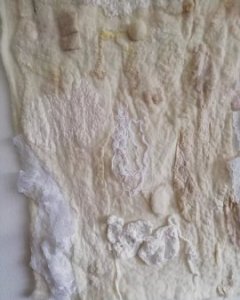
The surface layer was embellished with undyed locks, undyed white eri silk fibers, scraps of undyed habotari silk, white flax, and silk carrier rods. Its shape is very irregular and there are vertical holes from which one can peek at stuff underneath. I liked the fact that it’s not one single white, but many different shades of undyed natural white and of bleached or optic white. Even stretching the idea of “white” a bit to include cream and beige even.
I added a natural-fiber net that I got from my grocery shopping, and on the background strings gotten from labels of clothes and scraps from a cotton handkerchief, to remind me of all the mother-work wife-work women-work that is the “good girl” ‘s lot in life.
An overview of my upper layer layout with all the embellishments before felting
Some of the embellishments that I added on the merino wool : you can spot the vegetable carrier net, locks and a silk carrier rod.
An habotai silk scrap and some locks on another part of the upper layer merino layout before felting
In various areas I used the embellishments as bridges over the holes between the merino wool parts, so as to link all the parts together.
I lightly rubbed it and then used the sander to be sure that all the bits could stay firmly in place. I did not want it felted firmly, and I rolled it only a few times in two directions, horizontally and vertically. I washed it and left it to dry.
This wet prefelt of the upper layer does not seem too exciting, yet, but the holes seem just right for what I want to do.
In the meantime I prepared the background layer, with 3 layers of undyed merino wool in a simple horizontal-vertical lay-out. I rubbed it and rolled it a few times, leaving it at the pre-felt stage. I washed it and let it dry.
On the second day, I combined the two layers, that were mostly dry, and all the other embellishment elements.
I laid out the two prefelt irregular layers on my carpet to have space to work on them and add all the sewing.
I wanted to explore what it used to mean to be a “good girl” and to make mistakes and be a “bad girl”, so on the background and peeking through the holes I placed different things that had been linked to women’s craft and life, including commercial lace, scraps from a child’s wool vest (mothers always used to make their kids put their vest on underneath their shirts) and different fibers and yarns, and strings (women forever tying and untying shoes clothes bags families).
A detail of some of the embellishments that I added to the bottom part of the artwork: strings and lace and scraps of an old merino wool baby vest.
On the background, like alpha and omega at the top and bottom, I also wanted “wrong” (but free) crocheting and “wrong” (but free) knitting pieces, and the making of those was an experience in itself, as I found very hard to let go of purpose and of “perfection”, especially in the knitting. I used a cotton yarn for the crochet and a mixed wool yarn for the knitting, as those two types of yarn are most closely related to those crafts to me. I have to say that I quite enjoyed the free crocheting and I maybe will use it again soon, whereas I doubt that the freeform knitting will become a favourite of mines!
My “wrong” knitting at its very beginning
My foray into free form crocheting
The irregular shape of the crocheted embellishment quite pleased me.
On the top, the knitted embellishment is waiting to be sewed fast and then felted into the artwork.
After placing all the elements where I wanted them to be, I hand stitched them in place with a few hidden stitches each, starting from the top and the outer edges towards the inner parts and the bottom. It took me a bit, but it was essential, as I was much more confident that nothing was going to move when I went on with the following wetting and sanding and rolling. I hate hand sewing, but this time I felt that it was worthwhile!
I washed and dried the piece, and then waited to see if anything else was needed: I often find that I need to let the work get washed and dry out to be able to see what is not fine yet! In fact, I found that the merino wool vest scraps had not quite felted in as I wanted them to do, so I decided to needle felt them with a bit of added merino wool top fiber. This gave me the itch to add a few needle felted 3D shapes, vaguely organic shapes that are a symbol of the “good girl” sense of her body.
A needle felted sphere shape seemed also a good idea
I added some needle felted organic shapes
I really liked the journey and I think that the piece says what I wanted it to say. Moreover, I enjoyed trying new things in making it, and using those techniques in an organic way to express a world of meanings and experiences that I hope will find resonance in the viewers.
Some of the embellishments on the finished artwork upper part
Lower left of the finished artwork
The upper right corner shows clearly the two layers of felt
The laces have not really felted in, but I was not expecting them to: it’s synthetic commercial lace, so I make sure to sew them to the felt quite well.
I spent last night processing my planned article in my sleep. I woke up with a solidified plan. ✅ I sent the following message to my BFF Lisa: I’m writing my blog article, which is due tomorrow…finding (fiber) happy places, when we need respite. I was ready to go – then I decided to quickly file for Medicare, which must be done in the US, 3 months before we turn 65. I had already started the process, and was waiting for my window to complete it. No problem, I thought: just tell them what I want, and be done with it. [What on earth was I thinking??]
Walking to the Ocean at Dawn.
I’m looking at this photo, with a cup of tea, feeling my shoulders fall. This is a beautiful morning, Brian and I will never forget. It was the first morning of our vacation, and we were off to an excellent start.
I had a short list of photos, I wanted to capture on this trip. My plan is to eventually felt some beach scapes, to hang in our home. Crazy as it seems, I couldn’t picture an accurate sunrise or sunset. This relaxing vacation changed all that. It gave us so many meaningful memories, and beautiful photos at the same time. I am excited to begin playing with my fiber and supplies. I captured interesting photos as the tides came in and out, in the inter-coastal waterways and oceanside.
I thought the ripple patterns made at low tide were fantastic!
I have photos of trees dripping in Spanish Moss, and I can tell you how it grows on the Live Oaks, in the southern US. Our family and friends asked us what we did with ourselves, in 4 weeks, together?? We enjoyed each others company, and the beauty all around us.
Live Oaks draped in Spanish Moss, were in full bloom.
I managed to felt a couple examples while there. They are not great by any means, but they were made with what I had with me.
Electric felting tool from Ukraine (Orange Fly felting machine)
1) Ann found it on Etsy.
We knew Glenn had found it on Etsy and had a long chat with the inventor. He said that there had been illegal copies of his design, but they had not worked well having descriptions of falling apart and breaking quickly. His original design has been well-tested and had good reviews online. Ann and I wanted to try it out and compare it to the Chinese design.
2) The orange Fly from Ukraine.
3) came with Instructions.
Like the Chinese machine, the price is fluctuating due to the changing value of the Canadian Dollar.
There are a couple of safety instructions with this machine which should be noted.
Do not run without a needle in the machine
Oil the bushing and inspect to make sure the needle is not heating (you need to add another drop of oil) also running at high speed will wear out the bushing and it will require replacement when the needle feels loose when sitting in it.
I would add keeping hair away from moving parts of the machine (I was one of the first 3 girls in shop class in my high school, and I remember long hair and power tools don’t mix well. It was one of the reasons the shop teacher would not let the girls use power tools in shop class.)
Material that makes up the machine
The first thing you will notice is that The Ukrainian machine is made of a plastic for the majority of its body, unlike the Chinese one whose body is made of metal. I am not sure about the type or projected longevity of this plastic but as with most plastics it should last longer if a few precautions are taken:
Kept out of direct sunlight (can degrade some plastics)
Keep it at room temperature, and do not let it freeze or leave it in places of high heat (the dashboard of a car or in a sunny window.) being an electronic device it likely will not appreciate being left or used in high humidity. If in doubt it would be best to contact the manufacturer.
4) Hand grips for both machines
Ergonomics/ comfortable grip:
The handle shapes and thus how you grip them are also different. You may find one more comfortable than the other. I found the grip on the Orange one comfortable and it was easy to see where I was pointing the needle.
Switch and switch placement: the switch or small on-off button are both located in the area where the hand will be near. (i did not test the orange fly with the left hand but may add that to the final tests). For the Ukrainian machine, I found the switch to be well located for the Right hand and easy to turn on and off. The tiny black button on the Chinese machine was very sensitive and I inadvertently kept turning it back on as I tried to turn it off. This may just be me being too aggressive with my button-pushing. Ann seemed to be able to turn it off and on with less fumbling. You can see the Ukrainian switch in picture 2 of this post and in picture 7 from the last post, you can see the little black button from the Chinese machine. (https://i0.wp.com/feltingandfiberstudio.com/wp-content/uploads/2023/03/7.jpg?w=600&ssl=1)
Noise: the Orange Fly is slightly quieter than the Silver Chinese machine.
Needle penetration /Vibration/kickback; very little resistance to any of the surfaces or work pads with this one needle machine. (the exception was a fulled bulky knit sweater which gave a bit of kickback but this was fixed by increasing the speed.) This could be partly due to the decrease in resistance when working with one needle when compared to more needles working in close proximity. We were also not sure of the exact gauge the silver machine was using. Ann has some of the Crown 40-111 needles I sent over to her. These may improve the operation of the Chinese Silver machine and make the test more even. We will report back after her husband has a chance to de-crank the needles so they will work in the machine.
The second thing to mention about vibration is to further Ann’s finding or more correctly losing of a small screw from the Chinese machine. I found that one of mine (not one holding a needle) had loosened off when I was running a test comparing it with the Orange one. I spotted the black screw on the silver machine before it had a chance to fall out.
5) working on wool felt pad and wool felting base /Needle penetration from the back
6) pre-felt on medium felt pad
7) pre-felt on a bristle brush
Changing needles
While using the tiny allen key with the Chinese machine was fiddly but reasonably easy, getting the needle into the Orange machine was a bit more complicated. The instructions definitely had English words but seeing a video of putting the needle in fixed the confusion. Not having to have the pre-step of cutting off the crank (which is required for the silver machine) is an added incentive to look favourably on this one.
Overall, I liked this machine even more than I expected and Ann liked it too. Next Ann and I will expand our investigation just a bit more and look at 3 thicknesses of wet felt bases. We will look at both the Ukrainian and Chinese machines. Ann may have a third machine, this one is coming from Georgia, and has multiple needles. if it arrives soon enough we will add it to the wet felt base info and let you know what it is like to work with too. I will try to give a synopsis of the machines.
We will also see if our suspicion that the crown needles with their shallow working depth will improve the interaction between the felting surface/wool, brush or foam pad and the Chines machine.
PS: I have spent the last 2 days at the Ottawa Valley Farm Show, demoing felting with Mr. and Mrs. Mer as well as doing a bit of spinning on one of my travel wheels. I do want to show you some of the fun we got up to but wanted to tell you about the second felting machine before getting distracted again. I am hoping the spelling is ok and I haven’t forgotten anything! I am about to face-plant the keyboard so I think it’s time for bed!
I picked a piece or felt I had and added the sky and snow backgrounds. I used 3 shades of natural white wool for the snow so that it wasn’t so flat. I used Merino, Corriedale and something strong and shiny. the shiny wool may have been BFL or even Mohair.
Then I started working on the tree. I worked on a separate surface so as not to disturb the background too much as it is only lightly needle felted. I decided to work in two layers for the tree so this is the darker back layer. I started by just fluffing it up and then using a knitting needle to move fibres around to get a better tree shape. then gave it a dry felting ( just flattening and wiggling it a bit so the fibres stick together) to move it onto the background.
I picked a redder brown for the second layer. I forgot to take a picture of it when it was separate. I must have been in the felting zone. I put the tree slightly off-center. I tried it in the middle and I didn’t like it.
Here’s a close-up so you can see the 2 layers
I poked the tree all over to tack it in place and started fiddling with the roots, so it won’t fall over in the wind.
and some more snow
And that was as far as I am right now. I will probably fiddle with it more before wet felting it and then fiddling more, of course. I am thinking of adding a shadow but not sure how to tackle it. I am not sure where the sun is. I may have to go out to the field and look at shadows.
Have you started your tree challenge or maybe you’re going with making something useful or both?
We would all like to see photos of challenge pieces and if you are unable to upload photos directly onto The Felting and Fiber Forum ‘studio challenges’ thread, then please use the link below.
I have been working on my winter birch landscape. Here are the posts for part 1 and part 2 if you missed them.
I finished appliqueing the birch trunks and adding the machine stitched branches. I’m happy with the trees, now on to foreground snow.
Most of the comments on my last post thought it would be a good idea to add some snow in the foreground. I found a piece of white prefelt which I tore apart and auditioned in the left photo. The middle photo is with wool locks and the right photo is with wool slubs and nepps. I’m not happy with any of them. The one I like the best is on the left but I don’t have a good way to adhere the wool. I could needle felt it in but I really don’t like to needle felt into the silk of the nuno felt. I am thinking the foreground snow is not happening.
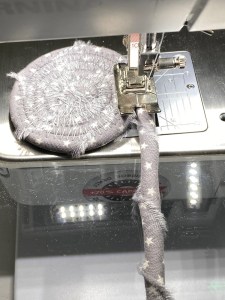
Another suggestion was to add red twig dogwood bushes. That seemed like a good idea to add in a contrasting color. I made a sample here on another piece of the nuno felt background. I used wool thread in dark orange, red and darker red. I first tried two threads, mixing the colors. The branches felt too fat. So I switched to one thread and decided to use the red and dark red threads. I hand stitched the bush using stem stitch.
Next came stitching it on the piece. I do like the addition of the red. Now I am letting it rest for a bit to decide if I want to add the red in one other area of the landscape. I think it might look more balanced if I had a few bushes further in the background. What do you think?


 I tried to take different angles to show the range of effects.

 This photo show how fluffy that mohair really is!

 When I tried on the scarf, I realised that I had made it a little too wide to make it into a comfortable scarf. So it was at this point, I decided that rather than using it as a scarf, it would work better as a stole. However, this now presented me with another need…
 I did try to add some sequins as way of creating more sparkle, but as they were so small, I found them difficult to sew on (my fingers are not so nimble as they used to be!). I tried gluing them in place, but that didn’t work either! So in the end, I just left him as he was. I do intend making him some antennae, but I haven’t had time to add those in yet. He is attached to a large kilt pin, so he can be used to hold the stole in place.


 1) Ann found it on Etsy.
  2) The orange Fly from Ukraine.
  3) came with Instructions.
 4) Hand grips for both machines
 5) working on wool felt pad and wool felting base /Needle penetration from the back
 6) pre-felt on medium felt pad
 7) pre-felt on a bristle brush


