
Framing; To Glass or not to Glass is that confusing?
Many years ago, almost forgotten in the mists of time…. Ok, when I was 16. I realized I could not possibly get an office or secretarial type summer job as many of my friends were getting (you have seen my spelling. Even now with the helpful suggestions from the computer I really cannot spell.) Working as a cashier was out because of the dyscalculia (Numbers are almost as bad as letters). So that left jobs the boys would not take at student manpower (shovel jobs) and finally I wound up working as a picture framer. Even with moving crates of glass (which are not light) it was better than shovel jobs. I wound up picture framing for 13 years until i damaged my ulnar nerve and switched careers but that is another story.
I was very lucky when I started to work. I was taught by a picture framer who was trained as a conservator. Acid free matting, backing and making rice paper glue with proper T hinges were part of my training. Mounting textiles on a ground was also something I did from small textile pieces to large quilts.
I even got to explain to people why their incredibly wrinkled Diploma could not be dry mounted because it was made of real parchment. I got that job because I would get so excited by real parchment I would explain how it was made and point out where the hair follicles had been. I would tell them how impressive it was to have parchment (made from stretched and prepared skins; usually calf, sheep or goat) rather than boring paper, so it was worth considering a conservator to get rid of the wrinkles. I would also explain not to hang it in the bathroom or direct sunlight. By the time I was done they were usually requesting the expensive restoration and very pleased with their masters or even sometimes a B.A. degree.
I framed small Tapestries in Theo Moormen technique with double glass and double mats on the front and single mat on the back. This allowed viewing of both sides of the piece but protected it from dust and handling.
Why would we want to frame a 2D felt picture?
- Framed work gives it more gravitas (something framed will be looked at differently than something not framed. A framed piece (or one finished to hang in another way) suggest more value than one that is not framed. This is why presentation or hanging is important for display in a gallery.)
- Protects the work from dust and unwanted handling/ fingering. (it also protects from possible vacuuming by over enthusiastic persons)
- Protects the fiber from the evils of wool moths or other horrors! (Such as a wooden frame with a paper backing or sandwiching your work between matts then add glass to the front and back. For further protection from dust or moths, the layers can be sealed with AF cloth tape along the edges.)
Why do some suggest Felt should not be framed with glass?
- Water damage when behind glass from wicking when washing the glass (this happens when Windex or other cleaning liquids are sprayed directly on the glass and drip down into the frame.) This wetness can wick around the glass and onto the work. If it is a photo it can actually become stuck to the glass, damaging the photo when the glass is removed. When cleaning framed pictures with glass, it is preferable to spray the cloth lightly with Windex or other cleaner then use the dampened cloth on the glass. Never spray the glass because of the possibility the liquid may leak into the frame and wick behind the glass or into the matt.
- Glass distorts the image. Using the wrong glass can distort the image. As non-glare glass is designed to work directly against the image but when elevated off an image it will blur and distort the image below. Choose Glass that is appropriate to your intended use. If you are using a shadow box, a filler strip under your matt or even sometimes just a double matt, consider either plain glass or one of the new glasses with a museum coating. Check if there is distortion at the height you will be placing the glass before final framing.
- Humidity forming behind the glass due to sunlight on it. (a lot of dyes, like paint, are fugitive. They fade in prolonged exposure to direct light.) Due to fugitive pigment, artwork should not be hung in direct sunlight, with or without glass. There are very expensive glass types that can reduce the UV damage but it’s better to just not put it there. Do not put artwork (or real parchment) in a very humid environment. You can damage the artwork and warp or distort the matt and backing. Sculptures with pipe cleaner armatures can also have trouble in places of high humidity too.
- Glass can flatten the felt. There are ways to elevate the glass off the pictures to allow for textural elements. If you have some 3-D elements in your picture you may require a shadow box (a frame with a very deep inside that your picture can expand into) if you only have a bit of texture or fluffiness you want to maintain you may only need to use a double mat (acid free). If you need a bit more height you can make a support to raise the matt up by adding foam core supports ether under the matt or between the layers of the double matt. (Under is more common). As you create a deeper collection of backing art, spacers, matts and glass. You may want to look more at a deeper wood frame although there were a couple options for deeper metal frames too. (There are some fiber artist that are laying out there wool in a picture and not felting it. Instead they are compressing it with the glass to hold it in position.)
- Glass is expensive and heavy. (Some of the specialty glass can be expensive, and in large sizes, it can be quite heavy. Plexi can be lighter but is not necessarily cheaper in larger sizes.)
Other considerations.
Framing is expensive. One way to reduce the expense is making sure your work is a standard finished size. This will allow you to pick up a stock frame matt and Glass. You can do this by making a matt template out of cheap cardstock or out of a cereal box type cardboard. Make templates with common matt opening sizes; 5×7, 8×10 and 11×14. You saw examples of this when I was working on my Christmas cards and the cardinal in previous posts.
If you are working from a photograph, try to scale your image to one of the standard sizes. Before you print it out to work with.
 1 Tulip scaled to fit in a 5×7 matt opening
Use a template (so you don’t get the matt dirty) to check as you work that you are keeping the image to the size you intended. I do often expand over the border just a bit so I have the option to shift my picture or elevate the matt without showing the underfelt.
 2 Tulip Framed
This is a Dollerama wooden frame, mat and glass I used from my mother’s day post Happy Mother’s Day 2021; May 17, 2021 https://feltingandfiberstudio.com/2021/05/17/happy-mothers-day-2021/
You can see the same technique of using a template used with the cardinal I was working on at the farm show demo.
3-7 Cardinals with matt template
The cardinals were from this blog post; So much time. So much to do! March 23, 2020 https://feltingandfiberstudio.com/2020/03/23/so-much-time-so-much-to-do/
Repurpose Frames you have or find
From the same blog, I showed you a different kind of frame I had found at a second hand store. They are called memory boxes or memory frames. There was a fabric backing over cork in the back of the frame and the front face with glass was hinged so you could change out what you put in there. Magnets hold the face and glass closed creating a shallow shadow box. The glass will protect the felt from dust but can be opened to clearly show that the picture is made of wool and not paint or pastels.
8-10 Memory Frames (decorative pins to hold the felt would work well)
These frames are fantastic for demos or felting displays so if you trip over one secondhand please consider buying it. I have the arctic landscape which was a water based challenge pinned in with sewing pins temporarily (I really should get a matt or felt to the edge but it shows that the piece is felt quite well.) Unfortunately they are a bit dinged up but still work well to protect and show the felt picture.
My final example of working with a mat template is from Sneaky Presents; January 10, 2019 blog post https://feltingandfiberstudio.com/2019/01/10/sneaky-presents/
The inside of an empty cereal box was my template. I again used the wooden frame mat and glass from Dollerama.

 11-12 Snowman
I wound up making three 5×7 pictures for that x-mass trip; The snowman, the cardinal and the bunny. All were expressing parts of Oakville (ok, the snowman was a bit optimistic considering the number of green Christmases we have had while visiting!)

 12-13 Christmas pictures
Ok I think we have the concept of using a template to make a standard size image to frame, fully explored. Now that you have the matt in front, what should you consider putting behind the pieces?
A few last things about Matts
Matts are available in both acid free and non acid free stock. Both types usually have an interior bevel of 45deg or a reverse bevel of the same angle but in the opposite direction. You can have a black or coloured core to the matt. Matts come in a huge array of colours, surfaces and textures. Some matts are hand made wrapped in silk, others some have lines or patterns drawn on them or powdered colour added (french matting). You can even add a wooden lip to the edge of the matt. All these options have a cost. Ideally try to get an Acid Free matt and backing that enhances your work.
Matts are cut on a matt cutter. If you are going to be framing a lot of your work you may consider an introductory course on matt cutting and framing. The price of a matt cutter for semi-professional use has come down so it may be worth investigating. A good quality matt cutter will save you a lot of frustration and wasted mattboard so don’t skimp on this tool.
Behind your artwork;
Ideally, a 2ply acid free matt board but since my days in framing this seems to have fallen out of favour. So let’s consider why we used to use one and what options there are now.
The 2ply was a barrier between the artwork (usually paper) and the cardboard backing. It was there to keep the piece from reacting with the cardboard and becoming either brittle or discoloured. This is not as much of a problem since the felt is not as sensitive to acidic cardboard but ideally a good acid free backing would be best for it. So let’s consider, if we can’t get 2 ply, what can we use instead? We can buy a sheet of 4ply to cut down for a backing (it’s a bit pricey to buy it by the small size you need since the backing you need for the 8×10 piece is almost the cost of a full uncut sheet. Since the cost is so close it is more economical to buy a full sheet and cut it carefully for what you need and save the rest for other picture backings.
Another option is acid free foamcore or even regular foamcore. Both make a good backing but they will start to add thickness so if you are working with a limited amount of depth in your frame this may not be as feasible.
Thinking a bit outside the frame you can find acid free paper in most reasonable quality sketchbooks. I have even spotted some available at Dollerama although they do cost $4.00 not $1.00! So, if you don’t want to sacrifice a sheet of your arches watercolor paper this may work as a separator from any acidic cardboard.
if you want to float your work on the backing, i would suggest using a fine pointed awl or heavy gauge sewing needle to punch 2 or more sets of small double holes through your backing and then you can carefully sew into the back of your work and down into the mounting board. With two holes you can tie a not on the back of the mounting board which will not be seen from the front.
There is a product called Coroplast, which is a fancy name for cardboard made from plastic. It can be used as backing without fear of acidity. You can see coroplast in a lot of yard signs (often a thinner quality but also cost less) or a thicker version is available at hardware stores like Home Depot. If you have a very thin felt picture (pre-felt with a light wool covering you may be able to sew or lace the felt around the foamcore or coroplast. Coroplast is stronger in one direction than the other. it is stronger with the holes running vertically with your work, (i hope this is clear). The felt can than be framed, but i would suggest a spacer to lift the glass. spacers can be made from foam core or you can buy clear acrylic strips which were available in my day for this purpose.
A non traditional approach to framing
 14 Farm show demo display with 3D felt pictures
The framing/hanging for the last guild art show required I start with a standardized 12×12 canvas. The rule was I could not exceed three inches in height so I removed the canvas and used the stretcher bars. I wrapped my felt to the lower level giving me almost an extra inch in height! The way I attached them is a combination of sewing (button hole thread) and lacing with a bit of needle felting to keep the center depressed. I had to felt the base quite firmly to keep the base recessed. You can see more here; Polar bear for the 150th Anniversary Art show February 12, 2018 https://feltingandfiberstudio.com/2018/02/12/polar-bear-for-the-150th-anniversary-art-show/
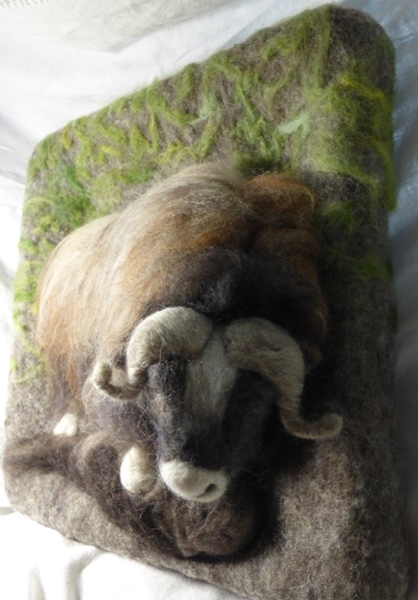
How odd! I do not seem to have a picture of the back to show you… oh time for another photo shoot! Muskox has volunteered.
 15 Sewing, lacing and felting to secure the picture to the stretcher bars
You can see the combination of lacing( with button hole thread) and then needle felting to give a solid base around the stretcher bars. (Something similar can be done over one or more layers of coroplast). This gave a finished ready to hang edge. Due to the depth of the figures, if I decide to frame this with glass I will need a deep shadow box or a bespoke (custom order) plexi box. Since the felt envelopes the back and front of the frame I may need a more complex way to keep the back moth proof. As it is, today we used screw eyes to the back of the frame as a way to hang it. We were using, I think, a #3 wire so I am not sure why I have a bit of spun yarn on the back of this one?

 16 -17 Musox picture Back and Side
You can see how much depth I have in the head which is wired so it can adjust a bit.
 18 Muskox Front
Now let’s get back to more normal framing considerations. We have made the piece, discussed the matt and the backing. let’s consider how do we attach the piece to these parts. ( you can just pay for custom framing and not worry about how things are attached but if you want to make sure it is done to your specification or you want to save money you can do this yourself)
With paper items; rice paper T-hinges or there were also acid free tapes available to hold the artwork to the backing. With wool; most of these option will not stick well unless the felt is very thin and light. For most textiles a bit of careful sewing to attach it to the backing was usually the best option. It was removable and usually would do the least damage. A few fine textiles owners would insist their piece needed to be dry mounted but there was acid free dry mount tissue available. This might work for very light thin felt (like nuno felt) but I would not suggest it for anything thicker or heavier. You may also have problems with adhesion to the backing. (I would suggest a small separate test sample if you are sure this is the way you want to attach it.)
Another option for a base to mount on is a matt board with a bit of batting on top. Then wrap silk fabric over the batting. The felt picture can be pinned or sewn in place on the silk. Because the felt is floated on the silk an uneven or random edge can show as a feature of the piece. I would still put ether a matt or a spacer to elevate the glass off the felt.
With some felt pieces you may be able to pressure fit the felt between the matt and backing. This means no sewing, just carefully position the picture between the matt and backing, clean and add the glass, then place the frame over top. Turn everything over to show the back carefully and add the nails or bend over the tabs to keep everything in place. This does not always work as in the case of a shadow box so a few careful stiches hidden under the matt or into the back of the piece may be needed.
What are our options for Glass?
Now let’s consider glass options and I use the term loosely since Ikea’s “glass” is now Plexi. I have framed with very large sheets of plexi for commercial purposes (they were for the real estate industry; large floor plans and drawing of what the houses would look like) The plexi, especially at that size, was a pain. It tended to scratch easily, it distorted the image if the plexi was not very close to the image and it built up a static charge when you took off the protective coating (which would not be good for lightly felted wool). Its’ good point is that it did not cut you like glass occasionally tried to do. It looks like plexi has also improved over time so you may want to ask more questions at your local framing store. Do inquire about the static problem we use to encounter.
Most pre-made frames will come with standard regular glass. There are more options if you want to upgrade the glass. Since my time as a picture framer there are many more options for glass ranging from the cheapest, regular glass, to various types of coatings to reduce glare or UV damage to the artwork (some are quite expensive). Some of the new coatings look very effective but also advise not to use regular glass cleaners on them or you will destroy their coatings effectiveness. (Always apply any dampness to the cloth, not the glass when you are cleaning – remember about wicking and damaging your artwork)
Some of the “non-Glare” glasses are not suitable for shadow box applications since their pebbled surface distorts the image when not adjacent to it. You may want to consult your local framing store if you want to investigate the various glass options.
One other option when considering glass is you can show both sides of your felt by having glass at the front and back of the piece. When I framed some of my own parchment I showed both the front and back so you could see it was parchment and not paper. Oh no, I better grab the camera and show you what I mean.
 19 parchment with acid free suede matt and Museum glass
This was very expensive museum quality glass when I framed this about 30 years ago. (The piece has not been in direct sunlight and there has been no noticeable colour change over time. so i would say the price was worth it.) The glass on the back is regular glass since it would not be visible most of the time and not exposed to excessive light. I painted and framed it for my mother in law who was always very fond of angels. She sent it home with us last year. It now sits beside my husband’s computer. it is not in direct sunlight but is near a window.
 20 light showing through the parchment
I held the picture in front of the window so you can see the sun light coming through the parchment with the begonia shadows.

 21-22 framed in double glass and matts showing the front and back
There are matts on both sides of the parchment, covered by glass. There is tape over the edge of the glass and frame. The turnbuckles were screwed in through the tape on the frame. The tape is sealing the back so no dust can get in. If you noticed, the ripple in the top of the parchment is not due to humidity. This piece is from the outer edge of the skin and the ripple is showing where one of the tie points on the deer skin edge was.
A profile view of some types of framing


23- 25 Different parts of frames:
The Frame
Finally, let’s look at the frame. For traditional framing (with glass), you will need ether a wooden or metal frame. Wooden (or if you are looking at the dollar store versions some “wood” is actually plastic) Real wood is the direction I would tend to suggest for a strong frame and the ability to seal the back in brown paper. Once your have your piece assembled but before you put the hangers on, if you are not using double glass, you can add a paper dust cover to the back of a wooden frame. Stick the paper to the back edge of the frame with double sided tape. You can get rid of the excess paper around the edges of the frame by using a sanding block on a slight angle to cut off the extra paper. This gives a nice neat finished look to the back and keeps out dust and wool moths. Consider the profile (shape) of the frame for the positioning of the hanging wire. If you have used double glass you may need to elevate the wire position and keep the wire snug so it will not stretch above the frame when hung.
With wooden frames the glass/matt/felt/ backing are usually secured in place with finishing nails, brad points or turnbuckles if you are flush with the frame. There are a few options for hanging devices but most common were screw eyes and wire which are usually placed in the top 1/3 or the frame. An Awl makes a handy measuring device to make sure your positioning them at the same level!
Metal frames are available and are often a cheaper option. They go together with a screwdriver and usually use clips to hold the glass securely to the front of the frame. As long as you use a strong well-fitting backing and lots of metal spring clips, you should be able to keep the wool moths from being able to get to the wool. (As well as keep the dust out and protect from anyone wanting to vacuum the felt.)
As i showed you with the Guild Art Show, there are other ways to present a felt picture or hang a tapestry which does not involve traditional framing (with or without glass). Some of my examples; frog/ lily pad, polar bear and muskox are finished and ready to hang but are not formally framed. Ruth has had a number of posts with effective ideas to create a neat hanging presentation but without the traditional look. Depending on the piece you have created and the aesthetic you are creating you may want to try a less formal presentation. If you want to look at a more formal one, I hope I have given you a few frugal ideas and a starting point to work from.
Have Fun and Keep Felting!!!
40 thoughts on “Framing; To Glass or not to Glass is that confusing?”
What a fascinating post! So much useful information – thank you Jan.
I found out the hard way, a few years ago, that Ikea had gone over to plexi when I bought a frame the same as I had before … except I found that it wasn’t the same when I got it unpacked!
Your painted angels are beautiful and the framing is a delight.
Thank you for the tip on cleaning the glass – I expect that will be a revelation to many.
thankyou!! i hope it wasnt too long!! (i have trubble makeing short posts but i will keep trying!)
i asked some of the Ikea employes about why the plexi when i realy wanted glass. they said it reduced the amount of glass broken in trasit. (well dont drop it off the fork lift!!)
it is absolutly astownding how many pices of art comeing in to be refrained had damage due to the way thay were cleened. i wish we had a hand out for how to clean your pictures and not to put them in direct sunlight or high humidity. we may want to consider a care and feeding instructions for our felt work!! (i have noticed Dragon’s interst in dark chocklet with orange! too much and he will not be able to fly!!!)
framing is a bit mistic to anyone who hasnt done it, just remember to do the steps in the rite order and consider the parts that will best protect (and inhance) your pice. if you can keep to a regular matt opeing size it will not be as expencive…… unless you start getting distreacted by swade matts… realy fancy glass……
Your posts are never too long Jan because they are always interesting!
Thank you for sharing this wealth of information. I love when I finish a felting piece, but framing the piece, ugh! After reading your post, I’m ready to tackle the frame process!
thank you Sue! it can be a bit overwhelming, i hope this has given you a few options and the insperation to try it!
Have fun and keep felting!!!
Fantastic and informative post. Thank you.
Thank You Kathryn! i hope it wasnt too long! i tend to have trubble making short posts espeshaly on topics this big! Good luck with your future frameing!! and keep felting!!!
Lots to learn about framing! Thanks for sharing, Jan. I for one had no idea about glass on the back of a frame, I always thought it would be some sort of wood board or card stock… the more you know 🙂
You are correct cardbord or a paper dust cover is much more common than glass as a backing but glass gives a faboulous opertunity for felters to show off the other side of there work which can be almost as intersting as the front! if you have a matt between the back glass and the back of the piece it can look vary neet and presentible on both sides. i hope this post gives more ideas and options for frameing!
As good as your posts are they are nothing compared to the brilliance of whoever spellchecks them. The person is a genious!
yes i agree but i have to use that brilliance spairingly, after 30 years of continual exposure to the rite way to spell your mear english is about to implode…. any post now….. but i do aprresiate your sacrifice in order to provide translation so the fiber artist of the world will not have there spelling distroyed by exposure to mine! thanks Glenn!
Such a good post with tons of useful information about framing. I do find that most people dread the finishing and framing part so this is a big help. Thanks 😘
thanks Ruth, i have enjoyed your frameing posts! i hope this will inspier more people to take the leap and frame there work!
Great post Jan, lots of information. I am lucky I get to pick your brain anytime I want.
Thanks Ann! i am glad i can be of help. (some of the guild gets a bit overwhelmed when thay ask for suggestion on a topic and i send them 3 pages of options. i was restrained i only did 3 pages.)
i am also vary lucky your live near by so i get to ask you questions too!!! and your Hat classes are so much fun i keep takeing them!! and your cookies and butter tarts!!!!! i am looking forword to seeing you in a week at the guild library!! (there may be candy!!)
I agree with Lyn, your posts are never too long. They are so fascinating that you don’t want them to end – a bit like reading your favourite book – you can’t put it down but don’t want to finish it.
I have rarely used a mat with my felt pictures. I’ve always shown the “organic” edges and kept the distance between the glass and the picture with spacers round the edge. More recently I have used velcro pieces, hook side only, stapled to a (usually) fabric covered backing board and just pressed the work on to them. The hooks grab the felt and just hang on. Another felt artist in our town used to emphasise the wavy edges of her work by making them more obvious and then getting board cut to exactly the same shape (possibly wood, I’m not sure) and attaching the felt to this (again not sure how). As her pictures were large and more primitive in interpretation than my style, this worked very well.
I had to look up coroplast on google to find out what we in the uk call it – corrugated plastic. I have some of that which has started to go the way of all plastic eventually – it’s breaking up. Mind you it is about 40 odd years old. Back in the day the NHS hospitals used to use large boxes made of this stuff to contain operating instruments when they were being sterilised in autoclaves. I was given several of these boxes by my sister when they stopped using them. So maybe the steam has weakened them.
I have yet to get to read through the 3 post you’ve given us links to; I really ought to get dressed and dry my hair first!
Ann
there are lots of options to present your work. i hope i have given a few ideas of why you mite do it one way or another depending on what you are trying to acheeve. and maybe a few options you hadnt thot of? i like seeing the edges if there interesting on pices so floating on a backing with a spaccer to lift the glass is a great option. the Velcrow is a brilliant idea. we have stick on velcrow if you havent see that yet. (craft section of the doller store). it mite work if you yused the little rownd dots of velcro on the back pice of glass to position the felt between two sheets of glass (with or without a spacer depending on the thickness of the felt. i would probubly consider sealing the glass sheets with tape so that windex or wool moths are less likely to get in. (likly the asid free cloth tape or may be something more industrial and try duck tape!) hummmm. oh no i am getting more odd ideas!
i hope you will enjoy the other posts i have done. i tend to get excited about things, often felt, or frogs, or frogs made of felt, or dinosaurs or dragons or landscapes or books…… ok i mite be curious about a lot of things.
Dont get too fussed about the getting dressed, with all the covid restrictions we have been through, if i dont see anyone all day should i realy get out of my night gown? well i gess i should but do i realy need to? ok how about just changing night gouwns? i have been telling myself if i get dressed (usualy skipping the socks) i can do something fun.
have fun and keep felting!!
Great post Jan. Thank you so much. I learnt so much today from it. Your tip about glass cleaning gave me one of those Doh moments. I have been spraying directly onto the glass for years and wondering where the damp was coming from. I know better for next time.
I am going to try to print off this post and keep it in a file so I can return to it – otherwise I will drive myself mad trying to locate it online.
How lucky were the recipients of your beautiful pieces!
Thanks! i am so glad it was helpfull. I have seen so many pices being reframed that had water damage from inthusiastic cleening with exsessive liquid glass cleaner. its hartbrakeing to tell someone they have distroyed there photograph that cant be replaced. (even the conservator couldnt fix everything.)
maybe i should rite a book but it will likely be full of lots of bad puns i didnt see when i rote it.(i got bonis marks on an exam for useing hummor in an essay – i had talked about souls as fish soles atherial beings and sowls as bottoms of feet, in connection to the iconography of a domed cathedal. the image was the apossels dressed as fishermen (fishers of mens soles) i never got the rite sole so the teacher thot it was fabulously funny she read it to the class spelling soul each time i used the word. there was a lot of students that looked like thay were going to fall out of there chairs laffing but i dint get the jokes. if she said soule spelt like a fish i would have got to enjoy it too. she did say it was the best use of hummor she had seen in an exam.)
everyone did seem vary pleased with there christmas pictures. it was a lot of fun decideing on the immage and then makeing them.
Thank you for the incredibly detailed information about framing . So many considerations.
thanks Anne, there are a lot of options and considerations. the price can vary from a frame mat and glass from second hand store to fancy costome cut mats, spacers, speshalty glass and expencive wooden frames! if you consider how you will present your pice befor you start, it may give you more ideas while makeing it. i liked when some of the “leaves” of one pice escaped the interiro of the mat space and driffted over the mat itself in one area. its a bit like actors who suddenly brake from the play to talk to the audiance. a bit unexpected but iteresting if done sparingly.
have fun and keep felting!!
Really interesting post Jan. I’ve been wondering how to mount my tapestries and keep them safe from wool moths and you’ve given me some ideas.
YAHHHH!!! Thworth the wool moths!!! (kill them if posible too) i may be a bit blood thursty but they deserved it. i have enjoyed seeing your tapestrys, your family cottage is vary inspiering from all the pictures ive seen, though there dose seem to be quite a bit of water…… something a bit dryer may be safer!! the lake did attack the boat house afterall! (and Don’s House but that was a river so much more dangerous!)
i hope you will contiue your tapestreys after you finish your next artical writeing!!!
This post is a definite keeper! What a lot of super information brilliantly explained and illustrated. I know that I can find here again but I also saved it. Thank you for this excellent guide.
And yes – guilty of spraying directly on the glass of frames! Never again.
I am so glad you found it helpfull and that you will spray the cloth (damp not wet) and then wipe the glass. it is amazing how sneeky wetness can be! never trust water or other similer wetness to stay where you put it! (i would like water better if it wasnt so wet, and the cold part isnt any fun ether)
have fun and keep felting!!
Thank you for this Jan. Lots of food for thought!
Your Welcome! i had a lot of fun and challenges frameing for 13 years through high school then afterwords. it was always intersting and lots of problem solveing. although both frameing and later the massage therapy were hard on the body. i like felt its much lighter!
have fun and keep felting!!
The information you shared made me think of a thesis. So complete and easy to read and follow. If you haven’t already considered a book…or booklet…this would sell out often, I am sure!
Thanks ever so much.
Cathy
thanksyou! i would love to rite a book i keep thinking of the books in swedish/ English or Finish/ english i would do Sivear dislexic / english. i have discovered reading in my native dislexic is much more memerable to those i studyed at school with (highschool/ University/RMT) i always had vary popular well photocopyed notes. if you read your own notes your brain tells you “seen it, done it, dont have to pay attention” then given my notes your brain says ” seen it, don…….. what? let me sound that out… i have never seen it spelt that way…. well isnt that memerable…. ” and than they get an A and i work my but off for a B or C… oh well. thats becouse my note dont work that way on me my brain is perfictly happy to have 5 different ways to spell jurry and none of them were correct. i am vary pre-gootenberg in my spelling. (randomly aplying difernt rules each time i try to spell a word. one of my frends says she thinks i dont have many if any sight words and my brain decoads or recoads the words each time i try to use them thats why i can wind up with the same word spelt difernt ways in the same parragraph)
i do have a lot of intersts so i may have to ether rite a number of small books….ok i may not be able to do small books…. just look at my idea of a short blog or answer! or maybe a realy big book on a few topics?
keep pokeing at me and maybe we can figure out topics of interest that i know stuff about?
have fun and keep felting!
There you are Jan, we keep telling you that you should write a book – now it’s two, one on armatures and one on framing.
The sooner the better
Ann
ok i think there is a trend of i need to rite a book! let me make it past xmass and finish my photo memorial project by spring and we can try to figure out topics that would be of interst. any suggestions?
i am quite comfortable with wire, and have more i want to explore relating to armatures. Frameing is fun but there are so many exciting new glass options to look at!
is there anything else that mite be worth investigating?
we can thing about it and return to this next spring.
have fun and keep felting (and frameing the felting!!)
I really enjoyed your post, great information sharing, knowledge and skill with framing of our work. I have learnt such a lot from it too. Thank yo.
You are vary welcome! I am glad it was helpfull. i hope this gives you a place to start from and maybe more questions to ask! Ruth has some realy intersting hanging options that dont involve frames or glass thay may be of intest too!
have fun and keep felting
This was such an interesting and informative read. I agree with Cathy and Ann, it should be put into a booklet for sale.
thank you! i see a trend! i will look into book riteing (i feer i will distroy any editor’s spelling by the end of the book though!!) i am glad you enjoyed the post!
have fun and keep felting (and reading but maybe only in audio format since reading while felting may be dangerous to the fingers.)
Thanks for a very informative post Jan. This whole area can be a minefield, it’s great to have so many options and considerations explained and illustrated as you have done here.
thanks Karen! if you have some of the options and what the difference is doing things one way or the other hopefuly you can decide what will work best for your situation. its like informed consent in heath care but more woolly.
its amazing how veamently i have been told never use glass becouse it caoused humidity… then after a few more questions find out the “humididty” apeasrs after washing the glass. or the hummidity occurs after showers and find out the work is hanging in the bath room. sometimes its good to look at why we do something not just how we do something. there may be a perfectly valid reason to not put glass on a pice. you want the sheepy smell, you dont want to compress the locks but dont want a mat or spacers or you would like the pice to be touched. but left with out glass it will likely get fingering, there could also be dust build up, and posibly moths or other hidious things wanting to eat it. so lots of options you just need as much information as posible to make your infored dissition considering what you want your pice to express.
Re the Velcro Jan, don’t trust the glue! I used to use the gluey backed velcro but after a hot day my framed and hung entry in a juried exhibition slid to the bottom of the frame. The heat had melted the glue just enough to let it slip. So now I staple as well.
(Luckily I had not sealed the back of the frame so was able to do a quick repair job when no-one was looking.)
Ann
thanks Ann, heated glue looses its adhesion, is a good thing to consider, i think reinforcing with stitches would help. i have sewen threw stick on velcrow before. its was not easy and it can leave a sticky residue on your needle so i would not think that it would be a good idea for a sewing macheen (not that a sewing macheen would sew through mat bord but it mite work with a canvis backing – well the old treadle would do canvis).
be carefull of staples and humidity, thay can leave a rust marks.
i am glad you were able to fix it!!
OMG. I forgot about rusty staples. I wonder if you can get brass ones, or will they go green – or is that only copper? I hate sewing stick on velcro, so if I’m going to sew to avoid stains, it’ll have to be non stick.
Though I am told that the glue on Wilco’s own brand of stick on is super strong.
Nothing’s simple is it!