A while ago I saw some fused glass pictures and was inspired to make some summer beach pictures. I like the simple style of this type if picture. I spent a few evenings drawing and colouring pictures. I always forget how relaxing and fun colouring is.
I decided to do a seaside picture first as summer has just started. I used
I used all prefelt except for a little silk for the waves. I split the prefelt and cut it so it wouldn’t be too thick where they overlap. I tacked everything down lightly with a felting needle.
This is how it looked after felting once.
I forgot to take one after it was finished but I all became flat and slightly blurred. I decided to add some stitching
It gives it much more definition. you can see how flat and blurred the house and boat edges are. I was thinking of going around the house pieces and the boats. Maybe add some little grass tuffs. and underline the waves in white. What do you think, should I add more stitching?
I was sitting here wondering what the post would be today when I realised it was my turn to post. So you might guess I am running a little behind. It has turned cold her so I thought better make myself a hat. Normally I can make several hats in a day. Not this one. It is a never ending project. I started the hat on Friday. Now its Wednesday and its not done yet. First I made a larger template than usual because I wanted to make a scrunched up hat.Then I looked for colours. I have nothing I want in large enough quantity to make a hat. That means the first thing is to blend all the purples together to get enough wool to make my hat.
Before CardingFirst time through the carder.Third time through the carder
Here it is all the wool laid out on Friday.
The yarn on my spindle in the picture will end up on both parts. I also have a similar hand spun yarn in pinks that will go on the hat. I forgot to take pictures of that on Monday. Last night I sewed it up into tight scrunches ready to be steamed and ironed.
The part that is not sewn will be turned to the inside with the top attached to it. The top was sewn towards the center. My hands were sore after the sewing do my plan is to do the ironing today and then I have to sew the top on and see if it looks any good on me. I will show you the finished hat in my next post. What have you or are you making for yourself ?
Last year I was talking about sorting my felt and fibre scraps into categories. I sorted my felt offcuts by size ranging from long and wide to short and narrow. This photo shows them. I was trying to work out what to do with the smallest pieces. I wondered how it’d look if I just pushed them close together on top of a piece of fabric and sewed them into place. So, I tried. I started in the centre with some red pieces, and they worked alright, so I added more. I kept to similar colours and added some pieces of fabric too because I liked how the nuno felt pieces looked. I also added some art yarns for a bit more texture. I kept adding and sewing until the red section was done, then I worked on the blue part and did the green part last. When it was finished it looked like this:
I kept turning it around, folding it, measuring it. I made sure the piece of fabric I worked on was big enough for a book cover, but the finsihed piece was too thick for that. I turned it over, folded it again and measured a bit more, then decided I could make a book cover out of it if I cut it and used different felt for the inside flaps. So, more measuring, hunting for felt and sewing of felt to fabric. This is what the inside looked like before I’d quite finished the bottom edge:
And, this is what it looked like once all the edges were finished:
I’m not sure whether I prefer it with the red part on the front:
Or whether I like the blue better:
I had quite a good sized piece left over, and I actually really like the green part the best, so I thought I’d use it for a gadget/camera/phone case. This is one side:
And this is the other:
I don’t feel so odd now for saving all the tiniest bits of felt scraps ‘just in case’ 🙂
I’ve been trying to continue with the things I learned during Ruth’s challenge for getting 5 minutes of fibre time into each day. I don’t always manage that and often end up with one or two days where I have a couple of hours fibre time, and 3 or 4 days without, but I’m organising my time better and having projects at different stages, ready to work on when I do have the time. On my desk I have a box of felt pieces that have been measured and cut and are waiting to be sewn. I also have a box of part made up items; things like purses, glasses cases and coin pouches which have been sewn on the machine and are waiting for me to finish off with blanket stitch. These are a few of the purses at various stages, the blue ones just have the back pocket mahchine stitched into place, the white piece on the left has some stitching around the pocket edges, and the one at the front is just in need of a button and buttonhole.
This is one of the camera cases I’ve been working on. The gray fibre is carded silk carrier rods. I blended some of the silk ‘fluff’ with merino and used some for surface texture.
I mentioned last time that I had one more felted piece using the pink synthetic fabric. It isn’t really meant to be anything but an experimental piece, combining nuno techniques and using a resist. This is a compilation of images.
Another experimental piece I did was one using some crimped acrylic fibre that looks like a synthetic version of laps.
It produced a really nice effect.
I have managed to finish off a few pieces and must get them photographed for listing on etsy. This ring pouch is one piece I finished. I first made some heart ring pouches a few years ago so I had somewhere safe to put my rings and bracelets when I take them off for felting. I’ve made a few more for gifts. They’re only small, about 2 inches high and 2.5 inches wide, this photo makes this one look huge!
If any of our UK readers use a lot of fabrics (I know we have some who are doing City and Guilds courses) you might be interested in a post I did on my blog the other day, about Abakhan, the fabric/craft shop I buy most of supplies from. I’m always interested in learning about others though, so if you have a favourite, feel free to share it, we all benefit from others’ experiences, especially if it saves us money 🙂
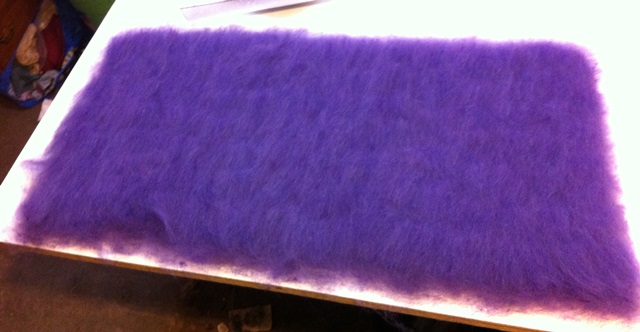
I mentioned recently that I had a look through my box of felt pieces to make things with. I think I put as many pieces back as I kept out (I think anyone who makes felt knows how hard it is to cut pieces up to make things!) so I went through it again telling myself it’s a waste to keep them all packed away in a box 🙂 I had quite a lot of pieces this time. I started looking at some of the bigger pieces to see how many notebook covers I could make. Some of you might recognise this flowery piece from my e-book, I’m trying to convince it it’s big enough to make a notebook cover from! In the end I decided to make a couple of camera cases from it as it had a base layer of muslin.
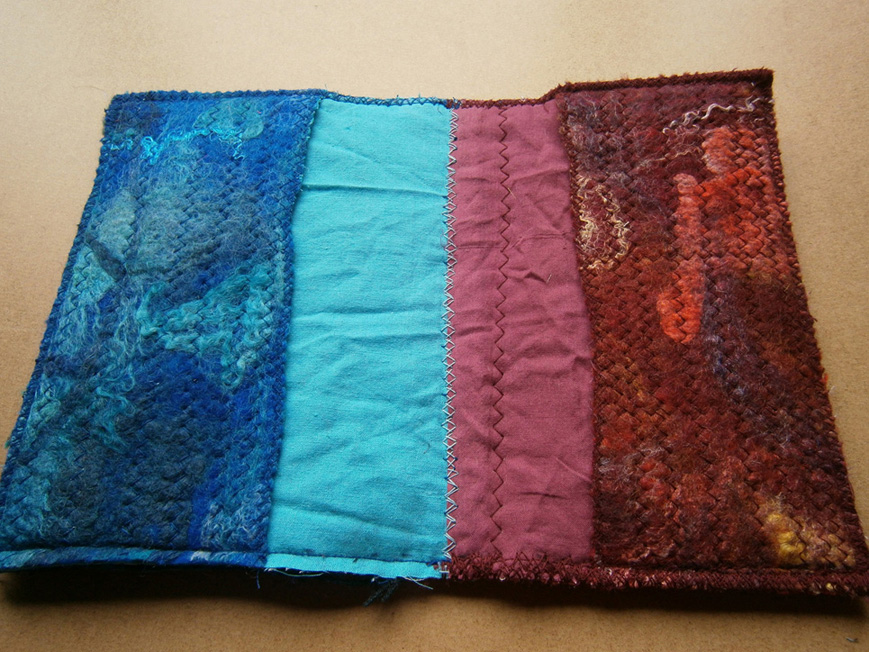
I cut out a placemat and two coasters from a thick felt piece I made just before Christmas and found some pieces perfect for making into glasses cases and coin pouches. I added some stitching to these to make the felt stiffer. I tried to find the perfect embroidery thread to blanket stitch them, but I wasn’t happy with what I had, so waited for the threads I ordered from Rainbow Girl on etsy. They are just like DMC coton perle but with more colour variations. I also finished sewing together my other cotton gauze purse, but haven’t sewn the button holes yet.
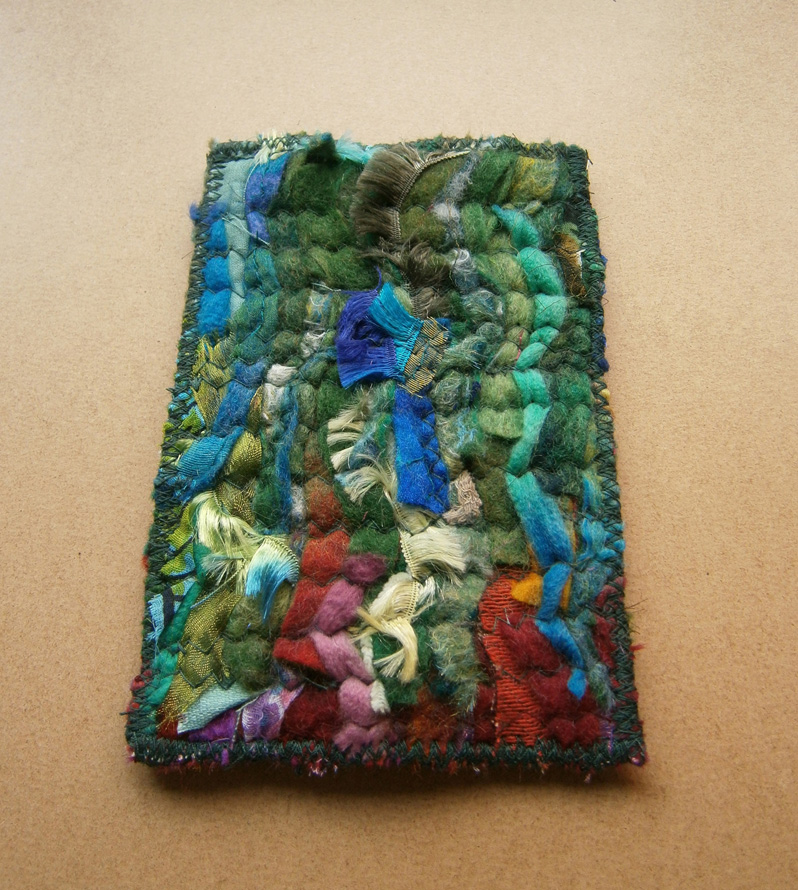
Quite a few of the pieces I had were perfect for gadget cases (camera, phone, iPods) so I ended up with a huge pile of cut out felt pieces waiting to be sewn up with the machine. I finished them by Monday, though I think half that time was spent trying to thread the needle, just as I thought I was about to get the thread through, my eyes would flicker and I’d miss 🙂
Machine stitching might make me feel like the cases are secure, but I never feel anything is finished properly until I blanket stitch it, so out came the threads again.
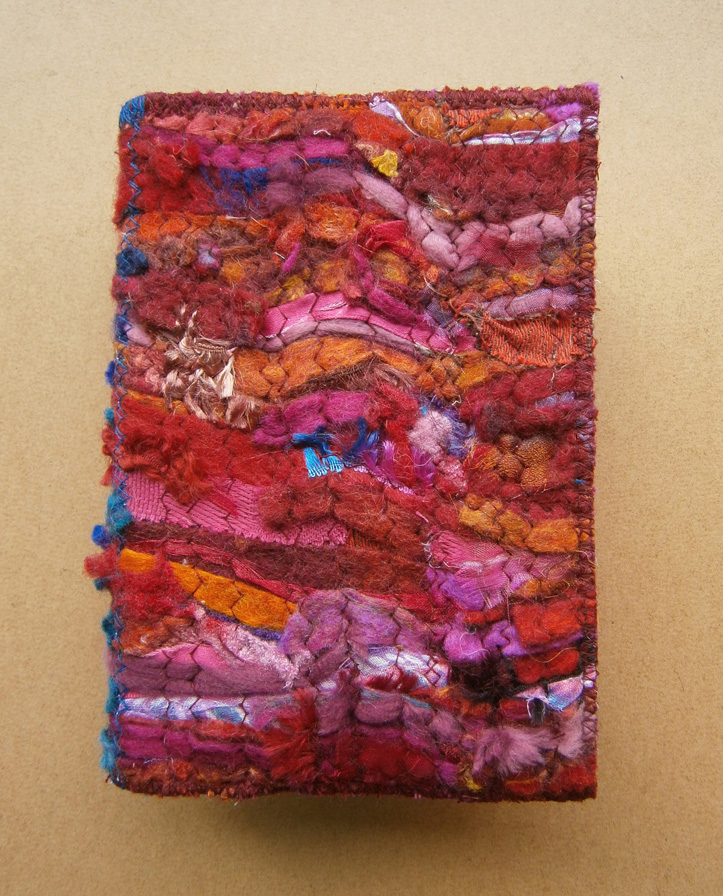
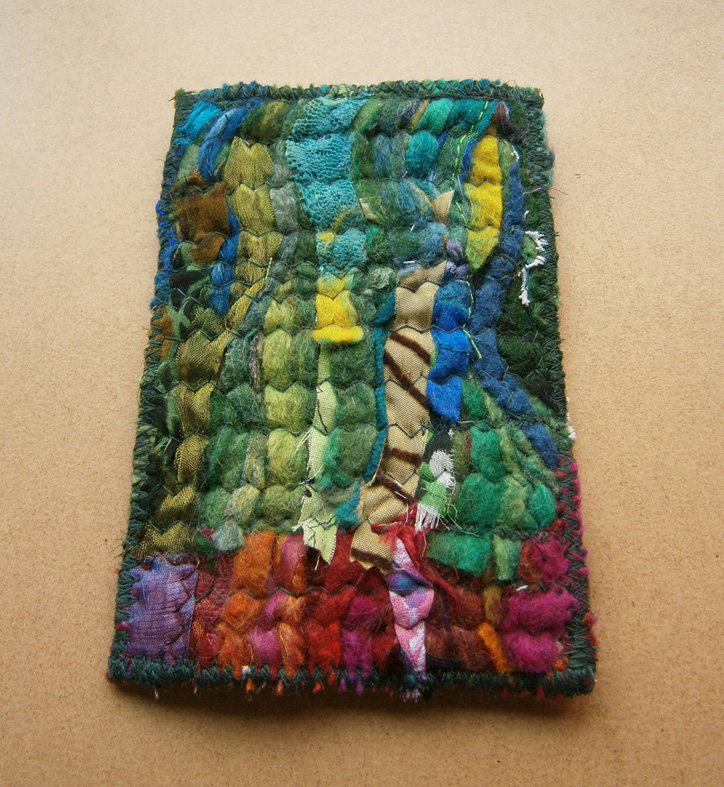
One thing I did manage to get finished this week was a notebook cover. This piece of felt really was hard to cut up!
When I made a pot pouri case last year, I kept the natural edge of the felt for the flap, I really liked the uneven edges. I liked them so much that I try to use the natural edges as much as possible now instead of cutting, and luckily this piece of felt was the exact width I needed for a book cover and I left both the inside flap edges natural and just finished them with blanket stitch. When I’ve managed to work out postage prices and convert to US $, I’ll add this to etsy.
Talking of etsy, I’m trying to add a variety of different things to my shop there and this last week I added some more collage sheets. They are all A4 sheets with 9 ATC size (3.5 x 2.5 inch) images. There are a couple featuring English census returns images and I’m working on a series of sheets featuring altered versions of my original artwork… oils, pastels acrylics and gouache.
Our UK readers probably know that postage prices have gone up again, and not only that but the weight categories have widened too, so the prices/weights jump quite steeply. The new price list is available online now, but it seems they’ve tried to make it as complicated and as clumsy as possible. I went through it and made myself a couple of charts to simplify it. I think I copied all the info correctly, so if it helps, here’s a PDF of prices for letters and small packages.
Around this time last year I was still doing the Take A Stitch Tuesday challenge. I struggled with it, and didn’t always enjoy it, but I did like what I produced when I used some felt offcuts from a piece I’d made with natural wools for placemats and coasters. I used my own handspun thread to sew the stitches. This is one I made using chain stitch, and this is one using cretan stitch. I hadn’t used my threads in a while, but recently I’ve been inspired by my flickr-friend, Marchi Wierson, a sculptural fibre artist who uses a variety of techniques in her work, such as wet felting and crochet, and loves working with natural wools and fibres. Her recent vessel commission and some gorgeous natural fibre yarns had me rummaging through my wools and fibres and getting my spindles out to spin more thread and yarn. I decided to use three shades of Shetland Wool.
I pulled off some of the tops from each shade.
Then I looked through my embellishment fibres for some I thought would make a nice match. I chose Soybean top, viscose top and flax.
I added some of each fibre to the Shetland tops.
Then I blended them by hand.
I got a couple of my spindles out, this is one I made and painted a few years ago.
I made a small amount of thread, though even a small amount of wool and fibres goes a long way when spinning thread. This is it wound around the spindle.
Then I blended up some more Shetland and fibres and spun a thicker yarn. I will probably use the yarn in a wet felting project, though I have used them for needlefelting before.
Do have a look at Marchi’s photostream if you have time, her work is amazing and inspiring 🙂
You might have noticed a few changes to the site recently. We’ve been updating it and adding more photos to the galleries. We’ve also added a new page for Fabrics, and Ann’s ever popular Cat Cave ‘how to’ is now listed on the Wet Felting Tutorials page.
I finally put the free motion embroidery foot on my Sewing Machine. I did a small sample to see what different movements did. I used contrasting thread so I could see what I had done better. As you can see I did a few things. I tried to sew down some loopy yarn. this was hard. The yarn moves and you can’t really pin it very well. Its to easy to run the machine over the pins.
The solid red, with lots of stitching is a piece of silk carrier rod. I tried moving the felt at different speeds and having the machine sew at different speeds. Fast machine and slow hands seemed to work best so far. You can see near the end I was getting better at controlling what I was doing and managed to write my name. I like the way the stitching looks on the tree best, well the green part anyway.
Here is a shot at the back side.
The machine stitching looks so different than hand stitching. I think the combination of the two will be great. But for now I need to practice my machine stitching. Anyone have any tips or suggestions about machine stitching?