Browsed by
Tag: prefelt

A Busy Week and an Half

A Busy Week and an Half

I went to a small sale the other weekend. It was at a small pioneer village. http://www.langpioneervillage.ca/

I demonstrated spinning with a drop spindle and sold 10 drop spindle kits. I think I could have sold 10 more if I had had them.

lang museum

The museum is also working on getting an old Jacquard loom working. This is the one that will stay as just a static display.

lang jaquard loom

If you are old enough you will probably think the cards look like computer punch cards but these pre date computers by quite a bit. The cards are the pattern, they are sewn together. I will post more pictures of the loom over on the forum. http://feltandfiberstudio.proboards.com/thread/1059/jacquard-loom

After the show I stayed wit my friend Maureen who owns Dreamspin Fibres,  http://www.dreamspinfibres.ca/ (shameless plug for a friend) I made a hat using prefelt. I hadn’t done that before.

pink and green hat

The green stuff is some of that strange yarn everyone is knitting and crocheting the spiral scarves with. It is a tube so I cut the tube up one side and opened it out. It came out great.

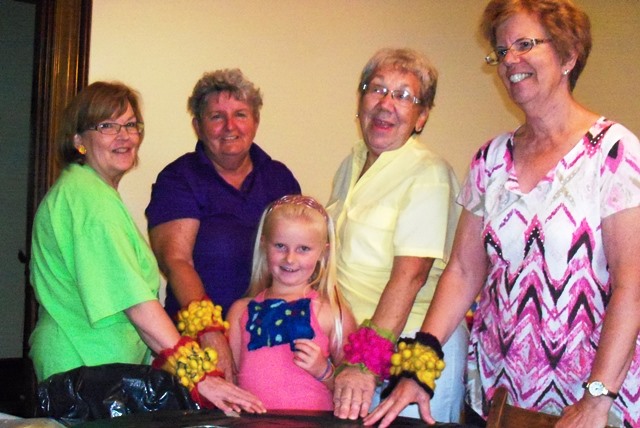
Then this Monday I taught a bobble cuff workshop for the first time. The ladies in the class where a lot of fun. Audrey’s granddaughter was there and very interested so I gave her some wool and she made a small picture in a plastic bag and I showed her how to make a tube bead with some pencils.

cuff class

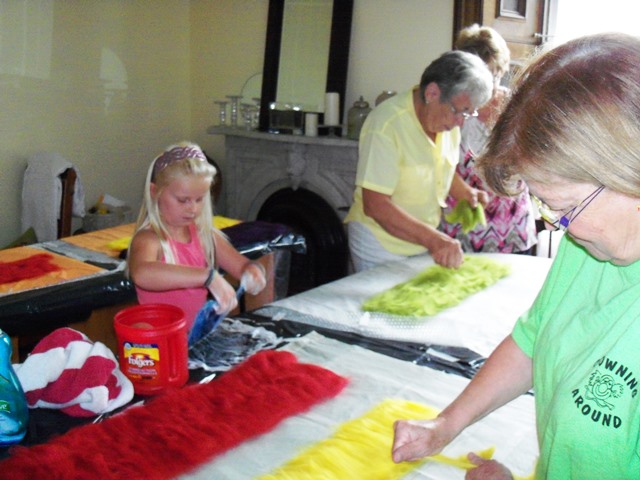
By the end of the class they had the marbles in the cuffs. The cuffs have to dry before you can cut them to get the marbles out. They will do that today. I made everyone a sample with marbles in them so they could try cutting the felt while I was still there.

cuff class finished

That’s been my very busy week and a half. I almost forgot to do my post today as I was busy making hats and scarves for a sale I have on September 7 and 8 in Almonte. http://mvtm.ca/museum/?page_id=2675 If you are in the area come out and say hi.

Felt Cuffs in Progress

Felt Cuffs in Progress

This week I am working on a few cuffs. These will have bubbles in them so they have to start out really long as when I put the marbles in them to get the bubbles they shrink fast.

These are made with commercial prefelt.  Then some silk offcuts from other projects and some throwsters waist

cuffs ready 1 cuffs ready 2 cuffs ready 3 cuffs ready 6

The bottom right picture is the back side of one of these. It is covered in silk throwsters waist. The silk will show up inside the bubbles.

The back ground is prefelt and  a green batt  cut  with my rotary cutter to get the nice neat rectangles. There is throwsters waist and some blue faced leicester curls that I dyed.

cuffs ready 4 cuffs ready 5

Next I wanted to try something different.

cuffs ready 7

The red is a thick piece of prefelt form an other experiment. It wouldn’t stay folded over the curls until after it was wet down but I forgot to take a picture of it. I added some throwsters waist onto the top after I folded it.

Can you tell I was in the mood for throwsters waist?  I do love how it shines and goes all curly. The next time it’s my turn to blog I hope to have them done so I can show you how they turned out.

Prefelt

Prefelt

There are two kinds of prefelt. One is needled prefelt. Commercial prefelt is done this way. It is needled just enough to hold together.  I use this sometimes, it works very well. I get it in small pieces and by the yard from Dreamspin Fibers. http://www.dreamspinfibres.ca/  (shameless plug for a friend).

The second is wet felted and this is easy to make yourself. Lately that is what I have been doing. You layout your felt as usual but you stop when it is just holding together.  Rinse it out carefully and let it dry. it is till fragile but strong enough to cut out shapes when you don’t want the fuzzy edges that traditional layout gives you.   I have been making  small pieces and some from the ends of some batts that are not big enough to do much with. They are very helpful when you want very definite shapes.

prefelt on table

I don’t have any exact plans for them but they are very handy to have around.


My Second Entry into the Weather Felting Challenge.

My Second Entry into the Weather Felting Challenge.

I was tidying up after making something else and had a pile of green trimming. With Zed’s felt scraps post still fresh in my mind they looked like branches to me. I think I must be in a tree mood. I used prefelt for the back ground because I didn’t have any scrap black felt and I wanted to get on with making the pictures and not with felt making.


I used the edge of an off cut in very pale blue piece of felt for the snow and a very thin edge piece for the clouds and moon. its hard to see but I layered the snow pieces on  2 of the pictures to see if it would give more depth after felting. i have never had much luck wet felting finished felt to semi felted pieces but after some rubbing and rolling it all went together really well. I am quit pleased with how they turned out.

There is more depth in the layered pieces. It doesn’t show well bit it does make the snow look more dimensional.  They still need ironing to straighten up the edges. They are a bit to big to use on cards. I think they might look nice side by side in a long frame.

So now I have answered Zed question what do you do with your scraps. http://feltingandfiberstudio.com/2012/11/10/felt-and-fibre-scraps/

Felt Cuffs and Hats

Felt Cuffs and Hats

My last post showed you some bubble samples I made when visiting my friend Maureen. This time I will show you what we did with them. The first thing we did was try some wrist cuffs. We both used the same colours. They were two scrap pieces of pre felt that Maureen had. We felted them together and down to 22 inches long. The bubbles will bring them to a good length for around your wrist.


I won’t show you all the steps of felting and putting the marbles in but as you can see it was done in the sun on the patio with a glass of wine. We are not all work and no play. In the right hand picture you can see the marble inside the bubble I just cut open.


Here they are on and in the right hand picture you can see we left one bubble uncut. It acts as the button to fasten the cuff around your wrist. We put a felt ball in that one.  That was a success so we decided to do hats.


Here you can see the resist and the size of the finished hat with the marbles in it. On the right is Maureen with hers on. They are still wet at this point. We ran them through her laundry spinner and they were dry in the sun in an hour.


By then we had eaten dinner and it was back out the deck for a glass of wine and cutting. Here we are wearing them and a close up of mine so you can see the cut bubbles better. I stretched the large bubble after I cut it open to really show off the contrasting colours.

We had a great couple of days together felting and enjoying the weather. I have to say her husband was great he did most of the cooking and all of the clean up.

Surface Texture Challenge – Mouldy Cheese

Surface Texture Challenge – Mouldy Cheese

A couple of weeks ago I joked that I’d found inspiration for Ruth’s Texture Challenge in my fridge. I wasn’t really joking 🙂 I’ve always liked the look of mould, but there was a really nice looking piece of mouldy cheese that I thought would be perfect for the Challenge. I didn’t get to photograph it straight away, and the mould had grown a little more than I liked by the time I did, but it still looked good. I discovered that photographing mould is as ‘easy’ as photographing felt, so it’s not a great photo, sorry.

Mouldy Cheese

 I started with a couple of layers of merino to get the shape, then I blended different amounts of greens and mustardy merino shades with some plastic fibre for the main mouldy parts and used white prefelt and wool nepps for the white parts, then I wet felted it. I didn’t get the colours quite right, but I like the way it looks and it was fun to do. Now I’m wondering where I should look next for inspiration? 🙂

Felt