Browsed by
Tag: prefelt

Grapes of Memories Past

Grapes of Memories Past

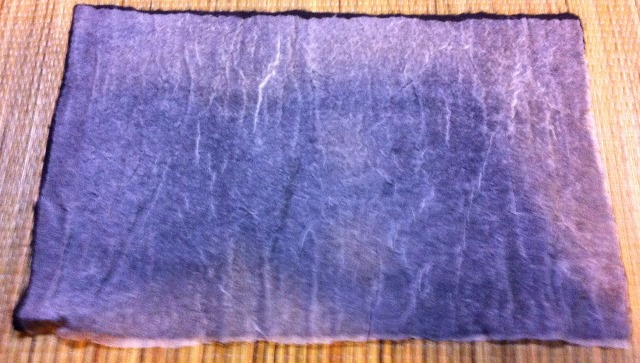
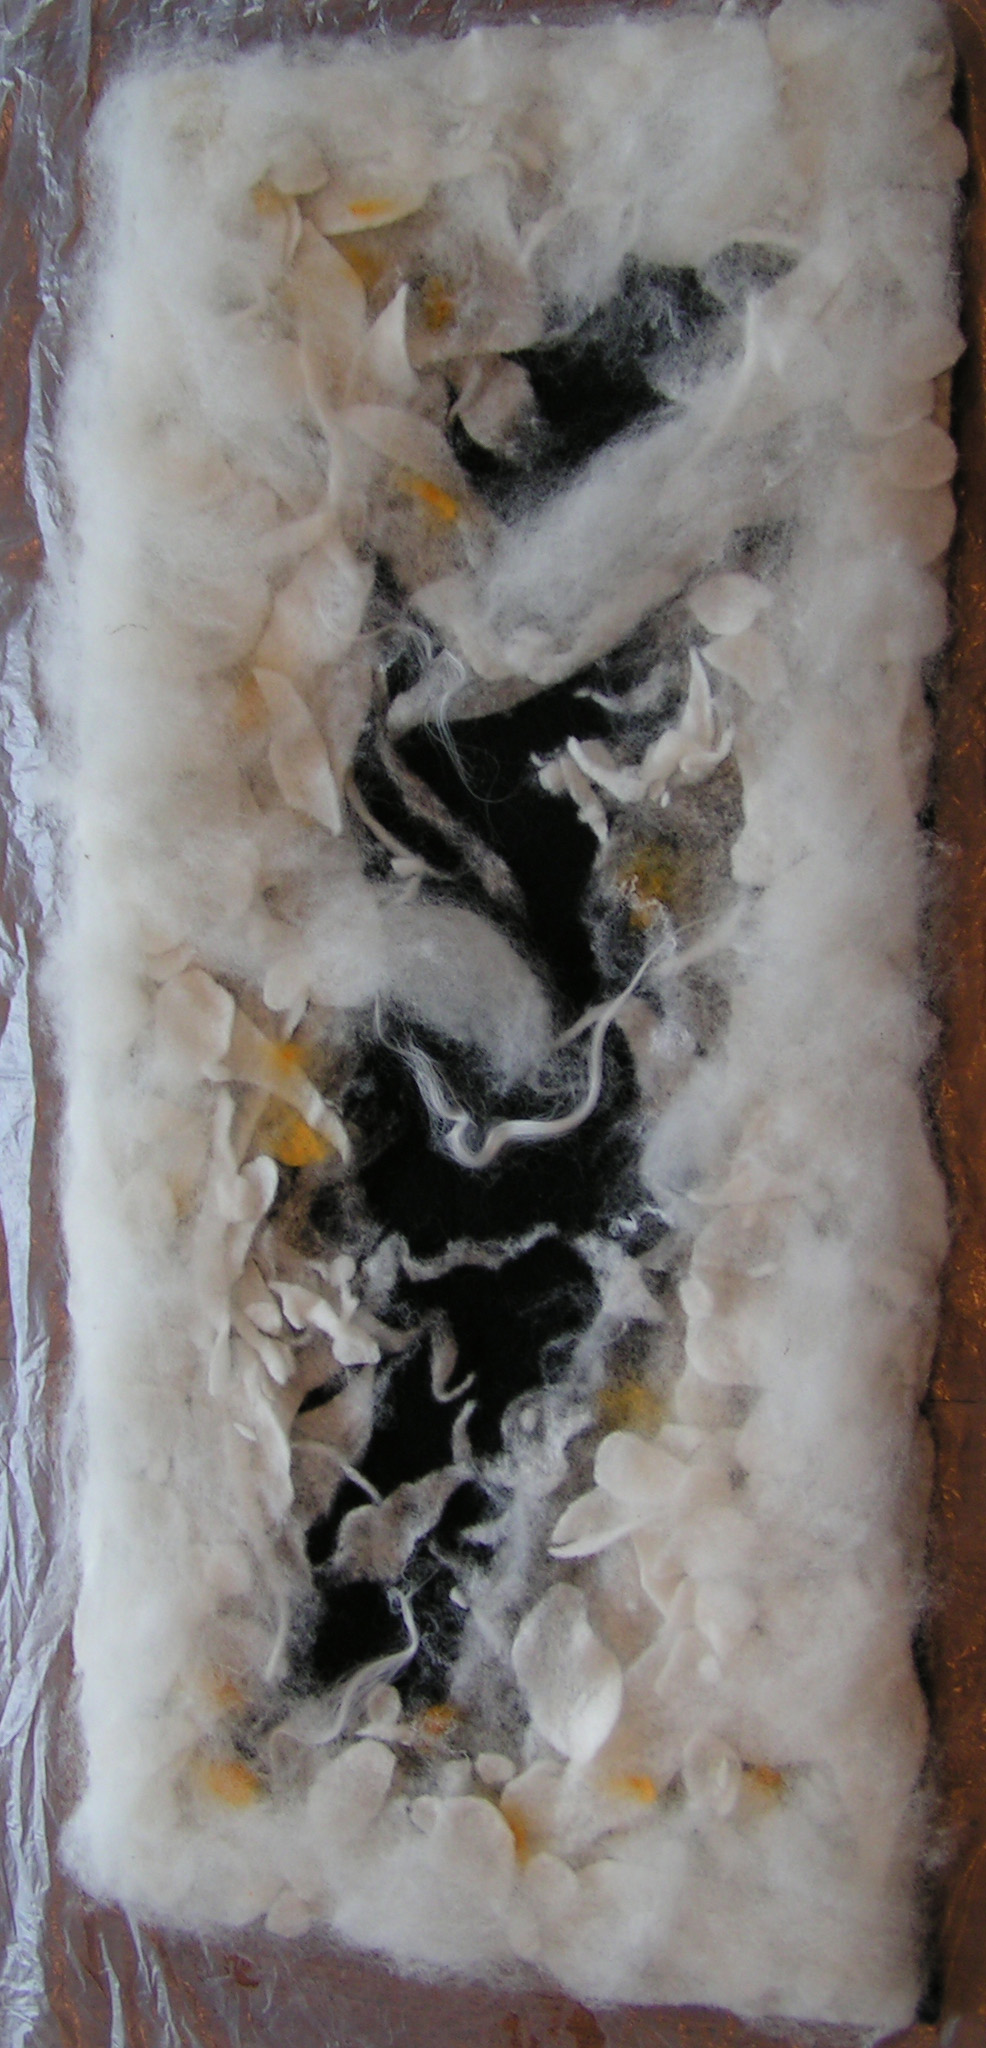
When I first started dyeing roving, I had a few “oops” results.  However, since I’ve acquired a drum carder, I’ve learned I can revive the partially felted roving with careful carding and patience.

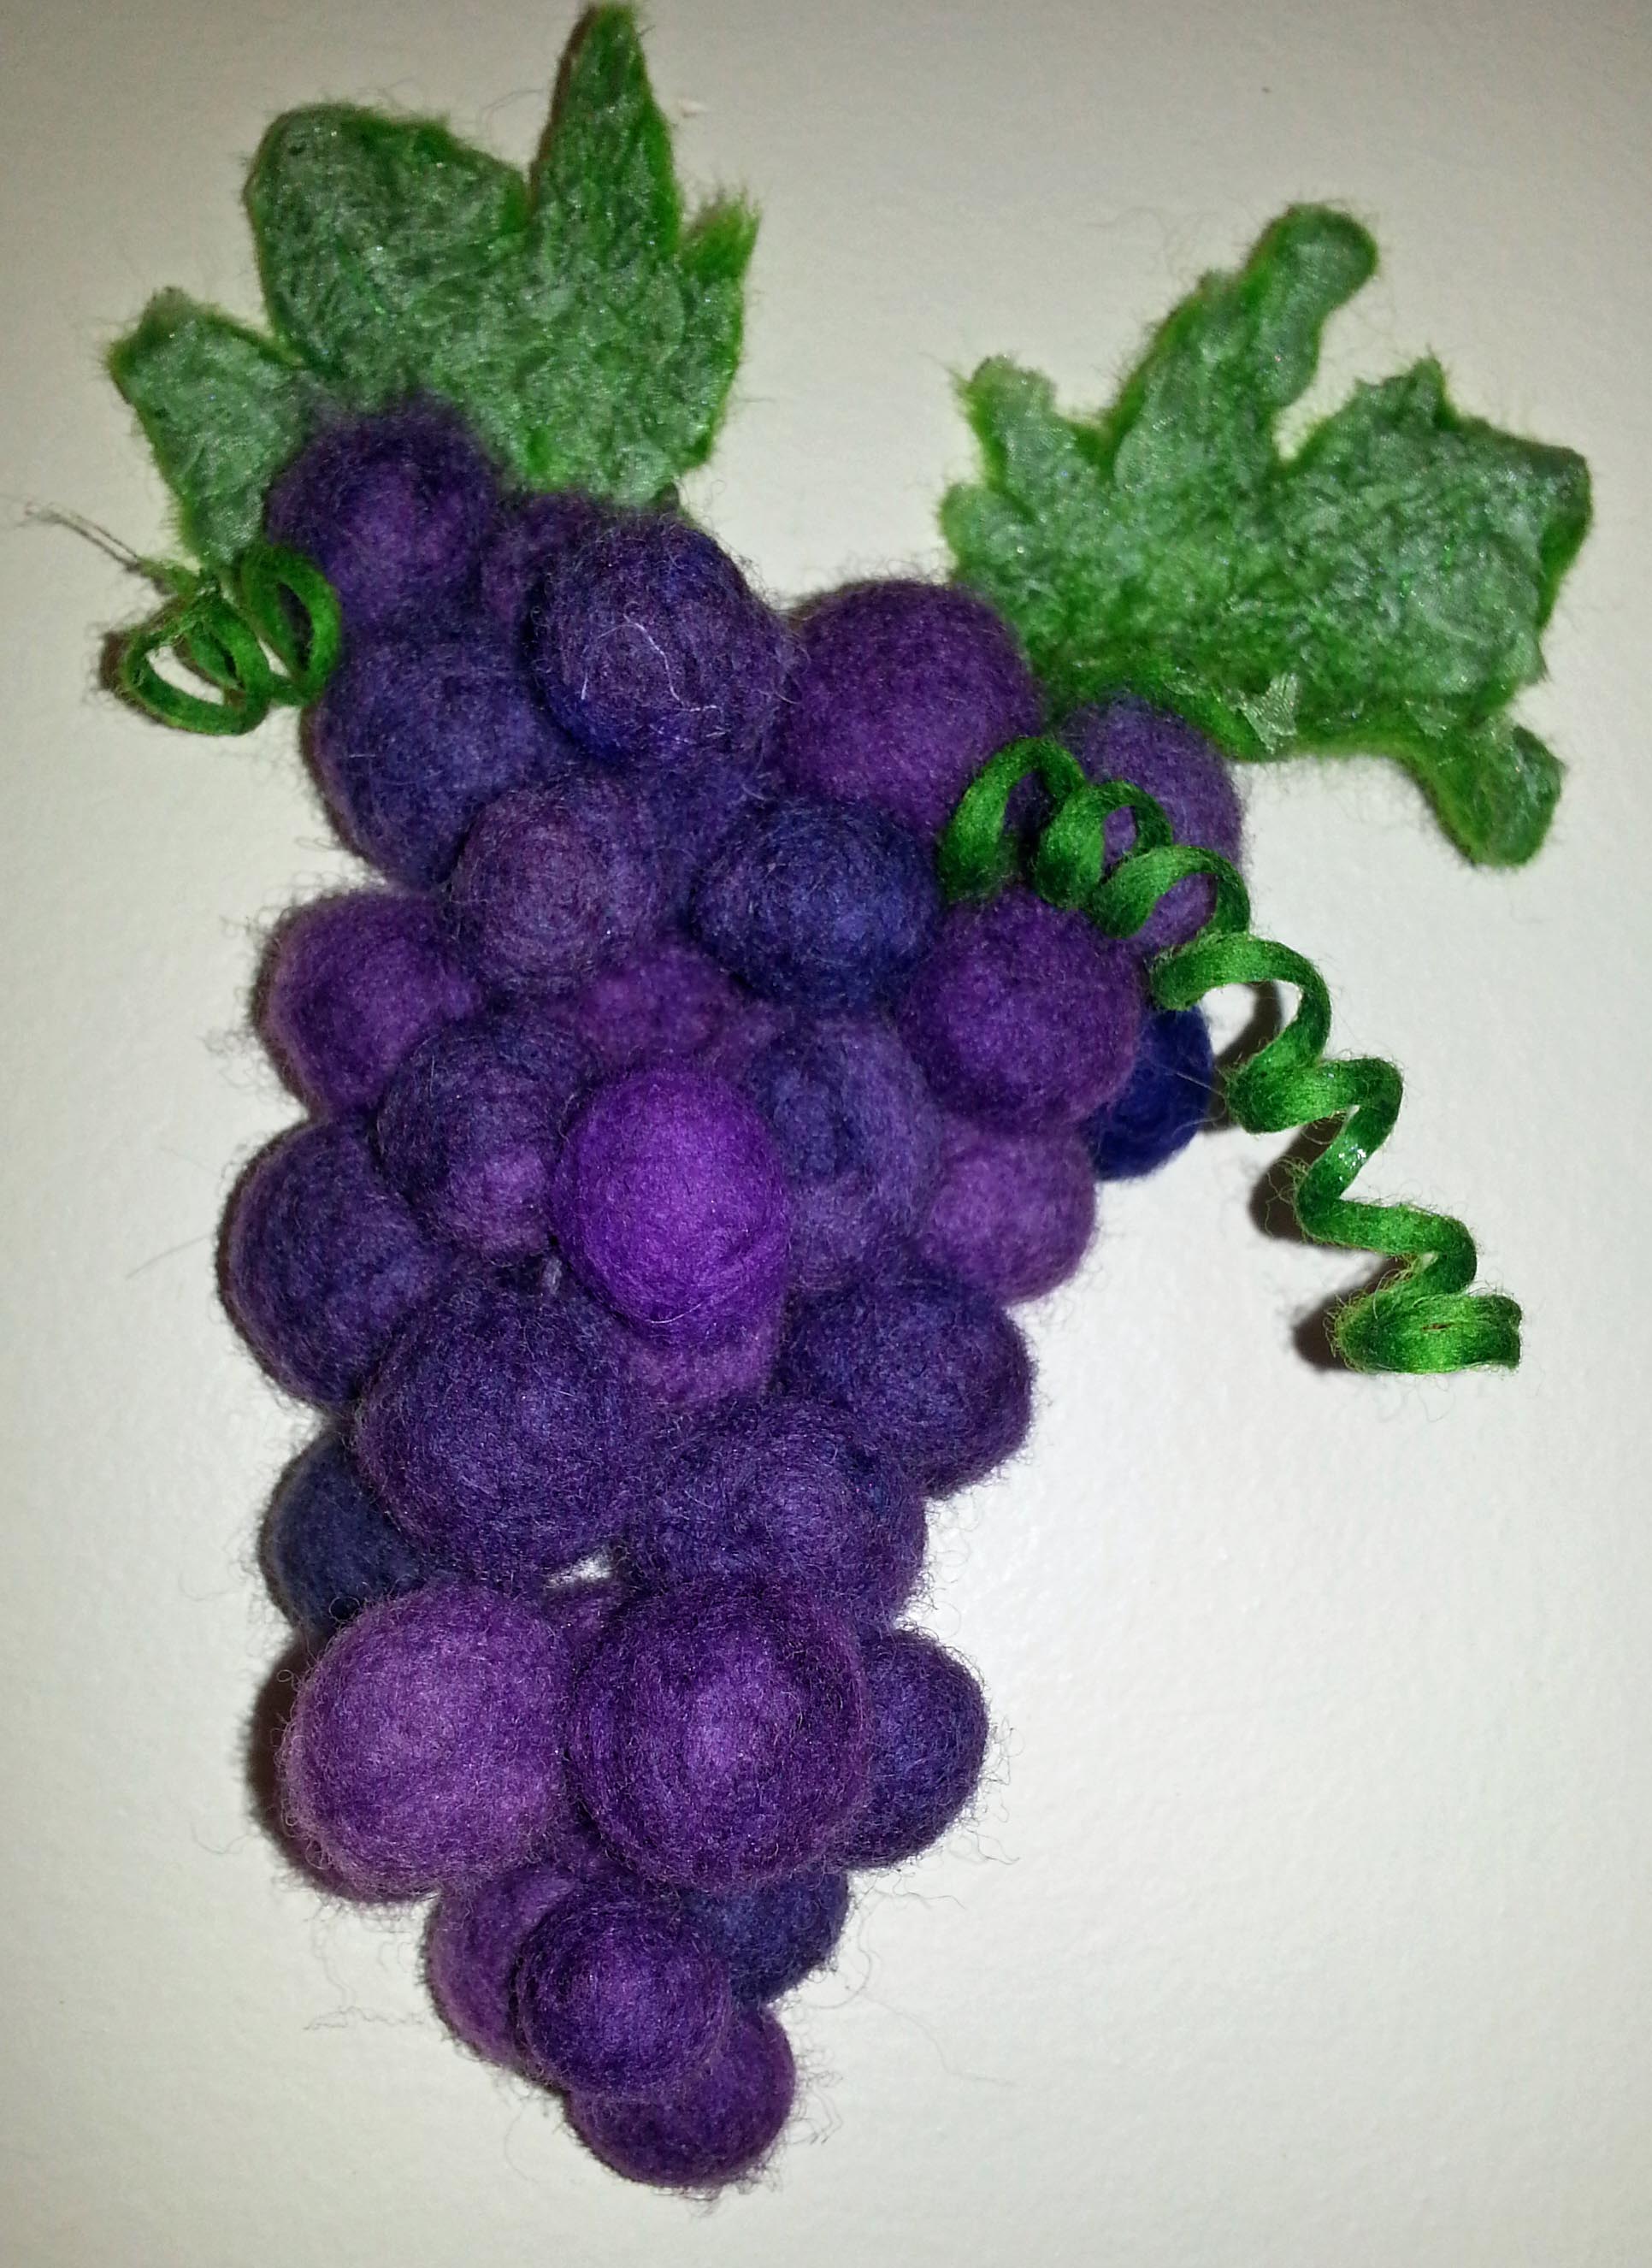
I’ve had this purple roving sitting around for a couple of years.  I really enjoy making three dimensional objects so it seemed natural to make some grapes with my previously felted roving.  Not only did I feel good about being able to use the roving, but it brought back happy memories of my childhood when we had grape vines in our yard.

It was a tradition to pick the grapes, then my mother would make jelly and grape juice.

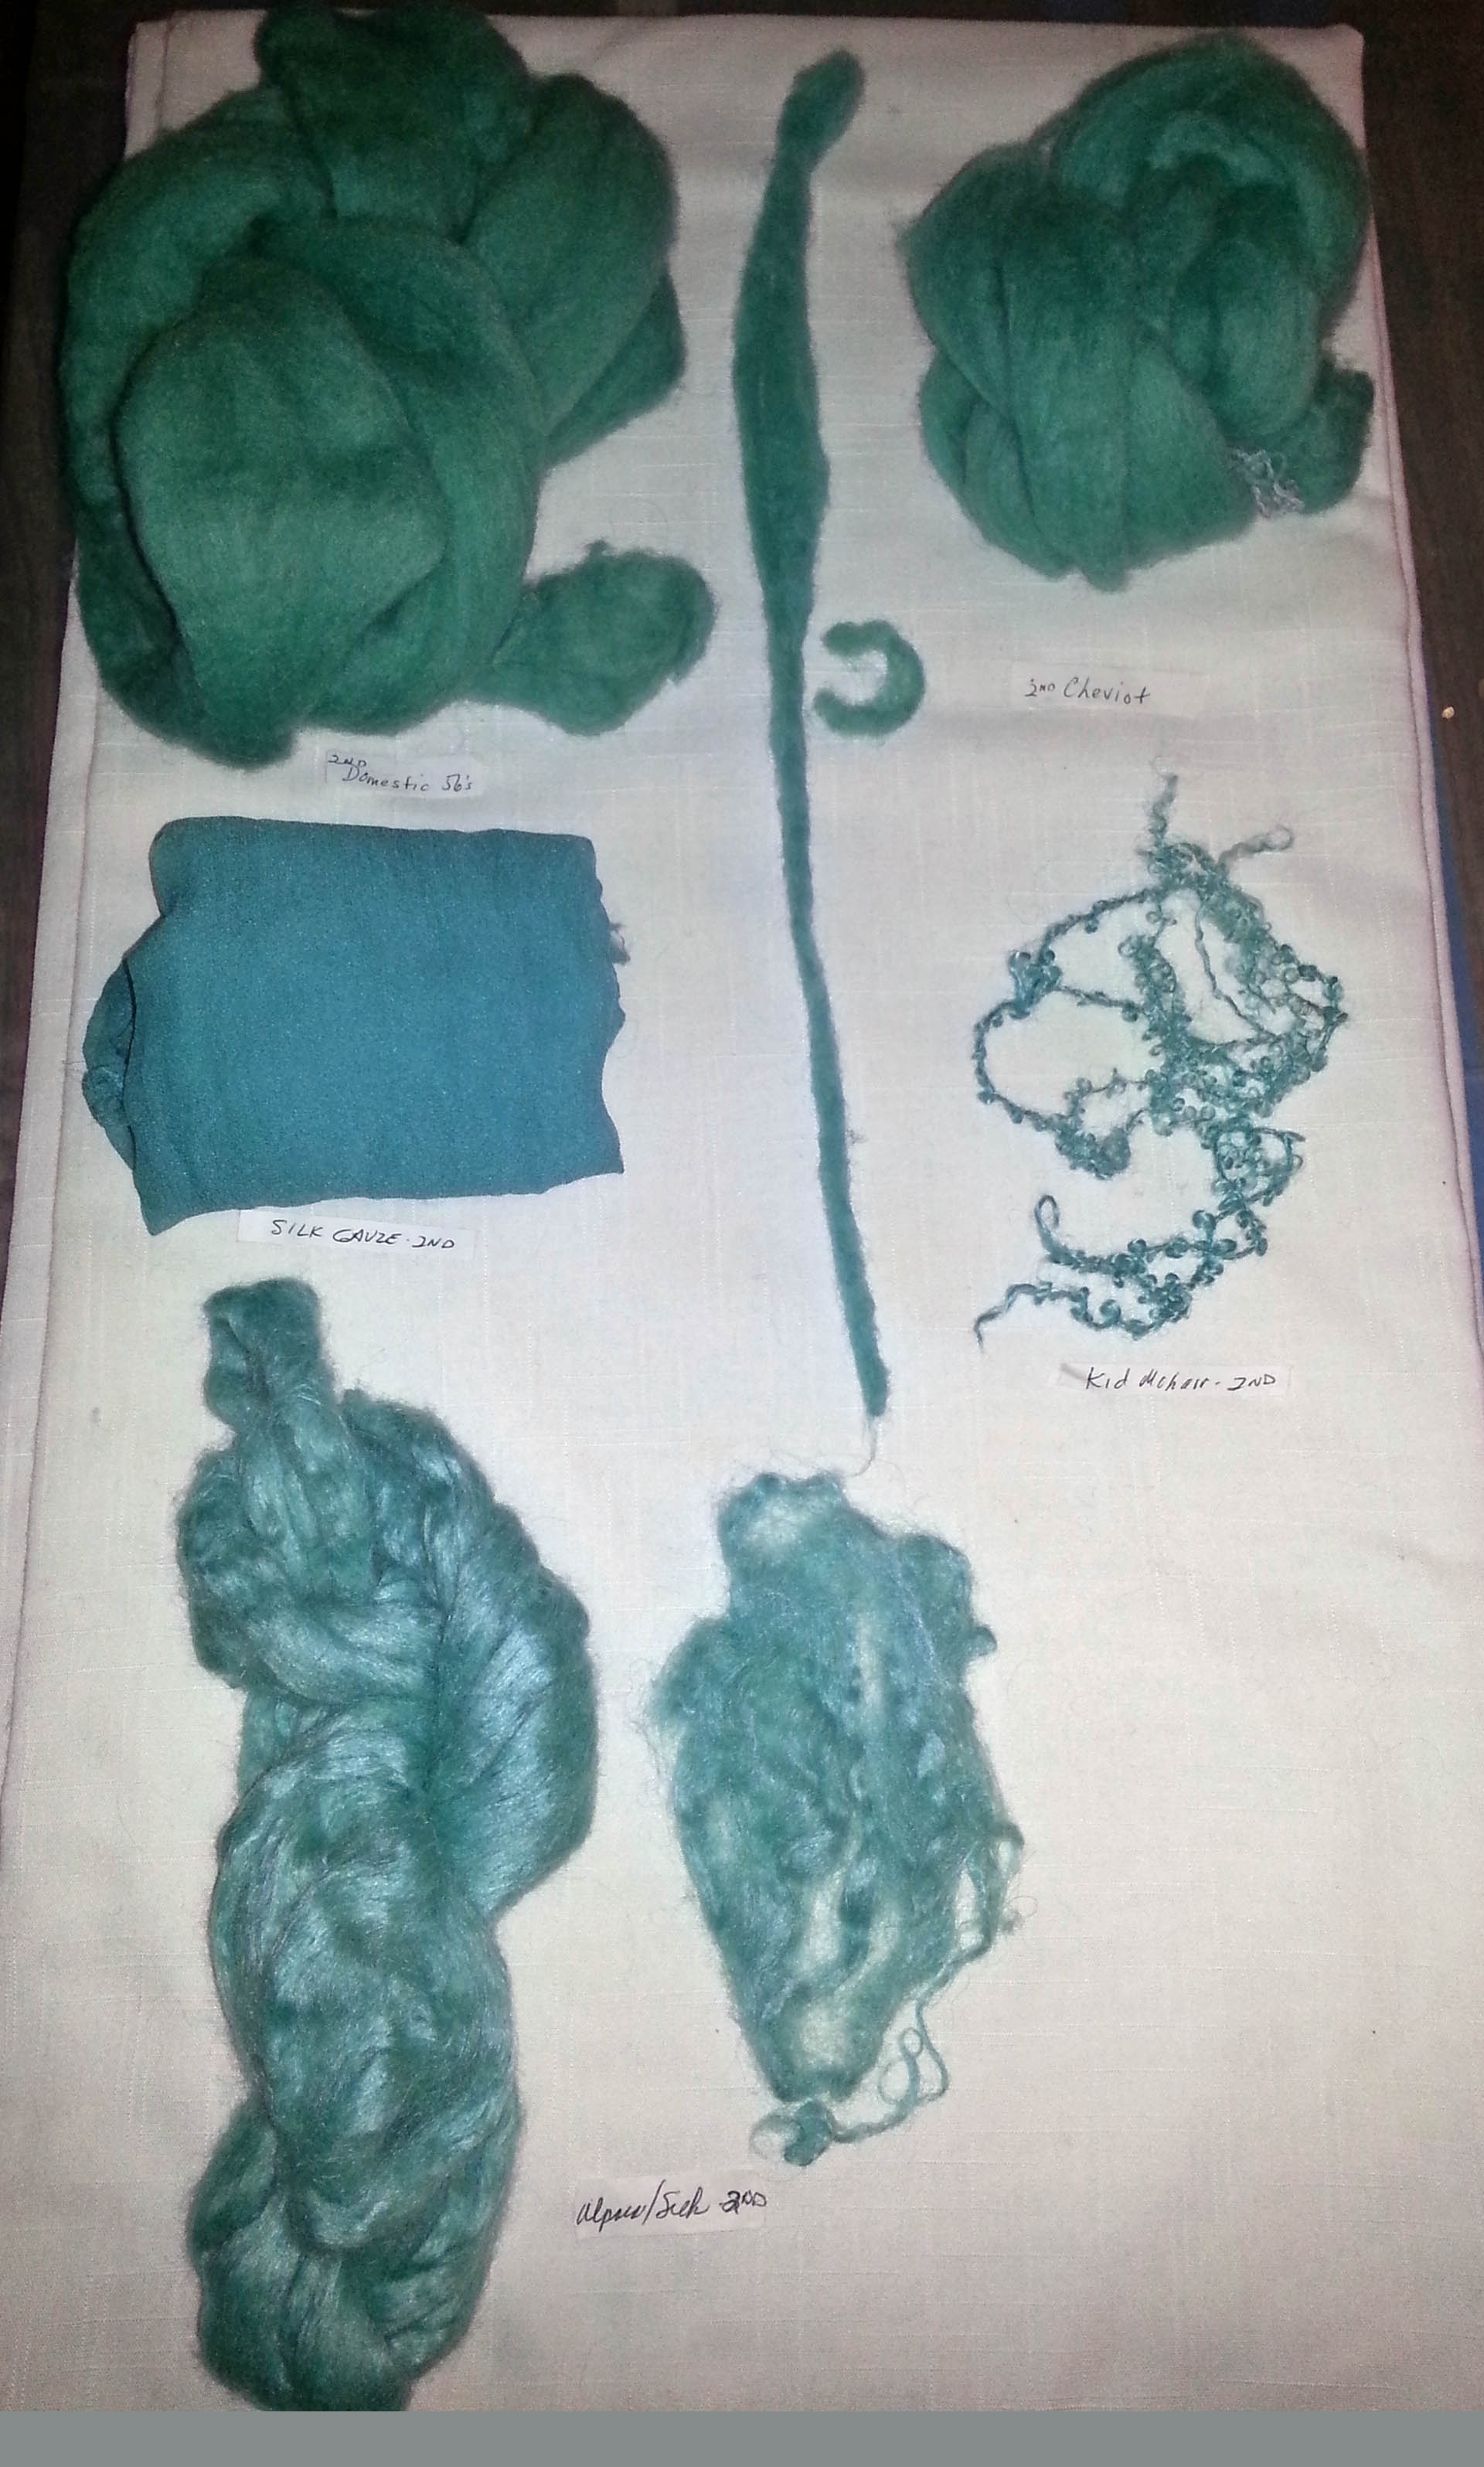
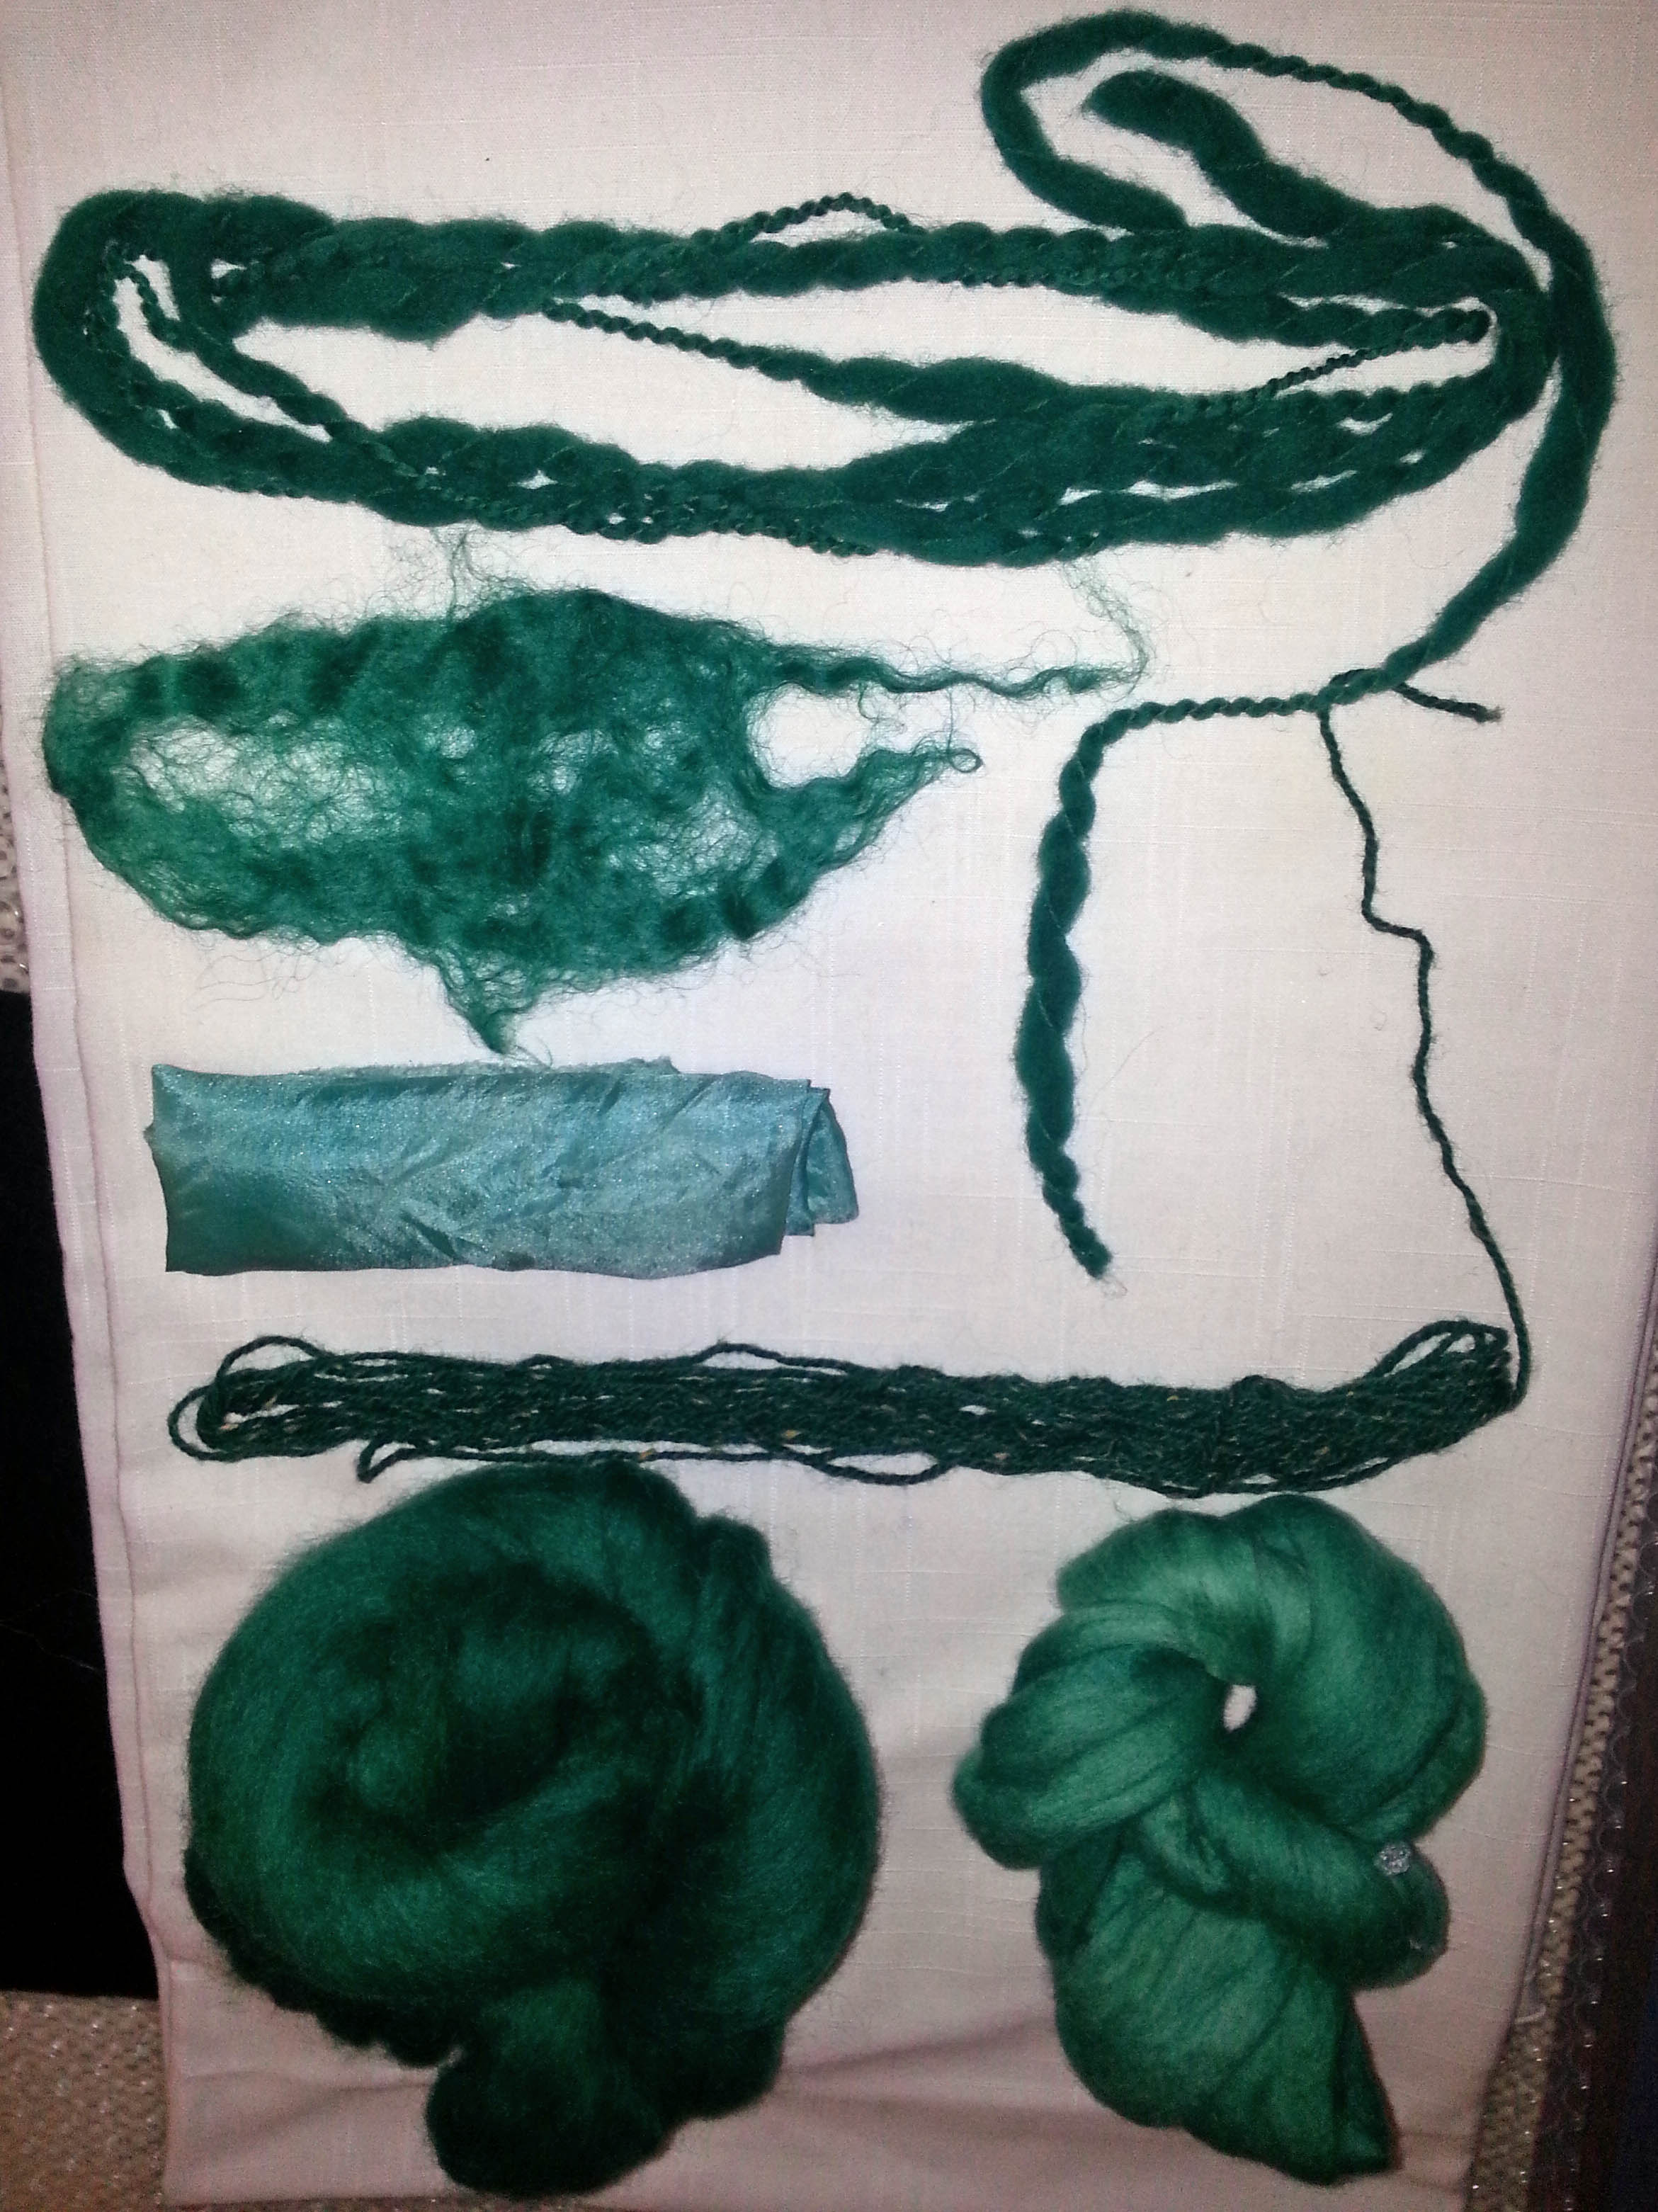
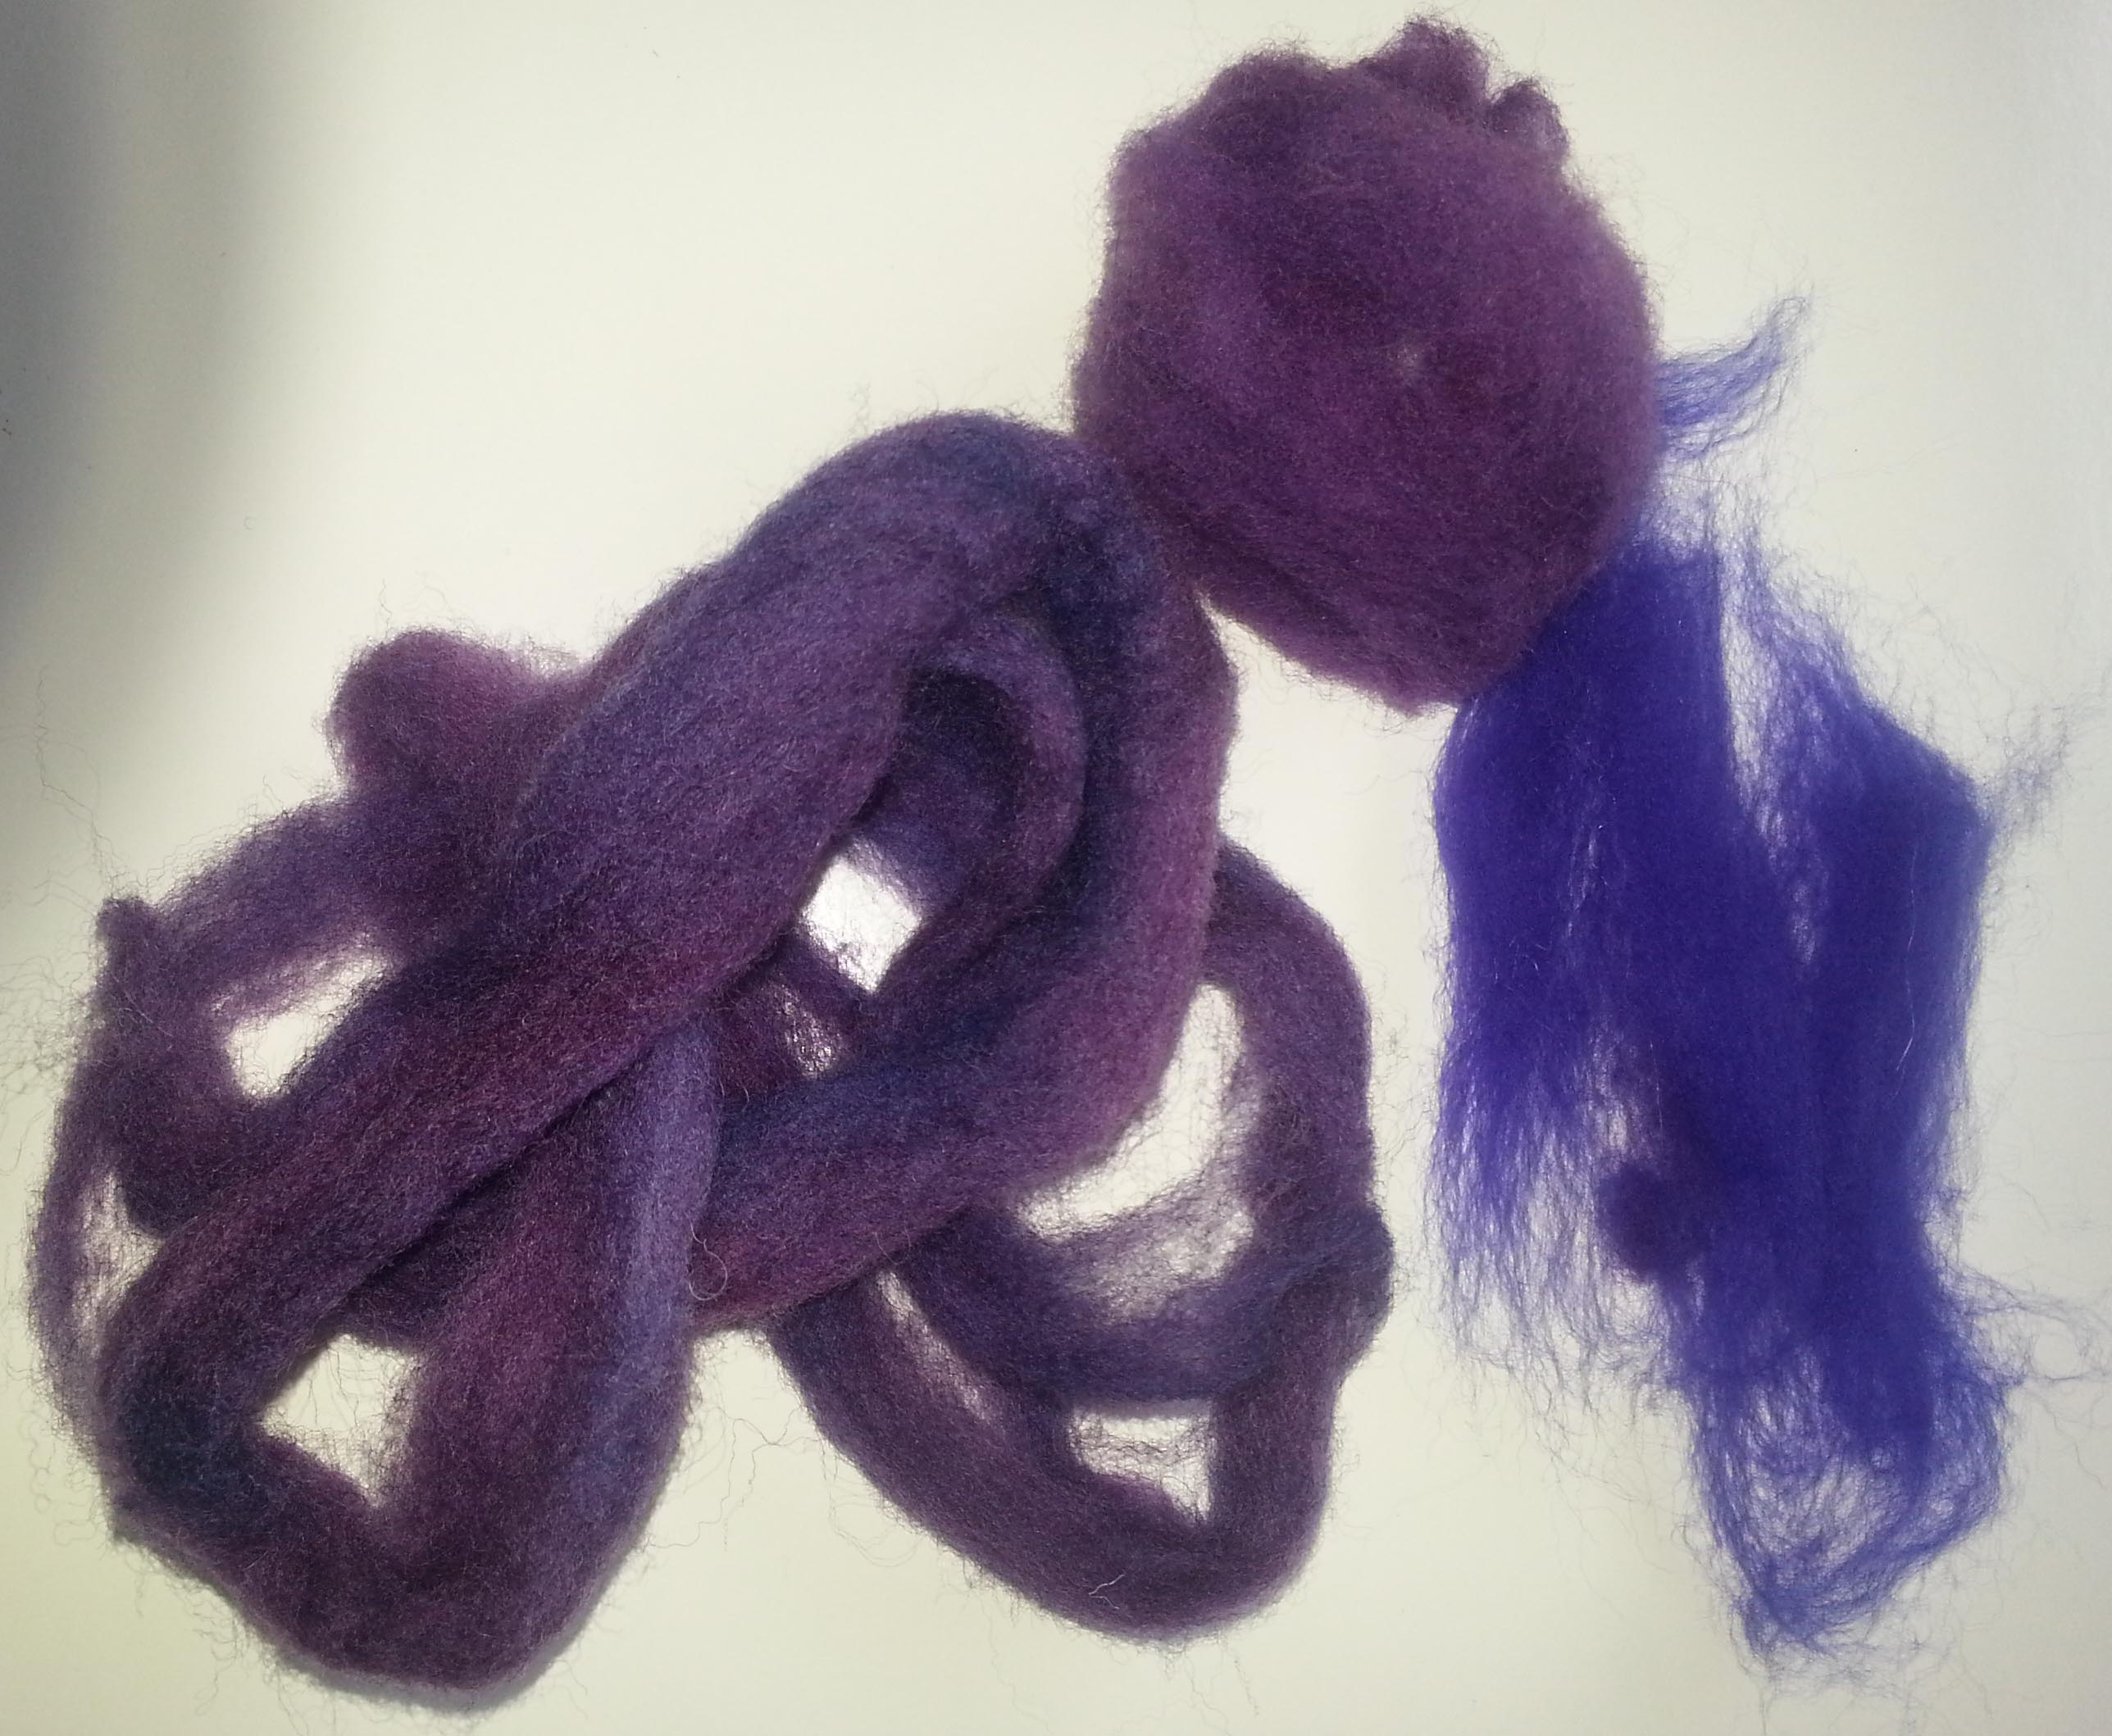
The roving already had various shades of purple so after running the partially felted roving through the carder,  I added some other shades of purple merino.  The addition of unfelted roving give it a shiner and softer appearance and texture.

roving

Since grape leaves are very textured, I decided to make a prefelt with a silk top for the leaves. It gave it some texture and sheen.

nuno prefelt

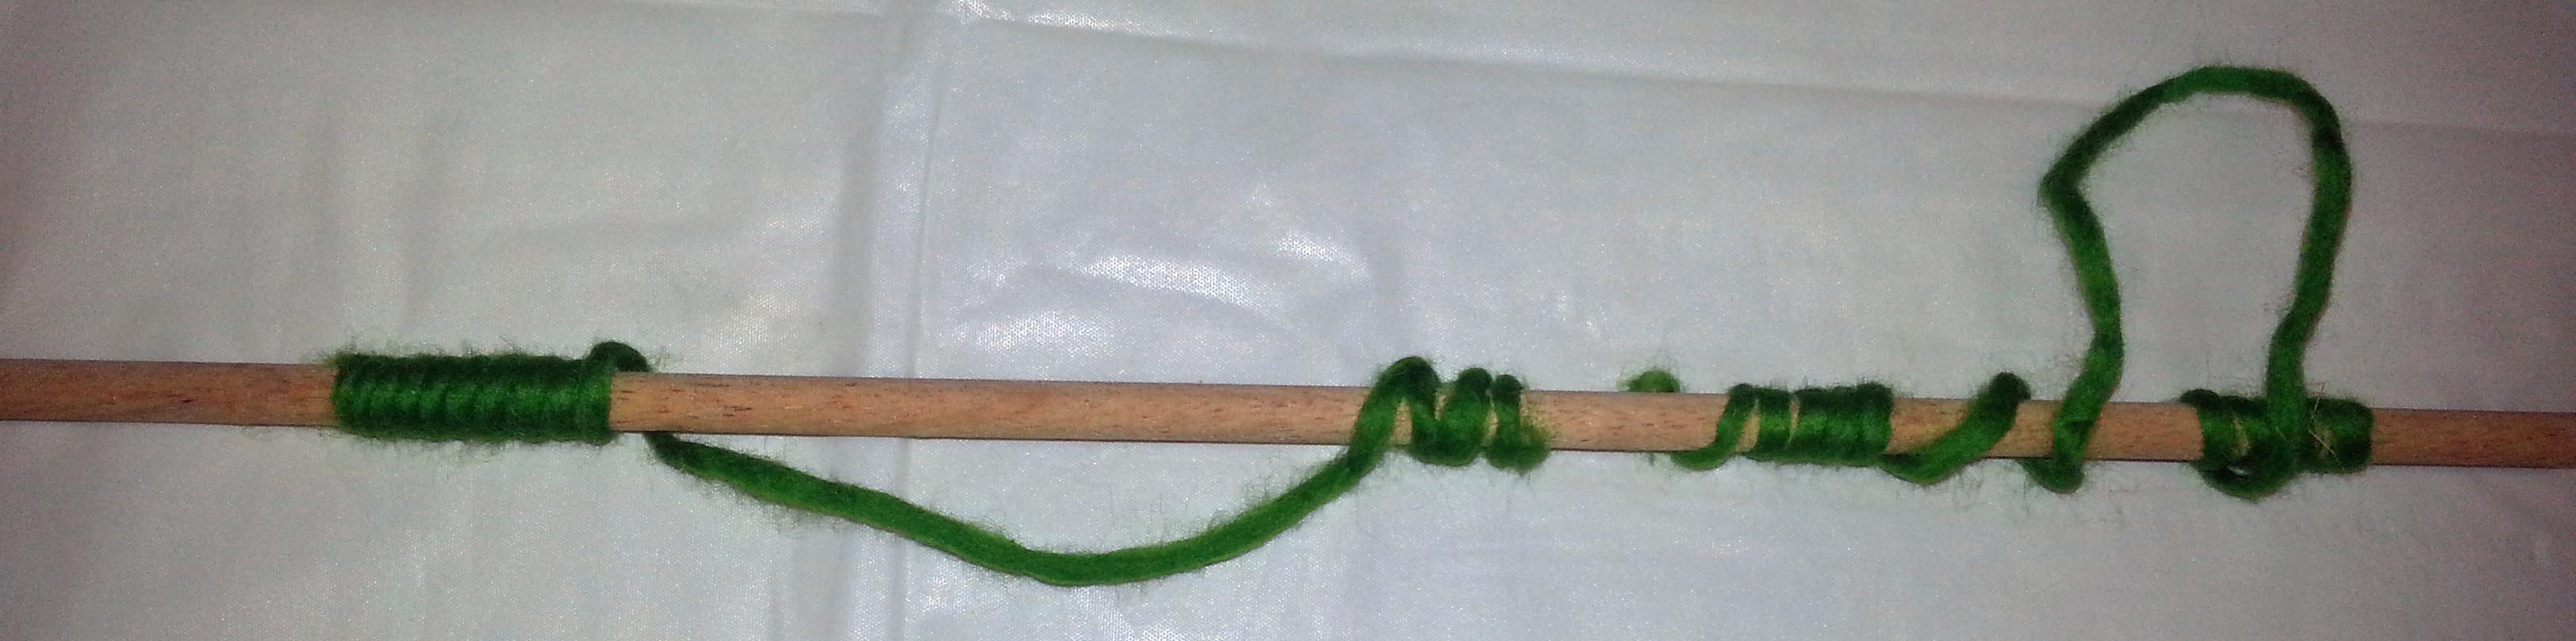
For the vines, I used roving rolled into a cord, then wrapped it around a small dowel to dry then cut it to the length I wanted.

vines

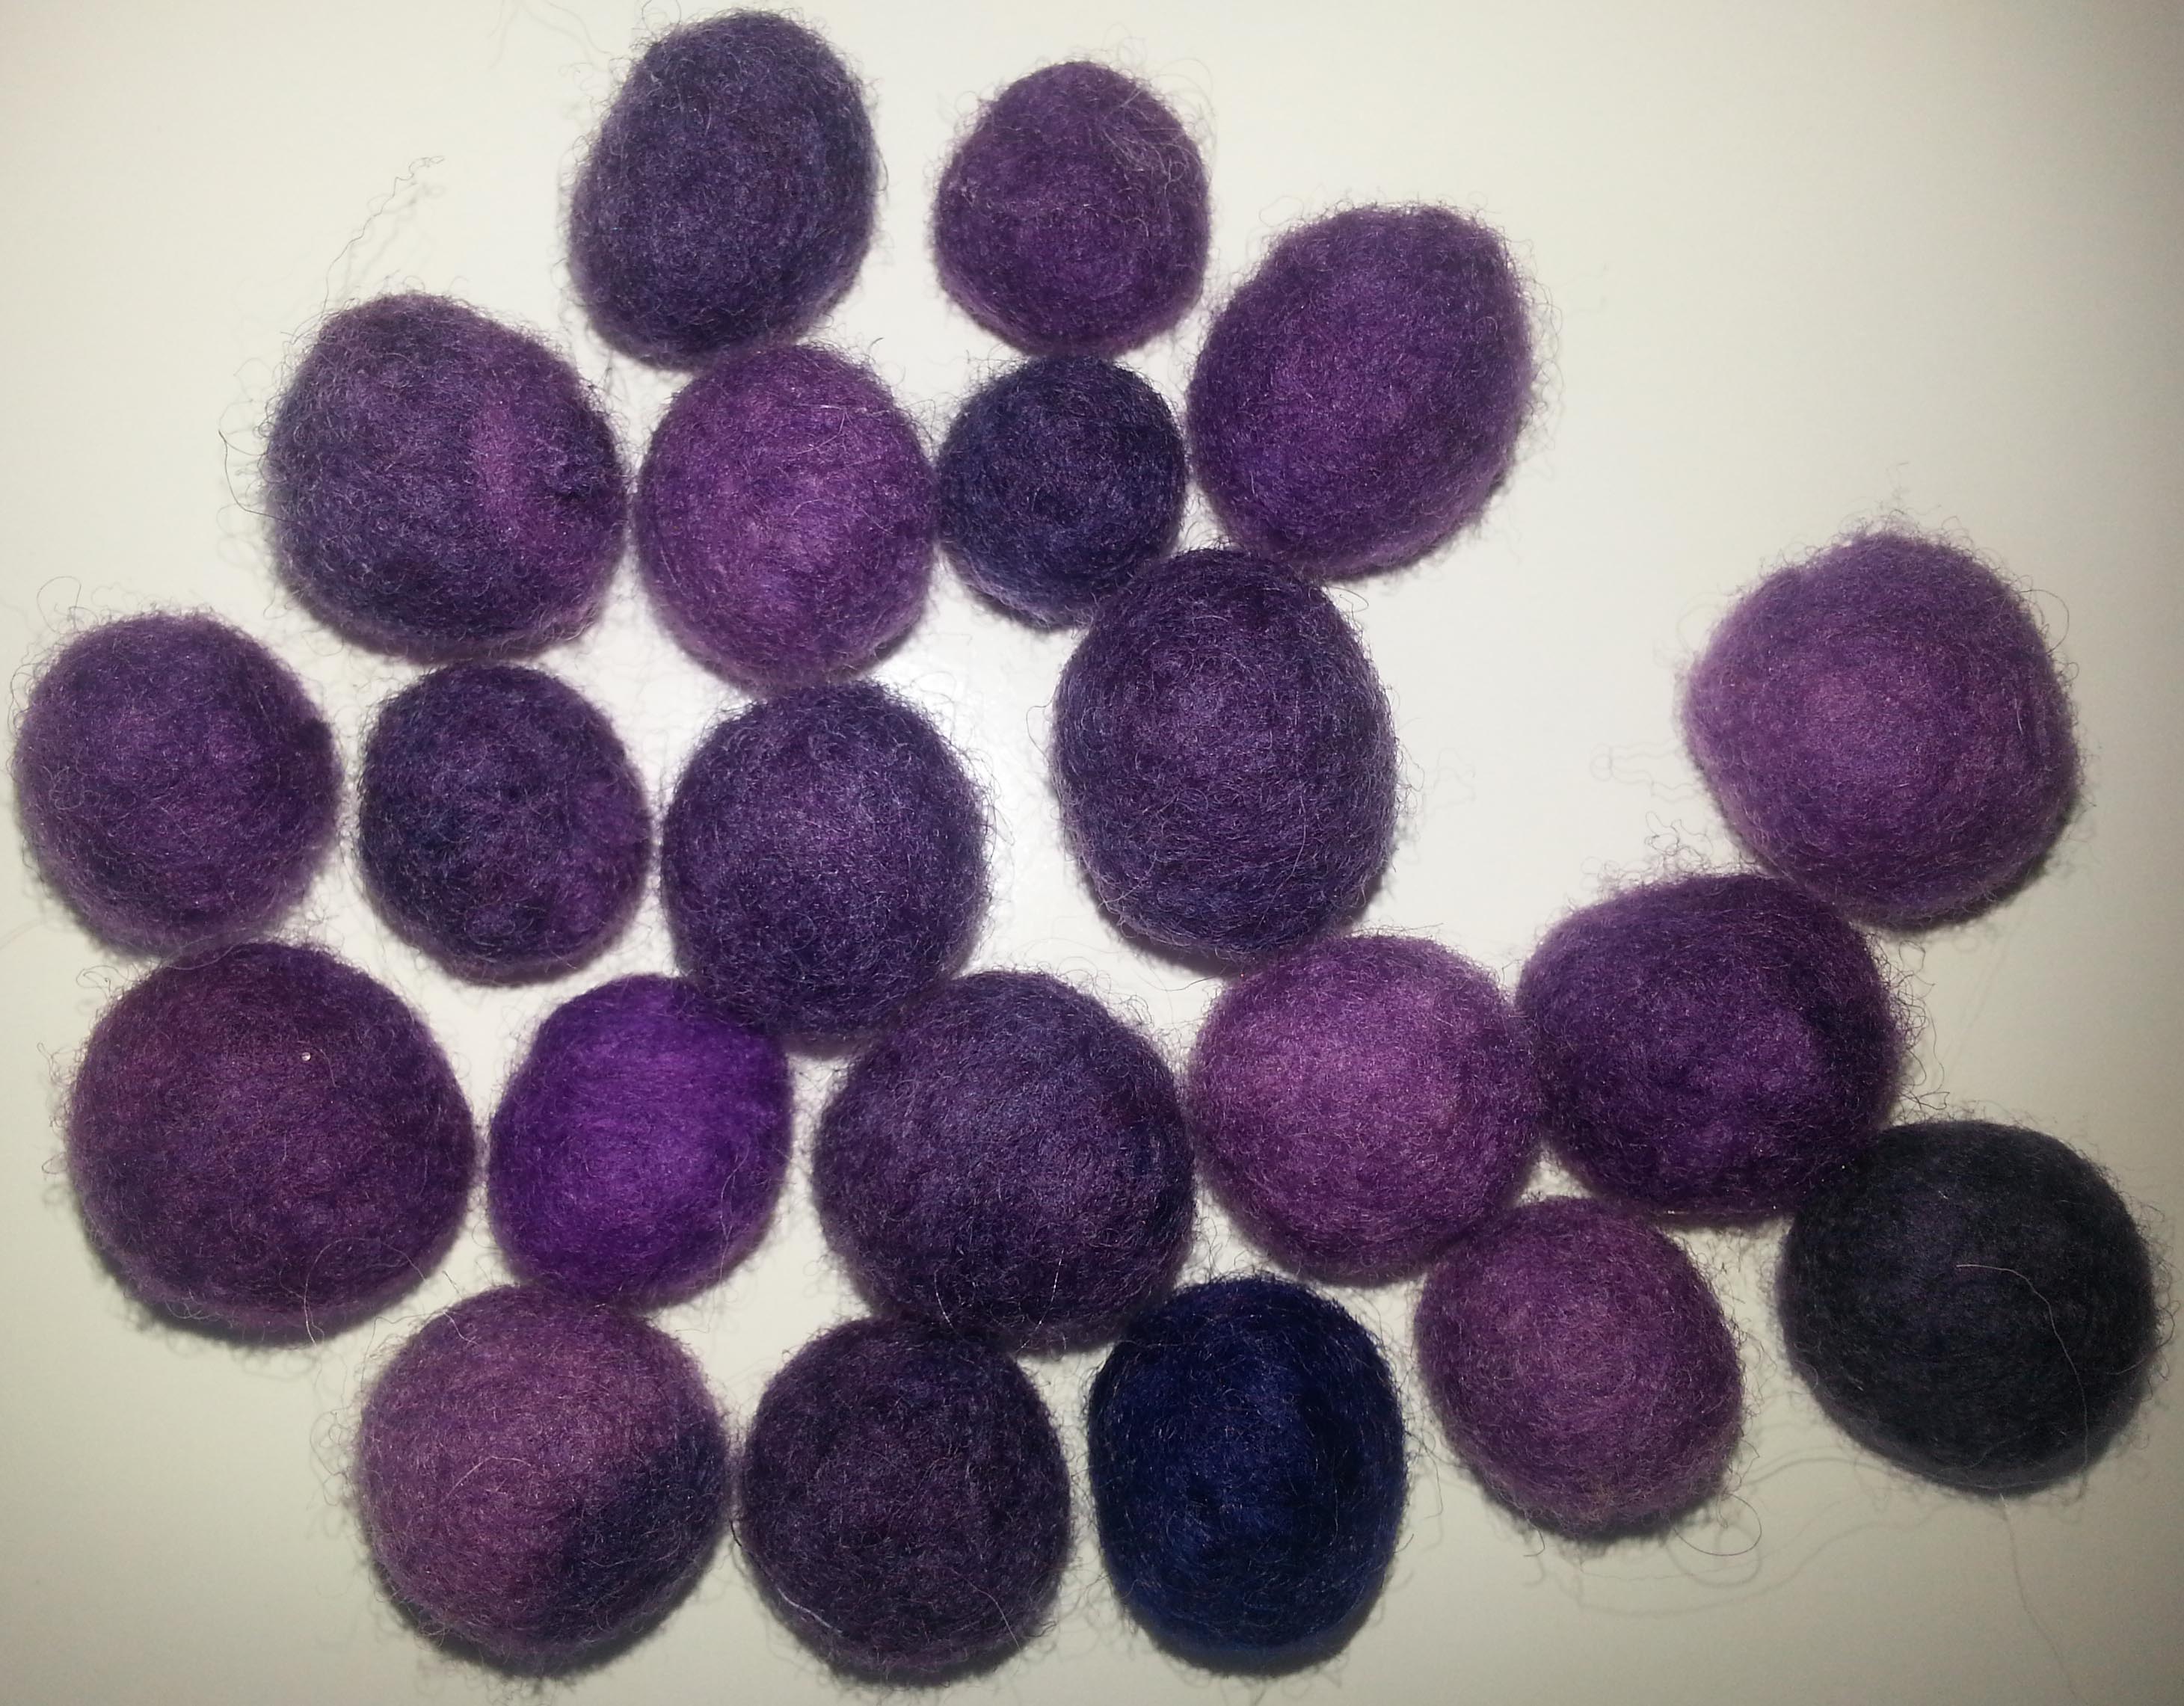
Then I spent a few hours rolling little grapes.  I wasn’t sure how many I needed so I piled them up and added more grapes until I was satisfied it resembled a bunch of grapes.

grapes

With a sharp needle and some purple sock weight yarn I built my bunch of grapes, then attached the leaves and vines. It now hangs on a narrow wall between the kitchen and family room where we occasionally enjoy a glass of wine and I reminisce about picking grapes and my mother’s fabulous jelly.

finished

What projects have you worked on lately that recall fond memories?


Some Felt Pictures for Summer

Some Felt Pictures for Summer

A while ago I saw some fused glass pictures and was inspired to make some summer beach pictures. I like the simple style of this type if picture. I spent a few evenings drawing and colouring pictures. I always forget how relaxing and fun colouring is.

coloured picture 1 coloured picture 2 coloured picture 3 coloured picture 4 coloured picture 5

I decided to do a seaside picture first as summer has just started. I used

seaside 1 before

I used all prefelt except for a little silk for the waves. I split the prefelt and cut it so it wouldn’t be too thick where they overlap. I tacked everything down lightly with a felting needle.

spliting prefelt

This is how it looked after felting once.

seaside 1 after firs felting

I forgot to take one after it was finished but I all became flat and slightly blurred. I decided to add some stitching

seaside 1 after sewing

It gives it much more definition. you can see how flat and blurred the house and boat edges are. I was thinking of going around the house pieces and the boats. Maybe add some little grass tuffs. and underline the waves in white. What do you think, should I add more stitching?


Second Quarter Challenge Finally Done.

Second Quarter Challenge Finally Done.

That’s right I have it done and with days to spare. 12 whole days at that! Here are the details of the challenge if you missed them.  Challenge

I have know what I was going to do for ages I just hadn’t done it. I like Stephenson’s mirror pieces but I also liked the flower pieces so I decided to combine them.

stevenson 1  stevenson 2

I used a thin piece of black prefelt I had and doubled it up for the back ground. I then used my own handspun for the stems. I added silk throwers waste for the flowers and then more hand spun for the spirals. I wasn’t sure how everything would stick. There was not a lot of fuzzy about any of it. It worked out fine though.

I forgot to take a picture of it before felting but here it is finished. I like it a lot more than I thought I was going to.

stepnenson picture

I found this frame on my front porch ( have no idea why it was there) and laid it over the picture and I like it even more.

stepnenson picture frame

If you haven’t done a piece, go ahead and give it a try, you still have time.

Don’t for get to visit the Forum to see how others have interpreted the theme.  Challenge

The Four Day Dye Experiment

The Four Day Dye Experiment

I recently read some new instructions for dyeing using citric acid and salt. Well not new,  I took a class a couple of years ago where the instructor used similar instructions. Normally, I use vinegar for dyeing.  But I like to experiment.  I have also been wanting to try some new fibers and have never dyed something I’ve already felted.  So, I decided to combine the experiments.

I made samples using Cheviot, Romney, Icelandic, Texas Mohair locks and Domestic 56’s.  On each sample I put a piece of silk Habatoi, silk gauze, thick and thin yarn, mulberry silk and prefelt. I was going to make a placemat out of them, but they all shrank differently, so I have to rethink what to do with them.

felted samplesAccording to the instructions, I had to weigh the fabric to dye (before soaking in synthrapol).  I had a large pot so I put together some Merino, silk habatoi, wool yarn, and wool thick and thin yarn along with my samples.  All total 128 grams.  Next, into the soak, then on to mixing the citric acid and salt solutions.

After a thorough search, I couldn’t find the citric acid I thought I had. Whoops.  Well, it should still work with vinegar, right?

1 gram of fiber= 1 milliliter of dye.  Then depending on the Depth of Shade desired the amount can be multiplied by 1 through 5 (light to dark.)  When I filled the syringe with 120 ml of dye, it looked like a lot so I decided just one DOS would be enough to start. Normally, I would use a tablespoon of dye.  If I wanted a darker shade, I could add more dye later or overdye it.  I used my own dye stock that I had on hand.  After getting the fiber and dye bath up to temperature (185 degrees), I let it simmer for 30 minutes and checked it.  The water was still very dark.  I added more vinegar and let it simmer for another 15 minutes. No change. Another 15 minutes, then I added more vinegar and turned the heat off and left it until morning expecting it to be exhausted.

day 1 BSurprise!  Beautiful colors, but plenty of dye left.  I removed the fibers, rinsed and rinsed then let them dry.

Back to the dye pot.  I decided I probably didn’t need more teal fiber, so I added a couple of teaspoons of yellow.  Then put in some Domestic 56s, alpaca/silk, kid mohair yarn, Cheviot and silk gauze after soaking in vinegar. I repeated the dye procedure.

day 2Staring at the dye pot the next morning, there was still plenty of color left.  So, on to day 3 with Domestic 56s and Cheviot.

Day 3bOkay, enough, right? Dont laugh. I had to see this through.  Day 4 included thick and thin yarn, wool yarn, a piece of felted Wensleydale, silk habatoi, Romney and Merino. I expected some pastel colors the next morning. No.

Day 4Finally, the dye bath was exhausted and I had the biggest surprise of all. The Romney was darker than the fibers on the first day.  It’s a good thing I like teal.

4 days

I finally realized my mistake — my prepared dye mix  is 1 teaspoon dye powder to 8 ounces of water which is double the concentration than what the instructions were for making the dye solution.  (1 part dye powder to 100 parts water — i.e. 5 gm dye powder to 500 ml of water.)  I didn’t pay attention to the dye solution instructions because I had already had some made.  My bad.

I haven’t given up.  I have citric acid now but will try a much smaller amount of fiber and the right amount of dye solution.  But now on to make some batts and start a new project.


Trying Commercial Prefelt

Trying Commercial Prefelt

A couple of weeks ago, Zoe from Heidi Feathers kindly sent me some prefelt samples to try out. I don’t have a massive amount of experience with prefelt, I’ve made my own a few times for specific projects, and have tried a couple of thicknesses of plain white Merino prefelt as a base for a few things. We’ve talked about commercial prefelt on the forum a few times, wondering things like whether it keeps its shape well, is it thick enough to use for surface design, etc. I had no idea so I was looking forward to trying it out.
For the first piece I made, I used a couple of layers of Merino tops, then did a very basic ‘weave’ using strips of prefelt, silk  and cotton gauze:

OLYMPUS DIGITAL CAMERAI didn’t do anything to the prefelt pieces, just laid them out. As you can see, the silk didn’t attach to the prefelt in a couple of places because it is quite firm and there aren’t any visible loose fibres.

OLYMPUS DIGITAL CAMERAIn my opinion this is definitely a good thing, I’d much prefer a prefelt to be firm with definition, and when using with fabrics which might not attach easily, you can rough up the prefelt where you need it, using an old toothbrush or wire dog brush. For the next piece I tried out, I used the same ‘mirror’ idea from the Studio Challenge and repeated patterns either side of an imaginary line across the centre of the piece. I started with two layers of Merino for this too, then just cut a variety of oblongs, triangles and squares in matching pairs and added them to the top in a random reflective design.

OLYMPUS DIGITAL CAMERAI really liked the way this turned out. It gave me confidence that a more complicated pattern would work well, keep the defined edges and shapes without distorting.

OLYMPUS DIGITAL CAMERAThe last piece I tried was just a little test using some scrap pieces. Left to right: Some geometric shapes; a piece that I rolled between wet hands; a piece I dampened slightly and coiled; a piece I twisted with some Merino top; a piece I twisted on its own; some very thin off cuts I laid out or twisted and another prefelt/Merino top twist.

OLYMPUS DIGITAL CAMERAI took this on an angle so you can see  there is some thickness to the shapes while still firmly attached.

OLYMPUS DIGITAL CAMERAThanks a lot to Heidi Feathers for the prefelt, who are also doing a generous giveaway and a Meet The Supplier in a couple of days, so please check back on the 28th for that 🙂

Felting with friends: scarves, dying and more bags.

Felting with friends: scarves, dying and more bags.

On our felting week end Maureen decided to do scarves. She wanted to try out some 50/50 merino silk that she had.  She laid out the wool quite thin and rubbed it into prefelt.

maureen felting thin scarf

Once it was prefelt  she spun the water out of it and started cutting it. She made slits that she then stretched out and started fulling.  You stretch and full, stretch and full and end up with great holes.

maureens cut scarf 2

Next was into the dye pot. Although the scarf turned out great, it did not show off the silk. Usually the silk and wool take the dye a little differently, with this blend I was all one. We decided that it was because the it was to well blended.

maureens cut scarf

Maureen did 2 more scarves one in the same style and one solid. Sorry the pictures of them did not turn out.

Diane hasn’t done a lot of dying so Diane and Maureen dyed some silk chiffon.  The silk was twisted and dyed with several colors.

dyed fiber dyed fiber.

On the last afternoon I decided to make a bag for my mothers birthday.

moms bag startThe inside of the bag will have a red stripe. I used a combination of commercial prefelt and top. I also added some Blue Faced Lester wool to add some strength and stiffen it.

moms bag ready to felt  This is the outside. There is black next to the resist and the white on top. I wanted the black to migrate through the white and make a light gray. This is the finished bag. its reversible.

gray felt bag gray felt bag reversed

Diane decided she wanted a new shopping bag. She started out huge and did many layers of prefelt and wool.

dianes giant bag

Here she is fulling it

dianes giant bag fulling dianes giant bag fulling more

You can see it did shrink but just after this she gave up and said she will put it in the washer at home to see if she can shrink it more. At this point it is a large sturdy basket.

This is our group shot. We were very busy. You can see Maureen’s two scarves on the left.

fruits of our labour

The one on the right was one Maureen had made recently, added just the balance the picture. And finally that was the end of the weekend. We needed to go home and rest.


Jackson Pollock Piece Finally Finished.

Jackson Pollock Piece Finally Finished.

I started my first quarter challenge back at the beginning of February. I made a piece of nuno felt using black wool prefelt and white silk to make a canvas.

beginning beginning felted

Finally the other day I decided to try out my idea on how to paint the canvas. I thickened some die with arrowroot powder. I was aiming for a paint like texture. I had never thickened dye before and I didn’t want to spend any money ordering something special. I looked up thickeners and arrowroot was the one recommended for acidic things.  It is a very fine powder.

thickened dye

I added a little to each small batch of acid dye and heated it a little. The first one I heated too much and it was like vulcanised rubber in the bottom of the cup. lesson learned less powder and less heat.

I started with yellow.It wasn’t dribbling how I wanted so I thinned it down. I didn’t like that either it  spread out too much. For the next 3 colours I poured it from the cups and moved them across the canvas quickly. That worked really well. Then I heated it in the microwave.

dye applied 1 into the microwave 1

While I was doing this I realised I had not put any vinegar in the dye. I heated up some water and put it in a basin and when the canvas come out of the microwave I put it into the acidified water and heated it in the microwave a bit and let it cool. having to put it in the water bath blurred the lines a bit but the arrowroot made it stay put for the most part. as you can see the thickened yellow is what moved in to the water the most.

after microwave vinigar bath 1

When I rinsed it and it felt really slimy. I thought I rinsed it well but it was harsh and stiff feeling when dry so I gave it a good wash with some shampoo. This is the finished piece. I think its very Pollock like.

finished pollock

I haven’t ironed it yet but I think I will and use the heat and steam to square it up.

Finished Necklace, now Bracelet

Finished Necklace, now Bracelet

Last time I showed you my necklace with the balls inside. http://wp.me/p1WEqk-1WL Next was cutting some of the ball out.

bubble bracelet 1

At this point I still like the idea of a necklace but have no idea how to sting it. To me it needs a chunky chain or something to go with it. I suppose I could make some felt snakes for it but I like necklaces to sit fairly high so It would need a clasp and I don’t know how to do that. I decided to make it into a bracelet. I added a nice button that matches the inside of the bubbles. I did a blanket stitch around the buttonhole to stabilise it.

bubble bracelet closebubble bracelet button hole

While I was in the mood I finished up 2 samples for a class I am teaching in May. This is a 2 hour class so it had to be small and fast. This is  a class I don’t get paid to do so I am sort of testing out an idea too. I am thinking of proposing it as a class at an upcoming fiber event. I am writing instructions for it and thinking maybe I would make up some kits to sell.

nuno braclets 2

The one a the top is an older one and the other 2 are the new ones. I don’t much like the pink and blue flower on but everyone I show it to likes it so I guess it’s just me. I think  it’s because I don’t much like the fabric and it doesn’t have much texture and that’s what I like about nuno felt.

First Quarter Challenge – Inspired by Jackson Pollock

First Quarter Challenge – Inspired by Jackson Pollock

When I first announced the 1st quarter challenge, I knew which Jackson Pollock painting would be my inspiration – The Deep. I don’t particularly like his multi-colored paintings as I find it difficult to put all those different colors together and come up with a coherent design. So I was drawn to the neutral colors and nearly monotone color scheme in The Deep.

I had originally planned on doing the felted piece in multiple layers, felting each layer separately and then putting the piece together after felting. But when I got out my supplies and saw the cut up pieces of white prefelt, I changed my mind.

Materials for Jackson Pollock Challenge PieceI had a black prefelt scarf length piece that I folded so there were four layers of background prefelt. I then had bunches of scraps where I had cut up a white prefelt scarf for a sample for when I was writing my book. Of course, I saved them as I knew at some point, I would use them. I also had some crimped nylon fiber that Zed had sent me ages ago but I had never tried. I thought it would be perfect to put along the center black section and add some bright white. I also used a bit of white banana fiber as well.

Layout with Pre-FeltNext I laid out all the prefelt pieces. I hoped that all the different sizes of white prefelt over the black would end up looking like brush strokes. Some areas had more prefelt pieces than others to give the mottled grey appearance on the edges of the original painting. I added just a little bit of yellow-orange prefelt in torn pieces.

Addition of Merino Fiber in Lay OutI added the banana fiber and the crimped nylon along the edges of the center black section. In hindsight, I should have added more nylon. I also added some merino fiber around the edges as I was afraid that the outside would not be white enough with just the prefelt.

Completed PieceHere is the finished piece. You can click on the photo to see it enlarged. I liked the results and the process was really speedy since I started with prefelt.

Center SectionHere’s a closer view of the center section. I’m not sure I got the depth that the painting has but I do like the results. I also see that the original has much more blue and green tones around the edges, but I wasn’t trying to do an exact rendition.

Banana Fiber and Crimped NylonThis photo shows the banana fiber running from top left to top center. You can see some of the crimped nylon just right of the center of the photo.

I hope that you’ll try the challenge even if you aren’t really inspired by Jackson Pollock. Perhaps you could just take a small portion of one of his paintings and enlarge it and use that as an inspiration. Or look for one of his less well-known paintings or something from his earlier work. It is fun to try working from a different point of view. We’d love to see what you create.

Meet the Supplier: Dreamspin Fibres

Meet the Supplier: Dreamspin Fibres

We would like you to meet one of our sponsors and a friend of mine Maureen Harding of Dreamspin fibres.  We met a few years ago at a fiber conference and became friends. We live far enough apart that we only get together a few times a year but we always have a great time felting and trying new things. She doesn’t mention it here but she has a sale on select fibers at the moment.

m silly


Q-4 Three types of fibre you can’t live without?

Merino, silks, silk fabric but other fibres depending on the project

Q-3 Have you always been a felter?

I’ve been felting for 15 years, before that I was spinning and knitting.

Q-2 Two tools you use all the time?

Pool noodle and plastic window screening. (and ball brause)

Q-1 One fibre art technique you love the most?

I have to say felting. But also enjoy spinning and knitting

store room

What is your business?

We sell wools, prefelts, fabrics for nuno felting, a few felting tools, mostly for felters.

Why and when did you start selling fiber?

It was an outgrowth of my interest in sheep and wools.  Initially I raised sheep, learned to spin, learned to felt, and started buying other fibres wholesale for my own purposes. After a while I started selling fibres at fibreart venues and would make up articles to show what can be done with the fibres. People started asking me if I would teach them how, and this led to doing workshops in felting.

What kind of items do you sell?

As well as fibres for felters, I also sell felted articles such as nuno scarves, felted hats, and felted bags at various shows throughout the year.

dreamspin prefelt


What do you think makes your business different from similar ones?

We pride ourselves on our fast service, orders are made out the same or the next day. We offer free shipping on orders over $100 in North America. And we are always happy to offer assistance and advice over the phone, or email.

Where are you located?

Near Campbellford in Ontario

Where can we find you on the internet

Dreamspinfibres.ca

This slideshow requires JavaScript.