Browsed by
Tag: prefelt

Connections

Connections

I know that some of our readers are members of the International Feltmakers Association and therefore know all about our upcoming exhibition “Connections”. For those of you who don’t, the Feltmakers organisation uses their AGM at the end of March as the launch for a themed annual online exhibition to showcase our members work. The wonderful thing about these events is that they are not juried, there is no right or wrong so no one is judged, it’s open to any ability and how you interpret each theme is entirely up to you. All of the online exhibitions can be viewed by anyone, not just members, simply visit Feltmakers.com and click on Our Feltmakers from the menu and then choose Online Exhibitions. Last year’s theme was Hats Off! Hats and fascinators are simply sculptures for the head so we could let our imaginations run riot and you can see the wide variety of headwear created for that event here.

For me this year’s brief took more thought as there are so many different ways it could be approached…..”you can find connections in the way you interact with other feltmakers, in the way you are inspired by nature, other mediums or other artists. You can also explore the literal: how can I connect one part of the felt to another?”

I finally whittled my thoughts down to two ideas. The first would take the form of another head piece, because I’m developing a bit of a thing for fascinators, and the second would be a 3D vessel.

I am a huge fan of the Dutch Feltmaker and Milliner Saar Snoek. Saar has a different approach to many other feltmakers I know and her imagination and creativity when it comes to felted headwear is phenomenal!

How I approached my Fascinator might sound like a cop out to some of you but remember the theme of the exhibition is Connections🤩 So rather than start from scratch I decided to “connect” three existing pieces of my own to create a Fascinator, these are pieces that were never intended to be worn on the head. One of these was originally designed as necklace which I’ve worn on several occasions along with the second piece which was a matching bracelet. They were both Nuno felted, stitched, embellished with beads and backed with fabric.

Next I looked around for something suitable to top off my head piece. I’d been working with organza earlier that day so auditioned a piece of that but decided against it. It needed something with much more impact!

I’d previously made a blue version of the Splash, inspired by the wonderful Australian feltmaker Pam de Groot, and thought I’d try that out for size. Although it was far too floppy at this stage I could envisage it working as the third piece of the Fascinator. I used acrylic paint to colour it to complement the other two pieces and to give it enough rigidity to keep its shape.

Next I removed the necklace chain and invisibly stitched everything together.The final stage was to attach it to a gold metal headband repurposed from another project and then talk a friend into modelling it for me. Fortunately Maria was all for it and I think she really suits it too!

For my second piece I started by sketching a variety of shapes including cords, spikes and balls which could be used to join individual pieces of flat felt in a decorative way. While I was considering how this would look my design changed several times and ended up becoming a four sided hinged structure. At this point I realised it would be a good project for Waltham Windmills next challenge which is Structures. So having only made four connectors I decided to park that design for now and moved on to plan B.

The first four connectors are now being saved for another project

Plan B was based on a very rough sketch but became more of a “let’s make a start and see where it goes” sort of plan to avoid any more procrastination!!

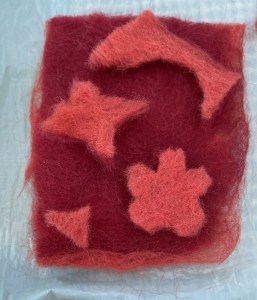
I started with an egg shaped resist, covered it in green and grey Merino fibre and worked it to prefelt. Various thicknesses of hand made prefelt and fully felted offcuts were then arranged on one side and covered with a thin layer of white Corriedale fibre. At that point I decided to add the grey concertina protrusion before attaching the ropes, balls, cords and several other pieces of prefelt on the top side. In all I connected at least 60 separate pieces of felt as well as small pebbles, acrylic wallpaper and dried seaweed. It’s very tactile and I’ve left it hollow so it can be pushed and pulled and reshaped allowing the viewer to also connect with it.

I hope you’ll take the time to visit the Feltmakers website after the 29th March and see the exhibition for yourself.

Creating A Nogai Floral Design Using Sticky Fabri-Solvy

Creating A Nogai Floral Design Using Sticky Fabri-Solvy

As I told you in my last post about our trip to New York City, I visited the Met Museum’s Watson library. I am doing research on ancient felt making patterns in and around Central Asia.

This is one of the books that I found in the library and it had loads of illustrations with different patterns. But, the book was written in Russian. I went ahead and scanned the illustrations and hoped that I would be able to get it translated when I got home. It took me a few days to realize that I knew someone who speaks Russian, Galina! She is a member of The Felting and Fiber Studio Forum and will be teaching another Fantasy Fish online class soon. Galina kindly translated for me and also told me a little bit about the book. The book is about the Nogais, a Turkic ethnic group, who now live in the North Caucasus region. This is “next door” to Central Asia and since these were nomadic people, I think I will include their patterns in my research. The book was written by Fatima Kanokova and her doctoral thesis had a theme of “Decorative Art of the Nogais.” Thanks so much Galina for your help!

I took one of the floral patterns from the book and enlarged it. I then painted it on paper in the colors I was going to use. The colors were limited to what size and color of prefelt I had available. I used a very lightweight commercial prefelt and decided I was going to need at least two layers and then a backing piece of prefelt. I did try and do a little dry felting of the two pieces of prefelt so they would stick together during cutting. This wasn’t very successful. I would highly recommend using a thicker piece of prefelt to begin with and the cutting process would have worked better. Next, I needed to decide how I would transfer the design.

I was thinking of using the freezer paper method like Lyn used with her pigeon/rubber ducky piece but then suddenly remembered that I had some Sulky Sticky Fabri-Solvy that I had bought for free motion machine embroidery. I did not like using it with the sewing machine  or hand sewing because it gummed the needle up so much. But I hoped it would work with the prefelt.

The Sulky Sticky Fabri-Solvy has a paper backing on a sticky, water soluble fabric type stabilizer. So I traced the design and cut it out with a craft knife. I cut very carefully, so that I could use both portions of the design for the negative and positive shapes.

Here it is after cutting and you can see the negative and positive shapes that resulted.

Next was to peel the paper backing off and position the pieces on the various colors of prefelt.

Here is the prefelt with the cut shapes of Sticky Fabri-Solvy stuck in place. Now on to cutting them out. I tried cutting them with the craft knife but the two layers of prefelt kept shifting around. So I used a small, sharp scissors to cut out the shapes. Again, I was very careful so that I could use both the positive and negative shapes in the two different colors.

Here are the shapes after cutting. If you look closely, you can see the cutting wasn’t perfect. Again, this would have been easier with one piece of thicker prefelt.

Now to put the pieces together in an inlaid fashion. I used a piece of white prefelt behind the red background. If I had been thinking about it, I should have used a piece of red prefelt. Then you wouldn’t be able to see any movement of the cut shapes if it occurred during felting. But I didn’t have any white prefelt for the brown background piece. I decided to cut the edges of the brown piece and add a red background.

Here’s the brown piece after cutting and adding the red background. I didn’t inlay the brown into the red background, I just laid it on top.

On to felting everything. I covered both sides with a nylon curtain and wet the pieces down. Hopefully, you can see that the Sticky Fabri-Solvy mainly stuck on to the nylon curtain and then peeled off. I washed the remainder of the stickiness out of the nylon curtain and preceded with felting as I normally do. The little bits that were still stuck on the red prefelt dissolved. I’m sure the whole thing would have dissolved without pulling it off with the nylon curtain. But sometimes this type of water soluble fabric leaves a stiff residue and I didn’t want that to happen. So I was happy with it all peeling off easily. I had tried to peel if off before I wet it down but it would have damaged the prefelt. Also, I found that with the stabilizer in place, the pieces fit together easily and held their shape better than the other pieces that didn’t have any stabilizer. It didn’t really matter with the end result anyways.

And here you can see the two pieces after felting. The one on the right had a bit of ruffling edges since the prefelt in the center was thicker than the outer edge. But that didn’t matter because I was planning on trimming the pieces after felting.

Here are the two pieces after trimming. This method worked great and now I have a useful purpose for the roll of Sulky Sticky Fabri-Solvy that I have.


Using My Prefelt

Using My Prefelt

Having made the prefelt without needles or water it was time to try using it. here’s the post about doing that: trying-out-a-new-way-of-making-prefelt/ I cut a small square ( 2.25 by 3.75 inches)  and added some cut bits to the top.

Even though as a whole piece, it had been very sturdy, The cut pieces seemed fragile. I wondered if it was because they were small. I decided to try a bigger piece( 3.5 x4 inches). I folded a smaller piece to cut a flower shape and popped it onto the prefelt square

I thought I should try it on a loose wool layout.  I laid out 2 good layers of wool and added some prefelt to the top (4.5×7.5 inches).

I put them on some plastic on a rubbery rolling mat. I did some rubbing but not a lot as I prefer rolling. I had started to wet it when I remembered to take a picture.

This is after one set of rolls, you can see they already look integrated. the small piece looks like the shapes have really blurred.


I rolled it twice more, no more than 50 rolled back and forth each time.

I don’t think it looks very different. The prefelt defiantly incorporated into the prefelt backing and loose wool backing.

Here are the prefelt on prefelt samples after drying


the small pieces lost all semblance of shape. I think they were just too small. the bigger piece faired much better. There was almost no visible migration of fibres on these, even on the back.

The loos wool worked well the shapes stayed better even the smaller ones. They are visibly thicker, a little puffy. I don’t see any migration of the background up through prefelt.

On the back, you can see the outlines of the shapes. the shorter cut fibres of the edge migrating. I have noticed this with regular needled or wet felted prefelt too.

None of these pieces were properly fulled. They have just begun to shrink. The migration may have been more on both sides and with both backgrounds if they were properly fulled but I ran out of time to do that if they were going to be dry for final pictures.

All in all, I would say it’s a faster and easier way to make prefelt than needling or wet felting. I don’t think it would work for cutting intricate designs but they just maybe my bad cutting. I don’t think the commercial stuff works well for intricate things either.

I did try peeling the layers like you can with the thicker prefelt.  It worked ok in the thicker parts but wouldn’t come apart at the thinner edge. A more consistent layout might solve that problem.

Trying out a new way of making prefelt

Trying out a new way of making prefelt

I recently heard about a no water, no needle way of making prefelt. I thought I would give it a try and see how it works. It’s fairly simple. You layout your wool on a mat or plastic and roll it dry. When I teach resist felting I usually dry felt the layout by just pressing and wiggling to make it stick together well enough to pick up and move, so we can make the second side. I am sure we have all found that ball of roving in the bottom of a bag that is well on its way to bing a solid felt blob. Taking this idea further just makes sense.

On Sunday it was Library day at the guild and I knew it would be a fairly quiet one so I took my supplies with me. Here is my try at dry non-needled prefelt.

I am using a rubbery placemat and a plastic grocery bag. The Grocery bag is because I put the little piece of plastic in my coat pocket and then didn’t wear my coat. I picked 2 colours so I can see how much migration there is if any. I did jiggle the felt to stick it together, the same way I do when I want to move a layout.


I rolled it 100 rolls in each direction flipping it between as well. It came out very flat and has started to shrink.


I rolled it some more. I had intended to do another 100 rolls in each direction but we were chatting so I am sure it got much more than that, especially on the last set of rolls. It definitely shrunk in both directions but not a lot.


I cut it to see what it looked like. the edges are thicker and flatter than the middle but it’s still pretty solid.

Jan took a movie of it with her camera. It shows how sturdy the prefelt is.

I rolled it again to see how the edges would fair. There were wisps that migrated out in the direction of the rolling. I think it would have been better to just finger rub the edges. There was really no migration to the surface by the opposite layer.


All in all, I think it worked well with very little fuss. Next, I am going to try cutting out some shapes and felting them on their own, to prefelt and on a fresh layout. Have you ever tried this method? how did it go?


Fingerless Mitts or maybe they are Gauntlets or Wrist warmers

Fingerless Mitts or maybe they are Gauntlets or Wrist warmers

I am super busy getting ready for our last farmers market of the year. We sold so many meat pies I will be frantically trying to make as many as possible for this Saturday. I thought you might like this fingerless mitts post I did a few years ago.


I decided I want to sell some fingerless mitts this fall. Or maybe they are gauntlets or wrist warmers? Does anyone know what the difference is?

First I have to make a pair of resists. I traced my arm from knuckles to almost my elbow.  then measured around my arm to see how much I had to add for depth. then I figured on 30% shrinkage.

fingerless mitt resist

Naturally, I picked purple wool. I used about 60 grams for the pair. mostly because that is what was in the ball of wool I grabbed.

100_7131


fingerless mitts ready to felt

Here they are finished

fingerless mitt finnished

They turned out fine and they fit me and my much thinner daughter so sizing is good.  I may add some stitching and beading.  I think they are a little heavy or thick. I was going to put a thumb hole in but I think it would be uncomfortable with the thickness. Next time I think I will use 40 grams of wool and see how that goes.  I may try making the part over the hand pointed too. I think it would look nice.


Influencing Shape with Prefelt Part 2

Influencing Shape with Prefelt Part 2

I finally got around to trying a different shaped pod using prefelt to influence the shape. My first post creating a seed pod is here. I created this pod in the same way but started with a different shape and cut the prefelt differently. I decided to use a bit brighter color for the inside layer.

I used the same green batt that I had used on my last pod but used a tear drop shaped resist. I covered the resist and felted until it was holding together to make a prefelt.

I then cut a little cap off the top and a diagonal type cut all the way down to the end. The photo on the left shows the “front” side and the photo on the right is the “back” side.

I then took the green prefelt off the resist and covered it with orange wool and wet the orange wool down. Then I put the green prefelt back over top of the orange wool. I wrapped the orange wool around the resist from side to side. Next time, I think I would wrap it from end to end to get a more defined shrinkage but it worked this way too. The orange layer is fairly thin compared to the thicker green prefelt.

I then began felting the two together. I carefully rubbed along all the green edges and worked on getting the edges to stick down to the orange underneath. Once everything was holding together, I removed the resist. Then I fulled the piece and rubbed along the orange lines to get the resulting shape. I fulled it very hard so it would hold its shape easily.

And here’s the result. It does look very much like a seashell but also could be a chili pod or some other sort of veggie pod. These are really fun to make, have you tried this technique yet? Please show us your results over on the forum.


Third Quarter Challenge Sample

Third Quarter Challenge Sample

I have been trying to decide what to do for the third quarter challenge. I remembered a post Zed did a while back that showed the back of her piece and how a colored piece of prefelt showed on the back as the edges migrated through the felt. So I thought I would try that idea.

I used a piece of white merino prefelt and then cut circles from a batt of short fiber merino in black. The plan was to put the circles on the back of the prefelt and see how the color migrated through the prefelt. I used only one layer of prefelt.

I placed the circles on the prefelt and then wet it down. I flipped it over and then mainly worked from the front side rubbing to felt.

Here is the piece after felting. The front is on the left and the back on the right. There was definitely a lot of migration of the black fiber through the prefelt. It gives it a muted appearance.

I then blocked the felt on a foam square to even out the edges a bit.

And here’s the finished felt after blocking, left is the front and right is the back. It’s interesting how the edges of the circle migrate more than the centers. So you get a darker line around the edge. Now to decide how to finish this. I was thinking of screen printing some circles over the top. What color would you suggest? I think I might cut it up afterwards and make some note cards.

Using Prefelt … Almost

Using Prefelt … Almost

I’ve been meaning to make more of my own prefelt for ages. I have some commercial prefelt, but thought it’d be nice to have some in other colours and even multi colours. I also had the idea I wanted to recreate a band logo or design or something. There was one I had in mind, with only 3 colours, so I thought I’d start small. The first colour I needed was red:

And, I also needed black, not as much, but I wanted to make enough in case of mistakes:

And it’s probably a good thing I did! I’ve only cut simple shapes from prefelt before, all freestyle I think. I might have been a bit too ambitious with my idea … Firstly, all the faffing around with the design, simplifying it to individual colours, then making those just outlines, enlarging, printing, cutting out etc, that all took a couple of hours. Then I couldn’t find anything to trace around the shapes and leave a clear outline. So, for now, I’ll just have to show you the shapes ready for tracing:

Those are the main shapes (flames), there are some smaller ones I’ll need to do too. I don’t think there’s enough black for too many mistakes, so I’ll have to be careful!

One thing I do have finished is a bird pod. Probably better for nesting material, I think.

And the back:

Have you overestimated how ‘simple’ a project should be?

Wrapping Up 2017 Projects

Wrapping Up 2017 Projects

Right now its cold in the Chicago area and as Christmas quickly approaches, I thought of my daughter in law Mari’s parents who live in Japan.  Their weather is very much like ours here.  While we will spend the holidays in California, I thought I would make and send some warm scarves for them since they are staying in Japan for the winter.

Lately, I’ve been doing  smaller projects,  so these scarves took me a while to complete in stages.

I had some merino/silk roving in a couple of colors I thought would be neutral enough.The one on the left I used to make myself a cobweb scarf a while back. Then I made a my husband a scarf using prefelt in the center.  This time I was going to do something different.


The roving was quite twisted, so I made batts for each scarf. I laid them next to each other, wetted them down then let my EZ Felter machine do the hard work.

I finished and fulled them by hand using my bead boards and solar pool covering.  I  believe this roving had more silk in it and is a bit softer.

This roving was multicolored with a bit of brown, green, blue, gold and white in it.

While it looks beige in the pic above, the closeup is more the actual color scheme.

I hope no matter if you are in the heat or cold, you all have a wonderful, happy holiday!

Penquin’s 2017 Christmas Card

Penquin’s 2017 Christmas Card

Penquin (Anne Hickley) made me a beautiful Panda card for the holiday exchange.  For some reason I was stuck on the idea of a Poinsettia.  You may have already seen it on the Forum.

I made one for myself last year to hang as a decoration and wanted to do another.  Of course, making a card became more complicated than I had anticipated.  But I enjoyed making it.

I started out making thin red prefelt and cut out 5 or 6 layers of different sizes, putting plastic wrap between each layer leaving a hole in the center so they’d all felt together.  I had some green for the leaves and laid those underneath.  Unfortunately, I didn’t take pictures before I felted them.  But here is the flower after felting with beads for the center.

I stitched each petal and leaf.

Then I felted a white background with some sparkly fabric for a snowy effect.

I did another without the sparkle to be the back.  On the back I used Luminescent paint to write the words.

Now it was time to put it all together.  I used stabilizer on the back of the sparkly piece and sewed the flower on by hand.

Then the fun part was putting them together using the blanket stitch.

I’m happy Penguin enjoyed it and hope everyone is ready for the holidays!