September Adventures
September has been a busy and exciting month in contemporary textile art (specifically felting art) in Ireland so I thought I would feature what I got up to, I will call it my September Adventures.
Weather wise, the month started as we hoped it would continue (it didn’t by the way) with a return to fine warm weather – something we had not seen since last June. So I took the opportunity to visit our National Botanical Gardens (https://www.botanicgardens.ie/) which are situated on Dublin’s north side. The gardens (there’s free entry, if you ever visit Dublin, Ireland) opened in 1800 and are an oasis of calm with restored glass houses, magnificent specimens, bee hives and, of course, a tea room. There’s also a pedestrian access to the historical cemetery next door which I suspect is not seen too often. Glasnevin Cemetery also houses a genealogical archive for anyone wishing to trace their Irish ancestors (https://www.dctrust.ie/genealogy/home.html).
But, I digress. Let’s go back to the gardens. My visit coincided with their annual exhibition ‘Sculpture in Context’. The exhibits feature artworks in various media including ceramics, wood, metal. I decided to focus purely on the textile element of the exhibition and to photograph any pieces I came across as I wandered around. I was aware that some of the members of Feltmakers Ireland had pieces accepted for the exhibition; Clare Merry (http://www.merryland.ie/index.htm) an exceptional artist who quietly creates her pieces was featured. If you would like to see some of Clare’s work please check out her website, which, she tells me, is not really up to date, or Google her and feast over the images; Fiona Leech (https://www.instagram.com/feltathome/?hl=en) had three beautiful pots which were originally housed in the cactus house. Annoyingly two of the three pots were stolen within a matter of hours of their arrival and the remaining one was moved to a safer spot in the garden’s gallery. I thought I would show you the three pots as they were originally grouped together.

I searched but could not find Leiko Uchiyama’s beautiful work but here is a link to her website if you would like to check her out: https://www.leikofelt.com/my-felt-work/ I found two other exhibits from members of the guild. Their featured work while not through the medium of felt were equally stunning. Congratulations Mel Bradley (https://melbradleysilks.ie/) and Mette Sophie Roche (https://metteroche.com/)
I put together a slideshow of my textile finds in the gardens which I hope you enjoy.

Mette Sophie Roche; The vital matter of Fungi 
Mette Sophie Roche; The vital matter of Fungi (detail) 
Mette Sophie Roche; The vital matter of Fungi (detail) 
Fiona Leech; Drought 
Fiona Leech; Drought (detail) 
Frances Crowe; Terrain 
Frances Crowe; Terrain (detail) 
Frances Crowe; Terrain (detail) 
Claire Merry; Floral Path 
Claire Merry; Floral Path 
Ella Quinn; It’s nothing but a dead fish 
Niamh O’Connell; Cocoon 
Mel Bradley; Grasses 
Mel Bradley; Grasses
We had our first meeting after summer in Feltmakers Ireland and as usual the committee put an incredible amount of preparatory work into making it successful. It was a busy morning as everyone beavered away felting flowers to create a tapestry as part of the 20th anniversary celebration for the guild. Much to everyone’s delight, the guild’s founder Elizabeth Bonnar joined us. I thought I would feature Elizabeth here as without her it is doubtful that there would be such a vibrant community of feltmakers today. Here she is with her granddaughter and with the committee.


Here are some photos taken on the day.


The finished tapestry was revealed at Feltmakers Ireland ‘Bountiful’ juried exhibition which opened on 30th September.

The exhibition also saw the launch of the new book “Exploring Irish Wool for Feltmaking” The book is the product of a collaboration between many members of Feltmakers Ireland guild, sheep farmers, shepherds, shearers and suppliers and not forgetting the various washers and carders who took the raw fleeces, converting them into usable fibres for testing. I think this approach was quite unique and it will certainly be a worthwhile and useable addition to any textile maker’s reference library. Understandably it was a huge project so congratulations are due to all, especially Annika (Berglund), Breda (Fay) and Sinead (Doyle) who collated all of the findings into an invaluable resource on Irish wool. It’s so full of well written practical advice and it was made extra special by the presence of one of our Government Ministers, Pippa Hackett an ardent supporter of the project, who officially launched the book and the exhibition . Here is a quick look at the contents page to give you an idea of the scope of the book:

An added bonus is that feltmakers/wool artists can now make direct contact with numerous artisanal suppliers so there is no excuse for any of us not buying closer to source and of course for anyone overseas who wishes to use Irish wool fibre in their work purchasing from source.
It is available to purchase from the following link and I understand will also be available in eBook format shortly: https://feltmakersireland.com/exploring-irish-wool-for-feltmaking/
I hope you have enjoyed my September adventures. It has been an exciting month. Once again I would like to thank Feltmakers Ireland and their hard working committee who work tirelessly to maintain this vibrant community – it makes such a difference that, as textile artists, we can gather together and create regularly. I take my hat off to Elizabeth Bonnar and her decision to found Feltmakers Ireland twenty years ago; the catalyst for lifelong friendships, masterclasses, collaborations, exhibitions, networks and travel.
To complete September’s birthday celebrations, I thought I would produce a slideshow of the Bountiful exhibition which is running for the month of October in Phoenix Park, Dublin Ireland. I took photos on the day so I apologise where the light may be shining on the artwork. There are over 30 pieces of art and it will give you an indication of where Ireland’s vibrant felting community is at in its journey. I hope you enjoy it!

Annika Berglund: Variations on a Green Theme II 
Astrid Tomrop-Hofman: Positive Vibes 
Deirdre Crofts: A good Day’s Catch 
Clare Brophy: Share the Bounty! 
Helene Dooley: Visualizing the beauty of the Sunflower Field 
Mel Bradley: Flame Silk Velvet Devoré Nuno Felted Wrap 
Aisling Hassett: Seeds to Life 
Fiona Leech: Fading Memories 
Karena Ryan: Saol Fluirseach (Abundant Life translated from Irish) 
Eithna O’Dea: Plenty of Fish 
Juliane Gorman: Emerging 
Claire Merry: Danu, Celtic Mother Goddess 
Maria McGarry: Conference Call 
Breda Fay: Torthuil (Bountiful in Irish language) 
Sharon Wells: Kerry 1 
Joanne Foley: The Gathering 
Sandra Chase: Seed Burst 
Adrienne Dempsy: Where Wild Things Grow 
Annika Berglund: Variations on a Green Theme 1 
Astrid Tomrop-Hofman: Life is Funky! 
Sharon Wells: Stay Awhile 
Mel Bradley: ‘Royal’ Silk Velvet Devoré Nuno Felted Wrap 
Caoimhe Tuthill: Nature’s Bounty 
Neasa Ryan: Scattery Island 
Valerie O’Ceallaigh: Bountiful Love 
Neasa Ryan: Suaimhneas (detail) 
Caitriona Nolan: Particles 
Beibhinn Delaney: Faith in the future 
Sandra Reynolds: Summer’s End 
Helena McGuinness: Inspired by Traditional Arran Patterns


 1) 48-piece Rare Earth Magnet and Dispenser Set
 2) Tiny, tiny Enthusiastic Magnets sticking to a felting needle to show you how tiny they are
 3) This may not be the Corriedale you were looking for (spooky Jedi background music)
 4) Eventually there was a head-like shape, sort of
 5) Ears added to the slightly sheepish head
 6) Magnet balancing precariously on superior aspect of sheep neck
 7-8) Extending magnetic picker-upper of things mettle, with built-in light (it Is dark under the table)
 9-10) First I tried lightly felting a bit of wool, then attaching it to the back of the head. This was not totally successful since the magnet migrated lower than where I had been trying to hold it. I also found the needle was very attracted to the magnet when I tried to poke adjacent to it. Interesting.
 11) Sheep head sticking to bulldog clip
 12) Magnet sitting in a bit of a divot and leaving the rest of the loose wool to work over the top of the magnet once it was in position.
 13) The magnet was attracted again to the needle so this may not be quite the best solution
 14) It was a bit more challenging to keep the magnet where I wanted it but the divot did help.
 15) Success! But this took more time but kept the magnet location where I had wanted it.
 17) Now let’s talk about ears.
 18) Time to add the second Magnet and check it sticks through cloths. Yep!
 19) The tiny crimpy locks from Ferme Sol Farm in Wakefield Quebec
 20-21) Front and back view of the sheep broach with a second magnet to go inside your shirt. This is less damaging to fabric than a pin broach back would be.
 22) Here is the sheep with both the curls and ear details added.
 23) A bit of online shopping arrived and I have added the two new boxes to the tools I used for this project (you don’t need quite this many needles I actually only used 3needles, which were each different, to make the sheep)


 Core Wool


 Apologies for the blurry image!
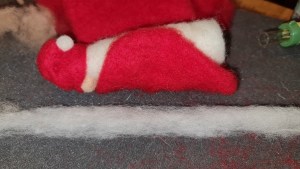


 I work the trim all the way around the cloak, and finally add trim around his hat. It’s important not to ‘over-felt’ the trim, because you want it to look like fur rather than felt.


 Here you can just make out the planter tray, holding my palette of wool batts and merino tops. Also, you can see my first born little pumpkin that I made last year! He had to make an appearance (can’t have them feeling left out!)
 As usual, Eccles had to get involved! She is not a problem, but Elliot (her brother) decided to strike while I was looking for the bowl, and pinched three of the merino wool tops off the tray. By the time I came back, I had three bird’s nests which I then had to card to get them back into some sense of order! That cat has such a passion for wool, it’s unbelievable! I don’t have a photo to show, as I forgot to take one but he really made a mess of them! He also managed to pinch the little pumpkin out of its box where I had safely (or so I thought) hidden it. I later found it under my dining room table, where he’d left it after playing with it! I must be mad to have taken in another rescue cat, but she is adorable and I couldn’t resist! Here is Penny!
 from this…………………………………………………………………………………………………….to that…
 Here you can see I have put one layer and flipped the resist ready to do the other side. You can see the edges of the reddish fibre curled around the edges of the resist.

 I left ‘tails’ at the edges, so I could wrap them around the other side.
 I can’t wait to make a scarf next!!!!!
 and then I tied string in between each lobe, so accentuate the shape as it dried


