Fabric Collage Landscape Part 2

Fabric Collage Landscape Part 2

Continuing on with the saga of the fabric collage landscape, I am steadily working my way down the piece.

I added texture to the mountains including threads, yarns and bits of cheesecloth.

I then stitched the bits down with free motion machine stitching. The trickiest part here is keeping everything in place but I just didn’t worry if things shifted. I kept going and moved things back as needed and just got it all stitched down.

I decided the grey cheesecloth was a bit much on the central mountain and added more brown cheesecloth on top. Then I stitched that in place.

Then I discovered that I didn’t like how the orange cloud and the distant mountain were so much alike. I tried stitching some darker thread on the mountain first and that helped.

But I thought it still needed a bit more attention in this area, so I added more blue stitching into the sky. I didn’t want to eliminate the orange, I just wanted more distinction between the sky and the mountain.

Next up, the central mountain needed a bit more detail. So I stitched some vertical dark lines in place. The trick is to add enough detail to get the impression you want but not to over do the distant mountains. The detail needs to be less here than in the foreground of the picture. (I just noticed that I must have stitched this part before I stitched the sky but you get the idea, I hope.)


Next up, I put the green mid ground in place and worked on the water. The sunset reflection had felt a little dark so I place a piece of light blue fabric in that portion instead of the blue green going all the way across. I then added a blue purple sheer fabric covered with a red sheer fabric. I messed around with the edges to make them look more natural. You can see here on the left if you look closely that there is a straight line going down the right side of the sunset reflection, that is where the blue green fabric butts up against the light blue fabric. I cut that edge in V’s so that wouldn’t catch my eye so much. I also played around with foreground fabric to see how it would eventually look with more green added at the bottom of the picture.

I then stitched the water into place. I wanted the water to have minimal stitching and texture so it would appear flat against the rest of the textured landscape.

Then I added the green mid ground pieces and fused them down with the iron.  You will notice that there is some white in one of the green mid ground pieces. The original photo that I was inspired by had snow in the mountains. In the end, I decided not to have snow in my picture so that will be covered up soon.

Next time I will show you texturing the green mid ground and some changes I ended up making to the water. Luckily, this is a forgiving process so mistakes can be covered up pretty easily.

Roots and Leaves

Roots and Leaves

In my last post, Work in Progress, I wrote about the A4 challenge I was working on with my local group at Waltham. I was well underway with my planning but, as often happens once I start on a piece, part of my plan changed. I decided not to use the felted backgrounds I’d originally made and instead I created the forest floor using painted and heat distressed Lutradur hand stitched to a cotton background. I used 70gsm Lutradur from Spunart and painted it with tones of green, yellow and grey Inktense. By applying the heat tool you can make wonderful lace effects which are very effective when they are layered.

Once all the elements were ready to be assembled, i.e. the pebbles, greenery and leaves, I positioned the roots in order to decide where everything else would fit. The easiest option for assembling would have been to use glue but, as Waltham is predominantly a “stitch” group, I went with the more time consuming method and hand stitched it all in place. The final stage was to attach it to a canvas to make it more robust for transporting and hanging.

Roots

I’m really pleased with the finished piece, which I’ve called Roots, and looking forward to showing it at The Big Textile Show at the end of this month.

I was hoping to show you Jacky and Caroles finished A4’s but unfortunately life’s got in the way for both of them! Neither ladies have managed to do anymore to their work as yet so instead here are some images from a recent workshop I attended with Textile Artist Jan Dowson.

Jan’s Workshop Sample

Jan was teaching a technique made popular by Susan Lenz. Susan layers polyester velvet onto polyester felt, free motion stitches with 100% cotton thread and then hits it with the heat gun……what’s not to like!! This was right up my street but rather than using square shapes as Susan does I used a leaf theme for my overall design. I’m now waiting for my order of polyester felt to arrive so I can make a larger piece…..

Adding free motion stitch to my leaf design.
The stitching is easier to see from the back
Ready for turning up the heat!
The finished piece.
A cheap alternative to wool combs

A cheap alternative to wool combs

A cheap alternative to wool combs

Have you looked with horror at the price of wool combs?  Have you longed for a fine worsted preparation to inspire your felting creativity? If a fine pair of English 5 pitch are not in your budget or the husband-frightening tines of a Viking comb are out of reach and you’re longing for a small pair of Louet combs but they are priced just a bit too high for easy acquisition, may I make an odd suggestion?

1 1 Mini-Wool Combs for sale at local fiberfest summer 2019

Have you seen an implement called a Bee Uncapping Comb? I had a spectacular AH HA! moment in one of the aisles in Princess Auto (a local automotive and stuff store carrying a lot of stuff from China). The AH HA! was so loud and spectacular I am sure the entire aisle I was in lit up and glowed! I was standing in front of white Beekeeping outfits, gloves and these spectacular red plastic handled metal combs!! OOOOOOH!! Coool!!! The angle of the handle inclines inferiorly so using them as a pair like normal combs is not quite as comfortable as I would like. But they work very well used individually like a flick carder (another piece of handy equipment that is a bit pricey for its size.  I got mine second hand and put it away in a very safe place…..somewhere in the living room I think… possibly towards the window? No I cant find it.  It is obviously too safe a place.)

2-1.jpg2

3-1.jpg(Note the difference in price from picture #1 and picture #3)45

3-5  Bee keeping supplys at Princess Auto

Being that the handle is plastic I may be able to persuade it to be in a more horizontal aspect. I deviate and will explain. During my secondary education (at Sheriden College and U of Toronto – that surprised you!) I was involved in the Society for Creative Anachronism (SCA). It’s a historical reenactment group that does among a lot of other arts-related endeavours, medieval combat. Many of my friends aspired to metal armour but being on a student budget many had various forms of PVC plastic. One friend carefully cooked his plastic armour pieces in his mothers’ oven to soften them. Then using oven mits and towels self-moulded them to the right shapes to make Visby plate armor. It was a bit smelly but the plastic bent. I am suspecting if I find a particularly sunny day I may be able to leave the combs on the car’s dash and gently persuade them to be straighter. I suspect that will have to wait til next summer since the sun is abandoning us now (was it something we said?).

Those few of you who have not had such strong longings for a set of combs may wonder why you, as a felter, may want such a tool? Its all about Fibre prep.

Fibre prep;

This can be an important component of felting. Although you can now reasonably easily buy prepared fibre in Roving, top or batts of various sizes, sometimes you want to use a less processed fibre source.

  • This could be because of cost (free fleece given to you is a lot cheaper than buying prepared fibre but it will cost you in time.)

78

7-8  the Icelandic fleece that was actually a very long Shetland from the Wool growers Co-Op

  • This could be because you want to make just the right colour or fibre blend or combination. (remember nature is never a flat colour)

And you know that different fibre prep tools will give you different preparations or effects.

Carding = Woolen. Carders will give you a loftier yarn if you spin and a less aligned roving to work from if you felt. This may be helpful when you want to work on a sculptural project but may not be quite as smooth to lay out for a wet felted vessel. But the disorganization of the fibres does promote felting.

9    9 One of a number of similar Dog brushes that work similar to a Carder

Combing = Worsted.  Whereas combing gives you a more aligned fibre preperation. The yarn made from Combed top would be yarn for men’s suiting material, smooth and with less pilling. Combed top is easy to pull out fine whisps for layout of wet felting or for picture felting but when laid in thicker layers may be harder to persuade to felt together with other thick layers. (this could be an affect you want but usually isn’t)

10

Fleece,  teased locks,  combed fiber

This slideshow requires JavaScript.

10-12 fiber prep with Commercial  Combs


The Tools

Carders come in a couple grades of carding cloth. The fine cloth is for cotton and other very short stapled fibre. These tend to be longer in size than the carders for wool which have a medium or coarse cloth for use with fine and medium wool. Carders are used as a set of two. They transfer the fibre from one card to the next bringing the fibres into a sort of alignment. Carders can create small batts, rolags or a semiworsted preparation. They are good for colour blending a reasonable amount of a colour. It you need more of a colour a drum carder may be more effective. If you want a smaller amount then the small pet combs/brushes that look like carders may be for you.

You can find Carders at auctions (often very beat up and only one is for sale) or you can by them second hand from spinners (usually the complete pair and in better shape) or you can by them from a modern manufacturer. Unfortunately this can be pricey.  There are also the pet combs/brushes which used to be available at Dollerama but have not been available for months. I have spotted them at Walmart but for more money.

This slideshow requires JavaScript.

13-17 Colour blending with Carders

This slideshow requires JavaScript.

18-19 Semi-Worsted

This slideshow requires JavaScript.

20-26 A punnie from a cotton carder using chopsticks

Combs are used with longer wools and other longstaple fibres. There are many types of combs, having one or more rows of teeth (Pitch); some are very long and sharp like my single pitch Viking combs. Some have two rows like my Alvan Ramer Combs which are bigger than the Vikings and heavier. English combs are large weapon-looking implements of fibre subjugation. They can have more rows or pitches of teeth.

This slideshow requires JavaScript.

27-29  Colour blending locks with combs

30.jpg  30 trying the Bee Comb – not as ergonomic when used with 2 combs. Wrist is straight when used individually.

When you have aligned the fibres, you can then draft from the combs or use a diz to make top. This will be easy to pull wisps from to lay out your wet or dry felting.

Flax has a similar multi-rowed teethed implement called a Hackle. (Fibre people have the coolest vocabulary) it is even more viscous looking but we will not get into that today.

I have been using them with the very long Shetland fleece I was gifted this summer at a demo then subjected you to the trials of skirting and washing it. I am getting fluffy clouds of combed fiber carefully stored in zip lock bags. Most will go to spinning a warp for my Medieval Icelandic blanket project but I am going to save as bit with witch to felt. I have been using the comb-waste for core wool for a little sheep.

This slideshow requires JavaScript.

31-32 Long Shetland fleece being combed

This slideshow requires JavaScript.

33-35 Using the comb wast as core wool for sculpture of sheep (grate not to have wast)

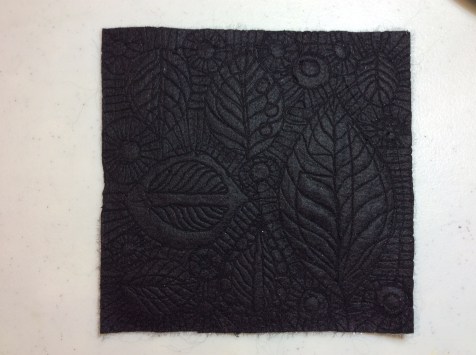
I have also been combing some died locks I purchased this summer to create the beginnings of a Van Gogh-ish night sky. At least I think it is a night sky. It may become something else by the time I finish it!

This slideshow requires JavaScript.

36-40 Opening locks with Bee Comb made a very animated sky

If I have piqued your curiosity, you may be able to find a couple Bee Uncapping Combs at Princess Auto or on line at a real Beekeepers supply store.   I hope this will give you another possible tool to expand your fiber prep and thus your felting fun!

Some works in progress

Some works in progress

Sorry to say I forgot it was my turn to blog today. It has been a hectic week with our last Farmers’ Market on the 12th. We make twice as much on the last day. However, I did manage to get a little felting in earlier in the week.

I use the dryer to do much of the rolling. It is an old gas dryer that is not hooked up to gas. we can’t get gas where we live.  but it is great for doing the rolling and it just needs a regular plug and not one of the big ones that electric dryers have.

I started a hat. It looks a little odd at the moment. This is its 3rd time through. I cut out the resist and then rearranged the hat and stuck it back in to make sure the 2 sides wouldn’t stick as it’s not felted enough yet.

When I put the hat in the first time I laid out this red nuno ruffle scarf. That takes longer than the 15 min the hat is rolling but I hate doing nothing while it tumbles around so I start something new and when it’s ready to go in I pull the hat out turn and flip it and roll it back up and both go in.

While that was happening I laid out a white one. I added some curls to one end. I fiddled with the picture a little trying to get the white curs against my white table to show better.

When it was ready I took out the other 2, rearranged them and all 3 went back in.

All that was on Tuesday. Having forgotten it was my day to blog I just ran over to my studio and took some pictures for you. The hat is ready to move onto handwork and shaping. The red scarf will get one more go around and the white one will have 2 more turns in the dryer.

And lastly, Happy Thanksgiving to all our Canadian readers. I hope you had a great Turkey Day.


Registration Open Now for Online Felted Concertina Hat Class

Registration Open Now for Online Felted Concertina Hat Class

Would you love to learn how to make some really fun felt hats? Then you need to take this wonderful online class with Teri Berry, Felted Concertina Hats.

The online class registration is now open and you can sign up here. The class starts on October 24 and is a four week course. You’ll learn all about how to make concertina felt hats and Teri shows you some great adaptations and how to move forward to create other felt hats.


You’ll learn about hat blocks, shaping and sizing your hats.

You’ll also learn how to make this cool snail hat as well as how to blend colors and make silk stripes.

So sign up now to learn how to make some really cool felt hats. You do need some felting experience but you do not need to have made a hat before. If you are confident making felt pods, bowls, bags etc. over a resist you will be able to make these hats.

Don’t miss the fun! Register now to take this wonderful online course.

My latest makes and a competition!

My latest makes and a competition!


So what have I been up to lately? Well this and that! I finally joined facebook a year ago to promote my work and workshops.  I also opened up my Etsy store, so I have been a bit busy.

I have been lucky to also receive a few commissions.  A lady asked me to make her favourite, a dragonfly! Well it’s good to step out of your comfort zone and try new things isn’t it.  Luckily it was well received and here it is finished and then a picture when Gloria framed it.

received_509940986239037

IMG-20190930-WA0001

I have a few fairs coming up including a two day fair, so I need to up my stock.  I really love making a wet felted picture and free motion sewing it.  I didn’t have any sheepy ones so here is one in its fluffy stage and then onto the sewn version.

20190925_170517

20190926_102820

20190926_151250

Because of the upcoming shows and dare I mention the C word – Christmas. I thought I would make a few similar snowy cottage cards, with the view to getting them printed onto cards as I have done in the past.  I put them on my facebook page and asked people which one they thought I should use as the card.  Votes where across the board, but I have chosen one.  I won’t say which I prefer, but which one do you like?

20190927_184444

20190927_184509


20190927_184528

20190927_184549

Finally I have a little prize giveaway going on on my fb page.  I want to get the following picture printed onto cards also, but I need a title!  If you would like to contribute a title that would be wonderful.  The persons who’s title I choose I will send a card to them, a small prize maybe, but it was made with love!

Stained Glass in felt part 1

Stained Glass in felt part 1

As I stared at a blank piece of felt thinking about what I wanted to try next, I looked around my increasingly cluttered office and considered my options. I considered: the sudden increase in freshly washed wool; spinning, weaving and felting magazines; plants brought inside to rescue from the winters’ impending cold; reference books; hat blocks; baskets and, somewhere under the pile of wool is a Poang Ikea chair (I may have to find it a new home –its very comfy to sit in but so hard to get out of). From among this clutter, I spotted a ball of green fine wool I bought at a Value Village.

Hummmmm……..

I have had this thought flitting around in the back of my brain for a couple years now. It has kind of worked its way to the surface among all the washing of sheep-shedding. It involves another approach to considering felt pictures. I have enjoyed and had reasonable results from treating fibre like a Watercolour painting when felting; thin layers of colour to build up to the final colour. (Fox) I have also used fibre like acrylics; mixing the exact colour I want and applying it in a much more graphic manner (Frog). I have treated fibre like a 3-D Grassi painting which is sort of combining both acrylics and watercolours. I want to explore this further. (Polar bear and Octopus) However, in the back of my mind, I have been curious about using fibre like stained glass.

Stained glass and tracery windows have this amazing graphic outline in either the stone or the lead chasing. There is a similar graphic expression in colouring book pages. The lines are usually black outlining areas of colour. The colour areas can be solid or it can be more subtly shaded. There was a science fiction illustrator I liked, who used red under paintings and let them come through in his final pieces. You can see a similar outline under painting in some of the Group of Seven landscapes too. So this would be a bit more like thinking of an oil under painting. I did not get to try oils at school but did watch other students use theirs.

Now that the techniques were decided upon, what should the subject be?  Sheep, Flowers, a rose windows?

I pulled out the foam kneeling pad from Dollarama (they should be back on sale by February) and another piece of the felted wool Duvet to use as a base. It was not the right size so after a bit of opposite diagonal tugging it became a much better size. I did not want to draw with a sharpie marker this time so I outlined the area with pins to give me a 5×7 image. (This means you have to replace the pins and check your measurements when you lift you’re felt from your foam base. If you cut a template to the size you will be matting or framing to this will make resetting quicker.)

11

I pulled out the ball of green wool yarn that had caught my attention and lay the loose end over the wool playing with different shapes. Looking at the spewed yarn made me think of a quatrefoil.  This means I will need something to make a circle with. Hum.  Ah!   The handy bottle of Robax Platinum; not only good for my back but also to use to make a circle of yarn around its base! I attached the tail end of the yarn and started to needle felt the yarn into the background. I figured out quickly that if you tip your needle towards the attached end of the yarn it was easier to control the line and not have it distort as it became affixed to the felt base.


2-4

Using pins as turning points for the yarn enabled me to layout a quatrefoil

56

5-6

If you do not pin the yarn directly into the felt it will hold it in place but still allow the yarn it to move.  As you start to affix the yarn to the base felt there will be take up or shortening of the yarn but the yarn can slide past the pins but still keep your basic shape.

Once I had a shape, I considered filling it in. I had been combing some locks and had a bit of comb-waste to play with. I did the sections between the quatrefoil in blue and then did the quatrefoil in purple.

7.jpg 7

89

8-9

I realized it was not a rose window I had created but a Viking shield so I needed to make at least another one. I have noticed using photo reference is easier in the design and perspective phase. Working right out of your head can be more stylized and a bit trickier. Both can create interesting results!

1011

10-11

Again I used the useful Robax bottle as a template and created more round shields (as opposed to a kite shield which is more Norman, not Viking). I extended off the edge of the pictures so I could get the composition I was developing. The prow won’t show but the curve going up to the prow would.  I should add a third shield to give the rhythm I would like. Next will be to start laying in planks on the ship.

1213

12-13

Laying in the planks I had to cross the round shields I felted up to the shield then skipped over to between the shields then cut the unattached part crossing in front of the shield. This was trimmed back and felted into the edge of the shield.

1414

I am not sure if I like the angle of the planks yet so I may pull them off and try again but I will sit and think about it for a bit. I will likely move the 5×7 outline in pins down a bit so more of the third shield will show. (working with a predetermined standard size will make matting and framing much easier later.)

While I think about the plank angles I had better go look at The Gokstad or the Oseberg Viking Ships. If you are lucky enough to live near The Viking Ship Museum in Oslo, Norway you can see them in person. I will have to use the internet.

I will continue to work on this technique and see how it turns out. But if you suddenly have an overwhelming need to try this too you might check out a ready-made source of images I should have considered more before I began this. With the explosion of stress-reduction adult colouring books, we have a lot of options to inspire us.  I am suspecting that simpler line drawings will be most effective but I am curious to see what catches your eye.  There are some free downloads of colouring pages in PDFs that might get you started at  https://www.justcolor.net/ . Otherwise, try a google search under image for adult colouring pages, printable. Many of the images are a bit busy so you may have to simplify them.

Third Quarter Challenge Coming Along.

Third Quarter Challenge Coming Along.

I showed you a blank canvas last time.

I have finally moved forward from there.  It was a slow start. I had a hard time finding a lightweight dissolvable stabilizer. But I did in the end.

Step one was to trace my pattern onto the stabilizer.

I did the rivers first and then the roads. I had to spin some yellow for the roads. I thought it would be easier to use then roving for that part.

I did the rivers first because the roads go over them.

I got the major roads done.

Next, are the secondary roads. That’s all that shows form this level of zoom. I think I will put them in with thread and outline the whole city in red. Hopefully, by my next post, that will be done. once I am finished I can move onto the fourth quarter challenge and get it done in time.

Fabric Collage Landscape Part 1

Fabric Collage Landscape Part 1

I was inspired by Antje’s post recently about creating a fabric landscape. I have had this on my list of things I wanted to do for a long time. So thanks Antje, for giving me the push to get it started. I have piles of hand dyed and commercial fabric. Many are just small pieces and scraps and I thought this would be a good way to use some of them up.

First I needed to find some inspiration. I looked through my photos of Glacier National Park and I wanted to create a landscape featuring Hidden Lake where we had hiked several years ago. Sadly, that was one of the years that we had thick smoke in the area from wildfires so my photos were not impressive. So I googled images of Hidden Lake and found one I liked to use as inspiration.

I used heavy interfacing as a backing and then started putting together my sky fabrics. In Antje’s post, she didn’t mention anything about fusing the fabric down as I would normally do so I decided to just wing it. I added threads over the top and then started stitching.

I started with light blue thread and stitching across trying to catch all the various elements down. I switched to a darker blue thread and then to two tones of orange thread. It was a little frustrating as pieces moved as I went but I just kept going.

I had less control over where each piece of fabric was and that made it less “perfect”. But that’s OK because I was trying to see if I could do a piece that was more “abstract”. (Not that I ever get too abstract.)

Then I started finding the mountain fabric colors and giving them a trial against the sky. I did put fusible on the backs of the mountains so I could iron them in place before I added the “texture” on top.

I continued to play around with a variety of fabric pieces to get the mountains the way I wanted.

Then I moved on to the green mid ground. On the left, I am trying the fabric I might use to see if it is the correct value and color. Then I cut out pieces to the correct shape for the mid ground area with trees.

I realized at that point that I would need to place the water before I attached the green as there was water on the left hand side underneath the green “fingers” of land that stretched into the lake. So this is a trial for the water.

Then I needed the reflection of the sunset in the lake. I tried a piece of cheesecloth on the left but it was a bit too pink and also too textural. I wanted the water to feel smooth against the textures of the trees and foliage. So I found a couple of pieces of hand dyed sheer silk organza and gave them a try. It’s looking better but still feels a bit dark in the reflected area. I also tried the green in the foreground. It’s looking more like a landscape but I still have a long way to go. It takes a lot of time for the trial and error of finding the right piece of fabric for each portion of the landscape not to mention the time spent stitching.

I hope you don’t get tired of seeing the process of this fabric collage as it appears there will be several posts to go before it is completed.

Fourth Quarter Challenge 2019 Colourscapes

Fourth Quarter Challenge 2019 Colourscapes

This challenge is inspired by our trip to Mottisfont Abbey where Kaffe Fassett exhibited over 70 glorious items including furniture fabric, clothing and wall hangings.

“I create in palettes of colour because that is my main obsession.” Kaffe Fassett

We were allowed to take photographs of Kaffe’s work at the exhibition – this is one of his wall hangings …

Kaffe Fassett Exhibition at Mottisfont

…and a close up of another.

Kaffe Fassett Exhibition at Mottisfont 1

Please click on the link below, scroll down a little, and you will come to a very short video of Kaffe Fassett talking about and showing some of his work.

https://www.nationaltrust.org.uk/mottisfont/features/kaffe-fassett-exhibition-at-mottisfont

So this quarter’s challenge is to make a “colourscape” using whatever fibre media you enjoy working with.  It can be realistic or abstract and any shape or form.

Go wild with this challenge and be as free as you like!

We often use our photos to inspire us, so we’d like to share some with you.

Chihuly Glass installation at the Bellagio in Las Vegas, US

Chihuly glass installation at the Bellagio in Las Vegas 1

Chihuly glass installation at the Bellagio in Las Vegas 2

Bar top in a hotel in Las Vegas, US

Bar top in a hotel in Vegas

A Peacock in Madrid, Spain

Peacock in Madrid

Jellyfish in a Singapore aquarium

Jellyfish in Singapore aquarium

Gaudi mosaic in Barcelona, Spain

Gaudi mosaic in Barcelona

Meadow in Christchurch, UK

Meadow in Christchurch, Dorset

Leaves on the ground at Kew Gardens, London

Leaves on the ground at Kew Gardens, London

Fishing nets in Crete

Fishing nets in Crete

Glass House in West Dean gardens, Chichester, UK

Glass house at West Dean gardens, Chichester

Trees at Mottisfont Abbey, UK

Trees at Mottisfont Abbey

Lego installation in Singapore botanical gardens

Lego installation in Singapore botanical gardens

And finally some blueberry leaves in our garden in the autumn …

blueberry leaves in the autumn in our garden

… and at this time of year, in some parts of the world, the trees and shrubs will be giving a wonderful display of colour!

We hope that you enjoy this challenge and that it brightens this quarter of the year.