Browsed by
Category: 3D

More sewing shenanigans (but still no waistcoat)

More sewing shenanigans (but still no waistcoat)

If you’ve been following my waistcoat sewing adventures, you’ll know I was fairly optimistic I’d have a finished (or, more advanced) garment to show you by now.

IMG_5683
Here she stands, in a corner, mocking me…

The thing is… I’ve hit a snag. After finding out the shoulder area needed more work, and realising the pattern I’d bought was more or less useless, I got discouraged. The major mental roadblock was finding out I’ll probably need to remove all the tailor interlining I’d hand sewn in order to fix the shoulder problem; also knowing my pattern-making skills are still in their infancy and therefore can’t be trusted, isn’t helping.

Of course, I’m nothing if not a great procrastinator, and therefore do have something new to show you.

In my free time (ok, when I’m stressed) I managed to follow a commercial pattern and make a new rabbit, as well as her garments.

IMG_9417

She’s got a lovely dress as well as some cute boots, plus a very proper-looking jacket!
The jacket was the most complicated make (I also found a couple of tiny instruction mistakes) but the most fun. She looks cozy, doesn’t she?

I had some leftover material and decided to create a smaller version of the bunny. I’m still undecided on gender. This is important as it will define the wardrobe. What do you think, boy rabbit or girl rabbit?

IMG_5805
Made from scraps of felt. I’ll probably change those weird eyes!

I had my bunny family sitting on a shelf in my studio. They looked alright there, but… incomplete.

IMG_0766
My studio library isn’t fibre-centric at all…

Suddenly I remembered I had a pattern for an armchair, part of the rabbit collection. It looked both complicated enough to be entertaining and simple enough to be finished in a short amount of time. I had to make two.

Well… the pattern had a couple of mistakes (this is starting to become a thing with me, isn’t it?) so I did have to take some time away from it after realising I’d cut the fabric too short in some places. After some consideration, a solution presented itself and I managed to finish one armchair.

IMG_9289

I did it in patchwork fashion for a trendy look. I’d never done this type of fabric assembly before, so if there’s anyone reading who understands how it works, feel free to point out any mistakes I might have made.

All in all, I think it came out quite decent, and my rabbit looks comfy and elegant sitting on it.

IMG_3122

Now… there’s a tiny bit of felting to be had in this story. See the chair’s rounded arms? The pattern tells me to use some wool batting, roll it up and hand sew in place. I had a better idea: I receive a weekly food box that has an insulating padding made of recycled bottles, and I thought, “this would be a great way to reuse it!” Will it felt, though? I brought out my needles, had a go, and success!

IMG_5690
Needle felted plastic, who would’ve guessed?

This will be going in the other armchair that I haven’t finished yet. Wish me luck, I hope this second one comes out looking similar, or I’ll have to create a story in my head as to why one rabbit is more deserving of comfort than the other…

So… maybe next post I’ll have a waistcoat? Don’t hold your breath, but fingers crossed.

What have you been up to lately? Any miniature furniture sewing? Tell me all in the comments section.


Felting Alfresco (Outside! Its Summer!) On to Pet Two. Part 1

Felting Alfresco (Outside! Its Summer!) On to Pet Two. Part 1

Felting Alfresco (Outside! Its Summer!)

On to Pet Two. Part 1

So, this week the goal was to start on Mer-Pet number two. (Sharkette Needs a friend!)

As usual, I did some digging on the internet to find out about them. After a lot of browsing, looking at Spotted Eagle Rays, Bat Rays and Manta Rays I decided on Manta Rays. As I was Focusing on collecting many different views, I started to notice there were differences amongst the photos I was collecting. I think I need to look at words now too. <drat>  While looking for pictures of what a female manta ray looks like I tripped over a post with cool facts about manta rays.


Cool Facts About Manta Rays:

The name “Manta” comes from the Spanish word “Mantilla” or cloak.

  • Female manta have pelvic fins but no claspers (that’s a male thing). Females tend to be larger and generally more friendly towards divers than males.
  • Manta can be identified by their splotch patterns on their bellies. Each is different.
  • Manta and Mobula rays have the largest brains of all fish. They keep their brain warm by a counter-curent heat exchange system using their circulatory system. This keeps their temperature more even than most fish.
  • They are smart and use coordinated and cooperative feeding. They are also social and curious about divers.
  • Rays are in the same family as Sharks and Skates. In the ray family, (Myliobatidae), there are two species of Manta (Manta Birostris – Giant Oceanic and Manta Alfredi – Reef manta) and 9 species of Mobula devil rays. You can tell the two types of Manta apart by their coloration, location and size.
    • Birostis (oceanic) has a ‘T’ pattern and there is a distinctive black/white division on their back and almost no spots on their bellies. Tending to be larger around 7m wide and are more solitary. They can stand colder temperatures and are seen most often off shore. Manta have evolved from sting rays but Manta Birostis is the one who has a vestigial sting on their tails.
    • while Manta Alfredi (reef) have a ‘Y’ pattern fading into the black colouration on their backs and unique spot patterns on their ventral side. They tend to be smaller, around 5m wide and are found more frequently in schools around reefs and tropical islands.
  • The Marquesas Islands are one of the few places in the world where you can find both species.
  • I also found photos showing all black and all white manta as well as a definitely pinkish one. So we should keep watching and see if there is another subset of Manta are discovered.


Ok, time to get to work!

 1-2  I brought out the implements, armature, fibre and photo reference.

3

3  Here is the armature I created for the back of the Manta Ray.

I reinforced the leading edge and front scoops (cephalic fins). The black wire running through the body is to help support the posterior aspect, back, of the body. There will be a separate section for the anterior body/mouth. I used fine floral wire to help stabilize the tail extension which like the rest of the body is 14-gauge aluminum – thankyou Dollarama!


I started at the proximal (nearer to the centre or midline of the body) point, attaching with a few quick stabs.  Then wrapped fibre towards the distal (further from the centre of the body) end then back, securing it at both ends.  As you can see, I was able to leave a loop at the end of the scoops. This gave a good location to secure the fibre at the distal end.  (I promise there is no medical vocabulary exam hidden at the end of this post but I bet you would pass it if there was!)

 4-6 Wrapping the wire securing at both ends

I added a base layer wrap to the armature to give a bit more support for the fibre that would be added later.

 7-9 First layer of skin for the wings

I then began adding the dark split from a piece of the batt and then adding more to build up the midbody section.

10

10 Back or top of manta ray

  1111 underside of manta ray

This brings us to the missing bits. We are missing the inner mouth structure, gills and the rest of the abdomen/body.

(Manta ray Undercarriage armature.)

So its time to create an armature for the mouth/abdomen.

12 12 Armature for mouth gets measured

Glenn arrived home and I moved to working from the bench in the front garden. Glenn enjoyed one of the gravity chairs and was just falling asleep when we started to hear Harp music which seemed to be coming form the other side of the front hedge.

13-14 working in the front garden

1515 Yes that is definitely a harp being played next door!!!

Our neighbour was hosting his other neighbour on his bench with her Harp! (He likes his lovely green grass, unlike my front yard, which has almost no grass.)

16

 16 What a wonderful way to felt, to live music! (Usually in the summer she plays harp at weddings. I hope she will be practicing in the front yard again soon!)

­­­­­­­­­­­­­­­­­­­­­­­­­­­

We use to have someone who played bagpipes at sunset from somewhere behind our yard. He or she was also vary good. i always hoped i would find them and be able to request Alice Cooper or a bit of really old Black Sabbath. in more normal years we would heading down to the Ottawa Bluesfest and watch live bands, mostly Alt rock, old rock, techno, industrial, prog-rock and yes even blues but only once or twice. i usually brought my drop spindle or one of the portable spinning wheels. It was fun to see bands we had never seen before and some we had. Muse, Alice Cooper and Gretta Van Fleet were particularly enjoyable!

this summer will make us appreciate all the things we use to enjoy once we get to do them again!  so back to felting!!

Mer-pet One gets her skin

Mer-pet One gets her skin

(Sorry I’m running late today! and have tried my best with the final spellchecking. my regular spellchecker is doing overtime at the post office, so you too can receive all your online orders. It’s as busy as x mass at the moment!)

We are going to skip ahead a week, missing the post about Mer-Pet two I had already written and continued on with Sharkette.

So back to the Shark.

This week seems to have flown past too. I remember days being longer and I use to accomplish so much more in them. I did get more garden work done and have a couple of shots that may inspire 2D felting or maybe a 3D bouquet?

      1-8 bits of colour to inspire you, from the front back and side garden.

9 9 the back patio with new bird feeders

I did a bit more work on my back patio putting out a hummingbird feeding (we are between the honeysuckle and trumpet vine booms) and 2 little wire bird feeders. They are not attracting the type of bird I was hoping for. I have seen a smaller long-tailed striped orange wingless “Bird” cleaning up underneath the feeder. While above two Rubenesque wingless long-tailed hairy “birds” clung to the feeder and generally made a mess. One was all black (and not nearly as nice as the Beautiful black mother crow and young crow that have been around the last 2 weeks). The second was about the same size as the black one but gray. I will try again to get a picture of these horrible wingless seed-steeling “birds” and hope the sparrows and chickadees will return. Oh, the black covered thing that is pretending to be a birdbath is the second larger blacksmith forge.  (I have odd porch decorations.)

Moving back to the side yard I brought out the fleece bucket I was using as a project bucket for the shark. I had my photo reference, hand carders, fibre, foam pad, assorted needles and of course, Sharkette.

10-12 photo reference, fibre and implements for stabbing! (I think Sharkett looks nervous)

I was treating shark both like a pastel in that, I had applied a base under-colour and like a watercolour, by hand mixing and using small thin washes of colour building towards the finished tones.

13-16 shark swims in a sea of fibre

Another brake for gardening, the two plant pots on the right have catnip, extremely potent catnip. Is anyone dropping by to pick up some catnip? (There is more in the back and side yard)  Hiding behind the catnip in the tall grey pot is a dahlia, which I hope will flower.

17 17

Summer is confused this year I have snow peas starting with the first raspberry!!

18-19 the snow peas grew about four feet tall and then started to flower

Now that I have nibbled on snow peas (and left Glenn the raspberries), it’s time to get back to felting

23

    20-23

While I was working on her a fed-X delivery truck pulled up the end of my driveway! They do that sometimes when dropping stuff off for my neighbours. No this time it was actually for here! Yes, this was the order I placed earlier in the week for Ann and I.   We plan to unwrap the likely explosive package this week and will let your know what we find within!!

24 24 I think there is a role of tape on that package!

Shark and I both were consciences and had our masks on! Hers does not fit well since it only covered part of her gills. Effective masks cover your entire breathing equipment, Mouth and Gills!

25 25 Safety first!!

I laid in the darker edge layers (I mixed the 2 darker grays with a tiny bit of the intense green) rather than use black which could have been too strong. Over that, I layered blends of the middle gray with green and blue, then fading into mid and light grays with hints of the blue and green tones. (Just think washes of thin wisps of colour to help optically blend and give the mottled effect of light seen through the water onto shark-skin.


26-28

My outdoor studio was nicely shaded but it was getting hot and I needed a drink brake for a caffeinated green beverage (Mountain Dew). Restarting my audiobook, I got back work.

29

29

I tried to get a shot to show you just how thin a layer of colour I was adding at a time. (the white needle is a new one I just got off Etsy from “thanks for mutton”. It’s a 42 crown which is the finest needle I’ve tried and was impressed. It’s not quick but it gave a cleaner surface than my coarser core wool needles.)

   30-32

The pen tool is holding 40’s and I have been working at a close to parallel angle for the outer coat.

I also wanted to show you her mouth. I saw paper clay teeth on line that were spectacular but have not tried them (yet, I may still go back and see if I can add tinny scary teeth)

33 33 toothless but likely still lethal!

She is a mighty shark able to leap foam needle holding barricades by herself! (look no hands)

     34-38 sharkette showing off with her new skin!

I will try and get a shot of her not in the shade. I should have brought better lighting to her photoshoot!!

So next we will go back in time and look at Mer-pet number 2 unless that possibly exploding package has caught your curiosity? Did you see how well taped up that mysterious object was? What could it be??

3939 Mer-pet 2 revealed or strange package investigation?

Felting Alfresco (Outside! Its Summer!)

Felting Alfresco (Outside! Its Summer!)

Fortified with Ann’s Butter tarts with pecans and raisins as well as cheesy scones I was ready to begin.

  1-2 Ann inspires more felting with her fine baking!

We were expecting dry, very warm temperatures for most of the week so up went the umbrellas to keep the lettuce from bolting out of their planters and add a bit more shade to the side yard. (Really, it’s just the part of the driveway we don’t drive on.)

  3-4 the side yard with Lots of potted plants and a few trees.

You may have heard me mention we use to have a very tall dog (he was a failed lab experiment. He seemed to be an attempt to combine a lab with a Russian wolfhound. It did not go as well as expected.) He also thought he was a cat. He didn’t like to get wet so we built him a covered area by the gate. He also used my flower boxes by the garage as a litter box.

5

5 Since Miaka’s, centre of the Universe, slept on the big  couch pillow,

66 Barking Cat, Mr. B, was determined to balance on edge of the oversized pillow too.

77 the covered area that we had to make so Mr. B would go out to the side yard if it rained.

I cleared the metal bench of plants and gardening clutter that had collected there and moved the stack of mesh plastic baskets holding fleece to be washed to one side. This gave me room to sit. I brought out a small folding table. Glenn had used it for a blacksmithing demo and it has not been quite the same since. Now with a place to spread out a bit and a lovely view of the snow blower I was ready to start work.

When we last left off,  Mer-pet 1, aka the young female great white shark, was looking vary shark-ish. Well, at least shark-ish enough that she would not easily be mistaken for a gold fish. I think we could make her happier if she were not easily mistaken as coral or other oceanic rocks (she is made of  brown/beige  mixed alpaca fibre so she was rocking the camouflage look a bit too much).

After a quick acquisition run last week to get better base colours for the Mer-family, I am now ready to think about colours. With Guild work increasing and a trip out to get the walker (which I took for a test roll)  i cut back my goal for this week.  It is now to get the base colour onto the shark. So I started up my audio book and got to work making her more colourful.

 8-10 Sharkette lounging in fibre.

1111 She is either tying to help speed up the addition of colouring or she is hungry and is eating the needle holder.

If she doesn’t eat my needle pen, I will be adding layers of shading to give her a more sexy shark look. i am pleased with the way her skin ripples as she flexes her tail, i hope with a bit more added shading she will be much more impressive.

This slideshow requires JavaScript.

12-15 A few shots of the not quite as naked sharkette during the alfresco felting.  Please don’t mention cream sauces to her, it may make her nerves or hungry.  (Neither state is good in a shark.)

First Mer-Pet

First Mer-Pet

First Pet for the Mer’s (“it followed me home, can we keep it?” begged Mer-Teen “Only if you take it for walks and clean its litter box” replied Mrs Mer.)

This has again been a busy week. We were off to see if the walker had arrived on Friday and found out that they had received 2 walkers they hadn’t ordered and not the one I had ordered. So maybe it will be this week.  Saturday we had a trip out the Farmers Market at the log farm not too far away from home. Ann and her Husband have a booth there. (go for the butter tarts, stay for the cookies, sausage, meat pies, bread …. And that is just at Ann’s booth. Ann is multi- talented!!)


    1-4


I added the fingers and hands to my Mer-Teen and worked on musculature for the forearms  I did a bit more musculature on the tail giving it vestigial quads, Knees, gastrocs and even Glutes (I may have to upgrade the gluteal endowment on her parents!! They are sadly lacking.) I now have the under-structure about to the stage I want for the Mer’s. So I ordered some coriadail.  Most were for possible skin tone blending from our local fibre store, Wabi Sabi on Wellington St.  They were doing order on-line with pick-up 2 days a week. Glenn kindly said he would go fetch the fibre for me.


 5-6

While I was waiting for the fibre pick-up day to arrive, I considered possible pets that the Mer’s should have. So I browsed Google image for sharks and found I liked the great white and the huge one that had some particularly good photos taken of her.

This slideshow requires JavaScript.

 7-13

Armed with a substantial selection of sharkness from many different angles I set to work building an armature. Using the aluminum wire from the dollar store I made a basic skeleton with lower jaw, pectoral, dorsal, second dorsal and caudal fins.

14 14

Working from the same, now quickly shrinking batt of alpaca, (thanks Ann!! I hope you find another one you don’t want!), I started at the head/jaw and worked towards the tail.  As you can see, I was watching Sara’s Felt along flowers while building a juvenile great white shark.  Just to the right is my photo reference to help me get the jaw and head the right shape.

1515

After the felt along was finished I switched back to playing Runescape while felting (Multitasking!! That is my greatly missed Dog’s character in the gold armor. I got him an account because it wasn’t fair that the cat got to have an account and he didn’t.) You can see I have reached the pectoral fins and the nose angle and jaw line are now closer to realistic.

16 16

Eventually I put on an audio book and really made some progress. Now I’m only a few fins short of a shark.

  17-18

A quick break for gardening and it was on to the missing bits to finish her off.

   19-21

So now I have the Mer-teen under layer reasonably close to what I was hoping for and the female juvenile great white shark under layer done .  I have one more pet underway but I will show you that later.

This slideshow requires JavaScript.

 22-31

3232

Today I was off to Wabi Sabi to pick up my wool order (Coriadail and Shetland). I separated each colour into its own bag with a tag so I can reorder, as I get low. (This will help a lot since I don’t always remember where I got a fibre)

33-34

Tomorrow I am hoping to start some colour blending, now that I think I have the base colours I want to work from. I still have to find the alpaca I was looking for and part of that bump of white South American coriadale I got quite a few years ago. I think I saw them in the living room last, now where could they be hiding?


Stay healthy and keep your hands in warm soapy water with wool.


3535


A Busy week, but my Mer-Teen is underway

A Busy week, but my Mer-Teen is underway

Today I wanted to tell you about the Quadra-dents, and show you how i made them.  I know they should be Tri-dents but I like the look of Four points better than three.  As frequently happens life gets busy or interrupts and plans get put aside for other plans. so i will get back to the quadra-dents i promise!

P1650915

 the Quadra-Dents

Unfortunately, last week I started to feel a bit better, so tried to catch up on gardening while sitting in a chair. I was working on weeding the tall pots along the driveway, transplanting catnip out and planting the herbs and vegetables in. I think I just did too much of it. To be fair the side yard and some of the back patio look much better.  I will be having words with that chipmunk that seems to have other plans since he or she keeps digging deep holes in pots I have already planted and moving or removing things I had wanted there.

This slideshow requires JavaScript.

1-10 Maybe these will give inspiration, Highlights of the front, back and side yard (yes that is a portable forest. the city wont let me plant poplar trees in the ground so the self seeded ones that start in my garden get moved to pots and grow happily there)

I did get a bit of felting in between meds, Dr’s visits, checking out a walker and weeding.

11 11  it is important to check Vital ergonomics when getting a vehicle.  My early cars were purchased on their ability to carry my warp waited loom in the hatchback.  Now its wheels and fiber as well as the looms!

 My Mer-teen is underway. i think she is taking after Mr. Mer since she also has great lats! (It must be all that swimming).  My goal is to get all the under-structures done so I can look at the proportions and keep them in scale.

12 12 Skeletal Mer-teen, Mrs. Mer and Mr. Mer.

This time I started working from the head down instead of starting with the legs and tail then working up. I have varied the order of application of fiber each time and seem to be getting a good outcome from all three.  So order may be more preference or to help keep in scale for the head and body.  This time I am going to add hands after I have the rest of the body blocked in. That will allow me to lengthen where the wrist is, if I need to. I think the torso may be a bit long on her parents but I’m short wasted and don’t like water thus haven’t seen a mer-person so maybe they are longer wasted than I am.

I have yet again notice felting while listen to an audio book ( this time  part of Wen Spencer’s Tinker series)  while  it is very productive, does make me forget to take photos. I remembered to take some as I switched books to Lynsay Sands’ the Trouble with Vampires.

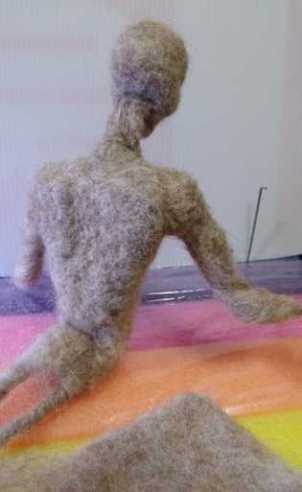
I made latissimus dorsi, SCM and upper traps. I made use of the 3-needle pen tool, and the up to 20 needle tool (set up for 12 needles) and various single needles for different parts of the body, head and arms. i am continuing to use the slightly felted batt of alpaca in variegated  shades of light brown- beige. it may felt a bit quicker with some wool content but i am liking the effect the alpaca is giving.

131415 13-15 making and adding upper Trapezius

1617 16-17 you can see the lateral superior border of pec major heading towards the bicipital grove,  the deltoids,  both the clavicular and sturnal heads of SCM and both clavicle.

I will keep working on the under-structure and hopefully will be ready to start the top layer soon.

I hope you are all having fun felting! Hopefully you are felting and relaxing out in your garden enjoying the summer! Stay safe and healthy!


Thinking Positive, it was a demo opportunity – Mer-Man in progress

Thinking Positive, it was a demo opportunity – Mer-Man in progress

Short post (for me) today before painkillers kick in again.

Sometime, probably Friday morning I did something that insulted my back. But it waited till Friday evening to launch into its escalating counter attack.

I claim innocence! I sat on a chair and planted out little pots of seedlings (broadleaf basil, radishes and one of the two curly leaf parsley). The planters were chair height so I was not bending and the pots the seedlings were in were quite light, I did pull the new hose so I could water but that didn’t seem too unreasonable either.

But by early evening I had decided sitting was not an acceptable activity as far as the disk was concerned. I had a burning and buzzing nerve (on the wrong side) and very puffy tops of both feet.  When I tried to get up later in the night, I could not without a lot of help and a lot of pain. Luckily, I have been collecting helpful items that my former patients could see or borrow, including a quad-cane. I got to use it for the first time. It is a wonderful thing when you need it.

1

In the morning I was not much improved. We called Tella-heath and got the receptionist. After getting the gist  of the problem told me a nurse would call me back. The wait would be about 14 hours (which would have been 11pm). Oh well, at least I could then ask questions. (It also allowed me to try to watch the next installment of the mermaid felt along but I was distracted so I will watch it again) He called in the late afternoon and was quite helpful and said I should call the emergency to get instructions on their present procedures.

I gathered a basket while I charged the cell phone (it’s always dead when I want to use it). Glenn got me, the quad cane, a normal cane and the basket into the car. He dropped me at the doors to the hospital. I think a snail in good health could have passed me as I tried to walk. I was having a lot of trouble thinking as well as walking (pain can make it hard to think and remember). All I remember of the first instructions was follow the green dots and the woman had held up a square sticky but had not given it to me since I had both hands full with trying to stand up. The waiting room was divided and some of the chairs had been taped off. The green sticky people went quickly but there were a lot of blue sticky people. I seem to have been blue.

So I found a seat in the far corner by the window and pulled stuff out of the basket. First the paper moridi until the Tylenol from the intake nurse stated to kick in. then it felt safer I put on the audiobook and pull out felting needles. (See this did have felting in it – there will be more)


(I didn’t notice when I did their photoshoot that Mr. Mer seems to be receiving a scalenes acupuncture treatment!)

An orderly would come and escort a few people at a time out of the waiting area. When called I moved as fast as I could but could not keep up with the others (maybe they had escargot for breakfast?). The orderly seeing the problem found a comfy wheelchair, Got me seated and jogged me up the hall to catch up to the two he had sent ahead. Compared to the snail speed it felt like flying! I was parked in the comfy chair of wheels just outside one of the inside waiting rooms at the end of the nursing station.  Since the back seemed to deem the new sitting arrangement worthy it reduced its screaming and buzzing. So I pulled the Mer-Man from the basket and continued working on defining his Illiotibial bands (I.T. band).

First the kind orderly who brought me the chair stopped by on his way to a break.  I explained how the needles worked and showed him Lats, upper traps, SCM and delts (they are a little accentuated so when I do the top layer in a thin wash of colour they will still show). I also pulled out the Mer-Woman to show him the size comparison. He seemed, particularly, to like her (she is naked). Some of the nurses rushing by seemed curious but too busy to stop. (There was a very grumpy woman demanding they get her food and Adderall). I got to see a nice doctor who was quite patient with me (it was still hard to think). He checked the feet and back and suggested contact my doctor, a big increase in painkillers and blood work to check for clots. If the blood work came back negative, I could go home.  The very nice nurse who had been harassed by the yelling patent earlier did an excellent job of taking blood and gave me 6 more pills.

Sent back to my previous parking spot I noticed I was at the tail end of the wave of patients so everyone seemed to be much more relaxed.  The doctor I had seen, and some of the nurses stopped by to see what I was doing.  Again I told them how it worked and about online felting sites and the felt along on youtube. I also told the two that seemed very interested, about the local weaving and spinning guild that had a good number of felters in it. (We may have new members when this pandemic is done). the results came back as no blood clot so I could go home, I was very tired.  I got picked up at 12:30 and climbed into bed just after 1 a.m.

(you can see the clavicles on both and SCM on Mr.Mer. I am still exploring the legs being absorbed by the tail.)

I was very glad I had taken the basket of felting and one of the kumohimo disks with me. Most people were just sitting there looking unhappy and bored. I was in pain but definitely not bored. I’m sorry I didn’t think the back would allow me to bring the camera so no interesting pictures of tarps draped between sections of the waiting room and taped off chairs but I’m sure you can envision it. It is wonderful to have light portable interests you can take with you to these places you would rather not have to be. (I am sure given time and a less fogged brain I might be able to figure out a wet felting take along …..maybe in a zip lock bag to keep things from getting wet?)  Stay healthy and be careful of planting vegetables, they may be heavier than they look or felt!

Second Quarter Challenge with Differential Shrinkage

Second Quarter Challenge with Differential Shrinkage

I needed to figure out something for the second quarter challenge and I wanted to continue my experiments with differential shrinkage. So I decided to combine the two projects. I had also read somewhere online to check out Soosie Jobson’s Youtube channel as she had some good videos about differential shrinkage. I’m not sure why I hadn’t thought about working inside out with this technique but it really helped.

I started with the resists made from floor underlay foam on the left. I wanted a spring/summer sunny look for the second quarter challenge so I chose yellow to red and a bright yellow green. I used hand dyed mixed 56’s wool. The photo on the right shows the diamond shaped resist covered with 8 layers of green wool.

After laying out the 8 layers of wool, I wet it down and then flipped it over so I could cut the diamond shape out of the green wool. I created four of the green shapes and place them at even intervals over the large round resist. The photo on the right shows the bottom with the solid circle in the center.

These two photos show the top with the ring in the center. You can see how the points of the diamonds overlapped the ring slightly so I trimmed those ends off so there wasn’t extra bulkiness around the ring.

Next I laid out the top wool, 2 layers, all laid in a concentric manner around the circle. I wanted a gradation of color from yellow to red, so the yellow to orange is on the top side. The photo on the right is wet down and you can see the thickness of the pie shapes and ring showing through.

Then I flipped it over and smoothed the edges over the circle. I did end up removing a bit of the extra orange wool in places.

I then laid out 2 layers of red orange to red wool in the same manner as I did the top side. It’s hard to tell in the photo but there is a gradation of color. Now on to wetting down and felting.

Here are the two sides after felting. I felt by rubbing and don’t do any rolling. I like to be able to feel how the wool is reacting under my hands and also to make sure that the edges around the resist are not forming a ridge.

I then cut out a small disk of yellow felt from the center top. I healed the cut edges by rubbing with soapy fingers and then removed the resist. I then turned the entire piece inside out so that the green was on the outside. This took a bit of patience and maneuvering. Then came the fulling and shaping.

And here’s the result. I did shave the entire vase to get rid of the fuzzies.

I decided to call it a Poppy Vase so I thought poppy seed heads fit perfectly. So hopefully, this will count as a personal item that I can use in the summer time!


Fun on-line, Creating the Under-Mer

Fun on-line, Creating the Under-Mer

With stay at home, I have been on line a lot more than I use to be. I have had fun playing Runescape, listening to music, (this week’s felting was assisted mainly by Blue Oyster Cult), audio books and I have had a lovely time watching videos on felting. I have watched both wet and dry and some that were even in English!  There have been a few free workshops and even some felt-alongs on YouTube.  I have watched hats, scarves and flowers being made. It is exceedingly strange with my aversion to unnecessary wetness that the felt along that got my attention was Sara Renzulli’s (Sarafina Fiber Art) felted Mermaid.  She has done a lot of 3-D sculpture, I particularly like her armature work and her felted horses. She has the felt along mermaid and other felt along projects posted on YouTube if you would like to check it out; https://www.youtube.com/watch?v=hljS4YRmz9w&list=RDCMUCQOKYjvA0xYeHXAnQCmTlIQ&index=1

By now you likely know me well enough to expect enthusiasm and probably not doing what the instructor was expecting (ether from miss reading the instructions or going off on a tangent). I suspect that too. Her Mer-Exampel is pink so I can see design changes ahead. I had originally intended to behave and adhere to the instructions, except for the pink body of course which was to be our own colour selection.

This being the week before the long weekend and our government here being very kind, has allowed some stores to partly re-open (garden centers and hardware stores were the two I needed to visit). So, at 6:30am, armed with gloves and one of my clinic masks, I was off on my quest for the side yard plants and 14 gauge aluminum wire. Wire first at Home Depot since they opened at 6am.  I found steel wire at 14 gauge and a few lighter steel ones but no aluminum… Oh well, maybe I will do better with flowers? Sort of,  I found most of the herb and some very short cherry tomatoes. Well since I’m out and across the street from the Dollarama, I should stop in there for a big shallow bucket to put the plants in until I can plant them out next weekend (I will use it as a plant saucer once I have the plants planted). Why look! Dollarama has aluminum wire the same diameter as the 14 gauge steel. I should have just gone here first! I picked up black and silver. (This could be a very sinister Mer-Person in that colour scheme.)
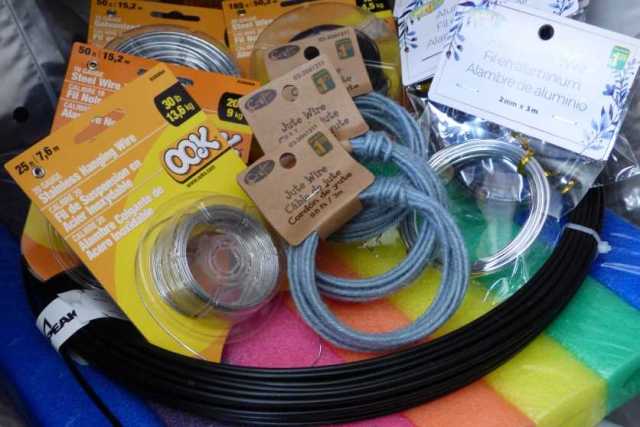
1 1 the hall of wire acquisition

I had wanted to make a Mer-Man, which just sounded much more fun but also wanted to understand the process before I messed with it too much.  Thus Mer-Woman it was and I followed along with the correct proportions but used the 20 gauge floral wire instead of the lighter aluminum wire I couldn’t find.


2 2 Mer-Woman

By this point, I was having quite a bit of fun and wanted to make a Mer-Man too.  So I upped the proportions making him 2 heads taller than the first.  I also added a sternoclavicular section so I didn’t wind the wires more than twice at the shoulders.  I used 20 gauge for everything but the hands since I found the tail wires a bit floppy in the Mer-Woman and wanted stronger in the Mer-Man. We will see if I overcompensated!


3

3 Mer-Woman and handsome Mer-Man

I was still having fun and started thinking about my niece who is a competitive swimmer, so on to Mer-teen, (pre-growth spurt) at least a head shorter than a Mer-woman. So subtracting 2 to 2.75 inches should work. Success I have a Mer-Family!

4 4 Mer-Man, Mer-Woman and Mer-teen


Now that I have 3 skeletal fish people it had better get stated on adding a bit of flesh to their bones!

I was being good and followed Sara’s instructions. She seems to work in a more additive way, like sculpting with clay. Make a shape and add it. While my inclination is to block in basic shapes then refine them by subtractive sculpting (lots of poking); adding in sections of wool then felting till it’s the required shape and reasonably firm. The way I have been leaning towards is a lot slower but I have good control over the felting. I wanted to try her method so I wrapped the wire then added the filler piece. i used parts of an alpaca batt from Ann, in blends and layers of light creams, browns and reddish browns. Not having the correct tool to do Sara’s rapping technique, I substituted one of my stick shuttles for weaving. It worked reasonably well.  I do like the idea of having a gradation of sizes that can be used to make a shape. This makes the shape size repeatable.

5        5 Creative use of a stick shuttle

I inserted the carrot shape into the leg space which created the filler for the tail.  Then I got engrossed in adding quads, creating an illiac crest at the hips.

 6-7 Filling the tail

As I started adding the body, arms and head, I got distracted…..(no photos sorry!) I had a blast adding latts, anterior delts and the serratus ant.  You can see cute little clavicles but I didn’t add more than a suggestion there might be a manubrium! I even had a sternum that was more visible before she acquired breasts. (I felt very guilty sculpting them, that needle did look vary sharp!) I got busy sculpting and firming up the fin section and discovered I liked the suggestion that there were knees in that tail, and the hint of the remains of legs within her tail.

8 8 Discovering (my) fish woman has knees (but no hands yet)

As I started to add the hands I realized I should have had hands on all my felting projects (whether or not they originally had hands). Look, she is self-felting!!

   9-11 Hands can be very useful in a sculpture

Saturday Sara had her wet felted tail section of this project. She showed laying out layers of wool then adding embellishments to it. Then wetting and rolling the tail cover. Her colours looked like they will work grate on her finished Mer-maid.  I particularly like the silk inclusions at the tail, it looks vary beta fish fin-like.

Since I am still having fun sculpting and I don’t have a spot to wet felt set up I am going to finish the under structure and then decide on the top layer to blend over it. I will treat this like a 3-D grisaille underpainting. I will lay washes of colour over top. The mottling reminds me of sand on a creek bottom. Since she does not have any obvious defensive or offensive weaponry (unless she keeps my pen tool), I think she will have to go with camouflage to be safe.

As I watched the instructions about wet felting the tail cover, I kept sculpting and finished out the structure of the tail. I added what in the base of the hand would be the thenar and hypothenar eminences at the base of the tail.  Muscles here would allow it articulation of the membrane between the outside edges of the fin and give more control when moving through the water. I gave her a single gastrocs (calf muscle) but kept the suggestion of two quads (thighs) and the hint of knees.

After the YouTube, instructions were over and I had most of the understructure in hand. I took a short break to plant a few of the plants I had purchased then gathered my camera for her in-progress photo shoot

1213

12-13 a quick touch up before her photo shoot

It had been very overcast when I took the first set of photos. I went inside to check them …. and the sun came out.  I grabbed the camera and my model and off we went to the front garden hopeful the brake in the clouds would last! It was a tiny bit brighter but the lighting was not the raking Caravaggio like light I would have enjoyed.

   14-16 photo shoot for Under-Mer-Woman.

(yes she is naked waving at strangers walking past on the side walk!)

   17-20 Luckily she became distracted and stopped shocking the neighbors

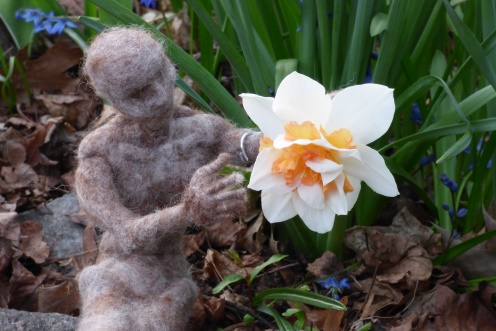
The Mer-Woman seemed most interested in the Daffodils once she stopped touching up the felting on her tail.


   21-23 Mer-Woman admiring Lungwort while sitting on rocks beside crashing waves of violets


I want to add SCM (Sternocleidomastoid) muscle in the neck and I have still more work to do on the face particularly the eyes but I am very pleased with how she is coming. I will put her aside and do the under structure for the Mer-Man and possibly the Mer-teen before I decide exactly what over layers of colour I will add. It should continue to be fun and He will get a trident I think!


I have not forgotten about my Pictish shepherd or the mysterious creature. Thanks to Ann M. and Carlene P. I have fibre to soon get back to them. I do tend to like to sit and think about a project partway through, so I can reassess it (see it through fresh eyes). I may come up with tweak in the design or I may finish it as I had originally intended.


I hope you are also enjoying all the tutorials, blogs, and other inspirational felting ideas out on the internet at the moment.   If you are not jumping into a project immediately, then  hopefully putting inspirations in notes or sketches to enjoy doing them later. Have fun inside and now also in your gardens!

24 24 to inspire you one of my fancy daffodils

Jewellery Challenge

Jewellery Challenge

It was great to see that “Jewellery” was the subject for the 2020 first quarter challenge. I love making felted jewellery, whether that’s pendants, bangles or brooches.

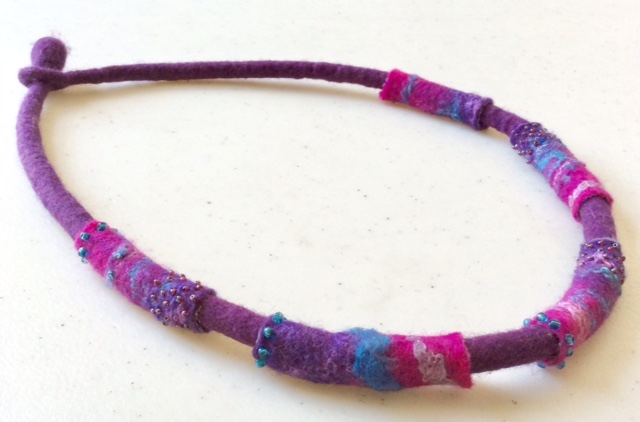
This choker style necklace is wet felted Superfine Merino.  It came about because I’d got some small offcuts of a very thin felt left over from a collar.  Rather than throw them out (perish the thought!) I had the idea of sewing each one down the long edge, to form tubes, and then use them as “beads”, threading them onto a felted cord.  To keep everything in place and avoid them slipping on the cord I attached small beads, sewing right through front to back.

The only problem is that when I try to wear it the cord slips around and ends up with the fastener at the front…..obviously the heaviest part finding its way to the lowest position!  Fortunately the cord is long enough for me to correct this so I’m going to have to cut the fastener off, slide another “bead” on and join the cord under it.

Another drawback with wet felted Necklace cords (or at least with mine!) is that, no matter how hard I full them, they do tend to go fluffy quite quickly.  To get around this I’ve started wrapping my cords with a machine zigzag stitch.  I’m finding that this makes them much more durable and also the stitching gives another dimension to the pendant/necklace.

This challenge also came at the same time as I was working on some ideas for quick and easy mixed media jewellery.  These next three pieces are a great way of using up small scraps of paper and fabrics plus any embellishments you might have lurking in the back of a drawer!

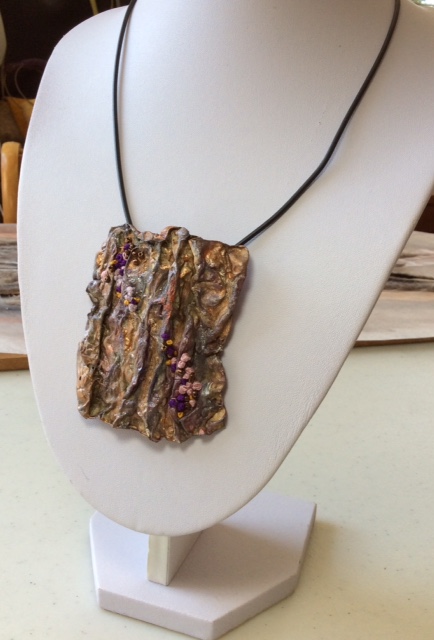
The rectangular pendant was made from heat distressed Tyvek which I’d first painted with metallic acrylics.  I’ve embellished it with pink, purple and mustard colonial knots and a few bronze seed beads and strung it onto a rubber cord.

The next pendant was made from tiny scraps of polyester velour fabric, backed with Bondaweb and ironed onto a painted, pelmet vilene background.  I’ve added beads, metal washers and a couple of “danglies” from a broken necklace.  The cords are two lengths of knitting wool which have been machine wrapped using the zigzag stitch.

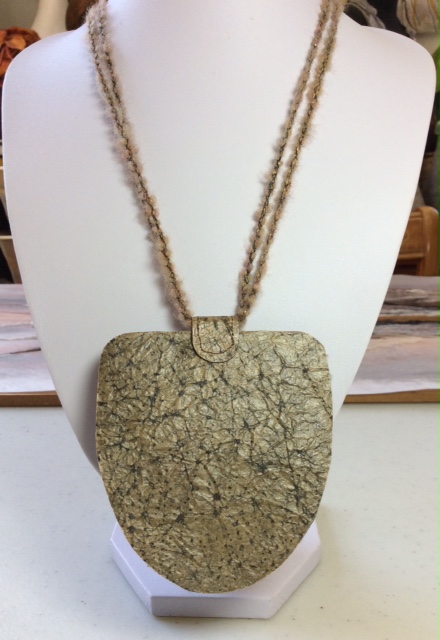
This larger pendant is my favourite.  I’ve kept it very simple using a dark grey cotton velvet furnishing fabric on a pelmet vilene background. I’ve sewn on brown craft paper, scrunched and painted with black acrylic to give it a leathery look, and added a metal trim, wooden bead and two smaller metal beads.  The back is also covered in the leathery craft paper.  Again the cords are simply wrapped knitting yarn but these are much longer than they look in the photo so the pendant hangs below the bust line.

Although we are living in strange times with social distancing and having to isolate, as long as we can maintain our motivation and continue to feed our creativity we will be doing ok!  Stay safe and have fun!