Browsed by
Category: 3D

Fourth Quarter Challenge 2020 Jan’s Ornament

Fourth Quarter Challenge 2020 Jan’s Ornament

Hummmmmm. I would like to make an ornament, using the cookie cutter needle felting technique. Now, what do I have as options? I have been collecting cookie cutters for over 30 years now. My original Christmas cookie cutters were dinosaurs. (the T-Rex was Santa! and the Triceratops had tricky horns to get out of the cutter.) Eventually, my collection grew and I added more traditional X-mass shapes to my collection.

Unfortunately, most of my 2 boxes of cookie cutters are stored well out of my reach at the moment and Glenn is off at work so can’t extract them for me. I should have remembered they were out of reach and no longer in the bottom drawer. (mumble)

Well, what do I have for options?

1  A bat, vampire teeth, a coffin, a cat, a moose and an Ikea set of snowflakes.  As much fun as the vampire cookie cutters are, I think they don’t say X-mas to most people. So they’re out.

2  As much as I love cats I don’t think I will try a holiday cat this time. (how would I choose between Timothy in Orange and white, Miaka in Black and white or Evil in all black? Someone would be feeling unloved.)

3-4   we are left with two highly festive shapes, snowflakes and moose.   But there was that incident on highway 401 while travelling to Oakville last week.  We were not involved but it looked very gruesome.  No maybe not the moose.

  5  So it’s the “Vinterfest” Snowflakes from Ikea. (They may not be sold out if you check your local store)

As I understand the concept of the cookie cutter, it is to provide a structured shape to contain the wool as you inflicted horrible stabbing upon it. The sides make sure the wool has nowhere to run! (i love needle felting it is such a gentle relaxing pastime! <Grin>)  The nature of the wool compacting as you poke it means extra attention and the addition of more wool is required along all the edges and protuberances.

6    I think that was some of the white Corriedale wool and the needle was a T36 or T38.

7-8  As the wool shrunk below the rim of the cookie cutter I added more fibre to the thinner areas. I also turned it over so I was compacting from both sides. If you wanted a thinner snowflake you would not keep filling it to the top of the cookie cutter. Whether you make a thick or thin shape it would still work best if it is fairly firmly felted.

9  I switched to the pen holder with two T42 needles (I had to look around for it.  I had left it in Mr. Mer’s Glute muscles.) I focused on adding short bits of wool around the perimeter of the cookie cutter. I was amazed at how much more wool it absorbed at this point.

10-11  Once it was very firm to the touch I started to extract the snowflake to see if it would be stable.

12   Ooh, nice solid snowflake.  Better not get hit with this one, you could poke out an eye!

Hum, now it’s looking a bit plain. I got that lovely variegated thread that had been donated to EcoEquitable a few weeks ago (they are a not for profit group that teaches sewing and recycles fabric and sewing supply).  I bet it would make lovely crows-feet and a star.

  13-14   Oh well the variegation is longer than I thought but I still like it. Now, where will I put it?

15 OH NO! Mr. Mer swam through, grabbed it and has run off with it!! That will teach me to store the needle pen in his butt!

Shark-Boy! part 2

Shark-Boy! part 2

When last we chatted, i had consulted with Ann while topping up the butter tart supply.  She suggested looking at the integration zone, yes he is a bit skinny and needs to have a stronger transition blending the join between boy and shark.

I have made a stronger integration zone between shark and human by lengthening the abdominals into the under shark and brought the shark flanks up into the lats. i also added a dorsal line in the lumbar spine and the cervical spine. yes that looks better!

then it was time to add hands.

1-3 Floral wire from Dallerama unlabeled but probably 22 gauge

After adding the fingers.  I tried one of Sara’s tools for the first time, I had been using my mettle ruler and one of my weaving stick-shuttles successfully but this gives a lot of length options in one tool. I could do a similar thing with coroplast (a type of plastic cardboard) but I was interested in trying this out.

4 finger making tool, Stick shuttle and ruler

I used the floral wire from Dollerama (I think its 22 gauge since its unlabeled). I used an extra section of wire to reinforce the wrist. Rapping tiny fingers was a bit fiddly but went reasonably well. I switched to finer needles and started to work on the thenar and hypothenar eminences (those two bumps of at the base of the palm). I spent a long time poking both hands to get the shape to a place I was happy.

5-7 I was very pleased with the expressiveness the hands gave. You can also see more of the transition zone from shark to boy.

Yes, that took a week and it was a time to top up the butter tart inspiration!

 8-10 “those hands look creepy”

Success! Except I understand the hands look creepy. That might improve in the next step, On to Colour!!

By the way, it’s still raining.

I started laying in the base mid-tone grey on the hammerhead body then started playing with skin tones in the boy parts. (sorry I got distracted with adding the colour layer and forgot to go grab the camera)

 11-13 base layer, then adding wisps of colour

Just a sec, Ann just messaged me a tornado warning, got to go move hanging plants, drying wool and the 3 umbrellas!

Well, we made it through with odd-coloured sky and layers of clouds moving in different directions then a huge downpour.

The next morning I was a bit hesitant to check out how the side yard was doing. The studio, plants and wool survived so back to work!

14 Here is the wool that keeps getting extra rinses, this is just the first part of one of the two large rams fleeces I bought a couple of weeks ago. There is still a lot of VM  including burrs to clean-out. Now back to Shark-boy!

  15-18  wool and hanging baskets survived adding detail at the intersection and along the spine.

19 This summer Mrs. Crow and her family supervised me, as I have worked on the Mer family.  Today they all dropped by for a visit.

I started to lay in more thin wisps of colour over the base layers. I started with the human skin tones and the integration of the abdominal/underbelly. I also added a bit of the detailing along the colour change.

20-22 Adding more definition between belly and sides of sharks

I think he is enjoying how it is going and took a quick swim around the table.

23-30

Once I can catch him, I will continue adding colour to his hand and the rest of his body.

Have fun Felting!! Maybe it will stop raining at some point so i can get back to washing and drying the last of the fleeces.

Shark-Boy! part 1

Shark-Boy! part 1

I started this post a few weeks ago but wanted to tell you about the Flax study group first. so while the Flax is off at the spa having hydrotherapy treatments lets look back a bit.

I hope you haven’t become bored in my fishy endeavors this summer. (I am looking forward to starting a less wet oriented project once I have this one in hand)

I have decided the Mer’s need a son. However, I want to have him more strongly on the shark side of the family, hammerhead shark to be specific. So back to my notes to adjust the armature sizes from the original measurements suggested by Sarra in her you tube felt along Mermaid.  I reduced the proportions for the body and then considered the extended length of the hammerhead shark body.

 1   14 gauge aluminum wire armature.

   2 Using a second piece of wire to Stabilizing the arms and third for the body.

For this Mer I went with a much more fishy lower body, basing it on the hammerhead shark.  I again did a thorough search of images to find reference shots. Referring back to the diagrams,  photos, and a bit of research I found out there is a difference in fin alinement between adolescent and adult hammerhead sharks.  I extended the body armature, adding fins in appropriate places for a youthful shark.

  3-4 adding a fishy long shark body

I have tried various starting points while felting the Mer’s, this time I started with the head and worked down.

  5-9 Starting at the top and working down

I added wool, by rapping and adding layers of wool, continuing down the body to the first pair of (Pectoral) fins. I secured fiber to the lower back then worked out and back building up the fins and upper part of the shark body.

 10-11 Pectoral fins

Now on to the first Dorsal fin. I created a flat rectangle and felted the center line which will become the front edge of large fin.

 12-13 Dorsal Fin.

The fin armature was rapped with the white wool then the fin cover was added and felted in.

  14 -19 the Dorsal fin and blocking out the shark body

When working It is good to take pictures, not just to have a record of what you have done but also to get a different perspective on your work.  (It’s like holding a painting up to a mirror to help your brain see it more clearly) He is still looking a bit too skinny, he needs a bit of weight training. I am sure I can do something about that.

Yes it rained again. another extra rinse for the fleece. I am still dry under here, so let’s keep having fun!

   20 more rain, shark-boy starts weight training

I started to play around with the transition section and adding a bit more width to the body of the shark parts.

  21-23 transition between Boy and Fish ( i have to make the transition look integrated not like a shark is eating someone feet first)

  24 checking both photos and diagrams

Now to add the Caudal fin, which has a subterminal notch! And yes it rained again.

25 this is a cool tool, it unscrews by turning the nob. be careful not to get one that requires a screwdriver  to undo it from below (it can be painful if you slip)

Pause in the rain, time for a Tomato brake!

   26-28  Haratige, Low acid yellow pair, Sweet i millions

Yes I am still trying to wash and dry fleece so yes it rained again. I guess it needs more rinsing? OK, back to work!

 29-31

Time to add the two Pelvic fins,

  32-33 shape both fins at the same time before adding them

It was still raining but not leaking in the covered dog area which is now my studio, Shark boy is keeping an eye on the weather while I make his fins.

34 will it ever stop with the intermittent rain?

  35 before adding the pelvic fins I need to add the Anal fin, but first checking the location on the diagrams and photos.

    36-37 make 2 so they will be balanced
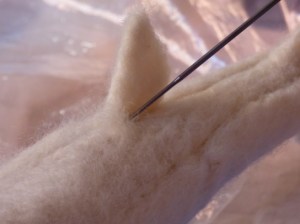
Adding the pelvic fins between the pectoral and anal fin. As you can see, shark boy did not inherit the vestigial knees found in the rest of the Mer family.

 38-39

Its time to pack up for the day. Tomorrow is the day to restock on Ann’s Tarts and get her impute in how this project is  going.

40 OK more rain.. time to pack up. tomorrow is Butter tart day!! (Saturday)
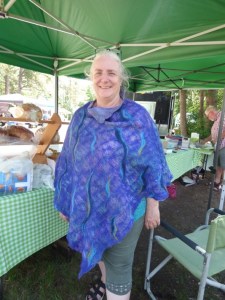
  41-43 Ann had her New poncho to show me! It looks grate!

The decision on shark boy was to keep working on the intersection between shark and boy. That will be next week but for now its time for butter tarts!!

Third Quarter Challenge Entry

Third Quarter Challenge Entry

I have been quandering what to make for the third quarter challenge for some time now. I had thought about making a coat for our new dog Edgar but he is so rough and loves to chew everything, so I wasn’t sure it would last long. I don’t wear wraps, scarves, hats or mittens much so I kept putting it off. But it’s getting down to the wire so I decided I would use my layout and differential shrinkage methods on making a hat. I’m not a hat wearer. I always think that hats make me look silly plus I have a really big head. But up in my closet, I have several hat blocks (from Hat Shapers and Frank’s Cane and Rush Supply – I have no affiliation with either of these companies). I thought I should try using things I have learned in my prior experiments to see if I would enjoy the process of hat making more than I have in the past. Plus I had a suggestion for using my leftover prefelt in a way to look like a brain. Doesn’t this sound like a recipe for disaster?

I started out by laying out two layers of red wool. I did the same layout that created a nice bowl shape here. The inner part of the circle is laid radially and the outer edge is laid around the circumference. Normally when I make a hat, I use a resist. But here I just started with a flat circle of laid out wool. I then added the cut prefelt for the “brain” idea. I covered the prefelt with another two layers of red wool. I then started felting and made sure it was all holding together.

Once the piece was at prefelt stage, I got out the Hat Shapers Shaping Dome. I worked the felt around the circle to get it to shrink and fit the dome shape. Once it was fitting that shape a bit better, I switched to the final Hat Shaper.

This one is called Flanged Brim Cloche. I soon realized that my circle wasn’t big enough and also that my ring of circumferential fiber/wool should have been larger. I worked and worked on getting it to shrink down, but it was done shrinking and very stiff. Perhaps I should have just turned it upside down and called it a dish at that point!

So what to do? I put it on the Frank’s Rush and Cane Supply high dome hat block. I just started playing around with different ways to decrease the circumference where the hat sits on your head. So I ended up with the back looking like a bonnet from Little House on the Prairie (a television show in the 1970’s for those of you who aren’t in the US). But I took a problem and made it into a design feature. I did stitch the back together after the hat was dry to keep the folds in place.

And here it is after I dressed it up with a felt flower that was hanging around the studio. And remember the yellow prefelt? It hardly made much difference in the shape at all. I didn’t double it up like I had in my previous experiments, nor did I stitch it down. So it gave just a small bit of shape and color to the end result. You can see the yellow best in the hat photo from above. And guess what? The hat doesn’t fit me, it’s too small and very shallow so it sits on the top of my head and looks ridiculous. It was so bad, I didn’t even take a photo. You’ll just have to imagine it.  Anybody need a hat?

At least I have an entry for the third quarter challenge and now I remember why I don’t make hats.


Prefelt and Structure

Prefelt and Structure

If you have been following my experiments lately, I have been trying felt rope as a base for structure. I had a request to try the same experiment with prefelt to see if there was any difference between the two.

I made  a piece of prefelt and cut it into strips with a rotary cutter. I decided to use two strips to give the same weight as the felt rope in my prior experiment. I also covered the same resist with two layers of wool laid perpendicular to the length of the resist.

I used two strips of prefelt and wrapped around the resist. These were stitched in place with yellow 30 weight machine thread. It was easier to stitch the prefelt than the felt rope.

I then covered this with two more layers of wool over the prefelt strips wrapped in the same direction as the first layer. The photos above show the piece after I removed the resist and the photo on the right is a closer look at one of the prefelt strip areas. It definitely shrank differently than the felt rope. The rope got very wavy under the felt.

And here it is after fulling and shaping. The only different thing that I did this time was to continue to stretch the prefelt areas into circular shapes as I was fulling. I think that helped to smooth out the circles compared to my last try.

And here are the two together. The one on the left is made with felt rope and the one on the right is with prefelt. Essentially the same thing. As you can see, the rope is a bit wavier but that might have been avoided if I have stretched it more during fulling. The thing I like about this experiment is that the prefelt works just as well as the rope and for me, it’s much easier to make. So I think my experiments with felt rope are over. 😉

A Felt Solution for a Small Problem

A Felt Solution for a Small Problem

Black thumb drive and black thumb drive and black thumb drive? Which Identical looking thumb drive has the file I am looking for? Silly me I saw them on sale and bought them! Now I again have a handful of thumb drives that I have to open each one to find out what it might have on them…. Well, that’s annoying.

thumb drives Yes, I have a lot of black thumb drives!

I had to pass some files over to Ann and need some way to make this little black drive look different from the rest of them and so it won’t get lost with any that she also has.

Sitting here in front of the computer, with a pile of fibre and lots of needles, I wonder…… can you needle felt directly to an attachment point on the drive? These have particularly small attachment spots for a toggle so a ribbon or leather strip won’t fit. But I think I can get a felting needle in there!

I had bought a pink rose and grey batt from Christine which just happens to be sitting here.  What shall I do? What shall I make? I have no clue… No, I don’t think I want a fish. So I grabbed a bit of fibre and started to poke at it, poke, poke, flip, poke, hmmm, no, not a fish. But it is starting to look like it wants to be a mitt. One of those really big winter mitts gripping the end of the thumb drive. Ha! My thumb drive has a thumb attached to it (with the rest of the mitt!)

OOPS, I gave it to Ann before getting a photo of it.

thumb and palmfingers

thanks, Ann!  the top is the thumb holding on to the hole in the drive and the purple is the back of the mitt. it has a big fluffy cuff. I will have to work more on the palm and wrist when I get it back.

Ah, another day of rain, I guess my fleece washing and drying is now getting an extra rinse again. it’s raining too much to even sit out and felt undercover today.

I grabbed some more of the same batt of pinks, rose and grey and started randomly poking at the wool. After a bit I started feeling like footwear, yes that is definitely a short felt boot. I added a bright pink bit of fibre as the sole and started pulling bits of curls and added them along the rim of the boot and extended the backup and attached it to the thumb drive.

1234567     1-7

I got distracted working on the computer and looked up to see MORE RAIN…. The fleece gets another rinse.

The weekend was busy with getting Mom groceries and birthday cupcake (chocolate on chocolate with chocolate!) She is 89 this year!  I had a wonderful visit with friends, with social distancing and then on to the birthday party and belated birthday presents for my Niece for her 16th birthday (we gave her a starter selection of fibre, needles and an instruction book. She had never felted before and made a very nice strawberry between getting the book, eating dinner and before dessert!

For the next thumb drive, I really wanted to make a wire sheep. I had some of the combed blue locks sitting close to hand so blue sheep it would be! I divided the single piece of floral wire into loops for legs, tail and left the rest for the head. My tiny scrolling plyers had disappeared gain so Glenn stopped into Dollerama to pick up more. I don’t know what I would do without that store, it has most of my not originally meant for felting supplies. I had to wait on the plyers until he got back from work so I hand twisted the legs and used the tail loop at the attachment to the thumb drive. I will tighten that up and make hoof loops later.  I decided to make a nice round little body but leave the legs and neck wire. The head I added ears and a couple of tight curls. I think she turned out quite well.

1089   8-10

The attachment is easier to see with the wire rather than with the boot or mitt felting.

111211-12

Since the labelling of the boot’s drive as a Boot drive gives it other meanings in computer vocabulary I will call this the pink slipper drive, and the other will be the blue sheep drive.

That was a fun little project and has successfully made the on sale black identical thumb drives now look different! Have fun and keep felting (but it may be best not to do wet felting with this one!)

13 13

Felt Rope and Structure Part Two or How To Wet Felt A Dill Pickle

Felt Rope and Structure Part Two or How To Wet Felt A Dill Pickle

I showed you my first failed experiment with a felt rope and using it for structure. I got loads of good ideas on how to improve the experiment and took those suggestions and came up with a plan.

First off, I decided to work around a flat resist and use the same kind of wool for the felt rope as the rest of the surface. So I used mixed 56’s that I hand dye. I dry felted a felt rope from the yellow wool. I didn’t add any water at all but just rolled it dry until it was holding together. It wasn’t firm at all. I left the ends loose so that I could make sure the rope was well attached.

I covered the resist with light green wool with a couple of thin layers all running lengthwise to the resist.

I then wrapped the felt rope around the wool covered resist and added a couple more thin layers of wool in the light green. I added a bit of darker green to the ends.

And then I rubbed and felted and began fulling before removing the resist. Here it is after I took the resist out.

And then I fulled it into submission. You can see how much shrinkage there was in comparison to the resist. It is very hard and certainly won’t lose it’s shape.

And here it is after I shaved the surface a bit. It could use a bit more shaving but I haven’t had time to let it dry yet. So once it’s dry, I will shave it again. To me, it looks like a dill pickle or perhaps a small minnow? It is much more in line with what I was thinking when I first tried the experiment. I will have to try it on a larger scale. I’m not sure that the felt rope adds any advantage over prefelt cut in a strip. Perhaps if I have gotten the rope a bit harder, it might have effected the shape more. Next time, I think I will lay the resist wool going around the short side of the resist instead of lengthwise. I would also use less wool on the ends of the rope or just use a cut strip of prefelt.


Felting Alfresco (outside! Its Summer!) Pet Two Part 3 She is Naked! We must fix that!!!

Felting Alfresco (outside! Its Summer!) Pet Two Part 3 She is Naked! We must fix that!!!

Felting Alfresco (outside! Its Summer!)

Pet Two Part 3 She is Naked! We must fix that!!!


Now it’s time for me to start adding a bit of colour! this is where we left off last time.

1928

this is the understructure of the manta ray next will be laying colour on top of the structure, like a gresi painting.

12 1-2 laying in the T line so she is an oceanic manta

If you have taken art classes, either commercial or fine art, you may have had a teacher that reminded you that paintings with large black spaces are not as effective as deep shadows with suggestions of something within the shadows. So not a solid black but layers of dark blue, green, charcoals and browns with maybe a bit of pure black. I mixed the darkest charcoal with a very dark green and blue. I also started to add some of the lighter greys in thin wisps over top to give that dappled light effect.

 3-5 base layer of simplified pattern and fibres I was working from

 I kept a zip-lock sandwich bag of mixed greys which I could then make lighter or darker as I needed.

676-7 Zip-lock of greys, a bit of mixed colour sitting on her shoulder about to be added in a thin layer over the dark sections.

Distracted by Princess Auto flyer, the snap ring plyers I have and use to bend the ends of the wire are very tiny and not as smooth as I would like. So I will be off to check these out at next weeks’ sale. I will likely also replace my old wooden bench (the one I was stuffing unskirted raw wool into bags on) while I’m there.

 8-9  This is Next week’s Princess Auto flyer! Another great place for fibre related tools, really! It is where I found the Bee combs! (Yes!! We got the Bench!! However, they were out of the cool plyers)

I added the Dorsal fin, I made the basic shape and added it just above the base of the tail. I then build up the sides of the fin to give it more of the correct shape.

1011 10-11 added the Dorsal fin then built up the sides

After checking with the photo reference I brought the darkness around the edge of parts of the wings

1213

12-13 Bringing the colour to the edge and just around.

Next adjusting the angle on the lower part of the white shoulder markings and adding white to cover thin areas where the understructure was showing through. So far she does not have any under spotting but I may revisit before the end of the entire project.

1415 14-15 Final touch-ups on the back of the mantel.

16-19 looking good, but she will need eyes so she can judge that for herself

Time to add eyes!  Hmm, I think we need a bit more extension on the eye orbs or she will not be able to see around her Cephalic fins. I surrounded the pupil then used the super sharp scissors to cut off the excess. (I found these again at Dollarama, for 4.00 Canadian, they have worked very well so I bought a couple more pairs).  I may leave her for a couple of days then re-evaluate the eyes, they are not quite right yet but close!

  20-24 Adding eyes and the nice scissors from Dollerama

I think the heat was getting to her since she started her photoshoot by stealing my glasses and mask!

  25-27 Mantas seem to be curious and playful and maybe a short-sighted

Oddly, the glasses seem to fit her.  Unfortunately, the mask does not quite cover both her mouth and gills.

So on to the photoshoot!!!

2829

28-29 She seemed a little static in her poses, so l let her loose in the garden to have some fun.

     303132       3335343736  30- 37 A quick swim through the front garden (wait till she finds out there is a back garden!)

I took her out to buy butter tarts and to show Ann. It’s good to get out and meet new people but she forgot to wear her mask!! I think she will need to quarantine before she can play with her Mer-People!!!

38-40 Felting is better with Butter tarts

I hope you have enjoyed the creation of my adolescent female Manta Ray. I still have more to do with this set of sculptures so please keep checking in on how it is going. Have fun and Keep felting!!

Felting Alfresco (outside! Its Summer!) Mer-Pet 2  part 2; Parts are missing, She needs her mouth and abdomen!!

Felting Alfresco (outside! Its Summer!) Mer-Pet 2  part 2; Parts are missing, She needs her mouth and abdomen!!

Felting Alfresco (outside! Its Summer!)

Mer-Pet 2  part 2; Parts are missing, She needs her mouth and abdomen!!

Next day it was back to the side yard and I started working on the inside of the mouth

132 1-3  I have to think about this, I have it unfolded. So am I working on the roof or floor of the mouth? I got myself sorted out, wrapped the wire and added the base layer. Let’s look at the details of what the mouth should look like.

   4-7 reference images for mouth

The last 2 manta are swimming upside down. The upper lip looks deeper than the original photos I had viewed.

Consulting the open mouth photos I had found, I added the gill arches and gill rakers.

These poor guys are being caught and killed for the gill rakers which are used as Chinese medicinal products to the point there numbers have dropped significantly. Dive groups are trying to educate governments that live Rays will generate more money through tourism (dives/snorkel tours) rather than what they will get from a corpse.

 8–11 Adding the gill arches and gill rakers

12-13 Glenn holding the parts together.


14

14 I added the dark interior to the upper pallet of her mouth.

I also extended the upper lip which seemed to be longer than I had originally thought from other photos I was consulting. This is likely a mistake. I suspect the image I was looking at was falsely labelled as a manta and was a Mobular of unusual sized and colour. (Another option is that this manta has had Lip Injections to make her look sexier to any male manta who is a lip man?) I may be able to decrease the extension a bit.

Now for the outer gill flaps on the underside of the body.

 15-16 making gill pieces

I used pins to hold the folded edge of the gill pieces. They work well to keep my fingers away from the pointy end of the needles and acted like handy extra hands.  I left the wispy side un-felted to improve attaching the gill covers.

By feeling from the underside, I located the first and last gill arch. I used a bit of grey fibre to indicate the position on the outside of the body. I estimated the position for the gills in between.

17-18 adding gills

If you are going to make a manta and want to add gills I would strongly suggest starting with the one farthest away from the mouth and work back towards the mouth.

Now let’s add the lower jaw/ gills smoothing into the body.

  1919 Checking the back after attaching the abdomen/mouth. Looks good.

2021 20-21 Check the attachment on the underside and the alignment of the mouth

The join to the body on the underside is too severe an angle. I will need to add more fibre to smooth the join between the body and wings. I also noticed that the join between the lower jaw and underside of the Cephalic fins needs a bit of work and the jaw angle is off a bit too.


Back to the side yard and let’s do the final adjustments to the understructure. It’s a bit warm today but there is a light breeze.

22-23 the side yard studio, it was a bit warm.

242524-25 working on her lip problem. I used the edge of the foam I was holding my needles in.

26272826-28 I started to blend the body with the wings. I also thickened the white fibre on the underside of the wings.

It was good to see one of my Guild Friends drop by on her way to do other errands. I picked the catnip behind the big anvil for her furry kids to enjoy.

 29 -30  if you look very closely the slightly rusty coloured thing under the very large plant of catnip is a large anvil.

Now Glenn can use his hammer and anvil again without attracting all the neighbourhood cats! (aromatic hammered catnip not as good as it sounds)

Then it was time to get back to work, but more on that next week.


Experimenting with Felt Rope and Structure

Experimenting with Felt Rope and Structure

I thought I would move on in my experimentation with creating structure in felt and differential shrinkage, this time using a felt rope. I’m not sure why I thought this was a good idea but I suddenly remembered why I don’t make many felt ropes.

I used a batt of yellow short fiber merino and tore it into a strip. I then worked a bit on trying to dry roll it to get some of the air out. But that wasn’t working too well so I added soap and water. The rope turned out OK but is far from perfect. I always forget how much patience these take to do them correctly. Now that the rope was done, how to add the felt to this spiral structure?

I came up with the idea of covering a PVC pipe with lime green mixed 56’s wool. I probably should have used merino but this is what I had grabbed for this project. I covered the pipe with wool and then wet it down.

I wrapped the rope around the wool covered PVC pipe and then began adding wisps of wool over the rope. I wet it down as I went to hold everything in place. I then spent a fair amount of time rubbing and working around the rope so that the wisps would stay in place and hold the rope down to the felt. Apparently, not enough.

Here it is after felting. What a mess. The ends of the rope were coming loose and it looked like my dog Edgar had been chewing on it. (Not really because he would have torn it to shreds in a matter of seconds.)

I took a break and then decided I need to full it much harder. I found a thinner stick to put in the middle and worked the piece with soapy hands as well as rolling it on the ridged mat and banging it hard against the table.

Here is the end result. Not appealing or impressive. But I might try again with a much thicker inner and outer layer of wool.  I also will probably try wrapping the rope around a flat resist instead of a 3D object. I can always full around the pipe or dowel rod after the felt is holding the rope together better. Not totally a disaster but close! I do think it’s good to go ahead and post about something that doesn’t work out as planned. Perhaps someone else will learn something from my trial and error experimentation. And perhaps you can empathize with me that not all projects are beautiful or perfect. What have you experimented with lately?