
Shark-Boy! part 1
I started this post a few weeks ago but wanted to tell you about the Flax study group first. so while the Flax is off at the spa having hydrotherapy treatments lets look back a bit.
I hope you haven’t become bored in my fishy endeavors this summer. (I am looking forward to starting a less wet oriented project once I have this one in hand)
I have decided the Mer’s need a son. However, I want to have him more strongly on the shark side of the family, hammerhead shark to be specific. So back to my notes to adjust the armature sizes from the original measurements suggested by Sarra in her you tube felt along Mermaid. I reduced the proportions for the body and then considered the extended length of the hammerhead shark body.
 1 14 gauge aluminum wire armature.
 2 Using a second piece of wire to Stabilizing the arms and third for the body.
For this Mer I went with a much more fishy lower body, basing it on the hammerhead shark. I again did a thorough search of images to find reference shots. Referring back to the diagrams, photos, and a bit of research I found out there is a difference in fin alinement between adolescent and adult hammerhead sharks. I extended the body armature, adding fins in appropriate places for a youthful shark.

 3-4 adding a fishy long shark body
I have tried various starting points while felting the Mer’s, this time I started with the head and worked down.


 5-9 Starting at the top and working down
I added wool, by rapping and adding layers of wool, continuing down the body to the first pair of (Pectoral) fins. I secured fiber to the lower back then worked out and back building up the fins and upper part of the shark body.

 10-11 Pectoral fins
Now on to the first Dorsal fin. I created a flat rectangle and felted the center line which will become the front edge of large fin.

 12-13 Dorsal Fin.
The fin armature was rapped with the white wool then the fin cover was added and felted in.


 14 -19 the Dorsal fin and blocking out the shark body
When working It is good to take pictures, not just to have a record of what you have done but also to get a different perspective on your work. (It’s like holding a painting up to a mirror to help your brain see it more clearly) He is still looking a bit too skinny, he needs a bit of weight training. I am sure I can do something about that.
Yes it rained again. another extra rinse for the fleece. I am still dry under here, so let’s keep having fun!
 20 more rain, shark-boy starts weight training
I started to play around with the transition section and adding a bit more width to the body of the shark parts.


 21-23 transition between Boy and Fish ( i have to make the transition look integrated not like a shark is eating someone feet first)
 24 checking both photos and diagrams
Now to add the Caudal fin, which has a subterminal notch! And yes it rained again.
 25 this is a cool tool, it unscrews by turning the nob. be careful not to get one that requires a screwdriver to undo it from below (it can be painful if you slip)
Pause in the rain, time for a Tomato brake!


 26-28 Haratige, Low acid yellow pair, Sweet i millions
Yes I am still trying to wash and dry fleece so yes it rained again. I guess it needs more rinsing? OK, back to work!


 29-31
29-31
Time to add the two Pelvic fins,

 32-33 shape both fins at the same time before adding them
It was still raining but not leaking in the covered dog area which is now my studio, Shark boy is keeping an eye on the weather while I make his fins.
 34 will it ever stop with the intermittent rain?
 35 before adding the pelvic fins I need to add the Anal fin, but first checking the location on the diagrams and photos.

 36-37 make 2 so they will be balanced
Adding the pelvic fins between the pectoral and anal fin. As you can see, shark boy did not inherit the vestigial knees found in the rest of the Mer family.

 38-39
38-39
Its time to pack up for the day. Tomorrow is the day to restock on Ann’s Tarts and get her impute in how this project is going.
 40 OK more rain.. time to pack up. tomorrow is Butter tart day!! (Saturday)
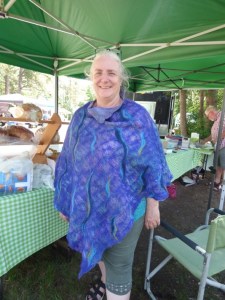

 41-43 Ann had her New poncho to show me! It looks grate!
The decision on shark boy was to keep working on the intersection between shark and boy. That will be next week but for now its time for butter tarts!!
4 thoughts on “Shark-Boy! part 1”
It’s really fascinating watching him grow.
Do you break many needles on the wire armatures when you are making figures? I seem to find my needles attracted to the armature as if it was a magnet!
Ann
It was really interesting to see how your design process worked alongside the construction of Merboy…. the scientist in me applauds your attention to detail with the shark anatomy!
The detail is fantastic! We smiled about your worry that you didn’t want the look of a shark eating a boy. But you’ve done the join superbly and it looks natural.
Lucky you to be able to have some of those tarts and Ann’s poncho really does look lovely.
Shark boy is looking good. Your attention to detail is what makes this family look so believable. I am really looking forward to the addition of “skins” of color to the family.