Browsed by
Author: ruthlane

When I discovered felting in 2007, I finally found the creative outlet for which I had been searching. I love that the versatility of fiber allows me to “play” with a wide variety of materials including wool, silk, fabrics, yarns and threads. Creating one of a kind fiber art pieces to share with the world fulfills my creative passion.
Waffling

Waffling

Usually by this time of the year, I have chosen a “word for the year”, have a list of goals written out and I’m well on my way to how I will achieve those goals. This year, I don’t have any of that completed and I just seem to be waffling. Is that a word? Anyways, I just can’t seem to make up my mind what I would like to concentrate on this year.

IMG_0392

First I think, maybe I should concentrate on entering my work into more national and international exhibitions. But then I wonder, what is the point in that? What will I gain from entering into shows/exhibitions? I always agonize over what venue might be right for my work and then there is always the cost for entering. Since I haven’t been accepted to any major shows, it always seems like a waste of money that could be better spent on supplies or perhaps taking a class.

IMG_0545

Then I wonder about what direction I should take when I make things. Should I concentrate on functional pieces that will sell readily or should I make things that are “art”.? Should I do three-dimensional sculpture, landscape pieces or should I work on developing a cohesive body of work that could be a “solo exhibit”? Then I start wondering if I have developed my own style and what that style is?

IMG_0636

I would like to take more classes in art and design but they are quite expensive and time consuming. Should I be saving my money so I can take another class? Or do I know enough already? How could that be? I don’t think I could ever know enough. I love learning.

IMG_2652

So as you can see, I just can’t decide what to do. I have been mulling this over for several weeks now and haven’t come to any sort of conclusion. Perhaps this year, I just need a little less structure and I will take things as they come. I will allow myself to waffle and avoid listening to that little voice inside my head that insists that everything be planned precisely. And I’ll see what the universe brings me 🙂

First Quarter Challenge 2014

First Quarter Challenge 2014

We have decided that this year for the challenges, that we will have a central theme and base all the challenges on that theme. The theme for 2014 will be famous artists. This does not necessarily mean that we will be picking our favorite artist but perhaps an artist that we would like to learn more about. Or maybe one that we think will be able to be interpreted fairly easily in fiber. So each quarter, we will name the artist and the challenge will be to create something in the spirit of that artist. You don’t have to “copy” one piece exactly but the feel of whatever you create should be in that artist’s style. You are free to interpret that artist’s work however you would like. It also might be fun to take a few minutes and learn a little about that artist’s life, history and what they have contributed to the art world.

Jackson Pollock “action painting”,

I have chosen Jackson Pollock for the first quarter challenge. Jackson Pollock was an American painter, and is possibly the leading force behind the abstract expressionist movement in the art world. The photos used here and the information about Jackson are from http://www.jackson-pollock.org. There are several other websites about Jackson Pollock as well as lots of photos of his work when you search images.

Convergence by Jackson Pollock

When I was growing up, my mother always got us a jigsaw puzzle at Christmas time to put together as a family. One year, we got a puzzle of one of Jackson Pollock’s “poured” paintings. I don’t remember how many pieces it had but it was over 500 pieces. It was probably the hardest jigsaw puzzle we ever put together. So hard, that after it was together, my mom covered it with some type of glue and hung it on the wall.  I think the puzzle was based on ‘Convergence’. If you check out the Jackson Pollock site, there is a puzzle that you can try out. It took me 7 minutes and 41 seconds to do (with a few interruptions) so see if you can do better.

The Deep by Jackson Pollock

I didn’t know much about Pollock before I decided to pick him for the challenge. It sounds like he had a hard life, struggling with alcoholism and dyeing at the age of 44 in a drunk driving accident. His most well-known work is in an abstract style and used a ‘drip and splash’ technique. Pollock said “It is only when I lose contact with the painting that the result is a mess. Otherwise there is pure harmony, an easy give and take, and the painting comes out well.” And also, “On the floor I am more at ease. I feel nearer, more part of the painting, since this way I can walk around it, work from the four sides and literally be in the painting.”

Full Fathom Five by Jackson Pollock

One of the reasons that I picked Pollock was because I thought that he could be interpreted well in felt. Of course, you don’t have to make a felt piece to enter the challenge. You can use any media that you would like. If you do create a piece for the challenge, you can either post it on the forum, Flickr or contact us and we will feature your entry here on the blog. We would really love to see what you come up with and I hope you’ll enjoy challenge.

Building in 2013

Building in 2013

My chosen word in 2013 was Build. I can’t say that I really thought about the word itself much throughout the year, but I did build things, the most notable of course was the yurt.

Is It a Mushroom?

The yurt building process began in March and we had the yurt raising party in mid October. This was the biggest felting project I have ever tried and even though it was hard work, I really enjoyed the process (excluding that one day it poured rain on us). Dennis and I learned so much and the end result was very satisfying. There are a few more things we need to do next spring before we put the yurt back up but all in all, it was a great experience. Thanks again to everyone who helped with the yurt, we really appreciated your assistance.

In regards to my other goals for the year, I did complete the last session of my level 2 stitch class which included making a beaded book, various applique samples, a machine stitched book and machine cut back applique. My class held an exhibition in September which was well received. I was sad when the class was over because I really enjoyed learning more stitching techniques, art and design and interacting with my fellow students.

The Daily Dose of Fiber Challenge was the first quarter challenge here for 2013. I wanted to encourage everyone to be creative every day even if it was just for 5 minutes. I did blog about my daily dose of fiber over on my personal blog on a daily basis. I had hoped I would get in the habit of blogging more regularly but that hasn’t seemed to last very long into the year. Instead, I am back to blogging once a week on my personal blog. I guess if I didn’t have a full-time job, five blogs, Facebook, the forum blah, blah, blah, then I would have more time. 🙂 But I do still try to have a daily dose of fiber each day and enjoy my creative time.

In June, I took another course at the Gail Harker Creative Studies Center, Level 1 Color Studies. Mainly using acrylic paints, we studied various color wheels and color combinations. It was really interesting to me to see all the colors that can be achieved and how one color looks different depending on what other colors surround it. I think you could spend a lifetime studying color.

Pile of Dyed RovingThroughout the rest of the year I dyed fiber, carded batts, worked in my studio journal, made a bunch of note cards, free motion stitched a variety of projects and made a few notebook covers. In my local group, I learned some new techniques including free form crochet, carving linoleum print blocks, ice dyeing, natural eco print dyeing, paper fabric lamination and encaustics.

Free Motion Machine StitchedI then experimented with the paper fabric lamination with nuno felting and it worked like a charm. I really like this technique and I think I’ll be trying more of this.

Close Up Shibori ScarfI also tried some stitched shibori for the first time and overdyed two scarves with that method. Even though the stitching and tie method is a bit fiddly, I like the result and will most likely be doing a few more of these as well.

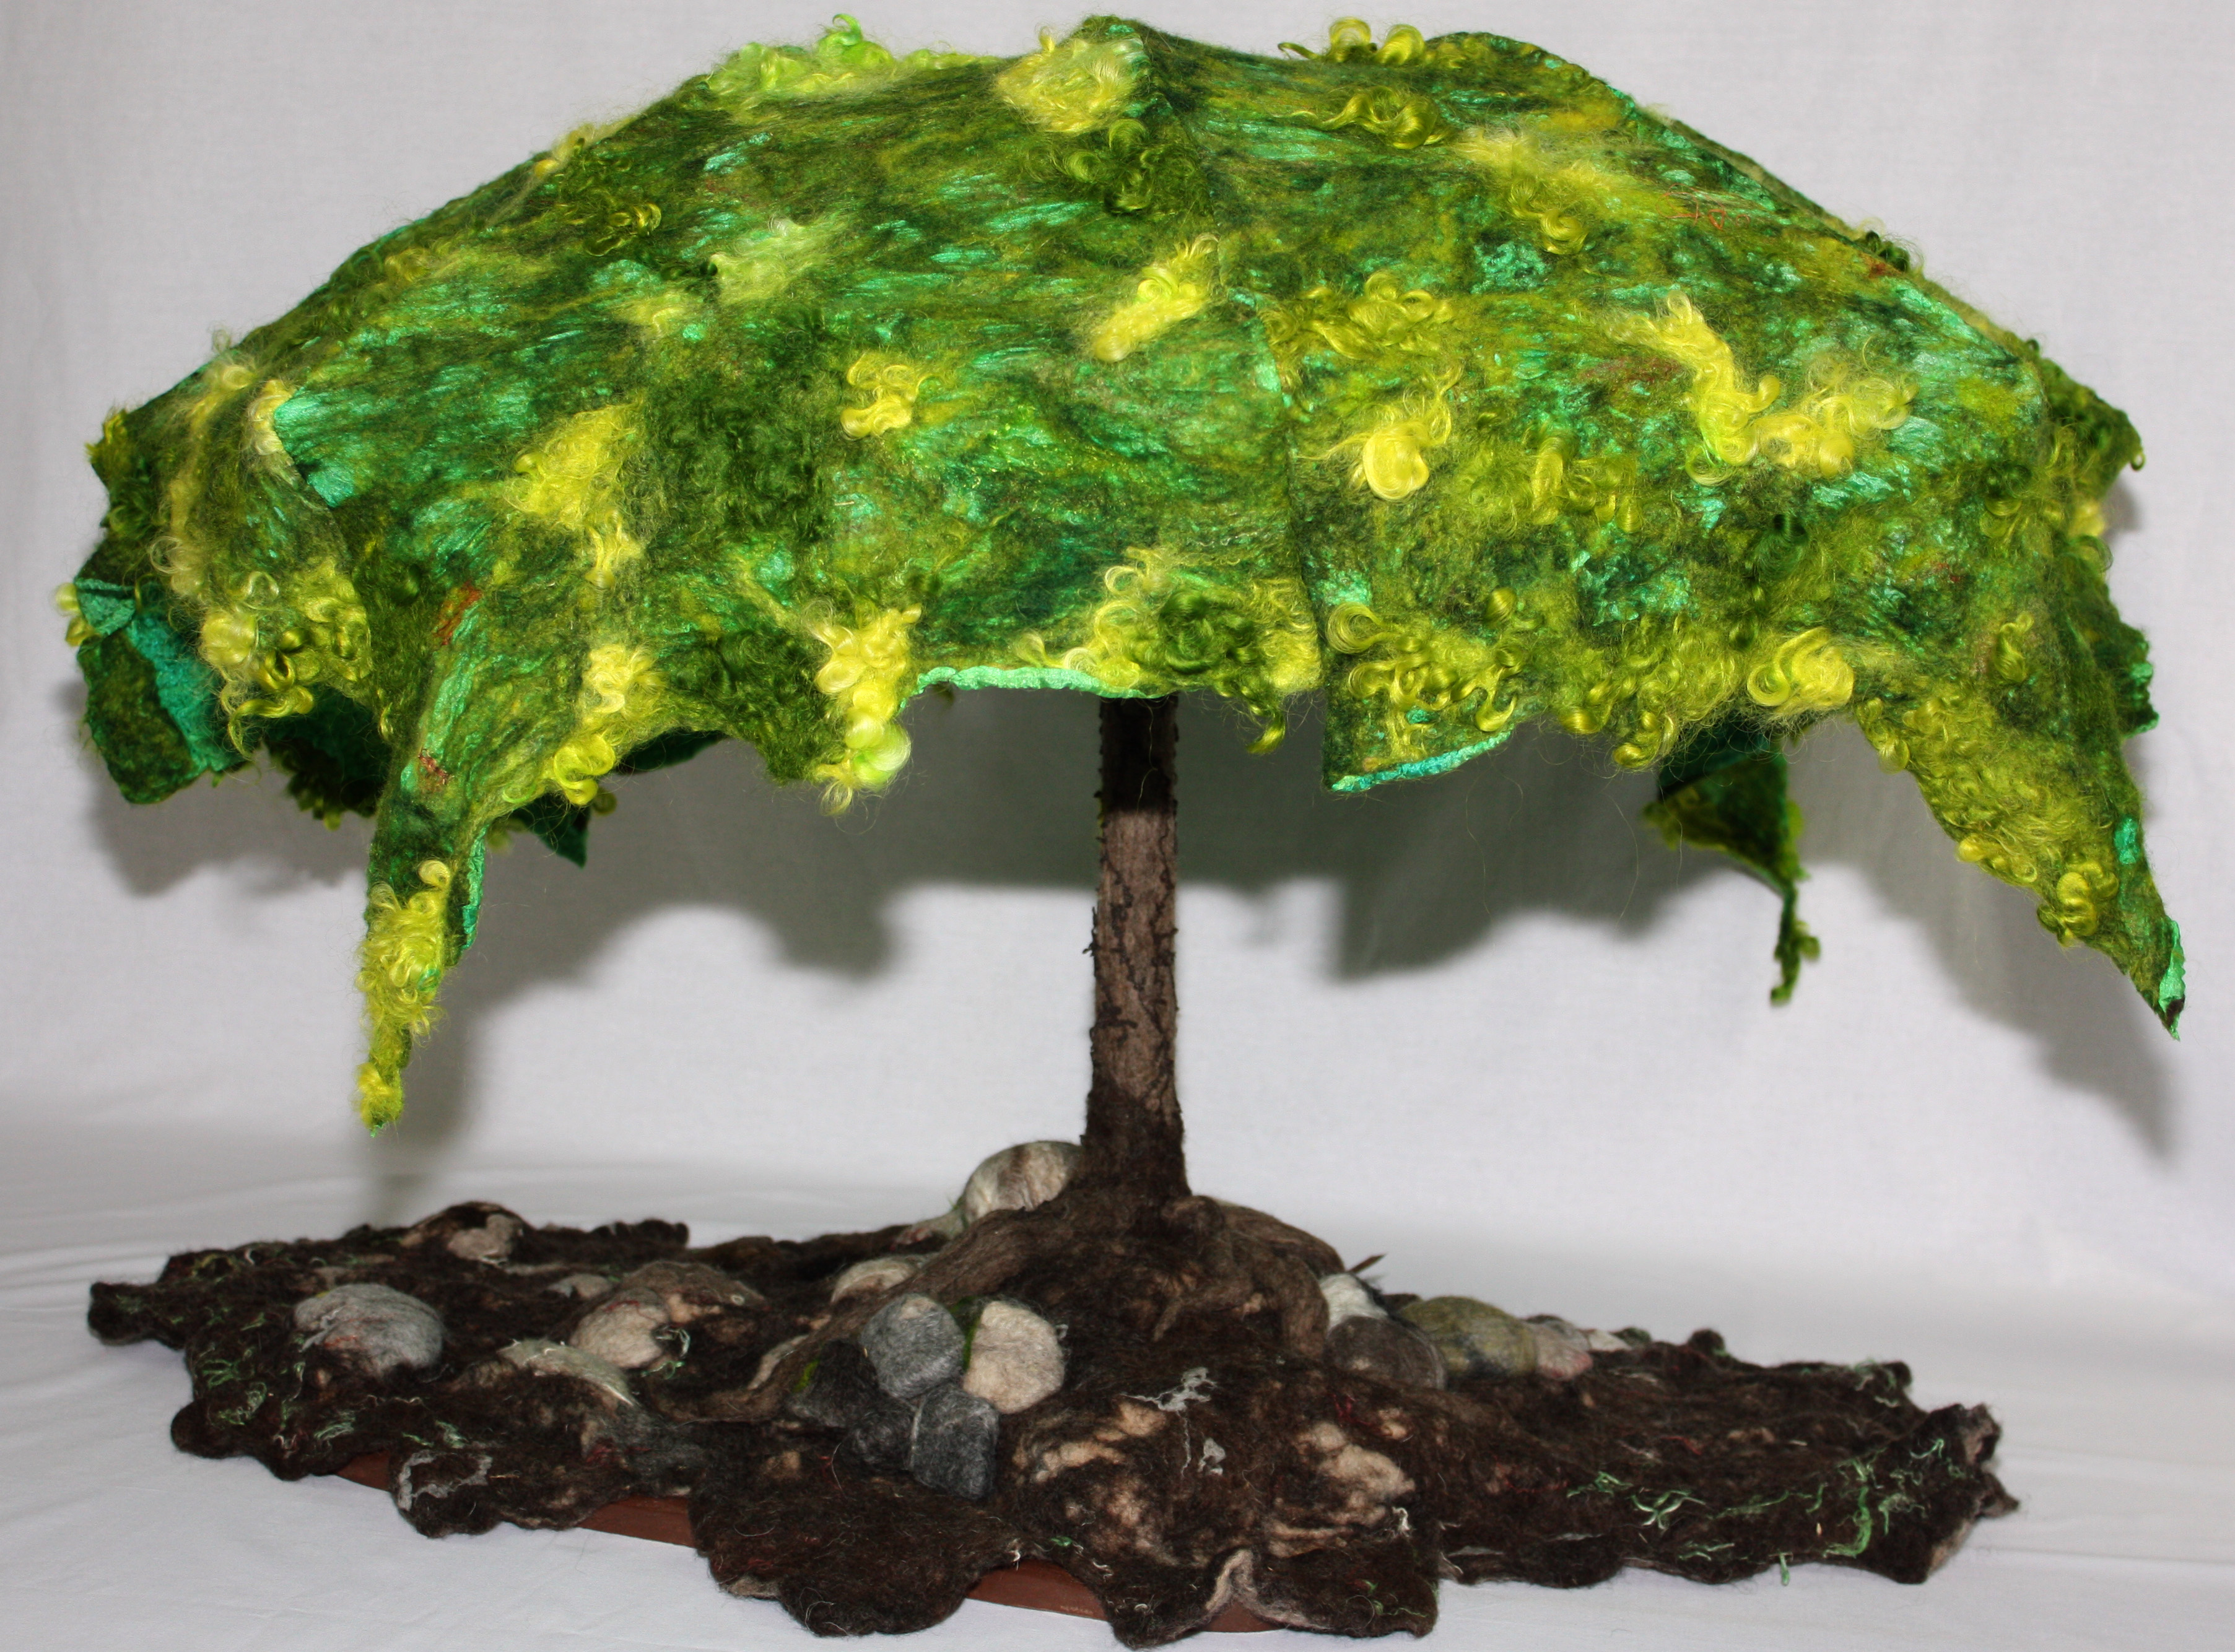
Full Tree 3One of my other goals was to continue to build a fiber arts organization that I started called Tangled. The group had its first exhibition with the theme of Shelter in October at The Purple Pomegranate. For that exhibition, I made my umbrella tree pictured above. This was made by felting over an umbrella and recreating the top of the umbrella with nuno felt. I am thinking that I will enter this piece into a few more exhibitions in the coming year. The group is also planning an annual exhibition and perhaps some outdoor fiber art installations.

The only goal that I didn’t manage to meet was making video tutorials. I did make some videos of the yurt and my beaded book but I haven’t managed to make any tutorials. Perhaps next year? I did make plans for further teaching opportunities but sadly those classes did not fill up and had to be cancelled.

As I was looking back over the year here, it amazes me how much Ann, Zed, Karen and I have accomplished. Well done ladies! I am also thinking on what the focus will be in 2014. Are you planning any big projects or changes in direction? We’d love to hear about your plans for the new year. Best wishes in the New Year!

Another Shibori Scarf and Hand Dyed Threads

Another Shibori Scarf and Hand Dyed Threads

Since my first attempt at a shibori scarf was successful, I decided to stitch another one that was an eco-dyed failure. This scarf was hand-made felt so it was significantly thicker than the last scarf I dyed with this method.

Beginning to Tie and KnotHere’s the scarf after all the stitching was complete and pulling the threads to tie off had started. The bright blue-green color came from commercially dyed eucalyptus leaves.

Tighter?I really worked at getting this one tied tighter than the last one. I think I was more successful but the felt was much thicker so it was easier to get it tight.

Shibori ScarfI put the tied scarf into a pot of acid dye that was a combination of black and red. I think it improves the scarf, don’t you?

Shibori Scarf - closer viewThere are still spots of the blue-green but now they are just accents as opposed to big blobs of ugliness.

Dyed ThreadsI also dyed a bunch of cotton and wool threads the same day I dyed the scarf. I ‘needed’ more blue violets and red violets in my stash of threads. I used #5, #8 and #12 perle cottons, regular embroidery floss and wool lace weight thread. The wool is all on the right side of the photo. It got thrown in the pot with the scarf and is a really dark, deep red.

Cotton ThreadsI really love how hand dyed threads are variable. I was working on getting a range of values in the same colors. I added a few green threads in too to make a nice color combination.

Wool ThreadHere’s a closer view of the wool thread. It has sections of brighter red in between the really dark portions. I’m not sure how I’m going to use these threads. I have tons of threads that I dyed for my stitch class but it always seems like I just don’t have the ‘right’ color when I need it.  Does that happen to you?

All of us here at The Felting and Fiber Studio would like to wish you a Merry Christmas (or whatever holiday you celebrate) and hope that your holidays are safe and happy! Thanks for stopping by, we appreciate your comments and love to hear from each and every one of you. 🙂

Making a Cat Cave

Making a Cat Cave

With all my cat item related posts lately, you’d think I have a cat. But no, two small dogs that don’t like cats. The cat toys I make to sell and I recently made a cat cave to give my sister for Christmas. She has a new cat and requested a cat cave. Her cat is still a kitten but is supposed to get fairly big so I wanted to make a good sized cave. Ann has done a how to post about making cat caves if you’d like further ideas.

ResistI started with a resist made from floor underlayment. That is a Sharpie pen in the middle to give a little bit of scale.

Working Inside Out

I usually like to work inside out when I use a flat resist. So this is the embellishment layer that will be on the outside when I finish the cave.

EmbellishmentsThe embellishments were mainly nepps and curls in grey and white. I used a variety of fibers including Icelandic, Gotland and Merino.

Black Wool Layer

I then added a couple of layers of black wool which was a mix of merino and mixed 56’s. I wet the black down and then progressed to the white layer that will be the inside of the cave.

Adding White LayerHere’s the white layer after it is partially complete. I ended up doing 5 layers in total. The white wool is mixed 56’s.

Beginning to FeltI then wet the whole thing down, rolled and rubbed like crazy. The felt is starting to come together in this photo.

Using a wooden rollerI used this rolling stick to work it over a bit too. This was originally meant to be a curtain rod and has nice grooves in it to work the felt. I then cut a hole and removed the resist. Fulling in the sink and beating it around quite a bit to stiffen it up. I forgot to take any photos at that point, sorry.

Shrinkage

Here’s the cat cave after finishing the fulling process. I put it on top of the original resist so you could see how much it shrunk. After I spun the water out of it, I stuffed it with towels and blankets to dry.

Finished CaveHere’s the finished cat cave. I almost forgot to take photo before I sent it off to my sister’s house.

Will the cat fit?Now the only question is will the cat fit in this hole? I didn’t want to make the hole really big and I guess she can always enlarge the hole if need be. Have you made any gifts this year? We’d love to see what you’ve made. You can post your photos on Flickr or on the forum.

Stitched Nuno Felted Paper Fabric Lamination Pieces

Stitched Nuno Felted Paper Fabric Lamination Pieces

I finally got around to adding some machine stitching to the nuno felted paper fabric lamination  pieces that I showed you here and here.

Stitched BearHere’s the bear. I started out by just outlining the bear but it hardly even looked like a bear. So I densely stitched the bear with dark brown thread. The background I just added some stitching in the trees with a grey green thread and the fallen tree with two colors of brown thread. The stitching holds the paper fabric lamination part down to the felt since it didn’t stick down during the nuno felting. I plan on making this into a photo album. I have to buy the inside photo album part before I can finish this as I don’t know what size to make it. I will show you the finished album when I get it done.

Photo FeltedThis is the before stitching photo. I definitely think the stitching helps to define the image.

writing in stitchOn the newspaper piece, I decided to stitch words of all the ways you can get your news these days. I used phrases such as twitter feed, news apps, 24/7 cable news, email alerts, search engines etc. Now I have to decide what to do with this one. I am thinking of making a wall hanging perhaps called “Death of the Newspaper”. Because it is small, I think it needs some type of background. Red would be a nice contrast so I looked in my stash of hand dyed fabrics and only came up with two pieces that were even close to red. Much more magenta than red though.

Choice of Background Fabric


Here’s the first one. It isn’t really big enough and seems much too pink for me.

Dyed Burlap + Newspaper?The second one is burlap and I like the color better although it is still very pink. Perhaps I should add more newspaper to the piece? So I put it on a recent paper. Now I’m thinking I need to make a larger piece of laminated paper fabric with newspaper and organza. Hmmm… What do you think? Any ideas or suggestions for me?


Felted Cat Toy Tutorial

Felted Cat Toy Tutorial

I had several people who had questions about the cat toys that I make that are felted. So here’s a little tutorial that shows how I make my cat toys. I apologize for the quality of the photos as I did this fairly quickly and didn’t have the proper lighting or any assistance. But you’ll get the idea 🙂

Supplies NeededSupplies Needed: Practice golf balls, old pantyhose, wool roving, plastic beads (sized to fit through holes in golf balls), felting needle and a washing machine.

practice golf ballsI buy the golf balls in bags of 24. You can usually find them in small amounts in stores that sell golfing supplies.

old pantyhose

I buy the cheapest pantyhose I can find and re-use them until they are falling apart.

beadsThe beads are also the cheapest I can find – they are plastic and most come in strands that I just cut apart.

Amount of Wool Needed Per BallBegin with a piece of wool roving and the plastic golf ball and wrap the wool around the golf ball. In the photo above, I have pictured the amount of wool that I generally use to cover the ball.

Wrap BallWrap the wool around the ball holding it tightly so the wool is snug against the ball.

Ball Inside WoolThe ends will look like this after the first wrap.

Needle Wool LightlyUse a felting needle to needle the ends into the wrapped wool just so it will hold together.

Needle Ends ClosedThen push the wool over the ‘end’ of the ball and needle it down until it holds together without any holes.

Insert BeadPut a bead through one of the holes and then needle that “end” of wool over the ball. Generally I needle for about 1-2 minutes at the most. All you want is for the wool to hold together over the ball at this point.

Ready to Tie UpThis is what the ball looks like after I have finished needling. As you can see it isn’t round but that gets taken care of in the wet felting process.

Put Into PantyhoseThe next step is to put the ball into the end of the pantyhose leg. I couldn’t get a photo of myself doing this as I don’t seem to have enough hands.

Tie Up in HoseThen tie off the ball in the pantyhose with a loose knot. Do not pull the knot really tight or you’ll have difficulty getting the knots out later. Continue the steps above until you have filled the pantyhose legs with wool covered balls or until you have made as many as you need. I usually put 9 balls in each leg so that there are 18 in each pantyhose. This last set I made, I did a total of 6 dozen. Now I’m all ready for Christmas sales and lots of happy cats!

The next step is to throw the ball filled pantyhose into the washing machine. I usually just put them in with another load that I am already doing such as towels or jeans. I run them through the regular cycle with the same amount of soap I would normally use in the washing machine. If you are using wool that you aren’t sure whether the color will run, put them in with one of those sheets that absorbs extra dye or wash them separately.

Not Yet Needled

Once the wash cycle is completed, pull them out and hang them to dry. You can remove them from the pantyhose when they are wet but the knots are easier to take out when everything is dry.

after washing machineWhen they come out of the pantyhose, the cat toy still looks a little fuzzy and may have loose ends that got caught in the knot.

needling to finishUse your felting needle to felt in any loose ends and to get rid of the “fuzzies”. Hold the needle at an almost parallel angle to the surface of the wool when you’re needling. Do not needle straight into the plastic golf ball or you may break a needle. Finished Cat Toys

Here’s the bag of cat toys, about half of what I made. Obviously, you could put more decorations on these but I don’t think the extra effort is worth it. This idea can be used to make Christmas ornaments as well. Several years ago, I bought larger baseball sized whiffle balls and decorated them.

I added the swirls and “blobs” afterwards with a felting needle.

To hang these ornaments, I just threaded a large needle with matching yarn and made a loop of yarn at one end.

Here are the ornaments on the tree. I hope you enjoyed the tutorial and do let me know if you have any questions. I’d love to see your efforts if you try out the tutorial.

Shibori Scarf

Shibori Scarf

I was inspired by Kim Winter’s post about shibori and indigo recently so I thought I would stitch, tie and over dye one of my “failed” eco dyed scarves. Kim had suggested that the indigo color goes well with the eco dyed fabrics, so even though I didn’t have indigo, I combined blue and black acid dyes to achieve a dark indigo look.

Stitched ScarfFirst I folded the scarf in half, stitched running stitch about every 1/4 – 1/2″ across the scarf. The scarf is a combination of wool and silk that I got from Dharma Trading.

Close Up Before Dyeing

I didn’t have any specific instructions but knew the general idea of how it was supposed to work. Sew a running stitch, pull it tight and tie a knot.

Tied TightHere it is after I tightened up all the strings and tied knots.

Close Up Tied ScarfI had some difficulty holding it tight when I was tying the knots. I don’t think I really got it as tight as I should have.

Shibori ScarfHere’s the finished scarf. It is really hard to get a photo of this color as it tends to looks just black. But it is a really deep blue.

Close Up Shibori ScarfYou can see the patterning much better in this photo. I haven’t ironed it out so it has a nice texture from the shibori tying as well. I think I’ll just leave it as it is and I was happy with the results. Thanks Kim, for the inspiration!

Button on Phone Case

I also added a button to my new phone case that I showed you earlier. This is one of Zed’s polymer clay buttons. You can learn how to make these from her e-book. The button matches perfectly – Thanks Zed!

Pile of Dyed Roving

And just so you don’t think I’m a slacker, here is the wool roving I dyed last week. 🙂

Nuno Felting with Fabric Paper Lamination

Nuno Felting with Fabric Paper Lamination

A couple of weeks ago, I posted about doing fabric paper lamination with my local surface design group. I used three of the pieces that I made to nuno felt the fabric paper on to wool. The process worked just like any other nuno felting. The important part is that there is plenty of organza around the image that has been laminated. The images themselves block the wool migration so you need to make sure that there is enough surrounding fabric for the wool to adhere around the image.

NewspaperI laid out the wool and then added the image on top. On two of the pieces, I added wisps of wool around the edges. This is the ink blot newspaper image on black short fiber merino.

PhotoHere’s the bear photo laid out on white merino. I thought I might make this into a book or photo album cover so I made it double the size of the photo.

FossilsAnd here’s the last one of fossils laid out on natural dyed wool (I think it is walnut but could be barberry.) I then felted as usual.

Newspaper FeltedHere is the result on the newspaper image.

Texture of NewspaperFrom this angle you can see the texture.

Photo Felted

Here’s the bear. The problem with the photo is that it is such a big section that doesn’t felt, just the edges are adhered. But it has possibilities, don’t you think?

Fossils Felted

This is the fossils after felting. I love the texture created with the organza, so organic.

Close Up of FossilsHere’s a little closer look. There was no real change in the fabric paper lamination part with the nuno felting.

Free Motion Machine StitchedI decided to add stitch to the fossils. I free motion machine stitched around the edge of the fossils with a dark, burnt orange thread.

Close Up of Stitched TextureThe fossils are now much more prominent with the stitching added.

Front of Phone SleeveI then made the fossil piece into a phone case. I obviously didn’t plan this in advance as the pattern isn’t well centered but I think I will add a button and loop at the top to keep the phone from sliding out. Anyone who knows me well will laugh at the idea of me making a phone case. I just got this new smart phone because hubby got a new one and could get a second phone for $10. I never use my cell phone. At least this one I have been leaving it on but since I don’t give out the number, no one ever calls. But now it will be safe in my bag 🙂

Back of Phone SleeveHere’s the back of the case. The sides of the felt were a bit wonky thus the wonky seam.

Stitch Closer ViewAnd one last close up. I really like how this technique worked and I think I will be doing some more of these. A couple of other people tried out the technique as well. Take a look at Teri Berry’s post and Kim Winter’s post where they tried out my idea for combining fabric paper lamination with nuno felting.

Indigo and Shibori by Kim Winter

Indigo and Shibori by Kim Winter

Today’s post is by Kim Winter of Flextiles. Kim lives in London, UK and has been blogging about her textile experiments since 2011 after taking creative and experimental textiles at Morley College. I follow Kim’s blog and have found it very interesting so I asked her to write an article for us.

Type “tie dye” into Google and a mosaic of fluorescent spirals and sunbursts leaps out of the screen.

tie dye - Google Search

But try “shibori”, and the results are more subtle, largely (but not entirely) blue and white.
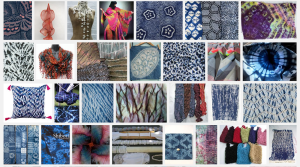
shibori - Google Search

Yet both are similar techniques – folding, binding, twisting or compressing the cloth so that parts of it are not exposed when it is dyed, resulting in very distinctive patterns.

shibori-close-up-001

The Japanese, as with so many craft forms, have developed the techniques even further, wrapping the fabric around poles before binding, using special devices for looping the thread around the cloth, or pulling up rows of stitching very tightly to resist the dye. And the dye often linked with shibori is indigo, which explains the dominance of blue and white designs.

“Like old men’s pee”

I was introduced to shibori and indigo dyeing at my local adult education college in London when I signed up for evening classes in textiles a few years ago. It was a great course, providing an introduction to different techniques over three terms, including wet felting, hand and machine embroidery, and soft basketry.

In the summer term our tutor heaved a large black plastic vat into the room, removed the lid, and I got my first glimpse of an oily, shimmering surface with flecks of froth. It didn’t appeal to everyone – one student described it as “smelling like old men’s pee”. But after a couple of dips, I was hooked.

I’m not going to go into the detailed chemistry here, but a well-maintained indigo vat is not blue – it’s greenish-yellow. Indigo turns blue only when it is exposed to oxygen, so when you remove a piece of fabric from the vat, it changes colour from green to blue before your eyes. It’s quite magical – and very addictive!

It also has the advantage that you don’t need a mordant, so it’s relatively quick compared with some other forms of dyeing. However, to build up colour fastness it’s best to dip several times and leave the fabric to oxidise well between dips.

Shibori obsession

I started off with conventional shibori techniques:

• stitching (nui shibori)

screen-shibori-010-resized

shibori cushion 001

• binding (kumo shibori)

shibori samples 003

• pole wrapping (arashi shibori)

shibori samples 013

• clamping with a resist (itajime shibori)

cd-itajime

And pretty soon I became obsessed – the experiments in a Kilner jar by the kitchen sink graduated to an increasing number of blue-stained buckets and bowls cluttering up the garden and kitchen, provoking gripes from (otherwise) Ever Supportive Partner!

home-indigo-001

oct2013 scarves4

Then I started experimenting with shibori in other processes.

• Shibori and screenprinting – stitching the fabric before screenprinting over it, then opening the stitching.

screen-shibori-007-resized

shibori-screenprints-large-translucent

moon-print-open

• Shibori and felting – binding or wrapping the felt or nuno felt before shrinking in a washing machine or steaming it.

marble-flask-tied

marble-flask-after

nuno-net-shawl-flowers-front

• Shibori on paper – taping the paper to a pipe, wrapping string around the paper, dipping, then adding more string and dipping again.
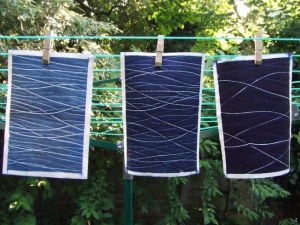
shibori-bound-paper

• Shibori in a heat press – stitching a pattern in synthetic fabric, then putting it with a sheet of disperse dye paper in the heat press.

heat-shibori-003

I also signed up for shibori indigo courses with specialists – an online course with Shibori Girl and a summer school in Norfolk with Jane Callender – where I learnt an incredible amount.

But, as with most textile techniques, there is still so much to learn and experiment with – one day I hope to grow indigo from seed, and produce a naturally fermented indigo vat (not easy in a cold London house). And ultimately I would like to spend some time in Japan, learning more about the whole culture and tradition that surrounds this entrancing dye.

Sustainable scarves

In the meantime, I’ve taken to upcycling scarves from charity shops and vintage sales using shibori and indigo dyeing. This has several advantages:

• It’s more interesting for me, as each scarf is different (colour, size, fabric, pattern) – so I don’t get bored.

• It’s obviously more sustainable – around 500,000 tonnes of clothes get sent to landfill every year in the UK alone, yet many of them are perfectly wearable.

• Because the cost of my raw materials is lower, the price buyers pay is lower too – whether the scarf is made of silk or cashmere. What’s not to like? 🙂

oct2013-scarves1

Some of these scarves are available from my Etsy shop; others I sell at various markets around London.

I’ve also started experimenting with natural dyes such as onion skins, coffee and tea.

onion-scarf2

But I think that indigo will always be my first love. It can be a bit temperamental to work with – the alkalinity has to be quite high, and you mustn’t slosh it around too much in the vat or the dye will oxidise and you have to recharge it too frequently.

Yet every time I unstitch, unclamp or unbind a new piece is like the first time – the sense of wonder at the range of blues I can get from a single vat, the colours changing and developing in front of me.

I even like the smell! 😉

fq-spiral-angleKim Winters

You can find Kim at her blog Flextiles or at her Etsy shop. Thanks for sharing with us Kim!