Browsed by
Month: April 2023

Where wool begins: Keeping sheep safe

Where wool begins: Keeping sheep safe

In my last post, I introduced you to how we raise sheep (and wool!) a little differently than most in Canada — our sheep live outside year-round and graze solar installations and cover crops as their day-job.

In that post, our livestock guardian dogs made an appearance and garnered plenty of attention, as they should. We couldn’t graze sheep like we do without our dogs!

Where we farm, coyotes are a major threat to sheep. Our sheep are also vulnerable to attacks by ravens and even bears, though it has been years since that has happened here. Did I mention we are in Ottawa city limits? We are! But yes, there are black bears, sometimes wolves, and plenty of coyotes to worry about.

There are a few options for guardian animals, including dogs, llamas, and donkeys. We’ve had the greatest success with dogs — it takes a predator to smell, spot, and deter a predator. And that is our goal: unless a coyote or group of coyotes is preying on our sheep, we leave them alone. We would rather not hunt or trap the coyotes, but it does happen from time to time that a troublesome animal or family moves in and even the dogs can’t keep them back.

We’re always asked what breeds of dogs we use. Most of our dogs are a mix of breeds — there are a surprising number of guardian dog breeds, all of which have been developed over hundreds of years alongside sheep flocks. Most of our dogs are Maremma (an Italian breed), with some Great Pyrenees, Akbash, and Karakachan in the mix.

A child and adorable puppies
Charlie and some puppies, March 2022

Our dogs are sometimes born here, or at other sheep farmer’s set ups, but it’s so important that they be from working parents and are born and raised with the charges they will protect. A pup needs to bond with sheep from the beginning so that they treat them as their own. The instincts these dogs have been selected for are truly amazing, but they still require training and support to eventually make it as a livestock guardian. Not all of them do.

We run about one adult dog per 200 ewes, but prefer that the dogs work in pairs. The final number (up to three or four) all depends on the coyote pressure, the terrain, fences, and whether we are lambing or not. There are always young dogs coming on and older dogs slowing down. It’s a real challenge to find the balance of new and experienced.

A livestock guardian dog watches as a ewe has her lamb
A livestock guardian dog watches as a ewe has her lamb. The paint on the ewe is to identify with breeding group she is in. It mostly washes off the wool, I promise.

We’ve just started lambing this week (see above) and two of our newest dogs are doing an amazing job keeping watch over the newest lambs. These dogs not only keep the ewes and lambs safe they also clean up the lambing areas (gross!) which serves a real purpose — less scent for predators to pick up on or come in to investigate. The relationship between these dogs and their flocks is incredible.

Even with many good dogs, losses still happen. This past fall and winter were some of the hardest for coyote kills in close to 10 years. They even took down a mature ram, which is rare. We did have a few trapped, and that seemed to help, but our goal is to add more dogs to keep the pressure down.

A livestock guardian dog looks over his sheep after being sheared
T-Dawg, a livestock guardian dog, looks after sheep

Until next time, enjoy the sunshine and if you’d like to see more of our solar grazing and lambing adventures check us out on Instagram at @Shady_Creek_Lamb!

Weaving with my stash

Weaving with my stash

So, what are you going to do with all this – stuff?  Its a valid question posed by my grandson.  He’s helping me clear out the house and storage spaces and there really is a lot of ‘stuff’ to deal with.  Time to get weaving.

I chose a warp that had a khaki base made up of lots of different fall colours so it could handle loads of different colours in the rest of the warp.  Colours don’t have to ‘match’ when weaving. The don’t have to match ever come to think of it.  This is the colour palette I chose.

hand spun skeing of khaki green beside mixed fall colour threads

This warp was longer than usual because I wanted to attach any subsequent hand spun warps to the wastage.  Wastage can be very expensive and finding a way to minimize this loss is good economics.  My plan is to have a yard/meter of extra fiber at the end of the weaving that I can tie the new warp onto.  This will save me wastage of a meter/yard per warp.  The only wastage will be a few inches at the beginning and end of each new warp until that extra yard is all used up.

The colours look great and the yardage I was able to get from my hand spun was really surprising, kind of shocking actually.  Really looking forward to getting started on the threading and weaving.

multi-coloured warp on leash sticks to keep cross in place

When making a warp a cross is introduced on purpose to keep the threads separate.  This cross is maintained throughout the threading process; it protects the warp from turning into a tangled mess.  The oldest and simplest way to do this is by inserting sticks on either side of the cross, tying them securely in place and getting on to the next step of threading the loom. This time I chose to thread from front to back of the loom.  Starting by threading through the reed – the metal comb installed in the beater – and then threading the threads through the four different harnesses.  Each thread has a specific spot on the loom where it fits.  Its a bit like programming a computer by hand, really by hand.

The threads were sett at 10 ends per inch which might be a bit snug, but it looks good and once the scarf is finish it should be soft and snuggly.

repair a broken warp thread with inserting and weaving thread

When a thread broke I was not surprised, it’s almost inevitable, especially with the irregularities of hand spun, so I did a repair by pinning a thread in place, threading it through the reed and it’s spot on the harness.  Then it was weighted in the back of the loom with a small weight.  I use clip on table cloth weights for picnic table cloths. Once the damaged thread is woven in a sufficient length the true thread can be brought forward, pinned in place, woven for a little distance, then the weight removed from the patching thread.  This patching thread can be cut.

If you look at the purple stripe, everything looks fine.  The scarf is done, the length is just what I wanted and then I spotted it.  A whopper of a mistake that will set me back a little on my plans to reuse this warp, save time, blah, blah.

I have been weaving a very simple tabby, over-under, super basic.  It’s deceptive because its very difficult to get an even look to such a basic weave.  The threads had to be pulled into position, not beaten.  This way they would make nice little squares when the scarf was washed and fulled (hopefully).

Then I spotted the threading error, nearly at the end of all this fussing around drats.

Not threading error
Threading error

Not the end of the world, just a bit disappointing.  I’ll have to rethread about half the loom, and be more careful this time! Oh, and fix that single green thread that has errors all the way down the middle of the scarf.


Keeping Mrs. Mer from getting chilly

Keeping Mrs. Mer from getting chilly

Mrs. Mer has been having a difficult time since I started working on her hand a couple of weeks ago. It has been hard to stay warm with only one hand to keep herself covered!

1) Mrs Mer at the gaming/felting convention. Felting needles working on SCM muscle in her neck, as she covers herself with one hand.and I am about to start working on the other.1) Mrs. Mer at the gaming/felting convention. Felting needles working on SCM muscle in her neck, as she covers herself with one hand and I am about to start working on the other.

This only got worse when I started to add her eyes and she could see the people around her!  I had sculpted her skull so that I would add eyes and then add lids over the eyes. (I had then used one of my longish thumbnails to create the curve for her brow, which had worked quite well. I was sure I had snuck a picture of her, pre-eye lids (it was truly unfaltering) but when I went back through the camera memory cards I could not locate it. I am starting to suspect small hands with the help of lidless eyes may have deleted the truly shocking shot of Mrs. Mer.

I had been invited to a small spin-in with some friends.  I was looking forward to seeing them especially after 3 long days in the guild library working on donations and the book count (checking that each book was on the shelf where it should be.) I have the circulating books done and am partway through the magazines. That leaves the reference books left to do.

I know it was a spin-in that I was going to but, my friends are very patient with me when I bring fibre but don’t have a wheel or spindle. Instead, I arrive with little barbed pieces of mettle, a garden kneeling foam and possibly a Naked mer-woman.) Seeing that she now had eyes (that sounds like a pun) I felt I should really help her keep her modesty or keep her warmer at least. I decided she needed a top.

Eventually, she will need a top that suits her fish parts and hair but for now, a quick top in white should suit the purpose. I found some white in the project bag she and her hubby have been…ummm ……hanging out in. (who knows what they’re getting up to when I am not watching!!  They may need an open plastic project bag soon!!!)

At a recent sale of one of our local guild members, I was able to buy an actual clover tool and clover brush.  I have wanted to try one for quite a while now. I have a large collection of Fake Clover Tools, this is the first time I have tried a real one. I found they are a bit quieter than the blue fake version, the green clover handle is comfortable and the movement is a bit smoother than the blue one is too. If you spot one second-hand and in working order I would suggest trying it. The blue is quite a bit less expensive and is still a good alternative if you are trying to stay frugal (saving your money for more fibre).

2) Green Clover tool (multi-needle holder) and the first layer of wool, both sitting on an old green foam felting base.

Under the Mer’s in their project bag, I found some white, which I started to lay out In a bra-like shape.  I started with the traditional double triangle and would add more fibre for an upper strap and a longer lower tie. I had considered a ribbon but I only had blue at hand. Which I did not think would work with her eventual highlight colours. I started with the clover multi-needle tool to get the basic shape firmed up.

3) the basic flat shape of the halter top3) the basic flat shape of the halter top

As I am sure you can see, the flat shape would not be very comfortable and there is the likelihood of gapping, which could cause drafts or wardrobe malfunctions.

4) the beginning of curvature in the top I have yet to add the halter strap or the under bust tie. Fiber is sitting on the green foam with the clover tool in the back ground.4) the beginning of curvature in the top I have yet to add the halter strap or the under-bust tie. Fibre is sitting on the green foam with the clover tool in the background.

To bring the flat shape into a more fitted full-figured shape, I switched to single needles (a T-36 & T-38). I started by making a dent to fit under the underarm.  Then I focused along the bottom edge of the braw to create the same effect as a dart or gathers. I put arrows on the diagram below, to show you the direction of needle insertion (Poking) to get the fibres to contract allowing the cup to start to form.  Another way to have made it would be to use a small rounded support like a foam ball or curved support shape.  If you were making a more rubenessque mer-woman you might want to consider some wire support (under the wire) for a mer-woman with greater endowments or substantial cleavage.

5) Arrows show the direction of fiber movement to create the cups and fitting under the arm.5) Arrows show the direction of fibre movement to create the cups and fitting under the arm.

I had her try on her top a few times adjusting a bit at a time. (She is very patent but I did promise to add her eyelids as soon as I could make her a somewhat respectable top.)

As you will see below I had laid in her eyelids before it was time to head off to see friends.

6) Mrs Mer shows off her new top and eye lids.6) Mrs. Mer shows off her new top and eyelids.

7) You can see how well fitting her new top is from this angle. On the table behind where I am working are some of the snacks we were nibbling on.7) You can see how well fitting her new top is from this angle. On the table behind where I am working are some of the snacks we were nibbling on.

8) If you missed the tempting tasty snacks hiding behind Mrs. Mer here is a close up of a couple of them! Paper napkin has Udderly Delicious with a cow picture on it.8) If you missed the tempting tasty snacks hiding behind Mrs. Mer here is a close-up of a couple of them! The paper napkin has Udderly Delicious with a cow picture on it.

9) Mrs Mer and felting tools sitting on the table, snacks a pop and Mr Mer to one side of the table with Bernadette and Ann in the background.9) Mrs. Mer and felting tools sitting on the table, snacks a pop and Mr. Mer to one side of the table with Bernadette and Ann in the background.

Mr. Mer also attended, he stood on a chair at the table and was holding a Mountain Dew (highly caffeinated carbonated lime/grapefruit flavoured beverage). I think that Mrs. Mer having eyes and a stylish top has captivated his attention since he did not flirt with anyone else that was there.

 10) close up o Mr. Mer sitting at the table with his bottle of pop, some wool and a pair of scissors. Behind him is a window with a hanging plant. 10) close up o Mr. Mer sitting at the table with his bottle of pop, some wool and a pair of scissors. Behind him is a window with a hanging plant.

He may like this beverage since it goes well with his hair.

It was a fun day and great to see a few of my friends especially when I am not working on the library but just being social.

I Dropped off Ann on the way home and then stopped to take pictures of the early spring colour changes. There are the reds, ambers and light greens of new buds.

11) Scrub brush in the colours of spring. Red wood branches, bits of green budding , amber and green grass. Small trees, and old fence posts leaning aesthetically.
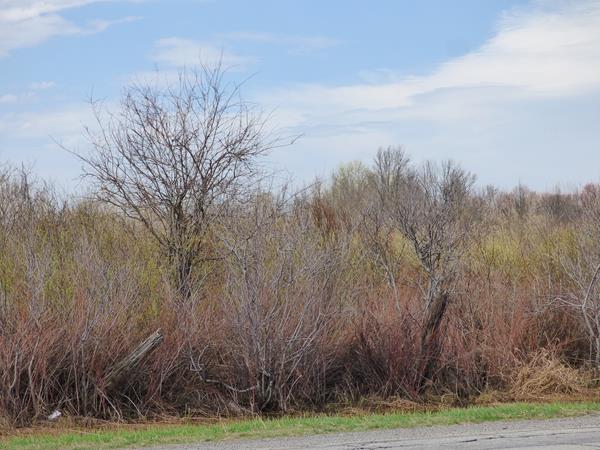
11) Scrub brush in the colours of spring. Redwood branches, bits of green budding, amber and green grass. Small trees, and old fence posts leaning aesthetically.

Lastly, I have a question for you about an upcoming post.  I have 3 hand carders which need covers, which fabric pattern would you choose?

12) fabric squares, Patterns from the top Right; Mice and yarn balls, Black white and gray sheep on clouds, Alpaca that look like long necked cat faces, blue paisley, Black White and Grey sheep with numbers, Cute fluffy white sheep on gray back ground. In the plastic bag, a second paisley and a light grey graph check.12) fabric squares, Patterns from the top Right; Mice and yarn balls, Black white and gray sheep on clouds, Alpaca and long-necked cat faces, blue paisley, Black White and Grey sheep with numbers, Cute fluffy white sheep on gray background. In the plastic bag, a second paisley and a light grey graph check.

One final shot of Mrs. Mer’s progress  (starting to work on her left hand and arm.

13) Mrs Mer with Needle in her Left wrist as she lounges on her back on the studio table at a guild social.13) Mrs Mer with Needle in her Left wrist as she lounges on her back on the studio table at a guild social.

Next is a Spring Tree.

Next is a Spring Tree.

I have been thinking about my spring tree for the 2nd quarter challenge. I have decided I will not try to make my tree a real tree but an imagined one. That will give me more scope to play. I did some thinking and the best way to show flowers will be to do a close-up of a branch.  I did some sketching on my pad for that. I am not a very good drawer but I think it’s not a bad branch.

sketch ideas for a tree and branch  sketch of a tree branch

I’ve decided I want some long, hanging flowers.

sketch of a tree branch

Next, it was off to the internet to look at long, hanging flowers. I think I know how I want to do them.


Then I had to have a good rummage to find the felt I used last time. How do things become lost so quickly? Well, I know really, I don’t put things away. 🙂 I did find it, and some felt I had forgotten about. I will try not to lose it again. It is just a white rectangle at the moment. I am trying to decide if I leave it that way or if I felt it light blue for the sky. I am not sure.

white felt for making a picture

That’s as far as I am at the moment. We are working on clearing things that don’t belong out of my studio. I need to rearrange in the house, to get another piece out. Another job for the list.


Experimenting with Paper: Felting and Joomchi

Experimenting with Paper: Felting and Joomchi

Our local art group made some Joomchi a couple of months ago and since that time, I have been thinking about adding paper to the surface of felt. I realize that there is a well known online course about how to do this, but I have not taken the class and these are my experiments on adding paper to felt. If you haven’t heard of Joomchi before, it is made from layers of mulberry paper that are wet down and agitated. Essentially, wet felting layers of mulberry paper together. If you search online for it, you will find YouTube instructional videos and some beautiful artwork made with the technique.

Six pieces of mulberry paper laid out over yellow wool batt.

I have a variety of mulberry papers in my stash that I used. I cut a 2 inch square from the different papers and laid these out on a couple layers of short fiber merino batt. I figured that the pinks and reds would probably run from leftover dye in the paper but that didn’t concern me. I just wanted to see how the paper would felt in.

I covered the wool and paper with a synthetic sheer curtain on both sides and wet down with cold water. This seemed like nuno felting to me, so I followed my routine for nuno felting. I treated the piece gently, used cold water until the fulling process and rubbed over the surface of the paper pieces to encourage the wool to migrate through the paper. I fulled mainly by rolling but did do more aggressive fulling in hot water once the paper was holding in place.

Six pieces of mulberry paper felted to the surface of yellow wool.

Here is the result. All the paper types felted in very well. You can see that the red paper shared it’s dye with a couple of the white pieces of mulberry paper.

Two pieces of mulberry paper felted to the surface of yellow wool.

The close ups show that the paper does crinkle a bit but it is adhered well to the wool. I like the use of inclusions in the paper and the surface is interesting.

Two pieces of mulberry paper felted to the surface of yellow wool.

The fibers in the top pink paper almost look like a silk but I don’t think they are. It’s probably that the fibers take the dye differently than the paper pulp.

Two pieces of mulberry paper felted to the surface of yellow wool.

As you can see on the red piece, the “tinsel” or whatever the gold strands are, migrated almost completely out of the paper. If you pull on the gold strands, you can pull them right out.

Photo of pink joomchi - layered and manipulated mulberry papers.

Now on to the Joomchi. Most of my mulberry paper is red and pink. I used about 5 layers of paper, wetting down each layer as it was placed on a corrugated rubber surface. I then used a piece of pvc pipe and rolled over the papers. I kept turning the paper at right angles and also flipping over to the other side. Once the papers began holding together, I crumpled them in my hands, then gently pulled them back out flat and continued to crumple them. I thought the texture that developed due to the fibers of the paper beginning to break down was very organic and beautiful. The process also causes shrinkage of the papers, another similarity to felting.

Photo of green joomchi - layered and manipulated mulberry papers.

Here’s the piece that I made with our art group. I borrowed other paper colors so I didn’t have to use pink/red again. You can see a bit of my red at the bottom left corner.

It was fun experimenting and I’m happy with my samples. Now to consider how I can use this in my work. Have you done any experiments lately? We’d love to see or hear about them, you can upload a photo here.

A big purchase

A big purchase

After years of deliberation I finally decided to take the plunge and purchase a drum carder.  This year’s AGM of the International Feltmakers Association which took place in March put it back in my mind.  My friends in the Felting and Fibre Studio cemented my resolve as they gave me lots of excellent advice during one of our get togethers.

So, research completed, I purchased from the German company Wollknoll  principally because they offered the best value for money.  While I was on their site I made some other purchases too, including a felting tool, some pre-felt, locks and a few other items.  The parcel arrived quickly and it was so exciting to receive it.  In fact it was like Christmas day only better because I didn’t have to stop what I was doing to cook dinner!

The exciting opening revealing all the extra ‘stuff’ on top!

I bought the Ashford wide (12 inch)  drum.  I opted for this rather than the 8 inch drum because there was less than €50.00 difference in the overall price.  It was very easy to put together and the box will be stored in the attic as I am given to understand that second hand carding drums have a good resale value in Ireland.  But for the moment I am going to enjoy it.

Once I put it together, Enda and I set out for Ikea which is not far away.  Jan had recommended purchasing one of their trolley tables on wheels for it as it could be secured to the surface and it would become its permanent home.  I found a lovely one.  (Thanks Jan ).  Enda helped me make it up and now they are sitting in my workroom.

Et Voila! Here it is all set up in its new home 🙂

On Easter Monday I finally found time to try it out using scraps of wool.  I am so excited with the results of my first experiments.


One of my reasons for adding to my order was that the overall weight of the package was not going to increase the transport costs.  Therefore, what I generally would ignore (because postage costs of buying small items made the price prohibitive) suddenly became attractive (with the ‘free’ postage).

My other purchases included some prefelt to experiment with.  I only recently found out that the Wollknoll merino  prefelt is a lot softer than DHG Italy product.  I’m an not sure why this should be important – it may be more malleable.    It certainly feels softer. I shall report back in this regard.  The grey one to the left of the photo is DHG Italy and the other is from Wolknoll.


I also purchased a new felting tool.  I like the feel of this beauty as there are no sharp edges to possible tear the felt (I have other felting tools that are quite pointed and rough).  I hope to test this one out soon:

Then comes the two ‘down the rabbit hole’ purchases.  first up, warp thread and then a concoction called ‘Foto Transfer Potch’  which I will need to read up about before attempting.


These should keep me out of mischief for a while.

Do you have any hints and tips for a novice drum carder?  Any assistance will be most welcome!

Latest experiments:

 Over the past few months I have been experimenting with felting on a ball.  This is just a personal challenge.  I wanted to see if I could make some pieces with different finishes which would be felted on the outside of the structure (the videos I have seen place the design against the ball then turn the piece inside out so that the design shows).  I am sure there are videos that show how to do this the other way around (where the design is already on the outside and there is no turning involved)but I have not been able to find them.  Here are the four I have made so far:

First Shibori and Ripples:


Next: Fantasy flower:


Here’s Geode Ball:


Finally, here’s Disco Ball using recycled coffee pods (my least favourite).  I used four different colour pods on this particular one.  You can see the different colours in the photo inset.  I did not like the colour of one of the sets of pods so I decided to use nail varnish to paint over it. Two coats.  It adhered very well.


I used a small yoga ball for my base.  It was handy as it could be inflated/deflated and it cost a fraction of what I would have paid for a felting ball.

Have you ever tried this method of felting on a ball? I would love to hear how you found it and see your pieces.

Happy creating!

Theatre Textiles Act 2 Scene 1

Theatre Textiles Act 2 Scene 1

After our move to The Exchange,  as mentioned in my first post  there followed several years’ worth of productions in which I was not called upon for costume assistance although I regularly helped my artist friend who designed and painted the Panto scenery, and assisted with makeup.  I once got the chance to make a giant beanstalk for our “Boy and Some Beans” Panto, after which I quite often was given the “head gardener” position whenever the scenery needed “vegetation” in addition to the painted sort.

In the mean time, and for several years running,  SNADS were asked to put on some form of Haunting for the Halloween weekend  at the local ruined mediaeval Wardour Castle.

Wardour Castle

Each year we wrote a short play, the various scenes of which took place in different spaces within and around the castle and it’s stone grotto, and 2 or 3 performances would take place each night over the nearest weekend to Halloween.  This was great fun, even if decidedly cold and/or damp on occasion, and we actually got paid for doing it!  It enabled me to expand my special effects makeup, which I had learned about at a theatrical summer school.  It was there that I learned of the amazing things you can do with gelatine and porridge oats!

I always liked to be a witch or a ’orrible ’ag as this gave me greater scope for doing ’orrible makeup and practicing my witch’s cackle!

Zombie face made up with gelatine and oatsPorridge anyone?

image of Halloween prop skull and skeleton hands beside zombie actorMe and a Friend (that’s me on the right)

I was tasked with making a prop for our 2010 Panto Arabian Nights.  The Sultan had a tame rat, which I was asked to produce as a hand puppet so that it could open and shut it’s mouth and wave it’s paws in a menacing way, and it was to have eyes that would light up red.  This of course I made in felt (wet and needle) and my husband provided the tiny red lights for the eyes from his model railway stock.  To make it more believable I needled a false hand onto the back of the rat and the section of arm extending from that hand covered the actor’s own arm as it disappeared inside his sleeve.  From the auditorium it was not really clear that the hand holding the rat was not the actor’s own, except that it was not the quite same colour as his real hand – which should have been made up but wasn’t.

Image of actor as Sultan with rat puppet and image of sultan, rat, captive dancing girl and Sultan’s chief wife
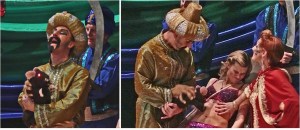
The Sultan’s pet rat

For the same Panto I was asked to make up the Genie.  Here he is with a camel.  (I didn’t have anything to do with either costume though.)

image of pantomime camel head and genie in turban wiping camel spit out of his right eyeCamel and Genie

I was actually the front legs of this camel in our 2017 panto Ali Baba – great fun but tiring because my head was in his front hump and my arms were up his neck, holding up the head with one hand and using the other to poke out his tongue!  This is the least tiring two person panto animal we have, at least for the back legs actor, because s/he is able to stand up with his/her head inside the second hump (it’s a dromedary).

In June 2013 the Society obtained permission to perform Terry Pratchett’s Monstrous Regiment.  This is the one which is (loosely) based on the story of “Sweet Polly Oliver”, as she is called in the old folk song. She joined the British Army, dressed as a man, to try to find her brother, who she had looked after as a boy.  (The “Monstrous Regiment” of the title comes from a pamphlet written by John Knox in the 16th Century – a “gentleman” who I think would have felt quite at home in today’s Afghanistan in regard to his attitude to women.)  In addition to the Company’s enlisted “men” – all women pretending to be men –  the Company boasted a (female) vampire and a mountain troll (also female, but it is difficult to tell the gender in the case of trolls).

I was cast as the troll – Carborundum by name.  Mountain trolls are actually living rocks and I thought that I could do something with the costume for that.  I had, a few years earlier, needle felted some bas relief gargoyles/water spouts using mixed bats of Jacob fleece, which actually looked like stone – as long as you didn’t get close enough to see that it was hairy, I should have borrowed my husband’s razor!

Corner Gargoyle/Water Spout – The original of this water spout is attached to the corner of a church tower in Hinton St Mary, the village just up the road from where I live.
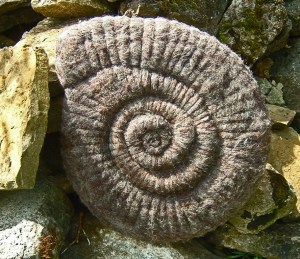
So I thought I could use felt, but what to attach it to so that it looked like rock and not clothing?  Well, a couple of years previously my Guild (Weavers Spinners & Dyers) held a special exhibition as part of the Dorset Arts and Crafts Association annual show, which was entitled Dorset Coast and Country – or something like that.  We had a whole room to ourselves and we filled it with exhibits depicting the county.  The Dorset coast is actually part of the Jurassic Coast – a World Heritage Site – and runs from Orcombe Point in Exmouth, Devon, extending east for 95 miles to Old Harry Rock, near Swanage in Dorset.  Therefore we had to include some exhibits around this.  I made a giant ammonite in needle felt and it was formed on a base of foam pipe insulation.

needle felted sculpture of ammonite leaning against some rocksAmmonite

So I knew that if I could find some grey foam I could make the troll’s costume out of that with felted embellishments.  Now I wonder where I got the foam from – silly question, as a needle felter I had been collecting foam in various sizes and thicknesses for ages.  Anyway, I put together a rocky costume, complete with some “moss” and embroidered lichen. I made up my face to be more flat planes than chubby me and this is the result.

actor made up and costumed to look made of stone – head & shoulders onlyCarborundum

Front row: Troll, female vampire trooper, Back row, officer and sergeant “baddies”


Terry Pratchett himself actually came to our Saturday night performance and obviously enjoyed it – he gave us a standing ovation.

Terry Pratchett talking to Troll with more cast behindCarborundum chatting to Terry Pratchett

I got to wear the costume at the Haunting of Wardour Castle that year and actually managed to frighten some of the punters when a chunk of the grotto turned round and glared at them!

Watch out for Act 2 Scene 2 sometime soon, when I might actually get as far as telling you about the Wicked Queen in the title image.


the local Gaming/Felting Convention is back – blending skin tones for Mrs. Mer

the local Gaming/Felting Convention is back – blending skin tones for Mrs. Mer

A break from all the felting machines!

We had a great day on Easter Monday testing out the felting machines. We added Ann’s new purple one from Georgia to the mix.  But since we have had non-stop machine chatting I think we need a break from the sound of needles impaling wool at high velocities. So why don’t you join me for a day trip out to the Kanata Games Club one day spring Gaming (and felting) convention?  Mr. and Mrs. Mer came with me, in hope of adding more detail and some skin tone to Mrs. Mer.


The Kanata Games Club used the same Church as before. It’s built on a hill and has two large halls one on the lower level with big windows. This time they were only in the upper hall since this is the first big gaming event since the pandemic restrictions. We all wore masks (the church is still masking) except the Mer’s who didn’t have masks of the correct size. I may have to make them some. Or maybe their fishy-er parts keep them immune. Can fish get covid? (better not think about that or I will never get to tell you about the day.)

We arrived and as soon as I was settled, he quickly wandered off to one of the big tables. The big round tables were full of people with brightly coloured games with many interesting little pieces.  I found one of the smaller unoccupied tables by one of the windows.

1) Shortly after 9 am, I was happily left at a rectangular table with a Tim Hortons bagel and my felting supplies in a small clear plastic box. Mrs. Mer is reclining with bits hand blended skin tone.

I got comfortable for a nice long day of felting!

2) Mr Mer was there to supervise and cheer on the gaming. Mr Mer leans ageist a blue bag on the table in front are the small wool pad, the wrong beige, my phone and audio book, and my small clear plastic box of tools.2) Mr. Mer was there to supervise and cheer on the gaming. Mr. Mer leans ageist a blue bag on the table in front are the small wool pad, the wrong beige, my phone and audiobook, and my small clear plastic box of tools.

It quickly became apparent that while I had packed almost everything I needed, there were two small problems.  I realized I had brought a slightly different shade of base tone for her skin tone. Well, That can be fixed with a bit of extra blending.  The second problem resulted from the ongoing rebuilding of my office into a fibre studio, which is messing with my ability to know where everything is (specifically my mini carders AKA small pet brushes have disappeared)!!!  Oh well, I can blend a bit of this nice yellowy-ness with this tiny bit of raspberry red to the new base tone and that should be just about right. Without carders, I was blending tiny bits by hand which is slow when you are both sculpting more detail and putting on a colour layer. I am not a fast felter, I like to putter, consider, add a bit more wool, and eventually decide whatever I am making is complete.  But hand-carding all that I wanted to work on today would be a bit slow even for me!

3) Skin tone base colour from blending white (re-carded world of wool core wool), beige and amber Coriodale  and a bit of red I think may be merino.3) Skin tone base colour from blending white (re-carded world of wool core wool), beige and amber Coriodale,  and a bit of red I think maybe merino.

4) Not fully homogenous blends one with a stronger white and one with a stronger beige under tone.4) Not fully homogenous blends one with a stronger white and one with a stronger beige undertone.

I spent a long time hand-blending bits of skin tone for Mrs. Mer. I used white, beige, amber and raspberry tones. The world is not made up of flat uniform colours, so not blending to a uniform colour will provide a more natural looking tone. Today I wanted to improve Mrs. Mer’s head shape and extend her skin tone.

Hubby came to check on me at the end of his first game and I explained the lack of carders. Luckily the Dollarama was just a bit farther up the hill at the closest mall, a bit far to walk, (there was still snow) but a very fast drive.  He returned with a set of carders (pet brushes), a plug to charge my phone (it was dead again….) a couple of drinks and some candy(that will keep me felting!!).

5)  Dollarama $4.00 carders (pet brush) with safety tips.5)  Dollarama $4.00 carders (pet brush) with safety tips.

Recently at one of the local guilds socials, one of the pet brushes was being used to tease out the ends of locks. This is sometimes called flick carding. (Bernadette can show you how to properly flick card some time if you are at a social). The locks were not very long and there seemed to be a lot of poking of fingers as well as combing of fibre.  The Carders/pet brushes, that I had just been given, have little white plastic tips on each wire, safety tips!!! The packaging says the covered tips are to protect the delicate skin of your pet, while it also makes it much safer for your fingers if you are flick carding locks.

Like full-size wool carders, these pet brushes have little wires embedded into a backing.  some carders have wires that are quite stiff and some are more flexible. The same applies to pet brushes.  For comparison Cotton carders (like the name implies are used with cotton which has a very short staple length compared to wool) have shorter more closely spaced wires and tend to be longer rectangular shapes than wool carders.

If you buy two of the little pet brushes you can use them exactly like you would a set of wool carders. It takes a bit of practice to get the movement of the carders to blend and mix the fibres but it’s worth the practice.

6-7) Close up of teeth on the comb. note the bend about 2/3rds up the wire 6-7) Close up of teeth on the comb. note the bend about 2/3rds up the wire6-7) Close-up of teeth on the comb. note the bend about 2/3rds up the wire

You can see that one wire has lost its safety tip. it may have been missing when I took it out of the package and I just didn’t notice. I did not seem to lose any others while carding. I have heard of small pet brushes that had longer wires and larger safety tips that can come loose and disappear into the wool. So far this brand seems to not have that problem. (it will be worth keeping an eye on these to see if the tips stay attached over time.)

starting to blend first blend with constituent colours in background a darker blend with Mrs Mer in the background the two blends showing the lighter and darker vertions8-11) Examples of blending fibre to create skin colours

It’s nice to have a pallet of blended colours pre-made to pick from when you’re adding the top layer of colour. I am also doing a bit more detailed sculpture of her head and neck so a general mid-tone is also helpful.

12) MRS Mer laying on her back, double needles working along angle of the jaw (Mandible)12) MRS Mer laying on her back, double needles working along angle of the jaw (Mandible)

13) New muscle development below the oxiput and above upper traps.13) New muscle development below the occiput and above upper traps.

As with Mr. Mer, I was concerned with her ability to see where she was going when swimming. Unlike a full fish whose eyes would be looking forward and to the sides, her eyes in anatomical position would be looking at whatever is below her as she swam. This could allow for painfully swimming into things or being attacked by a bigger fish that she didn’t see coming. To alleviate this anatomical problem of blending fish and human anatomy I added an extra muscle on top of the upper traps to help her hold up her head for prolonged swimming. I will also beef up her erector spini in the back so she can also tip her torso up to reduce potential neck stain. The things you have to consider when felting are just amazing!!!

I worked along the underjaw and corrected some of the asymmetries in her skull.

14) attachment of SCM mucle scluping along jaw and adding skin colour.14) attachment of SCM (Sternocleidomastoid) muscle, sculpting along the jaw and adding skin colour.

15) gaming tables with people playing board games

The gaming continued around us, with players switching tables as one game ended and a new one began.  A few came over to see what I was working on, but most have seen me at previous felting/gaming events. Someday I am sure I will get to share my table with another felter!!

I took a break from her head and neck and worked a bit down her arms and started adding a bit of skin tone on one of her hands.

16) Mrs Mer through her arm into the air while trying to stay modest and warm with the other arm/hand (I need to make her a shirt soon)16) Mrs. Mer through her arm into the air while trying to stay modest and warm with the other arm/hand (I need to make her a shirt soon)

17) Mrs Mer’s waves goodby as its time to pack up.17) Mrs. Mer waves goodbye as it’s time to pack up.

I was in the middle of working on Mrs. Mer’s hand when Glenn’s last game ended.  So it was time to pack up after about 9 hours of fun felting. We both had lots of fun and hope there will be another Felting ….errr …. Gaming convention soon!

If you do a lot of 2D or 3D needle felting and enjoy working with blended colour you may find one of the types of carders handy. Depending on how much fibre you need to blend at a time will give you an idea of which type of carder may be best for you. (carders give you a woollen preparation for spinning while combs give you a worsted preparation)

Here is a quick reference chart showing the amount of fibre needed and tool options to achieve that amount.

Amount of fibre Tools to consider Notes, Pros/Cons
Smaller than a handful Hand blending -(if the staple length is longer than you want you can tare it or use scissors to shorten it)

Pros: free!, quick and easy to do for small amounts

Cons: can stress wrists and fingers pulling fibre apart as you blend it.

A Handful or a couple of handfuls Pet brushes used like wool mini-carders -like mini carders quality varies by manufacture. Some teeth are very stiff some are very flexible.

Pros: cost $2.50 to 10.00 each (cheap)

Cons: some are not well made and don’t hold up to stronger wools or heavy use.

A double handful Wool carders -designed to work with wool. Comes in various teeth counts (fine/Medium/course).

Pros: You can sometimes find a set secondhand from spinners.

Cons: new hand cards can be pricey but not as pricey as a drum carder.New Around $100.00 Canadian with shipping.

A larger amount (a batt) Drum carder -designed to work with wool. Comes in various teeth counts (fine/Medium/course).

Pros: can create larger amounts of blended fibre than a hand carder.reasonably easy to use,

Cons: a bit harder to clean for some. Even second-hand 150.00 to 350.00, new; high 200s to much more for larger or electric versions. The smaller ones are moveable/ sort of portable. The bigger ones are better left in a work area)


18) 3 full size hand carders, pet brush carders (my real mini carders will turn up as I keep shuffeling things) and small combs; a set of Rodger Hockins and one bee decapping comb in the interm location in my ofice/studio18) 3  full-size hand carders, pet brush carders (my real mini carders will turn up as I keep shuffling things) and small combs; a set of Rodger Hockins and one bee de-capping comb in the interim location in my office/studio

If you do a lot of 2D or 3D needle felting and enjoy working with blended colour you may find one of the types of carders handy. Depending on how much fibre you need to blend at a time will give you an idea of which type of carder may be best for you.

First Quarter Tree Finished and I Got Mail.

First Quarter Tree Finished and I Got Mail.

After some final fiddling with the width of the trunk and shadow and adding a little red bird for interest, I decided I am done with the winter tree.

Next is spring so I have to figure out what kind of tree I made. I wasn’t thinking of a particular tree when I started the experiment in making a tree. Here is the original tree experiment post. https://feltingandfiberstudio.com/2023/02/22/an-experiment-thinking-about-the-year-long-challenge/  After doing some picture searches I think it is most like an Oak tree. The other option was a Maple but the bark on a Maple is quite grey and Oaks have much more brown and textured bark. Naturally, neither of these makes the kind of flowers that pop into your head when you say tree in bloom. They make droopy green (sometimes red) tassels. Maples make maple keys and Oaks make acorns.  What kind of tree do you think it is?  I may decide it is a fantasy tree so I can make blossoms anyway. What do you think?


The other exciting thing Jan told you about too. I got my Package from Georgia (Russian Federation whether they like it or not).

Here are some unboxing pictures.


I was surprised it was all assembled. Jan had some assembly required with hers. The other fun thing is it is purple and has a cute little bee. It has 4 what look to be size 36 felting needles in it. It holds 4 of them.

Purple and a bee are all very well but how does it work? It took a little experimenting on how where to hold the machine in relation to the felt surface to get the best felting. It worked well but it is hard to engage all the barbs on such a long course needle. We decided to switch out my big needles for one of the smaller crown needles. This also helps with a comparison of Jan’s machine to mine as hers only holds one.  I like it. It is bigger than Jan’s and I like hers too.  I like the Chinese one the least. A lot of that is the way you hold it. It is a much slower machine and we all know that patience is not one of my stronger qualities. One thing I would recommend is that you get an awl or sewing stiletto or something similar to use to hold new fibres down so you are not getting your finger so close to the machine. Unless you have long talons like Jan for doing such things.


In this last picture, you can see how much ( the white fibres) gets punched through when you fully engage all the barbs of the large 36 triangle needles and how big the holes are even when you only engage the first barbs( yellow fibres).

You will get to hear about the rest of the testing later. Jan is making a chart and doing some analyzing of data. Better her than me. 🙂

Felted Garden Vase Cover

Felted Garden Vase Cover

Four Ravens Gallery in Missoula, MT (USA) is holding a garden themed exhibition in May. I have several pieces that will be included in the show. I decided to make another felted vase cover to fit a glass vase that is 4″ diameter and 6″ tall.

Layout of green wool (layer 1) on resist for a felted vase cover.

I wanted a mixture of greens but didn’t want to take the time to card a batt. So I laid out different colors of green wool for each layer. Here’s the first layer, so that’s the inside of the vase cover.

Layout of green wool (layer 2) on resist for a felted vase cover.

Then I added a second layer which is much more neutralized green.

Layout of green wool (layer 3) on resist for a felted vase cover.

The third layer was a mix of greens that I had hand carded and was left over from another project.

Layout of red, orange and yellow embellishments and wool (layer 4) on resist for a felted vase cover.

Then comes the fun layer. I added a variety of green wool, yellow silk noil, red mixed wool in tufts and burnt orange locks. There are also a couple of pieces of bright green cheesecloth under there somewhere. Then the felting and fulling process (no photos) happened.

And here’s the vase. The photos show it from different angles. In the center photo, you can just see a small piece of the bright green cheesecloth. It’s a bright and cheery piece and reminds me of spring in the garden. If you’re in the Missoula area, you should check out the gallery as there are some wonderful artists represented there.