
Keeping Mrs. Mer from getting chilly
Mrs. Mer has been having a difficult time since I started working on her hand a couple of weeks ago. It has been hard to stay warm with only one hand to keep herself covered!
 1) Mrs. Mer at the gaming/felting convention. Felting needles working on SCM muscle in her neck, as she covers herself with one hand and I am about to start working on the other.
This only got worse when I started to add her eyes and she could see the people around her! I had sculpted her skull so that I would add eyes and then add lids over the eyes. (I had then used one of my longish thumbnails to create the curve for her brow, which had worked quite well. I was sure I had snuck a picture of her, pre-eye lids (it was truly unfaltering) but when I went back through the camera memory cards I could not locate it. I am starting to suspect small hands with the help of lidless eyes may have deleted the truly shocking shot of Mrs. Mer.
I had been invited to a small spin-in with some friends. I was looking forward to seeing them especially after 3 long days in the guild library working on donations and the book count (checking that each book was on the shelf where it should be.) I have the circulating books done and am partway through the magazines. That leaves the reference books left to do.
I know it was a spin-in that I was going to but, my friends are very patient with me when I bring fibre but don’t have a wheel or spindle. Instead, I arrive with little barbed pieces of mettle, a garden kneeling foam and possibly a Naked mer-woman.) Seeing that she now had eyes (that sounds like a pun) I felt I should really help her keep her modesty or keep her warmer at least. I decided she needed a top.
Eventually, she will need a top that suits her fish parts and hair but for now, a quick top in white should suit the purpose. I found some white in the project bag she and her hubby have been…ummm ……hanging out in. (who knows what they’re getting up to when I am not watching!! They may need an open plastic project bag soon!!!)
At a recent sale of one of our local guild members, I was able to buy an actual clover tool and clover brush. I have wanted to try one for quite a while now. I have a large collection of Fake Clover Tools, this is the first time I have tried a real one. I found they are a bit quieter than the blue fake version, the green clover handle is comfortable and the movement is a bit smoother than the blue one is too. If you spot one second-hand and in working order I would suggest trying it. The blue is quite a bit less expensive and is still a good alternative if you are trying to stay frugal (saving your money for more fibre).
 2) Green Clover tool (multi-needle holder) and the first layer of wool, both sitting on an old green foam felting base.
Under the Mer’s in their project bag, I found some white, which I started to lay out In a bra-like shape. I started with the traditional double triangle and would add more fibre for an upper strap and a longer lower tie. I had considered a ribbon but I only had blue at hand. Which I did not think would work with her eventual highlight colours. I started with the clover multi-needle tool to get the basic shape firmed up.
 3) the basic flat shape of the halter top
As I am sure you can see, the flat shape would not be very comfortable and there is the likelihood of gapping, which could cause drafts or wardrobe malfunctions.
 4) the beginning of curvature in the top I have yet to add the halter strap or the under-bust tie. Fibre is sitting on the green foam with the clover tool in the background.
To bring the flat shape into a more fitted full-figured shape, I switched to single needles (a T-36 & T-38). I started by making a dent to fit under the underarm. Then I focused along the bottom edge of the braw to create the same effect as a dart or gathers. I put arrows on the diagram below, to show you the direction of needle insertion (Poking) to get the fibres to contract allowing the cup to start to form. Another way to have made it would be to use a small rounded support like a foam ball or curved support shape. If you were making a more rubenessque mer-woman you might want to consider some wire support (under the wire) for a mer-woman with greater endowments or substantial cleavage.
 5) Arrows show the direction of fibre movement to create the cups and fitting under the arm.
I had her try on her top a few times adjusting a bit at a time. (She is very patent but I did promise to add her eyelids as soon as I could make her a somewhat respectable top.)
As you will see below I had laid in her eyelids before it was time to head off to see friends.
 6) Mrs. Mer shows off her new top and eyelids.
 7) You can see how well fitting her new top is from this angle. On the table behind where I am working are some of the snacks we were nibbling on.
 8) If you missed the tempting tasty snacks hiding behind Mrs. Mer here is a close-up of a couple of them! The paper napkin has Udderly Delicious with a cow picture on it.
 9) Mrs. Mer and felting tools sitting on the table, snacks a pop and Mr. Mer to one side of the table with Bernadette and Ann in the background.
Mr. Mer also attended, he stood on a chair at the table and was holding a Mountain Dew (highly caffeinated carbonated lime/grapefruit flavoured beverage). I think that Mrs. Mer having eyes and a stylish top has captivated his attention since he did not flirt with anyone else that was there.
 10) close up o Mr. Mer sitting at the table with his bottle of pop, some wool and a pair of scissors. Behind him is a window with a hanging plant.
He may like this beverage since it goes well with his hair.
It was a fun day and great to see a few of my friends especially when I am not working on the library but just being social.
I Dropped off Ann on the way home and then stopped to take pictures of the early spring colour changes. There are the reds, ambers and light greens of new buds.
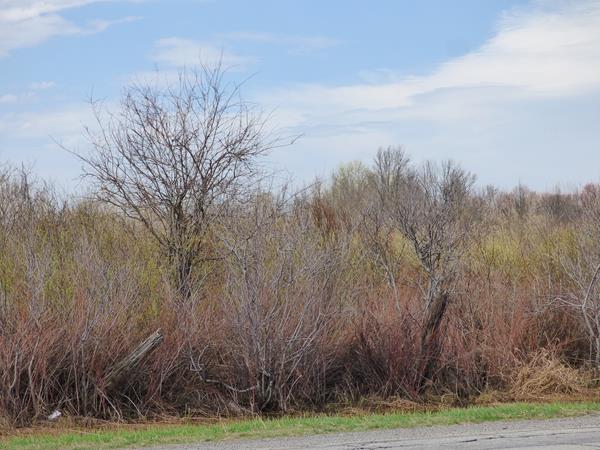 11) Scrub brush in the colours of spring. Redwood branches, bits of green budding, amber and green grass. Small trees, and old fence posts leaning aesthetically.
Lastly, I have a question for you about an upcoming post. I have 3 hand carders which need covers, which fabric pattern would you choose?
 12) fabric squares, Patterns from the top Right; Mice and yarn balls, Black white and gray sheep on clouds, Alpaca and long-necked cat faces, blue paisley, Black White and Grey sheep with numbers, Cute fluffy white sheep on gray background. In the plastic bag, a second paisley and a light grey graph check.
One final shot of Mrs. Mer’s progress (starting to work on her left hand and arm.
 13) Mrs Mer with Needle in her Left wrist as she lounges on her back on the studio table at a guild social.
10 thoughts on “Keeping Mrs. Mer from getting chilly”
Good to see the Mers again, Jan.
Mrs Mer must be glad that she no longer has to have her arm wrapped round her attributes. She is certainly looking less startled with her new eyelids, and I see she’s got a little bit of a “trout pout” which is just fine for a fishy lady. (I’m glad she doesn’t look like a duck like some of these so called Reality Stars who’ve had their lips pumped up!)
All those goodies and a proper pot of tea too, looks great. Our local deli/butchers would love those paper napkins. It is owned by an off shoot of a local farm shop, where they have a fantastic tea room cum restaurant. It is called Udder Farm Shop.
Mr Mer was looking very pensive, perhaps he’s thinking he’d better pay more attention to Mrs Mer now that she’s beginning to look so fetching or she might pay him back and start flirting herself.
Which fabric for the carder covers? Crikey, how to choose? How about a patchwork effect with a bit of each one, but that would make it extra work. I actually like the blue paisley, and/or the black and grey sheep on clouds.
Ann
Mr Mer looks so relaxed at the table and Mrs Mer’s ‘bits’ are nicely contained in her new bra and her eyes are lovely.
The spin-in looks enjoyable especially with all those snacks 🙂
The photo of the scrub brush is so lovely to look at – and it’s amazing how many colours there are.
If you can’t decide which fabric to use, number each one then put numbers in a hat and draw one out. While you are pulling a number out you will find yourself hoping that it will be a certain fabric … don’t bother looking at the number because it’s job done.
I’m here for all the fashion accessories the Mers might enjoy! I still vote for seashells, though 😀
Mrs. Mer looks very comfortable with her new eyelids and halter top. And Mr. Mer better be paying attention or she might swim away with another mer-man 😉 Looks like a nice time spent with fiber friends whether you spin or not.
I like the cat fabric in the bottom right corner.
Loving that Mr Mer gets to attend your group while you work on finishing his partner.
I was going to say which of the fabrics I would chose but then read Lyns response….what a great idea. I might use that suggestion the next time I’m struggling to make a decision!
To choose between two things Karen, toss a coin. When the coin is in the air you realise which one you’re hoping will win 🙂
Mr Mer is certainly needing to get his act together with Mrs Mer becoming so much more ‘mermaidenly’ appealing.
Spinning (or not), felting, chatting & enjoying such delicious looking snacks – what more could a ‘gal’ want?
Choice of fabric – that is a difficult one. Lyn’s suggestions are brilliant.
I was thinking how I’d love to have a flat stomach like Mrs. Mer has!
I was kind of drawn to the sheep with numbers fabric…
Mrs Mer is really coming together. I think she needs her lips to be a little darker than the rest of her skin. but maybe wait to match some of her hair. As for fabric, I like the coloured sheep without numbers and the mice.
Fascinating to see her construction.Has to be the sheep fabric.