Summer Needle felting Demo, July 12 2025
Summer Demo at the Glengarry Pioneer Museum
I have spent the week, investigating possible new cars, trying to fix the cell phone that had just been Fixed with a new sim card, so I can chat with my car’s Doctor and my bank. After one call out it is again refusing to let anyone talk to me. (it’s not that I get a lot of calls, but some day the visa purchases I am told I made, while I was sleeping, will be delivered. What will I do with all those amazon iPhone? I wonder who is getting them and who’s visa it is that keeps paying for them?
Was it a few weeks ago I was out at the father’s day Blacksmithing event in Dunvagen Ontario. While there, felting and taking pictures of blacksmiths, I was asked if I could come demo felting for their fiber and fabric event in July. I said I was interested but would have to confirm closer to the event. I am still not back to feeling like myself yet.
 1.1) the add for the Glengarry Pioneer Museum event.
So beside the phone and the car, I spent part of this week trying to find my demo stuff to do a display of both 2 and 3 D needle felting. (I should probably have found Miaka’s giant fish to sow wet felting, but as I said I am still not quite back to normal and seem to still be forgetting to think of things.)
Of course I need to take the Mer-Boyfriend I was working on too. Now where did he wonder off to? he went into the guild a couple weeks ago, I am sure he came back. What is it with Mer-Teens wanting to play hide and seek in my house?? We searched the bags that go back and forth to the guild, no, I looked in the office, the bedroom and was trying to search the living room. Glenn even checked the basement. I was so disappointed. Maybe he had found Miss Mer and they were hiding together? Maybe I should collect the rest of what I want to take and then look again.
I got the Moose bag with the landscape and the bags of fiber to work on it from the hall and added it to the commercial felt bin with handles. Glenn said he found the sample punctures down stairs. I found the green tool bag and extra foam garden needling pad to work on. I found the bag of core wool of carded roving from World of Wool and wound a couple big balls of wool from it. (I am going to have to get some more soon I hope Ann needs something from them!) I had Glenn’s moose bag hanging in the bedroom, when I grabbed it, it was lumpier than I remember it being…. I looked in and guess who was hiding inside? Mer-Boyfriend!!!
 1.2) a bit of a drive with all the construction on the highway
Saturday July 12 2025, Glenn loaded the car and we were ready to go. oh my, its seems a bit warm out! As you step out the door it feels like you are wrapped in a very worm wet wool blanket, except for the wet part that would sound nice, but the blanket is wrapped around the head too and you are trying to breathe through it. Not so nice, really. If only my car would consider letting the AC work, well I still remember cars without AC so rolled down the windows. The drive was not too bad once we were moving and we arrived with time to set up.
Other than hot it was a beautiful sunny day, booths were scattered around the museum grounds and buildings. I had a fabulous spot on the covered porch at the corner of the building and very close to the handy cap parking! We loaded up the grey box on the walker and threw the black car blankets on top. Glenn brought the other bags and we quickly set up a display. I turned the commercial felt box on it side so the opening was towards the back of the table where I would be sitting. This gives both a spot to hide stuff, like my camera, extra work tools, and wool, as well as give height to the display. I used it to lean the Mer’s against as well as one sitting on top of it. it also supported the two moose bags and the picture of the winter round bales. I had miss manta and Sharkette sitting in front of the work area and the little aluminum folding table from the car had the fox face picture.


 2.1-2.3) the Mer’s getting ready to People watch and hoping for a tennis match.
When I have the Mer’s comfortable, we can made a quick tour around to see some of the booths before people started to arrive.
Glenn took a few shots of the demo as I was working and chatting. They will show the display better and prove I was actually there!
 2.4) Glenn had the cool chair and a book on architecture as well as my old camera.
 2.5) Winter hay in the Ottawa valley

 2.61-2.62) Proof I was there (I never seem to be in the photos!!)
 2.7) Fox and my sturgeon reference photos

 3.1-3.2) There was a quilt display in the open sided barn
I was hoping to get back and take some close ups, But kept having people stop and ask lots of questions about needle felting. I hope I got them inspired to try it.
 4.1) Oh no I better hurry, the first few people are arriving. (Glenn is manning the demo so we can go take a quick look around.)
Most of the venders were under tents.
 4.2) Sewing
 4.3) Knitting and Sewing. I think the pom-poms will melt shortly!
 4.4) HUM selling alpaca yarn and teddy bares. I didn’t see any fiber but I tried to get a quick look.
 4.5) a close up of some of their stock
 4.6) Just past the building with the forge there was a booth with crochet. I got distracted looking ahead, and almost missed her!
 4.7) There are booths hidden under the trees and by one of the log buildings.
Oh there are more booths hidden by the open carriage barn! I almost missed them too, lets look over there first.
There must be fiber here somewhere!
 5.1) Swedish weaving. it’s a type of needle weaving on already woven fabric. The patterns were very interesting.
 5.2) Swedish Weaving Guild of South Glengarry and Area
 5.3) I think this was a display of Lace but I didn’t ever get a chance to get back and look. They had a lovely shady spot!
 5.41) this was a display of rug hooking
 5.42) some of their display
 5.51) Anagarumi gnomes, bees, and sea creatures!
 5.52) close up of the bees and the Cows I didn’t notice!
 5.61) Braided rugs, the one on the end I particularly liked the colours chosen
 5.62) cool sewing machine
 5.71) the embroidery guild display
 5.72) the embroiders enjoying the shade
AH HA!! I found fiber people!
 6.1) Drop spindles and fiber prep!
I found out later there was a drop spindle competition between three of the guilds represented here today. Think I was told it was The Twistle Guild of Glengarry, the Kingston Handloom Weavers & Spinners Guild and the Ottawa Valley Weavers and Spinners Guild (OVWSG).
I better get back to work soon or I will get fired before I get started!
Oh there is one more booth on the way back, it advertised bespoke Tartan kilts! (But no modeling display!!!) Sorry I got distracted by the tartan sample books and missed the kilts on the table.

 7.1-7.2) tartan sample books
Ok, now to demonstrate needle felting. I am focusing on making the flattish bottom of the sturgeon so I will have to build up on either side of the wrapped armature.
 8) Mer-Boyfriend in progress. focus is on under side of fish part of body
I explained multiple times why i was making a Mer-Boyfriend to lour the missing teen-Mer back to the office.
I was doing quite well with chatting and working on the under body, then realized there were booths in the school house too. Since the people seemed to be elsewhere it’s time to take a quit trip to the bathroom then on to the schoolhouse!
Oh this is where the fiber people are!! Two of the booths have drop spindles, one selling Ashford and the other had their own design. Quite hefty but I tend to like heavy whorls (I was tempted) I got distracted by second hand quilting hoops and bought 2.

 9.11-9.12) Tools
 9.21) Drop spindle demo to a customer she had batts on the shelves at the back too
 9.22) washed and unwashed fiber various breeds
Here is the winner of the 2-hour drop spindle competition. They were each given, the same amount, of the same fiber, and had to spin the longest even amount (?). I am not sure if they had to ply it, or if they were spinning singles.
 10) this is the competitor from my local guild who won!
 11.) odd I was sure I took a lot more progress pictures as I was working.
It was close to 3pm and I wanted to make a quick run (ok running is not really quick and it doesn’t look like running…) but I had wanted to go take pictures of the quilts and see what the yarn seller beside the wall-less barn was selling. I had a couple more people come up, just as I was wheeling away from the table with my camera who had questions about needle felting. By the time they had run out of questions, I looked up to see this.
 12.1) the quilts are disappearing!
Which quickly became this:
 12.2) 4pm and packing up
Oh well, maybe next year?
I did have a lot of great conversations, including with the photographer I saw at the blacksmithing weekend. He gave me a few more tips on the new camera (we both were admiring each other’s lenses)
I got an invitation to demo in Van Kleekhill but I found I was still feeling the drive, so it’s probably too far out for me yet.
I packed everything away and Glenn got it into the car. Which was quite warm… I think that the temperature outside the car said 38c. it seems hotter in the car… let’s roll down the windows. On the porch there were occasional little breezes blowing through, but when the breeze drops and now we are in the car, that blanket we are breathing into seem to be even wetter and warmer than this morning!
We stopped at the gas station before getting on the highway home, to buy cold peach drink and a Fresca. Ah that feels so nice. Window down as long as we are moving it feels a bit better. Just wait a couple months and we will be complaining about the cold. I guess we have got to enjoy the lack of snow banks while they are missing!!
The hot weather is grate for washing fleece when you don’t have hot water outside. So it’s not all bad! However, it has taken about 3 days to get the washed fleece to dry. I have now started the third batch of the giant white fleece and it got an extra rinse in the heavy rains with the thunderstorm yesterday!
In case I was feeling up to staying for the social tonight at the guild I brought someone to work on. The Mer-Boyfriend seems to be in a rush to get more work done so I had better get back to work before he wants to felt me! I did get a good chunk of library work done, but I was feeling wiped again by the early afternoon so did not stay for the rest of the social. Mer-Boyfriend got his hands on the felting needle I had been using on the weekend. He was all set to do a bit of work on himself!
 13.1) still a lot more work to do on the under structure
 13.2) I had better get that needle away from him soon!
I hope you enjoyed the drive out to Dunvagan, Ontario, and that it wasn’t too hot for you. (the car said it was 26+humadex on the way out and 36+humadex as we headed home.) Have fun and keep felting!!

 3.1 Alpaca tracks small bats of red wool
 3.2 The top row way to the left is right red Mer hair I was looking for. The are lots of different colours of locks in 2 lengths.
 3.3 this is a helpful chart showing Kohaku (red and white Koi)
 3.4 Side view of Mrs Mer admiring her new hair in a side view.
 3.5 Mrs. Mer Back view
 3.6 close up of Mrs. Mer admiring her new hair
 3.7 close up showing new eyebrows and her new necklace
 4.1 Ice Dragon, ¾ view
 4.2 Ice Dragon, Back view
 4.3 Ice Dragon, which I had made for Glenn ¾ view from the back
 5 Landscape of Maureen’s vacation
 6.4 some of the items ready to go to the Almonte Textile Museum
 1) Mrs. Mer at the gaming/felting convention. Felting needles working on SCM muscle in her neck, as she covers herself with one hand and I am about to start working on the other.
 2) Green Clover tool (multi-needle holder) and the first layer of wool, both sitting on an old green foam felting base.
 3) the basic flat shape of the halter top
 4) the beginning of curvature in the top I have yet to add the halter strap or the under-bust tie. Fibre is sitting on the green foam with the clover tool in the background.
 5) Arrows show the direction of fibre movement to create the cups and fitting under the arm.
 6) Mrs. Mer shows off her new top and eyelids.
 7) You can see how well fitting her new top is from this angle. On the table behind where I am working are some of the snacks we were nibbling on.
 8) If you missed the tempting tasty snacks hiding behind Mrs. Mer here is a close-up of a couple of them! The paper napkin has Udderly Delicious with a cow picture on it.
 9) Mrs. Mer and felting tools sitting on the table, snacks a pop and Mr. Mer to one side of the table with Bernadette and Ann in the background.
 10) close up o Mr. Mer sitting at the table with his bottle of pop, some wool and a pair of scissors. Behind him is a window with a hanging plant.
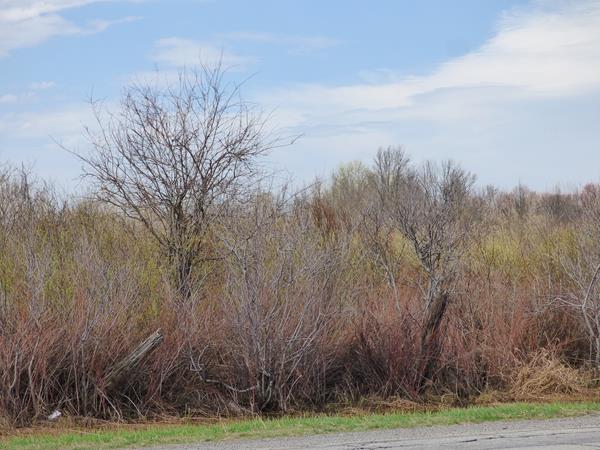 11) Scrub brush in the colours of spring. Redwood branches, bits of green budding, amber and green grass. Small trees, and old fence posts leaning aesthetically.
 12) fabric squares, Patterns from the top Right; Mice and yarn balls, Black white and gray sheep on clouds, Alpaca and long-necked cat faces, blue paisley, Black White and Grey sheep with numbers, Cute fluffy white sheep on gray background. In the plastic bag, a second paisley and a light grey graph check.
 13) Mrs Mer with Needle in her Left wrist as she lounges on her back on the studio table at a guild social.
 1) Shortly after 9 am, I was happily left at a rectangular table with a Tim Hortons bagel and my felting supplies in a small clear plastic box. Mrs. Mer is reclining with bits hand blended skin tone.
 2) Mr. Mer was there to supervise and cheer on the gaming. Mr. Mer leans ageist a blue bag on the table in front are the small wool pad, the wrong beige, my phone and audiobook, and my small clear plastic box of tools.
 3) Skin tone base colour from blending white (re-carded world of wool core wool), beige and amber Coriodale, and a bit of red I think maybe merino.
 4) Not fully homogenous blends one with a stronger white and one with a stronger beige undertone.
 5) Dollarama $4.00 carders (pet brush) with safety tips.
 6-7) Close-up of teeth on the comb. note the bend about 2/3rds up the wire


 8-11) Examples of blending fibre to create skin colours
 12) MRS Mer laying on her back, double needles working along angle of the jaw (Mandible)
 13) New muscle development below the occiput and above upper traps.
 14) attachment of SCM (
 16) Mrs. Mer through her arm into the air while trying to stay modest and warm with the other arm/hand (I need to make her a shirt soon)
 17) Mrs. Mer waves goodbye as it’s time to pack up.
 18) 3 full-size hand carders, pet brush carders (my real mini carders will turn up as I keep shuffling things) and small combs; a set of Rodger Hockins and one bee de-capping comb in the interim location in my office/studio
 1-Mrs. Mer, lying on a felting pad, with fin wires for lower fins added to her fish body, the needle is adding wool to the lower abdomen of the fish section.
 2- Close up of fish part of Mrs. Mer, adding folded wire that will be anal fin, the other fin wires are in place for lower fins and are wrapped in wool.
 3-Mrs. Mer viewed from the back showing understructure of wool and adding the back fin wires. She is lying on a wool pad on top of a handwoven cotton blanket of various colours of blue and bits of purple.
 4-Mr Mer, as his arms resting over the handle of my willow basket, is showing off his chest and smiling.
 5-Table at the back of the gaming convention, gaming going on at tables in the background, Mrs. Mer lies on the table showing her back. She has her fin wires wrapped in wool and has a felting needle stuck in her sacrum.
 6- Close up of Mrs, Mer’s gluteal muscles and the transition to fish, 2 ridges are developing reminiscent of gills.
 7- Mrs. Mer on a wool pad on the table. Showing the tail fin being built up with white wool over the Alpaca underlayer.
 8- Showing Mrs. Mer on the pad on the table, with very thin felt being built up between the upper and lower tail wire, there is gaming going on in the background.
 9- Mrs. Mer, lying on a felt pad on the table, with the clutter of mini Chocolate bars, Ice crackers, glasses and extra needles spread around her. I am adding more fibre to expand the thin felted tail fin.
 10- It band integrated with the Dorsal line on the fish body anal fin over a felt pad with a felting needle adding a thin wisp of fibre to the wire fin armature. Glasses and tiny pliers and cutters are lying on the felting mat.
 11- Close up of anal fin and tale (Caudal) fin both with very thin wisps of felt for the fins. They are lying on the felt pad with a needle sticking out of it.
 12 – Starting the Ventral fin one on each side of the lower body of Mrs. Mer’s fishy body
 13- Mrs. Mer is lying on her side on the table with her Ventral fin on the felting pad with a needle stuck in it. There is a bottle of mountain due (pop with a lot of caffeine), reference photos and my audiobook player also sitting beside the pad.
 14- Mrs. Mer is now leaning on her elbows on the felting pad. I have all the lower fins added as well as the tail, I have started to add a bit of light skin tone to her lower back and glutes.
 15- Mrs. Mer Lies on the table with her Dorsal fin spread out across the felt mat. There are wisps of wool being added to the space between the spines.
 16- Mrs. Mer props herself up on the table with a bottle of the mountain due behind her.
 17- Photo of the community center and the corner of some of the Market stalls with white tents.
 18 -bin of wool and 5 small bags of tiny locks sitting on the small chest freezer, more of the market in the background
 19- Feme sol Fiber yarn and batting for sail in pretty baskets.
 20- Rocks end farms yarn displayed on a table with driftwood support
 21- table covered in boutique cloth with colourful mittens on top
 22- 2 ladies looking at mitts one lady selling the mitts
 23- Mr. Mer and Ginger Chatting.
 24- Mrs. Mer interrupts Mr. Mer’s Flirting.
 25- Grid racks of hand-dyed yarn, a woman with a large pink handbag admires yarn
 26- Ornamental grass and brown-eyed-Susan flowers with dark rose colours flower I don’t recognize and general greenery behind.
 27- fall colour along the highway is green, orange, red and yellow leaves on trees.
 28- Mrs. Mer on a felt pad on the table with Mr. Mer leaning over the back of the walker supervising her felting. In the background, gaming is going on.
 29- his wife as she lays on the table with her Pectoral fin about to be worked on with the fake clover tool.
 30- Jan using fake clover tool on pectoral fin, with Mr. Mer watching over his wife.
 31- Mrs. Mer balancing on 2 mountain due bottles on the table, gaming happening in the background.
 32- Mrs. Mer tries to go for a swim but it is now time to go home. Glenn had fun and so did i.
 33- Mr.and Mrs. Mer share a project bag as they prepare to head home. Glenn sits behind the table ready to carry everything to the car.