Browsed by
Month: September 2022

WHOOSH and now it’s Fall

WHOOSH and now it’s Fall

This summer started out with a lovely leisurely saunter to it, and now that sonic boom I just heard is Fall clambering for attention.  Our guild has participated in at least five demonstrations throughout the region, some lasting for several days.  Some were at historical sites, some were at agricultural events or country fairs, but all were a load of fun.  And a load of work.  So now, we are preparing for our own event.  Our guild will be having our Sale and Exhibition in early November.  I’ll be a vendor so I need to get going on sorting through inventory and (sigh) start labelling and pricing items.

I’ll be having braids, batts, and spun yarn

And being terribly disappointed in how the photos turn out in this horrible lighting.  These colours are not at all grey and sad looking in sunlight, but this is how they will probably look during winter, so I should take that into consideration when I make colours.  Indoor lighting will have an emotional effect on how people view their decisions.

Anyway, you get the idea that there will be a huge variety of different items available at our guild Sale and Ex.  I am partnering with another guild member who weaves.  She took her degree in Fiber Arts from a University in Nova Scotia and does superlative work. Jan will get some of those for you later I’m sure.

Finally, something cheerful!  Well colourful in a Fall sort of way at least.  I’ve ordered labelling cards which should arrive this week, so I can at least get a jump on things by cracking out the scale and start weighing stuff.  Here’s hoping everyone has a great Fall (my favourite time of year, busy though it is) an abundant harvest and lovely fibre to work with.


Rare Earth Magnet on sale! Just add wool for more fun!!

Rare Earth Magnet on sale! Just add wool for more fun!!

A couple of weeks ago the latest princess auto flyer booklet arrived. It is always fun to look through and see what is on sale! Princess Auto is an interesting store that has a vast variety of things, hunting, camping, farm supplies, a bit of blacksmithing, welding, tool boxes, electric bikes, and lots of stuff I am not sure what it’s for but it looks interesting. I sat down to see what exciting things might be included this time. There may be more Bee Decapping combs (which make very cheap emergency wool combs! However, I have a couple of sets so maybe I don’t need to get another pair?) Aha! There is a metal bench on sale, circle that! Is there anything else? YES!! Magnets! (This is the link, they will go back on sale again sometime) https://www.princessauto.com/en/48-pc-rare-earth-magnet-and-dispenser-set/product/PA0008996993 ) 1) 48-piece Rare Earth Magnet and Dispenser Set

Glenn had a couple of things circled in the flyer too so stopped in after work the first day of the sale. I wasn’t quite sure what I was going to do with them but I knew it would be fun and I bet there will be wool involved. These are very strong yet very tiny magnets.

 2) Tiny, tiny Enthusiastic Magnets sticking to a felting needle to show you how tiny they are

I had a question a few weeks ago about making a sheep head, if I make a tiny sheep’s head I bet I can make a broach. Where did I put the wool with the tiny crimp I had purchased from Ginger at Farm Sol at the Wakefield Farmers Market? And more important, can I get more?

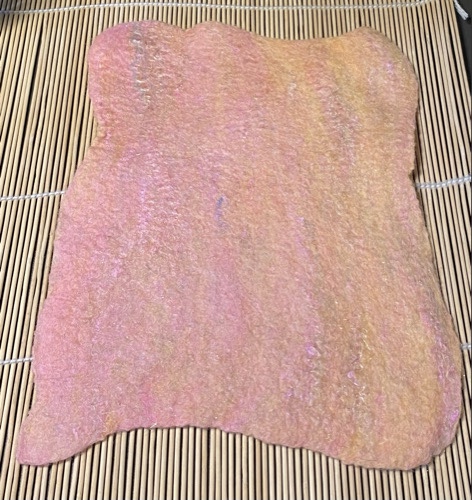
The mark 1 prototype I used unlabeled white wool roving, I am hoping it’s Corriedale but I’m not sure. It seemed less enthusiastic to felt than I usually find in Corriedale. So after more stabbing than I would have liked, I did get a basic head/nose shape.

3) This may not be the Corriedale you were looking for (spooky Jedi background music)

4) Eventually there was a head-like shape, sort of

Now that isn’t as sheepish as I would like. (This is why reference photos are really helpful) I know what’s missing,  I will need to add ears!!

5) Ears added to the slightly sheepish head

Now that is a bit better. Next to add the first magnet.

6) Magnet balancing precariously on superior aspect of sheep neck

The magnets were tiny and behaved in a slippery manner determined to fling themselves to their death on the floor!! Alas for the magnet, I used another previous Princess Auto Sales item to find them and pick them up!! (Without bending or crawling around on the floor under the computer desk, even better!!)((I am suggesting anyone doing Dry Needle felting should consider this marvellous invention to retrieve errant needles, and magnets from the horror of nether regions that the floor has become.))

7-8) Extending magnetic picker-upper of things mettle, with built-in light (it Is dark under the table)

The version that is brought in for sales with the light doesn’t seem to be on their website but here is the link for the lightless one. You can likely find something similar at any hardware store, this one says it will pick up 3lbs (that would be one big needle!!) https://www.princessauto.com/en/3-lb-magnetic-pickup-tool/product/PA0008716615

I wound up trying 3 ways of affixing the magnet into the back of the sheep head.

9-10) First I tried lightly felting a bit of wool, then attaching it to the back of the head. This was not totally successful since the magnet migrated lower than where I had been trying to hold it. I also found the needle was very attracted to the magnet when I tried to poke adjacent to it. Interesting.

This did let me find out that the magnet is strong and once embedded in the wool stuck to bulldog clips (some people call them binder clips) with enthusiasm and required gentle prying to get them to let go.

11) Sheep head sticking to bulldog clip

Next, I tried a divot in the superior aspect of the neck or back of the skull depending on your perspective. I placed the magnet in the dent and then added a backing that I had felted flat.

12) Magnet sitting in a bit of a divot and leaving the rest of the loose wool to work over the top of the magnet once it was in position.

13) The magnet was attracted again to the needle so this may not be quite the best solution

14) It was a bit more challenging to keep the magnet where I wanted it but the divot did help.

15) Success! But this took more time but kept the magnet location where I had wanted it.

(16) The third option is “this picture is unavailable” which was a combination of making a dent to seat the magnet and then making a felt backing for covering the magnet. I could have used a commercial felt but it’s so easy to just make a bit more of the wool you are using and you are sure it will match the head if you use the same wool.

17) Now let’s talk about ears.

It is time to use those C40-111’s again, Crown Needles!!! For the first two sheep heads, I attached white ears and then added the wisp of pinkishness to the attached ear. For the third prototype, I build a base layer of the white, then lay in wisps of pink to make the inner ear. Using the crown needle at an angle close to parallel allows the addition of colour to one side without affecting the other. The working depth of the crown needles is much shallower than regular needles. Once the ear was constructed I attached it to the head. This was a bit easier than adding the pink to the ear after it was attached.

18) Time to add the second Magnet and check it sticks through cloths. Yep!

This sheep is still rather naked and needs curls. Remember that trip I took to Wakefield a few posts ago? Well, we are about to find out what happened to those fabulous little locks.

19) The tiny crimpy locks from Ferme Sol Farm in Wakefield Quebec http://www.fermesol.ca/

The locks worked perfectly. The tight and tiny crimp was perfect for this scale of sheep. Her sheep are Icelandic/ Frisian/ Gotland/ Finn and Shetland crosses. These were really fabulous fibre blends.

20-21) Front and back view of the sheep broach with a second magnet to go inside your shirt. This is less damaging to fabric than a pin broach back would be.

22) Here is the sheep with both the curls and ear details added.

23) A bit of online shopping arrived and I have added the two new boxes to the tools I used for this project (you don’t need quite this many needles I actually only used 3needles, which were each different, to make the sheep)

I had ordered two more needle boxes, this time a T-38G-333 and T-42G-222.  The T is the shape Triangle, the first number is the gauge, the G is the tip or point specification, and there is another letter designating the barb specifications which I have ignored and the last digits are the number of barbs per side. So I will leave you with a shot of the new needle boxes (yes there are 500 needles in the new ones a bit less in the older boxes) and the other tools and pieces I used for this project.

Next week I have a choice of things to tell you about, Mr. and Mrs. Mer’s trip to the Carp fair (Friday, Saturday and Sunday) or the mini-workshop I gave on a card stock 7- strand kumihimo-like braid (Monday). There is also going to be another trip up to Wakefield this coming Saturday, to purchase more little locks and hopefully get some good pictures.  It has been a VERY busy four days in a row!! Now it is time to find the Robax-platinum and crawl back into bed for a day or so.

Have fun and keep felting (even if you are wearing gloves – you will hear about that when we chat about the Carp fair!)

Future felt

Future felt

So what would future felt be? Can you guess?


Here is a clue


Did that help?


how about this


I bet you know now.


Meet Pete also known as Handsome Pete. He is our new Blue Faced Leicester Ram.


He arrived on Wednesday. He is settling in well. he can see the sheep when they come in and he can smell them are girls. He is handsome and calm. He likes his back scratched. He is not sure about Ava. She is a dog after all but I am sure the others will let him know that although she is black and white, she is no border collie.

This very handsome and alert shot is also looking at Ava who is paying no attention at all.


Late Bloomers Finished?

Late Bloomers Finished?

I had showed you this background a couple of post ago and was planning on free motion machine stitching a meadow scene.

I started with some background grasses in a couple of rows. If I do this again, I think I would stitch only one row and make the grasses longer.

Then I began couching down some different yarns with machine stitching.

I decided I should go ahead and stitch in the main focal flowers now so I wouldn’t fill up their space with grass. I couched down the green yarn for stems and then stitched heavily over a piece of purple felt for the flowers.

I decided the piece needed some more skinnier lines and some darker values. So I stitched the weedy bits in dark brown. These would have been easier if they were stitched before the larger grasses.

I then added some dark green weedy bits to the left hand side and couched some lighter green yarn down across the foreground. As you can see, I started looking at the piece in a “frame” since that was how it would be presented. What else did I need?

I decided the flowers needed some leaves so I used more of the same green yarn and pulled it apart a bit to get more width for the leaves. Was it finished? There was something bothering me on the right hand side. Do you see the brown grasses forming an ellipse? It seemed to draw my eye too much. So a bit of unstitching was necessary.

Now here it is after a bit of grass removal. Is it finished? I will leave it hanging on my design board for a few days to decide. I think I will add a bit of darkness to a couple of stems just right of center. Probably with a marker or a bit of paint.

What do you think? Is it finished?

Making Unexpected Memories

Making Unexpected Memories

For this article, I’m going to take you on an adventure, using your imagination. Sounds mysterious…possibly exciting! However, in reality it was poor planning on my part, and I had to figure out something on the fly. That’s real life for many of us, so let’s move on, and it will all work out.

My mother recently moved to a Senior Living residence, in the Memory Care unit. It’s a difficult transition for anyone, and it was especially tough on my mother. I wanted to do something that would help her, get to know those around her better. A monthly tea party, presented a good opportunity. My mother has always been a lady that loves her tea…the English way, with milk. When Prince William and Kate got married, I bought my mother a fascinator to wear to tea. I went early the day of the tea, and grabbed the fascinator, from my closet.

Marsha dressed up for tea

We arrived for tea, and everyone stopped what they were doing. The residence photographer took her picture, and she was awarded the “best dressed” prize for the day. Everyone was buzzing about the need for hats. I mentioned to the craft coordinator, Cindi, that I could help the Memory Care residents make felt flowers for fascinators! We started discussing our plans immediately.

Needle felting wasn’t a good fit, for the residents, even though I had the protective gear. The coordinator said they let residents put projects together, take a photo, and behind the scenes secure items in place. That would totally work for flowers, cut out from felt, they made themselves. Last Friday was the day we set aside to make the felt. I knew my article was coming due, and thought, this would work out perfectly, but I neglected to think about privacy issues. So this is where your adventure comes in…(I know, you were hoping for a trip, to some far away destination…and maybe an umbrella drink.🍹) This is a recreation, of how we handled this for a group, in a Memory Care setting. I have a photo, with no faces, to show results the residents achieved.

I have to say, this activity was a huge success. I’m hoping by sharing the story, others will volunteer to do a similar activity, in their own communities. We had 8 ladies decide to join us, and I was prepared, if gentlemen decided to join us. I really thought this out ahead of time and had everything ready to go: bamboo placemats, cut bubble wrap, small pieces of clear plastic sheets, 2 water containers, 2 ball brausers, and liquid dish soap. I used my electric drum carder to make, very thin individual batts, for each person. I can’t tell you how pleased I was at that decision: it made everything flow along beautifully. I was told the residents love anything that sparkles, so I knew Angelina and Stelina would be present in each batts composition.

Merino, and Blended, Rovings … with Sparkles!
I made a thin sandwich of Merino, the Sparkly blend, and Merino on top. That keeps my drum carder lickerin cleaner, and requires less stopping. I repeated this process until my batt was as thick as needed.
Thin batt ready to remove from the carder. I’m hoping this blending of colors will resemble a sparkling rose petal, when it’s felted.
Just before finishing, I carefully add additional blended fiber directly to the drum for added interest to top of the felt.
This is the batt, once removed from the carder. Pretty petals on the ready!

The beauty of using my drum carder, is no need to lay out, and layer the fiber. A definite plus for working with groups. We covered the tables with clean hospital blankets instead of using towels…when in Rome, use what’s convenient. We set up each place with the following (bottom up) 1. bamboo mat, 2. bubble wrap – bubble side up, 3. thin fiber batt, 4. piece of clear plastic off to the side.

Starting from bottom left (moving clockwise) photo shows thinness of batt about 1/2 inch – batt laid out, ready to go – covered with plastic, wet down, air pressed out, and light circular rubbing.

The residents did each step the best they could. We had to help a few with rubbing, after a while, but by that point a few aides dropped by. They were curious, when they saw all the people, crowded in the crafting area. Their help allowed us to move on to rolling. Everyone rolled at least a little: good movement exercises. After rolling was finished, we took everything away, except their bamboo placemat. We told them to “wash their windows” and they rubbed a bit on the placemat. The best part came next: after rinsing the first piece out I demonstrated “whopping” the piece on the floor. Big smiles came out of hiding! Many couldn’t manage that, but the aides sure had fun, obliging in the process. There were good times had at the the craft table last Friday. The best part was my Mom beaming, with pride, and telling everyone I was “a pretty good girl,” when someone asked a question. Mom was having a good day, and knew who I was. I will take that memory with me forever…as I break away from typing to shed a couple tears.

These are the real photos of felt made by the residents. We will begin making flowers tomorrow, after this article is published.
This is the felt I made for this article. It’s absolutely gorgeous in person.

I’m looking forward to seeing the flowers, we make with our felt. But mostly, I hope to see a glimpse of the happy faces, that watched me throw that felt at the floor.

Coastal Felted Pictures

Coastal Felted Pictures

I had a few weeks of sales / exhibitions coming up and was rather low on felt pictures so I decided to go on a little picture-making binge.

First an oystercatcher. I’m particularly keen on square pictures but I know some people prefer rectangles, so last time I had a batch of box frames made for me by my friendly local framer, I ordered four large rectangular frames – two finished in oak & two white wood. (Frame size 84 x 64cm / 33 x 25”)

I’m afraid I didn’t take many ‘in progress’ shots of the oystercatcher.  I’d wet felted the bird’s body a little while ago. I then wet felted the background to fit the frame using a variety of pebble-coloured prefelts for the foreground, some incorporating bits of recycled silk scarves. The waves are merino wool with lots of small locks and some sort of tube of knitted yarn designed for scarf-making that I’d picked up in a charity shop.  The patches of sea foam are bits of cobweb prefelt and I also included some blue cobweb prefelt to suggest light reflected from the sky. These were added to two base layers of pewter-coloured merino with additions in green and mink.

I needle felted the bird into place then needle felted in the eye, beak and legs, using orange prefelt and hand-dyed fine merino wool.

I wasn’t sure what I’d put on the right-hand side of the picture.  I’d considered a second oystercatcher with its back to the sea but there wasn’t really enough room.  I live in Whitstable, in south east England – a town famous since Roman Empire times for its oysters – so thought oyster shells might work well for an oystercatcher.  I wet felted a pair of 3D oyster shells using bits of different recycled wool and silk yarn on the outside and some pearl fibre from World of Wool on the inside.  I like the pearl fibre as it adds a sheen and is presumably made from the insides of shells (i.e. mother-of-pearl) so it seemed appropriate.

I thought it needed another shell so cast about in my stock and found a wet felted mussel shell to add to the collection.  I messed around with the composition a little then needle felted them into place before framing. I now use sticky backed hook strips (like the hook half of Velcro) when framing felt – the hook strip attaches to the mount board and the felt is held in place by the little hooks. The felt can easily be removed without damage or residue if I need to move it or someone decides to reframe it.

Next up I made a very lightly felted cobweb prefelt to use in the next three pictures.

When making cobweb felt I tease out a piece of wool roving rather than laying out separate tufts of wool in a single direction. This is part way through the teasing-out process. I prefelt it very lightly – in fact it’s scarcely more than wet wool – so I can stretch it out as I apply it to a picture.

I then started on Summer Sea. Again a pewter-coloured merino base but with lots of other colours applied in wisps on the surface.

Then a layer of blue cobweb prefelt topped with some white cobweb.

Here’s the final picture ready for framing. I’m happy with this, even though the wisps of colour aren’t quite as visible as I’d have liked.  (64cm / 25” square)

Next picture is a single wave. I start with 4 layers of pewter merino for the sea area and two layers of natural white for the wave and beach.  In the past I’ve forgotten to take into account how much extra material goes onto the wave and beach. If I have 2 layers for the whole of the base, the sea part shrinks a lot more than the rest.

First I added some lighter grey/blue merino on the sea alongside some strips of darker blue cobweb prefelt. Then some cobweb prefelt in front of the wave to suggest water from a previous wave. Next I layered on broken baby alpaca top, mohair, silk hankies, wool locks and wool burrs to create the wave itself. I’ve also put a few strands of silk on top of some of the background waves and the wet-look front area to create sea foam.

Here it is from the side so you can see how high that wave is piled!

And here is the final picture.  I spent a while when it was dry picking up some of the wave elements with a broken felting needle to enhance the 3 dimensionality of the wave before framing it. (64cm / 25” square.)

4th and final picture was a smaller one (framed size 43cm / 17” square) called ‘Choppy Sea’.  Base layout is pewter with highlights in green and mink, with sections of blue cobweb prefelt and silk hankies for wave tops.

Here it’s felted and dry, sitting on top of its frame waiting to go in.

Again, I’ve used a broken felting needle to tease up the silk hankies that make the wave edges to enhance the depth.  And here is a view from a low angle to show the 3D.

So, that’s how I’ve been keeping myself busy recently.

To end with, a few shots of these pictures in situ in a gallery.

These pieces didn’t sell in this week-long exhibition but some older work did – which is a great result for me. I like to live a while with the new pictures so we get to know each other but prefer older things not to hang around for too long! However, the last week and a half I’ve been in the beach hut gallery in my local harbour and yesterday both the oystercatcher and the single wave found new homes, which made me do a couple of very happy ‘shop small’ dances.

If you sell your work do you also get that ‘I’m not ready to let it go’ versus – ‘ok, you need to find somewhere else to live’ feeling?

Almonte Fibrefest and Demoing

Almonte Fibrefest and Demoing

As Ann was saying, last weekend was the first Almonte Fiberfest since 2019.

 Almonte is a small town about 30 minutes from the west end of Ottawa. In 1818 David Shepherd was given 200 acres (0.81 km2) to build and operate a mill. However, it did not go well, there was a fire and Shepherd sold to Daniel Shipman by 1821, who rebuilt the mill. In 1866 the Rosamond Woollen Mill was built to manufacture fine tweeds.  By 1850, the area had seven busy woollen mills and was one of the leading wool cloth production centres in Canada.

1) Rosamond No. 1 Mill is now a condominium

2) Left the old mill Right the Annex

3) Mississippi Valley Textile Museum Entrance

The last textile mill closed in the early 1980s. By 1987, Rosamond No. 1 Mill was empty and was considered for a textile museum. The main Mill building was located by the lower falls. It was a large, six-storey, flat-roofed, stone building. The second building was the last of the outbuildings and referred to as the Annex which had housed the mill’s office and large warehouse space. It was a stone building on two floors, both of which could be reached from ground level (it was built on a slope). It was decided that the Main mill building would be renovated into condominiums and the Annex would be the new Mississippi Valley Textile Museum.

Over the years the building has been updated with HVAC, an elevator and even bathrooms! A large number of volunteers and small staff support and run the museum. It contains a gift shop, permanent exhibits and gallery space. One of the fundraising activities to help support the Museum is the Almonte Fiberfest. (See I did get back to the point eventually!)

2022 was the 27th Annual Fibrefest. Originally held in the Museum, as the number of vendors grew larger it expanded to include other locations, now it is located in the Almonte Community Centre (arena). This year there were 69 booths (about 30 booths smaller than in 2019). The smaller number gave a wider aisle and made the arena feel less crowded. Workshops were again offered but there was no cantina this year.  While twist fibre festival was, quite noticeably, heavily loaded with knitting yarn, Almonte was more diversified having both finished goods and supplies for many of the fibre arts.

Let’s have a very quick look around then head out to see the demos.

4) Three booths with felting supplies or finished felting for sale (FiberCraft, Wendo and Starbright Curios)

This slideshow requires JavaScript.

5-15) A Few Shots from Booths

Outside the arena, there were various fibre arts guilds and groups displaying or demonstrating their skills. (spinning, knitting, weaving, rug hooking, lace making, smocking and quilting).

16) West Carlton Fiber Guild (the guild just to the west of Ottawa)

 17) The Ottawa Valley Guild of Stitchery

18) Home Hospice north Lanark Comfort Crew

19) Ottawa Knitting Guild

20) Ottawa Rug Hookers Guild

 21) Ottawa Guild of Lacemakers

The arts collective Out of the Box was there but I cannot find their photo. The Smocking guild is usually there but I don’t remember seeing them this time.

22) Ottawa Valley Weavers and Spinners Guild Demo (Sat.)

Not forgetting of course is the demo for the Ottawa Valley Weavers and Spinners Guild that Ann was participating in. We had different volunteers on Saturday and Sunday, so the table display changed each day too.

23)  Part of table display on Sat and Sun

24) Pine Needle Basket Demoing

25) Part of the Sunday demo Team

Demoing is a great way to introduce the public to something you enjoy and are passionate about. It allows the public a chance to connect and possibly join your group. We have also had people ask if we take donations of books or equipment, which can help the group.

You don’t have to be an expert to demo, you don’t have to know all the answers. If you don’t know the answer to a question you can ask them to contact the guild website or Facebook page or you can ask one of the other demo people if you are in a demo team.  It’s often good to have a new weaver or spinner or felter who can say “I am just starting, this is fun, you can learn this too!” it’s important to smile and look like you’re having fun, scowling at your work is not conducive of others wanting to join you in your endeavour!

One thing I have enjoyed over the years demoing is hearing people’s stories of their mother or grandmother or Aunt who spun or wove and the descriptions of their equipment. In Almonte, I have heard stories about working in the textile mills from some of the older people attending demos.

Demos don’t have to have to be planned events with lots of people and a display table.  You can find yourself demoing when you thought you were just using your drops spindle waiting in a slow line, or needle felting while waiting for a doctor’s appointment.  If your guild or group has business cards with your web contacts keep some with your spindle or felting to hand out to anyone that seems interested. The stranger you give a card to may be a fibre friend in the near future!

If you get the chance, I hope you will try demoing, either a formal demo or a spontaneous accidental demoing. Both are fun! Keep Felting!

A little spinning

A little spinning

I really haven’t done much of anything since I did the jellyfish. I did go to help with a Demo at the Almonte Fiber festival last Sunday. It was so lovely to get out to an event and a demo. I have missed doing both of these the last couple of years.

I am sure Jan will show you many pictures of the event as she is the official photographer. So I will only show you my end of the display table. well for the first half of the day. Then the other felter left and a weaver arrived and my end of the table worked better so I moved to the other end of the table and didn’t take a picture. Jan will have. Yay Jan!

It’s messier than I remember someone must have been looking at it. That’s a good thing. and then of course I put my spinning down in the middle of it and took a picture.  The basket and flax and silk and cotton are Bernadett’s and were not quite that hidden from the front.


At the demo, I was using my drop spindle. I spun up some rolags I made with Wool from Bernadette and some saree silk.

That’s really all I have done lately. So here are some of the rolags I have left and some of the spun yarn.


These are two I spun earlier that still need plying. It’s fun to see how the different colours of sari silk affect the same colour wool.

Next, it’s the green wool, with different sari silks.


That’s it for now. I hope to do some felting before my next post but you never know it might be more spinning.


100 Day Collage Challenge

100 Day Collage Challenge

My local art group doesn’t meet over the summer but we decided to do a collage challenge. The challenge was to create a collage every day using at most 3 pieces of paper and to only take 12 minutes to create the collage. I started the challenge on May 24th and reached my goal of 100 days on September 5th. The hardest issue I had with the challenge was the time restraint. Even with choosing my paper in advance, I had a hard time completing a collage in 12 minutes. So I ignored the time limit but tried to keep it under 30 minutes. No waffling around on how it went together.

Today, I’m showing you some of my favorite collages. There were some that turned out good and others, not so good. But it was a great way to work on color studies, composition and to do something creative to start out my day. If you would like to see all 100 collages, you can check them out on my Instagram account here:

Ruth Lane Instagram

In case you’re wondering, I have a huge plastic tub filled with paper that has been gelli printed, screen printed, hand painted, printed with block prints and whatever other techniques I have done in the past. So I have a wonderful source of papers to use for collage. If you are thinking of trying this challenge, you can use whatever paper sources you have. Many artists use magazine photos, open source online photos, wrapping papers, or whatever they have on hand.

So here are a few of my favorites. You can click on the photos to enlarge if you’d like to see them closer. I had a great time searching through my papers and creating a different collage every day.

Have you tried this type of daily challenge? We’d love to see your results and hear about the challenge. Let me know if you’d like to write a post about a challenge you have participated in.

And speaking of challenges, our third quarter challenge using botanicals as a theme is over at the end of this month. I think a few of my collages meet the guidelines! If you have something botanical to share for the challenge, please submit your photo here.

Spinning for Pots

Spinning for Pots

I confess I have not been able to make much felt this month, I have started a new bag using some gorgeous Gotland hogget (1 year old) locks that have that beautiful graduation from black to white that is characteristic of Gotland lambs wool. This lamb wasn’t shorn in its first year so the locks are unusually long for “lambs” wool. More on that bag in a later post.

I have been spinning, this is 2 skeins of merino “singles” that I dyed after spinning:

This image has an empty alt attribute; its file name is IMG_0011-copy-1024x799.jpg

And here they are plied together, I am liking the berry colours but struggling to decide which pattern to use it on, I am thinking a pair of gloves but I found several patterns in a crochet book that I like….

This image has an empty alt attribute; its file name is IMG_0047-copy-1024x594.jpg

This was some core spun art yarn, that I am planning to use for some twining (weaving):

This image has an empty alt attribute; its file name is IMG_0015-copy-1024x907.jpg

On top of this pot:

This image has an empty alt attribute; its file name is IMG_0026-copy-1024x835.jpg

This pot was a bit of a learning curve from a glazing perspective, as you can see, the holes I carefully created should have been cleared of glaze before firing. I have managed to fix it with a tile drill but would have preferred the smoother edges of glaze at the edges of the holes.

I have been making quite a lot of pottery this month, including several lidded pots, all of which were the subjects of some glazing experiments…..

This one has 3 different layers of my favourite glaze combination (it gives a bluey-purple through to crimson red colour with pretty pink spots) with some wax over red underglaze:

This image has an empty alt attribute; its file name is IMG_0038-copy-705x1024.jpg

This one is a type of scraffito, where you paint on layers of different coloured clays and then scrape areas aways to reveal the layers underneath. The colours in this photo are not very accurate, they are actually black, lemon yellow, brick red and cream:

This image has an empty alt attribute; its file name is IMG_0040-copy-690x1024.jpg

This shallow bowl with a cat design was another experiment, to see if I could paint with coloured clay slip (a watery version of clay). I painted the image on clear plastic sheet in black and let it dry so the colours would not mix but that caused all sorts of problems, not least, the black slip cracked and broke up making it very difficult to add the other colours. The bowl is not a total disaster but I have some other ideas on how better to approach this technique in future.

This image has an empty alt attribute; its file name is IMG_0036-copy-1024x1001.jpg