Browsed by
Tag: mixed media

Third Quarter Challenge 2014

Third Quarter Challenge 2014

I have chosen (Oscar) Claude Monet as the artist for the challenge this quarter.  He was born in Paris, France in 1840 and died in Giverny, France in 1926.

MTIwNjA4NjMzOTE3NzY5MjI4Monet was named the creator of “Impressionism” because he was more concerned with light and form than realism.  The painting that inspired the name came from his painting “Impression, soleil levant (Sunrise), 1872,  which now hangs in Musée Marmottan Monet,Paris.

Impression, Sunrise 1872

He preferred outdoors to school and amassed a huge body of work based on studies of various landscapes at different times of day, season and weather conditions to study the changes in light and form.


Japanese Bridge 3
Japanese Bridge 3
Japanese Footbridge
Japanese Footbridge


Like many artists of his time, Monet suffered from depression, poverty and illness.  However, it never dampened his passion for his work.

My only merit lies in having painted directly in front of nature, seeking to render my impressions of the most fleeting effects.”
—Claude Monet

Sunflowers The-House-Seen-From-The-Rose-Garden2-small


Claude_Monet-Madame_Monet_en_costume_japonais Claude_Monet,_Grainstacks_in_the_Sunlight,_Morning_Effect,_1890,_oil_on_canvas_65_x_100_cm

There are several good sites of his work, but this is probably the most comprehensive,  cataloging over 1700 of his works.  http://www.claudemonetgallery.org/

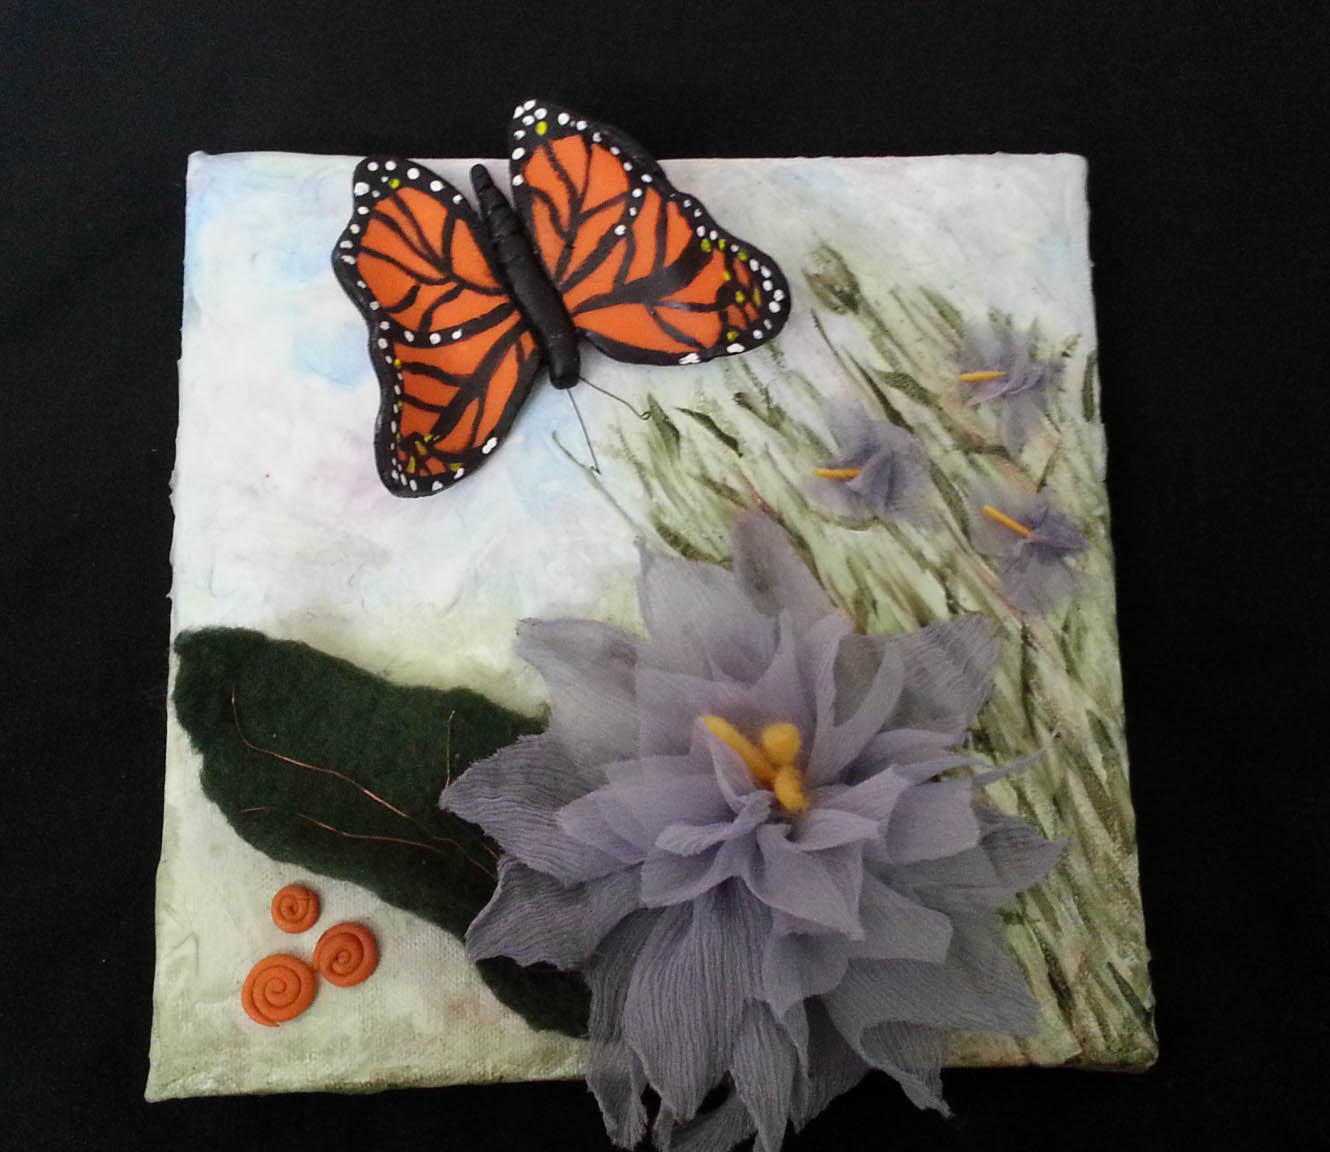
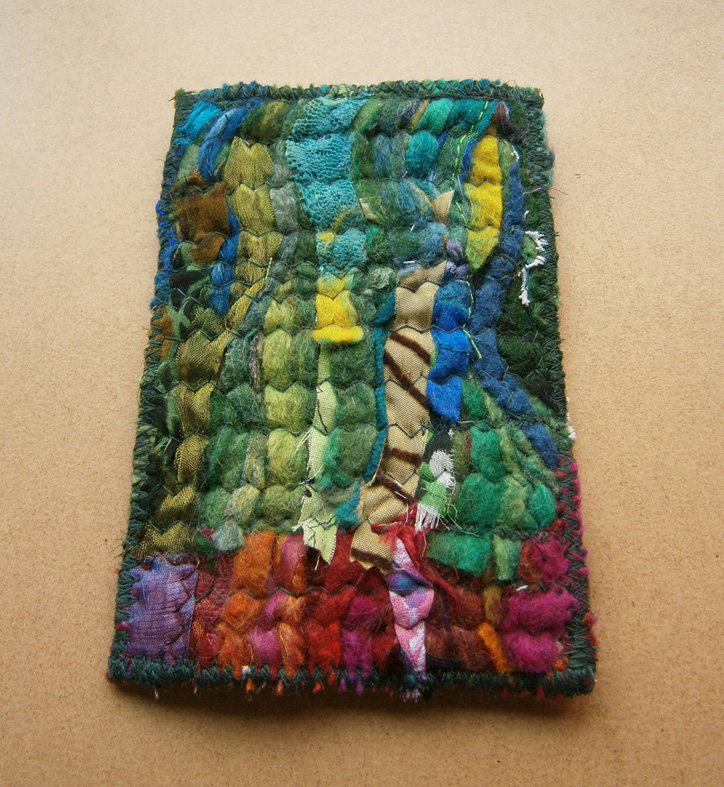
There are many repeating themes in his work and also a wide variety of styles throughout his long career as his style evolved.  I think there is something for everyone and a lot of it will lend itself nicely to felting and mixed media.

claude-monet-irises-detail Claude-Monet-Water-Lilies-38-Oil-Painting claude-monet-the-artist-s-garden-at-giverny-c-1900


Still-Life-With-Pears-And-Grapes-small cliff-near-dieppe

Happy creating!

Remember to post your challenge pieces on the forum: http://feltandfiberstudio.proboards.com/board/18/studio-challenges


Around the Web

Around the Web

felting around the web 4

http://jill-harrison.webs.com/apps/photos/photo?photoid=165390738

http://gifeltro.blogspot.ca/2013/10/unaltra-grande-fatica.html

http://feltingannie.blogspot.ca/2013/09/working-on-felted-landscape.html

stitching around the web

http://anajskreativestagebuch.blogspot.ca/2013/09/filz-fur-tanja.html I had a hard time deciding where to put this it is great felt but the stitching is such a big part of it.

http://dogdaisychains.blogspot.ca/2013/10/prettiness.html

weaving around the web 300

http://www.ingedam.net/gallery.html she does card weaving on her loom as part of a loom woven piece.

mixed media around the web

http://red2white.wordpress.com/2013/10/04/leaf-press/

spinning around the web

http://www.spinartiste.com/can-you-spin-this-suzanne-corriera-says-sure-thing

surface design around the web

http://alisaburke.blogspot.com/2013/10/my-new-line-of-accessories-and-giveaway.html

Fourth Quarter Studio Challenge

Fourth Quarter Studio Challenge

I’ve spent the past couple of weeks trying to think of a theme for the last Studio Challenge of the year. I still hadn’t decided last night when my girlfriend suggested ‘Monochrome’. I loved this idea because being restricted can really challenge you to think, but then I remembered that some of us had done a monochrome challenge a few years ago, it might even have been a challenge of Ruth’s. So after a bit more thinking … about maybe one particular colour for a monochrome challenge or maybe a section of the colour wheel, I started thinking about shades of burgundy, red, orange and yellow and thought ‘Autumn!’. I know for some of us, it’s only just started, and for some of us (yes, Kaz!) it’s been and gone, however you feel about it, it always has interesting things to offer in terms of colours and the life cycles of plants.

So the Challenge is, to make something (or as many things as you like) using felt, fabrics and/or fibres in whichever medium you like, with the theme of Autumn. Maybe an autumn sunset will inspire you:

Autumn (6)Autumn (5)Maybe the leaves on the trees turning citrusy yellows and greens, or the crunch of the dried brown leaves underfoot are what you think of for ‘Autumn’.

Autumn (1)Maybe you’re influenced by the gorgeous reds, oranges and yellows making trees a blaze of colour.

Autumn (2)Maybe Autumn makes you think of hibernation, damp and decay?

Autumn (3)Or maybe the leaves or plants themselves will become part of the piece?

Autumn (4)Have fun and don’t forget to share photos of your work with us if you join in the challenge 🙂  You can add photos to the Studio Site Flickr Group, tag your photos “4th Quarter Challenge 2013 Autumn”. You can also post a link to your blog or website in the comments on any of the Challenge blog posts, and we’d be happy to include your work in the Challenge Gallery. If you’d like to write a post about it, just use the form on the Contact Us page 🙂

Third Quarter Challenge – Marilyn’s Entry

Third Quarter Challenge – Marilyn’s Entry

Today’s post is by Marilyn Nelson (Pandagirl on the forum).

MNelsonchallengeoverviewThis was definitely a challenge for me since it was my first time using acrylics, modeling paste and curing modeling clay. I’m also more into abstract than realistic representation.

For some reason I was fixated on doing a butterfly (probably wanting to hold on to summer).  So, I worked on the butterfly first.  There were several renditions in silk and clay, but I ended up using the first clay one which I used wire between layers to bend the wings making it dimensional and painting both sides with acrylics. The antennae are wire.   A silk butterfly would have been even better, but I couldn’t figure out how to paint it like a Monarch.  I tried, but wasn’t happy with the results.

While I worked on the butterfly the rest of the picture seemed to come together.  I covered an 8×8″ stretched canvas with modeling paste and created a textured sky and meadow with a palette knife.  After it was dry, I began layering acrylic washes to intensify the dimension. However, after painting the texture wasn’t that obvious.

MNelsonChallenge side view 2

The bottom of the crinkled silk flower was left over from a failed felting experiment.  So, I cut another small piece to fill it out.  The stamens of the flower are yarn.  The leaf is prefelt that I felted a piece of wire on one side to be able to give it flexibility to form it.  Then I used copper wire taken from the ends of wired ribbon to make the veins in the leaf by running it lightly in spots through the felt to hold it.

I used the cut outs from the silk to make the smaller flowers. The orange spirals were a last-minute addition from left over clay I was playing with.Of course, I had to figure out how to attach everything.  I used a combination of modeling paste, acrylic medium and Mod Podge. (Not mixed together.) 🙂

MNelsonChallenge side view

I’ve included a couple of views to show the dimension of the piece.  I hope you can see the details.  I need to work on my photography skills.

Karen, a special thanks for posting the challenge and to all the members who have encouraged me to join the fun!  I had a great time and learned a lot.  I’m looking forward to the next challenge.

Marilyn Nelson


3rd Quarter Challenge Finished Pieces

3rd Quarter Challenge Finished Pieces

I worked on my mixed media pieces for Karen’s 3rd Quarter Challenge this week. The first piece I worked on was the smaller board with lots of folded and creased scrim on. I started by painting the background with some blue shades of acrylic paint.

OLYMPUS DIGITAL CAMERAThen I layered lots of shades of blue and white, then finished with some details of black, white, yellow and red. This is the piece just after I finished, while it was still wet.

OLYMPUS DIGITAL CAMERAAnd this is it when it is dried. You can’t really see the texture in the photo, but I’ve uploaded it to flickr, so you can see the texture of the scrim and the detail better.

OLYMPUS DIGITAL CAMERAHere’s a supermacro of a small part which does show some of the texture.

OLYMPUS DIGITAL CAMERAOften when I work with acrylics, I need to wipe off excess paint, so I keep a spare painting board nearby to wipe the paint on there. It makes a great base for another painting. This isn’t really part of the challenge, but I painted it just after the blue piece. It’s mostly the same colours, but in different amounts.

OLYMPUS DIGITAL CAMERAAnd a supermacro:

OLYMPUS DIGITAL CAMERAThe second piece I worked on was the larger board with 2 layers of scrim. It did turn out the way I’d planned, but didn’t look as good as I’d imagined. I painted a light grey in the centre and dark greys around the edges. Then I covered some laser prints of artwork in Golden gel medium and stuck them face down on the surface. When they were dried the next morning, I wet them and carefully rubbed off the backing paper to reveal the prints. I covered in gel medium then painted reds, oranges, yellows and whites around the edges. I don’t think I got enough paper off the bottom print. I might carry on working on this, I think it needs something else.

OLYMPUS DIGITAL CAMERASorry, Kaz, I couldn’t think of a way to add metal, there’s a little bit of silver acrylic paint on the blue one, though 🙂  Has anyone else made anything for the challenge?

Third Quarter Challenge – Lyn’s Entry

Third Quarter Challenge – Lyn’s Entry

Today’s post is by Lyn from rosiepink

Yacht Heeling
Yacht Heeling

I enjoy the Studio Challenges because they encourage me to try different things.  Karen’s challenge for this quarter is ‘Mixed Media’  and after spending a day on Lepe Beach during Cowes Week, I just had to do a yacht.

My husband likes painting so I thought a joint project would be fun.  I gave him a rectangle of machine-made white felt  (45cm x 33cm /18″ x 13″) and asked him to paint a sea/sky background using water colours.  I thought water colours would look good on white felt, sort of fuzzy and pretty, and it did look good … but as it dried the paint sunk right down into the felt!

He painted the background again… then we sadly watched it fade as before.

We stared at the felt, and had a think, then decided to try watered down acrylic paints.  It looked lovely but we weren’t going to stand by and nervously watch.  We decided to be proactive.  Out came two hairdryers and we blow-dried the watery paint on the felt as quickly as possible.  Success!

I cut a hull and sails from beautifully textured, shiny dupion silk then laid the pieces onto the painted background.  Yuk.  It didn’t look good.  So I tried other ideas such as using scraps of handmade felt and various fabrics.  Nothing seemed to work so I pushed it to the edge of the table and even considered abandoning the idea.

My room was a real mess because I’d got out so much of my stash searching in vain for just the right thing.  I took a deep breath and started to tidy, and that’s when serendipity happened.  A scrap of lightweight interfacing material somehow landed on the painted sea.  It looked good.  It wasn’t too heavy, as the other fabrics and felt had been, it would be easy to stitch into place and I could colour it.

yacht spinnaker in the water - small imageI cut out the shapes I needed then ran ‘messy’ free stitching over the interfacing until I was happy that it looked like a yacht heeling.  I considered leaving the interfacing unpainted (and I wish I’d taken a photo at that stage) because it had a delicacy about it that I liked, but I’d planned on having a colourful spinnaker so I applied water colours to the interfacing.  I used an almost dry brush because I thought that if I made the colours too solid they would overpower the background.

When I’d finished, my husband added a little more white acrylic paint to the bottom of the spinnaker and the hull of the boat.

I liked working on the joint project but it wasn’t easy on my ears.  My husband sails so he felt obliged to impart his knowledge by frequently pointing out that my stitching of the yacht wasn’t anywhere near technically correct!

Thank you Karen – I’ve benefited a lot from your challenge.

Third Quarter Challenge :)

Third Quarter Challenge :)

New Quarter Challenge

How times fly’s 🙂

I was unsure what to do with this next quarter challenge and as most of everyone here are felters or fibre artists I was having a lot of trouble coming up with a challenge that would be fun

So sorry but naturally I choose mixed media and I’m really hoping that you will give this a go

I’ll kick it off with my latest project and we’ll go from there


vines1

This was made on a canvas that I wanted to look like an old bit of wood, so I first gesso’d, then used modelling paste and heated it up, (heaps of fun)  followed by a couple of light washes of burnt umber paint, highlighted with a greeny blue paint  to represent mould and white gesso, I attached some old rusty wire then  cut out some fabric for flowers and leaves.  I then made some felt stems which I  paverpoled to stiffen,  painted the flowers and leaves after I laid them all out on the canvas,   added some silk spiderwebs and secured them with a spray adhesive and couple of metal spiders that I gesso’d black, can you find them lol being black their very hard to see but trust me, their there lol

vines2

vines3

Im really happy with the way this turned out and I was thinking that this quarter it could be a mixed media piece using a combination of things and making it 3D, if everyone is up for it 🙂

So the challenge is to create something on a background using at least one element from the 3 different catagories. It has to be on a background or canvas or anything else you can come up with and include

         1 –  Felt, Fibre, Fabric, Yarn , threads ect,

 2 –  Metal, wire, mesh, rusty bits  ect

       3 –   Paints, gesso, modelling paste, paverpol, or wood glue ect

I hope you’ll find this a fun challenge and be happy to play along xo


Mixed Media Piece From Felt Scraps

Mixed Media Piece From Felt Scraps

Last year I was talking about sorting my felt and fibre scraps into categories. I sorted my felt offcuts by size ranging from long and wide to short and narrow. This photo shows them. I was trying to work out what to do with the smallest pieces. I wondered how it’d look if I just pushed them close together on top of a piece of fabric and sewed them into place. So, I tried. I started in the centre with some red pieces, and they worked alright, so I added more. I kept to similar colours and added some pieces of fabric too because I liked how the nuno felt pieces looked. I also added some art yarns for a bit more texture. I kept adding and sewing until the red section was done, then I worked on the blue part and did the green part last. When it was finished it looked like this:

mixed mediaI kept turning it around, folding it, measuring it. I made sure the piece of fabric I worked on was big enough for a book cover, but the finsihed piece was too thick for that. I turned it over, folded it again and measured a bit more, then decided I could make a book cover out of it if I cut it and used different felt for the inside flaps. So, more measuring, hunting for felt and sewing of felt to fabric. This is what the inside looked like before I’d quite finished the bottom edge:

insideAnd, this is what it looked like once all the edges were finished:

outsideI’m not sure whether I prefer it with the red part on the front:

redOr whether I like the blue better:

blueI had quite a good sized piece left over, and I actually really like the green part the best, so I thought I’d use it for a gadget/camera/phone case. This is one side:

frontAnd this is the other:

backI don’t feel so odd now for saving all the tiniest bits of felt scraps ‘just in case’  🙂

Around The Web

Around The Web

Here’s a few links we thought you might enjoy.

felting around the web 4

http://kirstenhouseknecht.blogspot.ca/2013/03/nuno-felted-kimono-project.html

Renatos Eyeglass Case

mixed media around the web

This link has some fiber related tutorials but so much more that is interesting. http://www.howtohistory.com/video-tutorials/

Coiled Basketry by Tiger C

http://www.fibermixedmedia.com/

Michelle Mischkulnig’s Fiber Art

Kathleen Vance’s Traveling Landscapes

stitching around the web

http://www.doilyfreezone.com/premysl-knap-4/

Ann Wood’s Bloomer, Bloomer and Bloomer

dyeing around the web

Vicki’s Dyed and Painted Shower Curtain

More Progress

More Progress

Another progress report on my mixed media journal for Rainy

So we’ve gone from here last week

book2

I played around with the colors that much it wasn’t funny lol  but when i was sort of happy with it

rainys1 I  covered the whole thing Bitumen and waited for it to dry

rainys3

 then its rubbed back with white spirits to reveal the colors underneath and some foil

Once it was wiped back I still played with the colors but all in all im generally happy with it

The bits that look like little white pieces are actually the foil coming through, in person it looks so much better and the foil showing makes it look pretty cool, I wish i could take a better photo so it would show up better,  I really hope she likes it !!

rainys2

Then of course I had to try another one, so this is the first parts of laying out something, still no design as I was just playing,

1piece

I also added folded up foil like a pleat and some fibre, then paint in greens and blues with a bit of white and yellow.

After the bitumen was rubbed back this one revealed so much more foil that it looks pretty cool, and I really like the colors . but which way is up lol  ???

which way2

I know it doesn’t really matter right now. but i do want to make something with a purpose soon 🙂

which way1

This next one is for another very close friend ( Mary) to record her dreams  and called Dream Time ( orginal hey !  )  I’ve added those colored stips to see what will happen when I use the paint, bitumen and spirits, i’ll do much brighter colors for our  colorful Mary lol  and  i’d like to try to add some silk in with this one as well so we’ll see how it turns out. So far i’ve use foil !  tiny little bells, it might give a tinkle now and then lol, some foam and other beads and of course a key 🙂 i’ll try to add some silk over the butterfly.

marys

So that’s my week,  I really hope your all enjoying yours !!!