We’ve chosen 4 decades from the 20th century upon which to base the challenges for 2021, and the second challenge to all felters, spinners, weavers, stitchers, knitters, crocheters and mixed media fibre artists is …
… to make something inspired by the decade 1920 – 1930.
The ‘Roaring Twenties’ is well worth investigating for inspiration – here are a few photos to whet your appetite.
The ART DECO movement originated in the 1920’s – a style featuring clean, simple shapes – and it influenced design in arts, architecture, fashion and homewares.
Clarice Cliff was a ceramicist and is best known for her colour rich, Art Deco designs. This ‘Crocus’ cream jug was made in 1928.
The Chrysler Building in New York was designed by William Van Alen in the Art Deco style and building work started in 1929.
Chrysler Building (commons wikimedia)
Chrysler Building Lobby (commons wikimedia)
FLAPPERS
Quote from Wikipedia “Flappers were a generation of young Western women in the 1920s who wore short skirts (just at the knee was short for that time period), bobbed their hair, listened to jazz, and flaunted their disdain for what was then considered acceptable behavior.” Unquote
Who hasn’t tried to dance ‘The Charleston’? This is Josephine Baker dancing at The Folies Bergere, Paris, in 1926.
Josephine Baker (commons wikimedia)
HATS
Cloche hats were fashionable in the twenties and today people still felt, knit, crochet and stitch them.
left to right: Actress Aileen Pringle 1926 / Actress Vilma Blanky 1927 / Actress Joan Crawford 1927 (commons wikimedia)
PAINTINGS
The 1920’s saw many different styles of art.
‘Wisteria (right half)’ by Claude Monet 1920 (commons wikimedia)
‘Menin Gate at Midnight’ by Will Longstaff 1927 (commons wikimedia)
‘New York, Early Twenties’ by Thomas Benton, 1920/24 (commons wikimedia)
‘The Bridge of the Tug Boat’ by Fernand Leger 1920 (public domain)
We hope you feel inspired to take part in this challenge – please post your photos in the Studio Challenges section on The Felting and Fiber Forum, we’d love to see them.
Spinners who participate at demonstrations hear this question all the time. After washing, dyeing, carding/combing then spinning the most delicious yarn in the world, we have to do more? Isn’t this enough? Apparently there is an expectation that all our lovely yarn has to be used for something else. For years that wasn’t my problem; that was left to the devices of much more talented weavers, knitters, felters and other fiber artists. This was when we had fiber festivals and gathers of like minded people who could touch yarn and evaluate the grist for their next project. To my great surprise, I can spin a lot of yarn in a year.
During one of the relaxed periods of lock-down I was able to buy a lovely little loom. It was a Leclerc Mira, 27 inch, four harness, sectional beam. This little button came with all the bells and whistles – warping mill, bobbin rack with bobbins, electric bobbin winder, skein winder, shuttles, extra heddles, reeds, counter, the list keeps going and going. I was truly blessed to find this loom. It did come unassembled without instructions. That is a crucial bit of information. User manuals are easily found on-line with very good information. Kudo’s to Leclerc for providing customers throughout the ages all the information they need to maintain and care for these lovely machines.
This is some of the Cotswold I used for the scarves
Like most of the world we were in lock-down of one sort or another, but at one point both my son’s were allowed to be in my home as long as I wasn’t, so they took the opportunity to come and set up the little darling for me. Well, that was the intention. The reality ended up with an attempt to sort out the messy meccano set called a loom, define the parts, try to read instructions, etc. that ended with one of them saying “nuts to this, I’m going to start supper and clean the bathroom”. When I got home, supper was on the brew, the loo was clean and one son was struggling with a partially assembled machine. We finished it together. Pear is a shape, and it is not a good one when skittering around under a small loom. Skitter may not be an accurate description either, but you get the idea. I’m too old for this sort of activity.
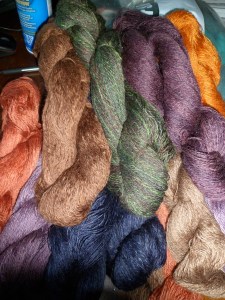
Cotswold is one of my favourite breeds and I had a lovely selection available for my first try after a long break from weaving. Several decades ago my then sister in law coerced me into taking weaving and spinning at the local college. I loved it, she did not. Once coming to this area, I was competent enough to be hired as a production weaver for a local artisan. We used sectional beams for warping and I prefer them to using a reel. The only draw-back for a sectional beam is the need to have individual bobbins for each thread. So if you are weaving at 10 threads per inch you will need 10 bobbins with enough yardage for the length and width of your warp. I really needed to crack out my math skills again. Thankfully, all the Cotswold I had spun, had yardage marked on the skeins, so I was confident that I had enough to use. I was going to make scarves for my sons.
I measured and did math and wound bobbins, redid the math; worried that I hadn’t done the math properly, so redid it and finally took the plunge.
Sectional beam getting ready to go
The weave pattern was a very basic twill. I just wanted to get back to learning how to do a full loom set-up again. The bonus would be having something useful to show for it at the end of the process. The idea of purchasing fiber to do this also seemed a little weird since my house was getting full of spun yarn.
Final warp, all ready for weaving
Taking the plunge and using my own hand spun was a significant eye opening experience. The wool I chose was just too rough for the final product of scarves. My sons are kind and tell me the scarves are warm and snuggly and all sorts of appropriate compliments, but the material feels a bit like kevlar.
I am now more aware of producing fiber with an end purpose in mind, not necessarily for me, but for other people as well. If I design the yarn with intent for an end use, I can explain to someone else what it will be good for. Some hand spun is not as good for weaving as it is for knitting, and some hand spun should never be used for scarves!
I have been working on more samples for the study group, I hoped you might like to see some of my investigation of the heaviest gauge of aluminum wire (6ga/7mm) we were looking at. It has come to my attention that it is also Palm Sunday. (I am glad I had included Palms in my samples!)
1 Part of the 7mm samples
I know most of us will not be making armatures that would require this gauge, but if you are wanting to make something quite large or you need it to have very strong legs this may be an option for you.
For both the 6.5mm and 7mm wire, I found it helped to wrap the foot loop wire with a layer of wool before I started to build up the foot itself.
The twisting of the 7mm wire required anchoring with the large welding pliers. (These were a fabulous find at Princess Auto. Yes, in the welding section. Did they not know they are well suited to make ninety-degree corners in armatures so should have been in the felt section? Oh right they don’t have a felt section yet.)
2-3 Welding pliers are actually excellent armature felting tools
Here are photos of the 6.5mm wire is being wrapped to form the support to attach the rest of the wool for the foot.
This slideshow requires JavaScript.
4-9 foot development leads to a leg.
With the 6.5mm I used the wire untwisted with no augmentation or secondary wire. While I did not find this particularly challenging I do see that some felters may find the lack of grip on the wire a bit annoying. While the gastroc (calves) at this size were very stable and quite firmly felted the quads did have the ability to rotate slightly. This I did find annoying. I suspect this would not be as much of an issue if this appendage had a pelvis. So if you are making a shape that ends in a cylinder shape you may want to investigate other options than a plain wire.
I would investigate Sara’s wax products to give a bit more stickiness to the wire or try tacky craft glue. Other possibilities to investigate would be Pipe cleaners possibly paired with floral tape if the pipe cleaner was not gripping to the wire itself. I have not investigated the life expectancy of floral tape so I can’t guarantee its longevity.
For the 7mm sample, instead of the open foot loop, I folded back the lower section to make it doubled to the patella (knee). This made me thread the short section of roving I was working with through the foot loop to cover the wire. It was a bit fiddly but was worth it to have a base from which to build the foot.
10-11 closed loop to foot harder to wrap but worth the effort.
The lower leg to knee was very easy to wrap. Remember when you are adding the wool in thin layers to make sure that when you start to get close to the end of the fibre spread it out so it’s quite thin and work back over what you have already applied. When you get to the end of the fibre keep turning the appendage as if you were adding more fibre while rubbing and smoothing the fibre you had just laid down. If your application is firm and built up in thin layers you will have very little needle felting needed to get this under layer to stick to itself. The preparation of the fibre will also make a difference, stripped batts work better than top but top will work. it’s just a bit harder for this particular application.
When I had completed the appendage, I found that there was even greater rotation in the larger gauge wire. This may have been due to the under layer being a bit looser than I could have wrapped it. I did a second sample and yes the quad still had a bit of rotation but not as much as the first sample. So I suspect part of the rotation is a looser under layer. I have made a sample with a pipe cleaner wrapped around half of the appendage and will see if that reduces rotation but I will get back to that one later.
12-13 next sample to address the problem in quad movement
Leaving the legs for a moment, I went on to the next sample, which was a hand with wool. This I consulted the bare wire samples I had taken for each gauge. After consideration, I started with the 20ga hardware wire (steel) from Dollarama for the fingers and 6ga for the palm and forearm. Unfortunately, that sample made like the hand from the Adams family and the thing crawled off. (I am sure IT will return the Thing shortly).
14-15 consulting the wire samples
To make the fingers I used Sara’s “Digit widget”. I have previously used my tapered mettle seed planting measuring guide for little fingers on my mice and the mettle ruler for the fingers on the Mer’s.
My second ample was 20ga aluminum from AliExpress for the fingers and 6ga for the palm and forearm.
This slideshow requires JavaScript.
At this point, the weather outside had stopped raining and we had a break. During which I rushed (ok, slow shuffle) outside to attend to the overflow for the rain barrel that had come adrift as well as fill the bird feeders. (I got scolded by a chickadee as soon as I stepped out of the door!!!) . I got three tomato pots and one tree moved from the front garden, where the pots over winter, to the driveway. Then my back said, “Are you nuts? Did you just move a potted poplar tree? Well, we are not moving the next one!! We are not doing anything that requires sitting or standing for at least the next day!!! If we don’t decide to yell at you longer” so I crawled back into the house took off my boots, by this point that was a big accomplishment and crawled into bed with a hand, one needle and a small baggie of wool. So, I apologize for not grabbing the camera, so it would be in reach to document the finger creating. Thus there is a bit of a jump in photos while I am adding wool to the fingers, palm and then to the wrist.
This slideshow requires JavaScript.
19-21 (the Palms of Sunday) the wrist still needs a bit more work, but the palm is close
I am not quite happy with the hand yet. I think I would be having an easier time with scale if I had been building from the arm down as I usually do with full figure sculptures. This way I am trying to guess the forearm thickness to match the hand to. I found the aluminum is a bit soft but may be able to stiffen it a bit more by more felting. There is enough grip strength to hold the felting pen without dropping it. But I would like it to be just a bit stiffer. Therefore, I may investigate shifting to a stronger type of wire or a heavier gauge of aluminum since the fingers are still quite thin at 20ga aluminum. I will find the 18ga aluminum and try that next.
We had a quick trip out to Rona to look for pot saucers (no luck) and while there, I checked out their wire selection. I picked up a brass and a copper as well as another un-coated aluminum. The new wire seems to be hiding in the car may be under the big bag of potting dirt Glenn put in the back. Once I find them, I will make samples and add them to the collection.
The 6.5 and 7mm would be a gauge to investigate if you were building a 3D picture that needed a supportive tree trunk or branch something would be hung from. You will need reasonably strong hands to work with it especially if you are working with it doubled. If you have a desperate need, you may consider a bench vice and substantial pliers to assist you in the wire twisting (no wimpy pliers for this gauge!). Glenn has a cool blacksmithing tool called a bending fork but I do not think I want to stick the aluminum in the forge! He also has a couple of jigs for bending “S” hooks which might be fun to play with. There is also a large leg vice sitting by the “small” anvil. I will let you know if I sneak out and play with his tools.
I haven’t had much time for felting with the puppy and lambs. I did manage a little spinning.
I got some nice tweed roving from World Of Wool. I think they will make nice hats and accessories. Then I wanted something to spin so I thought I would try these.
This is the pink. The dark flecks are viscose. It drafts nicely and makes a really nice yarn.
And the grey. Over-dying them might be interesting too. The viscose won’t take the wool dye.
They were both nice so I thought I would try combining them. I pulled off a thin strip of each colour and drafted them together. This is the single. I am winding it off the spindle into a centre pull ball so I can ply one end against the other.
and this was the result.
I think I like the two spun together best.
I am a slow spinner. I do it because I enjoy it but I don’t want a lot of anything. I am not making sweaters or even socks. I will use them for some decoration on some felt, probably.
This is is what I am currently spinning, some yellow for the glitzy line at World of wool. It has some super bright triloble nylon in it so it has lots of sparkle.
Yellow, isn’t a colour I have a lot of in my stash but I like how this is turning out. Surprisingly the multi-coloured sparkle tames the yellow. Do you spin? have you thought of it. It’s fun, portable and you can make some great yarns for decorating your felt.
This is a guest post by Ann B, one of our fabulous readers and forum members. She is planning on updating us as she makes progress on her project.
Having decided that I needed (and I do mean needed) to make another picture, I hunted through my design source photographs and fell in love (again) with the picture I took of a horse grazing on a hill in Devon. This was typical Devon, lots of hills and trees and (best of all in my mind) no people or buildings in sight. This is the original picture above. What appears to be sky at the top is in fact distant hills. There is no sky at all in the photograph. I was a little disappointed as I love using silk fibres and neps to produce a realistic sky, but the distant hills would be a good challenge in colour blending and matching. I also felt that the photo was a little dull, there having been plenty of clouds about on the day that I took the picture, so I decided to “photoshop” it a bit to brighten it up.
This is the result. There isn’t a whole lot of difference – I still wanted it to look natural – but you can now
see the fields on the hill right at the back, and in fact I think that there is a building on
the hill on the right. Next I decided that I needed to work on the composition a little. The horse isn’t quite in the best position for either a “Golden Ratio” or a Fibonacci spiral composition. So I took the dimensions of the picture – I would do an approximate A4 size – and I worked out the Golden Ratio figures. I had (I can’t find it now) a book on art which showed how to do this and I made myself an
Excel Spreadsheet with the formulae and formatting which would work out the proportions for me once I had input the height and width measurements.
That would be measurements A-B and A-D on the diagram above. This diagram is not to scale, it merely serves to show where the measurements that the spreadsheet throws up will be. Below is the Fibonacci spiral which largely reproduces the Golden Ratio on one side of the page only. A second, flipped, image imposed on it would produce the Golden Ratio. The Golden Ratio calculations make it easier to get
the right proportions for a non standard shaped “canvas”.
The measurements of my picture are approx. A-B 26.5 cm A-D 20cm so not far off a square. The Golden Ratio figures would then be: A-G 9.9cm; G3-G4 6.1cm; G4-B 10.5cm, across the top and A-G1 6.9cm; G1-G2 5.5cm; G2-D 7.6cm down the side (I usually work in “old money” but it is easier for this purpose to use metric).
In fact I sub-divided the left hand and right hand sections again, drew out the lines on a piece of A4 paper and then sketched in how I wanted to lay out the various parts of the picture. I moved the horse further to the right; I placed the stream on one of the vertical lines; I placed the trunks of the trees on the left onto two of the vertical lines and various other changes of level and subject on or near to intersections of the lines. (This is the composition technique used by Constable in his paintings.) Here is the sketch.
Just to see what would happen I put a tracing of a single Fibonacci spiral on top of the sketch and found that it worked too. The horse was right where the centre of interest should be. The sheets moved a bit when I tried to scan them together but I think you can see what I mean from this:
So now I will sort out my backing felt and start to lay out the picture on it. I had tried to lay out the background colours on some white commercial prefelt and wet felt it but I had overlooked the fact that the prefelt would not shrink as much as fibres from tops, so that was a failure because the size was not right for my measurements. I have therefore cut out a correctly sized backing felt, again made from white prefelt, but of a much larger size so that I’ve got some left over for the next picture(s). I have made a tracing of the sketch and will use that as a template to mark out the placement of the main features by stitching through the tracing. Then I will need to blend some colours and start “painting”. (Click on any of the photos to enlarge.)
The last time I posted here (in January) I described my plan to take various online felting classes. With all my sales and exhibitions cancelled or on hold I thought this would be a good way to keep me focused and motivated during our 3rd pandemic lockdown. Here’s the link in case you want to look back to January’s post.
This time I’m talking about my online learning since then, including how it has led me in some unexpected directions.
I was part-way through Teri Berry’s bag making class, which was great. I made my third bag, a backpack, and am very pleased with it. I’d definitely recommend Teri’s class. The instructions were clear and comprehensive and Teri was very responsive to my many questions, thoughts and comments. I learned a lot about bag making techniques, which is exactly what I was looking for.
Corriedale Backpack with Canvas Straps
Because two of the bags I made are large, relatively thick, and have to be fulled very hard, I admit bag-making was rather harder work than I’d anticipated. I rent a studio in an old industrial building that is largely unheated so maybe mid-winter isn’t the best time to be working so much heavy, cold, wet wool, but it’s a minor point. I had to use plastic gloves for the first time as my hands became so shredded and I often went home with sleeves wet to the armpit!
I’d planned to take 3 classes over January to March but was irresistibly drawn to a 4th: a 2-session live international felt-along by Aniko Boros (Baribon.Hu) learning to make her beautiful felted tulip pendant with pebble inclusions. Having signed up I realised it was going to be difficult to find the colourful 14 micron merino wool I needed. I only had white. I’ve never dyed my own wool before but I thought, why not have a go?
I already had some acid dyes so I started off with some 21 micron merino before going on to the finer and more expensive 14 micron. Then I tried silk hankies, Corriedale tops, mohair tops, silk fabric, alpaca & nylon …. nothing was safe. I had a blast. I had no idea how much fun dying would be.
Then it snowed and I thought ‘ooh, I could try snow dying’. That turned out to be great fun too. On the right are just a few of the snow dyed fabrics.
I had several colour choices of dyed 14 micron merino by the time Aniko’s workshop came around. The workshop itself was really interesting. A clear and detailed PDF was sent in advance and turned out to be very helpful on the first day when the sound or picture dropped out occasionally. It meant I could see what I needed to do next so was able to keep up. I’m pleased with my pendant (although I still have to add a fastener) including how the dyed wool worked, and feel I’ve learned techniques I will be able to use to make my own designs. Also, it led me into the entirely unexpected joy of dyeing.
Hand dyed 14 micron merino pendant with pebbles: Aniko Boros’ workshop
In the meantime I’d started Fiona Duthie’s online class Ink + Cloth. We practiced adding ink at various stages of feltmaking with loads of potential for using these techniques in future projects.
Above are samples of adding dye / ink before felting (on silk fabric) and on prefelt
These are samples of ink added in different ways to finished nuno felt with cotton and two types of silk. I’d found an image in the V&A museum online catalogue (a fantastic resource) of an early 20th century furnishing fabric with this style of lollipop trees that I was thinking of using for the 1st quarter challenge …but that’s a story for another time.
At the end of this I decided to combine various things I’d learned: to dye my own Corriedale wool tops for a bag and maybe to decorate it with inked or dyed pieces. This is still work in progress as I am not completely happy with it. I decided to let it dry and have a think before doing the last bit of fulling. After I’d laid out the wool I dithered over whether to add silk and prefelt pieces or not as I quite liked the wool as it was. At the last minute I added all sorts of bits and pieces without properly thinking through the design. I fear it betrays its history. A colleague who saw me rinsing it at the studio casually commented it was very ‘hippie, trippy summer-of-love’ which is absolutely not the look I was going for! I will come back to it soon. I included the strap in the photo to give an idea of what it will look like finished.
Now I’m part way through another class with Fiona Duthie: Fibre + Paper. It’s a fascinating process of combining specialist paper with wool. We started by making lots of samples: paper and felt, paper relief, extreme paper relief and paper with prefelt.
Above are samples showing different amounts of paper felted into 21 micron merino wool and bottom right combines prefelt and paper. They feel lovely and there seems to be so much potential to use paper with felt in different ways.
This week I made a vessel with paper embedded into the surface. It’s not perfect: I got a bit over-confident near the end and tore some of the surface (you can just see it bottom left, between the two ribs). I’ve been interested in shell shapes for a couple of years so I shall enjoy making more 3D paper & felt shell-inspired objects.
Paper felt shell-inspired vessel
In the coming week I will be trying out adding colour and surface designs with ink and paint plus making samples with some different papers. Fiona’s classes have been really enjoyable with excellent PDFs, photos and videos and lots of class interaction.
All the online classes I’ve taken have been great fun and very inspiring. They have given me lots of new skills and techniques that I will be able to use in my work. And they have definitely achieved my other objective: they have been really helpful in keeping me learning, focussed and motivated during what could otherwise have been quite a bleak time.
Having decided to take part in the first challenge for 2021, which asked for us to take inspiration from the years 1900-1909, I immediately thought of Louis Comfort Tiffany with his beautiful glass and Antoni Gaudi the Barcelona architect. As I have been fans of their work forever, it wasn’t a problem to take the relevant books from my shelves and start researching. Thereafter I was still undecided.
I mentioned my dilemma on a Zoom meeting with felting fellows….Gaudi won.
I knew I wanted to challenge myself even further with different techniques in a 3D structure. Just how much of a challenge….I am still finding out!
Using my book and pictures from the internet I set about sketching and drawing various interesting elements from Gaudi’s vast repertoire of buildings, just to get a feel for shapes and get my brain into gear, thinking about the structure.
I haven’t done any serious sketching for years so the ‘pen and thinking’ took several weeks. Finally, decided on Güell Park 1900-1914, and set to.
I also decided on a few other things too – to go big (or bigger than recent artefacts) and to start using up ‘stuff’ in a bid to reduce my stash. This included using some pure wool quilt wadding, which I have posted on before ‘A yarn and preparation experiments’ and have now used a few times. The reverse side, where the ‘Vilene’ type fabric is still attached, had the perfect cracked tile effect for an homage to Gaudi.
Those decisions made it was on to creating the shape and template. Having made a quick sample I knew that the shrinkage co-efficient was around 1.3….yep, you have read this right….I did make a small sample! It was then onto creating a typical Gaudi arch to the approximate size (the first arch was too thin, bearing in mind it would be opened up) – plate and bottle put to good use.
Also put to good use were vintage tools of my former trade!
Cutting out the resist and designing the remainder of the template/resist elements, another very very quick decision was made….measuring 62 x 39 cm (24 x 15 in)….this was NOT going to be a book template as I had originally sketched!
Note to self – permanent marker pen is permanent on fingers but not on a resist!
Finally it was onto fibre and materials, cutting the quilt wadding (my drift wood bricks from a bay in west Scotland are very useful) and repurposing a waistband from a deconstructed jumper.
Gaudi admired the writings of John Ruskin particularly ‘Ornament is the origin of architecture’ (Ruskin 1853) and he adhered to the thinking that an architect had to be both painter and sculptor. This is perfectly demonstrated in Güell Park where he let his imagination run fantastical in terms of shapes, structures and with everything decorated with colourful mosaics of ceramic tile fragments (ceramics being very popular internationally at that time).
Auditioning the fabrics to evoke the decorative mosaics, I found it interesting that Eusebi Güell, Gaudi’s greatest sponsor, lifelong friend and associate, was a businessman mainly in – textiles.
I started on the ‘collar’ by creating small patches of nuno pre-felt using scraps of fabric – I wasn’t worried that some didn’t overlap as it would add to the effect. Then cut these into the sketched shapes and pre-felted them to some wool wadding.
As I mentioned I was using up supplies, wool I had bought oh so many years ago….mmmm….I should have tried a sample first! Suffice to say, I will be single handedly keeping the razor manufacturers in production!
Then it was onto the main event laying down a fine herringbone layer of wool, wadding, resist, wadding and wool, taking care to enclose the edges well, the whole was pre-felted. Following which the ‘cord was laid in place and the second layer of wadding added to each side – stitched at the edges for added insurance! The whole was worked to an early pre-felt stage.
Adding the viscose – the viscose I have is in circular bundles which needs to be cut, thereafter I need to peel a quantity off. If I don’t want a knotted mass, this last is achieved by wrapping it around my legs as a counterweight and gently pulling….thankfully you can’t see me demonstrating this technique.
Recently I came across a Russian felter, who immerses her similar viscose in fabric softener, then dries it ready for use. I am still experimenting with this trick – thus far it does seem to stop the viscose ‘snagging’ (just like silk) on my reasonably smooth hands.
I then cut it into smaller lengths (as it won’t draft off like wool fibre) and going for the ‘cloud’ effect I place it horizontally on my carders. Vertical placement, as for wool fibres, doesn’t work….it just slides off the carder, especially the softener treated viscose!
The screen is a good resting post for the viscose! The peach coloured hank has been treated with fabric softener.
Viscose applied in mixed colour ‘cloud’ layers up to the cord.
An off-centre cut made in the base it was time to remove the resist. If by this point you are scratching your head wondering why….my thinking is….holes have a habit of growing larger, so simply slicing off the top would create too big an opening in the top. If I felt the structure almost fully then cut off the top it might be better. I can easily stitch up and conceal the base slit….time will tell if my thinking was on solid foundations!
With the resist out I could concentrate on the stitched seams.
It was now time to try the ‘collar’ which fitted as planned….pheu….but it was at this point I realised I had made a fundamental rooky mistake….I had laid and worked the cord at 90 deg to the vertical! Opening out the wet structure gave me a distorted shape with 2 sides longer….oops I should have placed the cord on a curve. With my former career I have no excuses for (and nowhere to hide from) this mistake 🙁
My solution….thus far….has been (with enough felt in the base) to pull, push and stitch the cord inside to achieve the curve. The downside of this action is that I now have a fold on the inside….mmmm!
The base has been tucked inside to check the curve, the ‘collar’ will hide the ‘dropped’ viscose. No, the section diagram is not a diagram of a demented mole….although….
I have come to a temporary halt whilst I re-think my next move. I don’t feel too bad thus far….unintentionally – I’m simply emulating Gaudi who being a pragmatist did not spend his life at the drawing board preferring to be on site, thinking things over, experimenting with and rejecting ideas to get to a solution.
As I mentioned earlier, the Ottawa Valley Weavers and Spinners guild had decided to try 3 study groups starting in February. One on weaving, one on spinning and I had the Felt study group looking at armature wire. We were going to look at different types of wire, in different gauges and in different combinations. To see how flexible they were and what size of sculpture might be appropriate to use them with.
We started on Feb 24, 2021, at 07:30 PM and ran for 4 weeks till Mar 17, 2021. I had ordered a lot of different aluminum wire online and had found quite a bit of non-braided wire at the hardware store and Dollarama. I was doing quite well until last week!
As we came out of lockdown, we had the opportunity to do fun stuff in a limited way again like have a guild library day!! Ayah!!! Getting out of the house, pulling and bagging books to ready for pick up, the Anticipation!!! Then the horrible realization that the car still wants to quarantine in the driveway, watching the buses go by. After a quick consultation from the nice CAA man who said he has seen a lot of this problem, suggested we wait for the next warm snap and see if she will start. Unfortunately, that would be after Library day!!
0.5 This is the Sunday of Library day (Masked Librarian receives book return). Saturday Elizabeth, not pictured but also masked, helped with book pulling and bagging while I dealt with the circulation database and added new items to the library.
I was very grateful for 2 of my very wonderful friends who gave me lifts down and back to the guild library while my Kea Soul sat in the driveway refusing to stop self-isolating. I rather overdid it even with their help, well I do not get out much now and wound up back laying down how frustrating. As the 3 days of warm weather arrived, on day 3 she started!! 2 trips to the car doctor and a rather hefty bill and she is now fine.
Besides library and car surgery excitement, I have been organizing and participating in the “Armature Wire Study Group” through our local guild. We were making samples of various gauges of wire, single, twisted, and then felted over. We had a number of different kinds of wire, copper, steel, rubber coated steel, stainless and aluminum. We had gauges from 6 aluminum to 26 steel floral wire.
For my samples I have been making appendages, well, 15 twisted wire and 15 wool covered legs with feet, 4 wire arms with different gauges of fingers on hands and 22 samples of each wire I was able to get. (there are a few that still have not arrived yet!) All the appendages are hanging up beside the desk in little baggies, with labels, notes and wire samples. I had wanted to do samples of two different gauges of wire as well, but am running a few days behind where I thought I would be. I still have a day so I may get a couple of the options done but without a wool covering.
1-3 all the samples (This is part of tonight’s zoom meeting for the study group)
4-5 one of the leg samples 20ga aluminum
6-7 arm samples
The EXPERIMENTATION –Loop joint Samples
One of the participants had wondered about increasing articulation at the joint. I decided to try a simple loop to loop connection and a loop to loop with lateral support. The idea was to keep the “bone” sections from bending when it’s not appropriate. I sampled 2 connecting loop options in 9ga aluminum which is quite heavy. The first was two loops set perpendicular, at a 90 deg. angle to each other. The second was the same configuration but with 18ga aluminum secured above and below the joint and acting as the medial and lateral collateral ligaments (MCL and LCL) to this mettle joint.
– to try to give articulation in one plane of movement. Using 9-gauge Aluminum wire.
8 the bare armature with the first joint attached.Joint 1
Joint 1
9-12 The first loop to loop joint
2 loops locking together, the lower turned so the main articulation swing will be front to back. This will give hyper-extension but may be reduced by wool over layer. Wool does provide increased support but still allows more lateral shift than wanted.
– Freely swings to the front and back (anterior/posterior movement).
-it also swings freely from side to side (Medial / lateral movement).
-the joint can not be positioned to stay in one location other than what little support the wool is giving it. (This joint needs emergency surgery to correct for the lack of both the lateral and medial support ligaments!!!!
Joint 2
13-17 the second loop to loop joint with lateral support
Loop at joints – with double twisted wire of the same gauge creating a loop for superior articulation. Augmented by 20 gauge aluminum wire (at sides of joint for adding grater lateral support).
-lateral support from wire greatly reduces lateral shift in the joint almost all the movement is front /back, anterior/posterior.
-again positioning is not an option other than the restriction from the wool covering the joint it can be moved but will not stay if released. moves more freely than just a single or twisted wire.
Conclusions: will not work for posing a figure but may be of use if you need a flexible joint that returns to its resting positions. This may be an option for some other project, but not for the project I want to do next.
We will have one more meeting in a month to report after we finish all our samples and exchange information. So I may be able to give you an update on a bit more of our findings. This looks like it was a good felting question to investigate
18 Articulating swing arms for webcam and tablet
I bought some new equipment to help with my zooming and after much surcharging for improved lighting. Eventually, I remembered the box with the magnifying lamp picture on it was not empty. (I had moved it when I was trying to sort out the office so should have remembered more quickly that I had it.) I got out my light for de-hairing Qiviut fibre to augment by poor office lighting. Of the new stands, one is designed to hold a phone, (if only mine would let the zoom app lode and open) but also how has the attachment to hold a webcam pointing at the desk and the other is holding Glenn’s older small tablet. I got Miaka’s email to log in through the tablet, so it could take a picture of me. It’s all been very exciting and a bit of a steep slope on the learning curve!!
It’s now getting quite late, which is why my spellchecker is not available (I think sleep spellchecking may be no better than me believing Microsoft word when they tell me “that is defiantly the word you meant”!!! I will hope that it doesn’t lead me too far astray.)
There are rumours it is getting warmer and there may be spring soon. I saw strawberry leaves poking through the fall leaves on Friday (car doctor assessment day) but by Monday (day surgery car day) they were all dead again. they always seem to be a bit overenthusiastic. I know that soon we will all be out Felting Alfresco again!!!
This exercise started with me wanting to make some felt cubes and triangular prisms to make a more 3D version of a sky view landscape. the first thing I thought of doing to get the shapes was to felt around some small wooden blocks. I spit some into roof shapes and some in half for shorter cubes. Although this seemed like a good idea it was not very successful. the pointy corners proved to be a problem and adding more wool would just start rounding them too much.
Then I was talking to the group and Lyn said to try squishing them into squares when you making them. Well of course why didn’t I think of that. Now I need to make balls and I had been thinking I should try making a bunch of them, why make 4 if you can make more. I had seen a video of them making large numbers all at once in Nepal. So off to google how to do that. There are several videos on how to do this. Living felt has the best one.
Step one roll up some wool for the beads. I wrapped the wool around a chopstick and poked it a few times with a felting needle to hold it while I make more.
Once I had a bunch ready I added some soapy water. Just ad a little then roll them around the container to absorb it. Then add a
little more until they are wet but not soggy.
Then I popped the lid on and started rolling them around and shaking them until they were felted. This works really well and doesn’t take long at all. I rinsed them and couldn’t believe how dirty the water was.
Now I need to full them, I put them on a towel and used the starburst lid of my container to roll them around. adding pressure as I went.
On to a drying wrack.
I squished a few into the right shapes for my picture
I haven’t started the picture yet. I did make a sheep glasses holder for my granddaughter who just got glasses. I flattened the bottom so it wouldn’t roll. You rest the glasses on the lamb’s nose. His nose I a bit piggish but he was gone to her bedroom to find the best place for him before I could fix it.
And just to throw another spanner( or 2 ) in the works we started having lambs ( early, rams are very sneaky and quick when they want to be) got our new puppy. not sure how much felting will be going on but I usually do best when I have no time. Always seems to motivate me and create ideas.
1. Viscose tops – I really love working and experimenting with this plant based fibre. Created from regenerated wood pulp, viscose has all the look and feel of silk tops, without the static when you draft it and it is considerably cheaper. A brilliant fibre for adding some lustre and surface interest to wet or dry felted projects. You can make fibre sheets in different densities and use thin wispy sheets for layering or thicker ones for cutting out shapes. Being a similar micron, viscose integrates really well with 19 micron merino roving. You can card it with other fibres, lay it out thickly or thinly for different effects or blend colours together. Being a smooth manmade fibre with no scales, it won’t wet felt on its own, but only needs a surprisingly little amount of wool fibre to get it to all hold together.
2. Merino roving – Like many felters, I am a fan of combed 19 micron roving. It is easy to work with, quick to felt and ideal for wearables and many other projects. After a visit to the DHG dye-house some years ago, I am still in awe of the complex process and scale involved in processing, dyeing and creating commercial roving from raw fleece.
3. Uniblends – Our exclusive Uniblends are my dream fibre. Custom blended, they combine the qualities of viscose and 19 micron merino wool. I love to use it in one-way cobweb layouts – it drapes beautifully, reduces pilling and is less itchy against the skin than using wool only. Using Uniblends speeds up the laying out process as the fibres are already combined and you don’t have to worry about embellishing the other side! You can also add additional viscose if desired, 2-directional layouts give a heathered effect and it spins well too.
Q-2 Two tools you use all the time?
Well, apart from my 2 hands, I use my homemade mega felting tool and ball brauser constantly. Ball brausers are fantastic water sprinklers for speedy wetting out of a project and with a little care, can last a very long time. My biggest tip is to never to leave it standing with the spout in water or soap solution for any length of time. This prevents rust potentially settling in and snapping off the sprinkler head. Shown here with a ball brauser for scale, my mega felting tool is pretty large. I have made smaller versions but this one is great for large projects like making wraps, garments & scarves. Glass décor beads have been glued to a rendering tool, sourced from the local hardware store.
Q-1 One fibre art technique you love the most?
Nuno felting without question. My preference is to use embellished prefelts rather
than applying roving directly onto fabric, using hand dyed Margilan silk or cotton gauze.
General Questions
What is your business?
Unicorn Fibres is an online business selling supplies for wet felting, needle felting
and associated arts.
What kind of items do you sell?
Lots of Fibre, Hand dyed fabric and Tools for felting. We stock 19 micron merino roving in +100 colours – solid & variegated colours, merino/silk blends & our exclusive merino/viscose Uniblends.
Our range of carded wool batts is growing and particularly popular for needle felting along with Corriedale roving.
Over 45 viscose colours available as well as hand dyed Margilan silk and Cotton
gauze for nuno felting.
Ball brausers and a variety of tools for needle felting.
And if you are stuck for a gift, eGift cards too!
What do you think makes your business different from similar ones?
Along with having considerable felting expertise, we are focused specifically on the needs of felt makers/artists. Our aim is to keep prices low and service high.
Weight options – Fibre can be purchased from as little as 10gm (0.35oz), up to 1kg (2.20lbs) bumps. Flexible quantity options to suit your needs.
Custom products – Our Uniblends are created exclusively for us and a dream to use.
Bundles – Merino and viscose bundles are offered to make colour choices easier, quicker and a little cheaper.
Hand dyed gauzes – Margilan silk gauze and Cotton scrim with characteristic colour nuances to enhance nuno felting & other textile projects.
DHG reseller – We are an official reseller for DHG products who use ethically sourced fibre and create their products to the industry’s highest safety and environmental standards.
Shipping – Turnaround time for orders are generally same-day and we dispatch orders really fast, twice a day. All stock is onsite, so there are no drop shipping delays.
Where are you located?
We are an online business in Perth – a pretty idyllic spot, at the bottom left hand side of Western Australia. Close to amazing beaches and a city that sits on the Swan River.
Sara is very kind and generous and she is doing a giveaway for all of our readers. Please read the instructions below to enter. She has also given our readers a coupon code for a discount for a purchase of Uniblends from her site. See below for details. Thanks Sara!
Giveaway and Offer
Two Giveaways –
For one international and one Australian recipient:
You can win a bundle of Uniblend rovings – 6 x 50gm (1.76oz) packs in colourways of your choice, inclusive of shipping.
Giveaway is now closed.
Offer
Use coupon code: UNIBLEND10 for a 10% discount on our exclusive range of Uniblends – stunning variegated extra fine merino wool and viscose roving blends.
Prices include 10% Australian tax, but are excluded at checkout for international
shipping addresses.