Slow Stitch Update and a Celebration

Slow Stitch Update and a Celebration

The last time I showed you my Autumn Nuno slow stitch piece was back in April and it looked like this:

I have been continuing to stitch on this piece for 15-20 minutes per day. I have been concentrating on the bottom left corner and bottom foreground to fill in the vegetation/foliage in those areas.

Here’s a close up of that area which has the first pass of seed stitch and just needs some of the lighter areas filled in a bit more. I also think I need to evaluate the values once I’m happier with the foreground.

And here’s what the full piece currently looks like. You can click on any of the photos to enlarge them. So progress is being made, albeit slowly. I’m still enjoying the daily practice of hand stitching, adds a little zen to my day.

One year ago today, we adopted this little guy from Mission Valley Animal Shelter. His name is Edgar and he was a stray so we don’t know his breed or his age, but he has added so much joy to our lives. I thought you might want to help Edgar celebrate his adoption day and see how he is living his best life.

Summer Garden Project

Summer Garden Project

I have to confess this month, I am flying solo, because Alex has happily returned home to live with his housemates now that he’s had both Covid vaccinations.  I had planned for him to visit me last weekend, for him to join in the blog project, but my partner Pete went up to London recently to watch Swansea City Football Club in the play-off finals for the Premier Division!  As a result, I felt that it was too risky for Alex to come and stay, just in case Covid reared its ugly head.  So I’m afraid you’ve only got me this time!

Anyway, it’s that time of year when we all love to get out and about for some fresh air.  With lockdown affecting so many people’s plans for holidays and travel, many of us have turned to more home-based ideas to spend time in the fresh air.  We have spent a lot of time in the garden over this past year or so, and I thought it would be nice to combine ideas for the garden with wet felting.

Here are some photos of our garden, which just over a year ago, was a mass of overgrown weeds, bamboo and brambles!! I think it’s coming on really well.  Pete has worked a miracle and Alex has enjoyed learning how to garden and grow vegetables.

Summer Garden


So… I decided to make something that would be a pretty addition to our garden……. a liner for a hanging basket of flowers.

I started by measuring the diameter of the wire basket from rim to rim, including the depth.  It measured 21″ in total.  In order to allow for shrinkage, I made a rough guess and decided to make a circle measuring 30″ in diameter.  I decided that I didn’t want it too thick, so opted for doing two layers of wool batt, with a few decorations using Merino tops.

Before I started laying out my wool batt, I decided to make some spirals for the outside of the liner.  I though they would add a nice decoration, and would make the liner both colourful and hopefully attractive to bees!

Merino tops in assorted colours

Some of the merino tops were quite short, so I drafted them in order to make them longer.  As you can see by the pale green one, I need practice!!!

I wrapped the ends in some clingfilm, which I secured with an elastic band in order to keep them dry and prevent them from felting.

Next, I felted them in order to make my spirals.  I don’t know about you, but it’s hard to roll them in your hands as they are so slippery! So I managed to find that by rolling them gently on a towel, I got a much more even shape and they were easier to roll.

Next was to start laying out my wool batt.  Firstly, I did a layer of lavender coloured wool.  Once I had laid that out, I then added my merino snakes! I have to admit, at one point I did think this was going to end up looking like Medusa!

Fluffy tails

I fanned out the dry ends of my ‘snakes’ so they would be sandwiched between the two layers of wool batt.  Once I had all six snakes in place, I added my second layer of turquoise wool batt.

As you can see, I left a hole for you to see how thick I was laying the wool batt.  I have to admit, the blue looks more of a sky blue in the photos, but in real life, it has a lovely turquoise hue to it.

I added some merino coils on the top, so look like little flowers.  Then I started to wet felt the wool.  It took quite a while and I have to admit it was tricky at first, because my table was the same width as the diameter of the wool batt circle.  This meant that I had snakes trying to slither off in all directions!!!  But once they were starting to get trapped by the wool batt, they were a lot easier to handle!  Perhaps I was a snake charmer in a past life!

Anyway, I finally got there! I did not quite manage to shrink it back down to 21″ diameter, no matter how much I worked it and fulled it.  I did contemplate trimming the top back to the rim of the wire basket, but in the end I decided I quite liked it as from above, it looked like a large Petunia flower!  I cut six triangles out of the circle, so that it would sit better in the wire basket.

It looks like a spinning, spiralling cog wheel!

I was quite happy with the result…

I then made my snakes into spirals using pipe cleaners to shape them and left the whole thing to dry.

In the end, I also decided to use the triangles that I had cut out, by inserting them lower down into the wire basket.  I think it looks like an upside down jesters hat now!  I have planted it with a few flowering plants, and I’ve put it at the bottom of the garden.  This is where I put my special, meaningful things.  I like to think the fairies appreciate them!

Happy in its new home!

I hope you like my wet felted basket liner! I thought I would leave you with some photos of my midnight garden to finish off…

Midnight Garden


In Ottawa, Tis’ the Season of New Fibre Acquisitions!

In Ottawa, Tis’ the Season of New Fibre Acquisitions!

My first fleeces of the year were purchased today.  Even better, I was picking them up at the same Farmers Market where Ann sells delicious tarts, cookie, Bread and pies! The Market is set up so you go in a big circle with all the booths have space and a wide gravel path. This year there are more booths.

1-2 Barhaven Farmers Market

 3 Ross and Ann!

I bought Mom a couple of Chocolate chip cookies (they are her favorites) as well as Cookies and tarts for Glenn. More customers were arriving so I couldn’t stay and chat so it’s time to move on to the Fleece.

 4 Note the bag of fleece in the back left corner of the booth!

The fleeces I purchased were Rams who belong to a flock of about 300 sheep. The Ewes are gainfully employed as professional Lawn maintenance specialists, keeping the weeds trimmed under solar panels! I hear the burrs that were in last year’s fleece have been almost eradicated.  (I did not see any in the fleeces I got this year as I re-bagged them).

 5 This is a bit better view of the 2 skirted Rams.

 6-7 Distracted by small cool wild flowers beside the parking spot.

Now to get back to the important parts, these rams are Canadian Arcotts. This is a breed that you may have had  the opportunity to  have  fun with before. Its one of 3 breeds (Canadian, Outaouais and Rideau Arcott) developed by the Canadian government here in Ottawa.  The last part of their name, Arcott, stands for Animal Research Centre Ottawa.  The Arcott breeding program began in 1966 with the goal to create a breed which reproduced rapidly for genetic and other sheep research. The original mix of breads are listed as Finnish Landrace, Southdown, East Friesian, Suffolk, Leicester, North Country Cheviot, Ramnelet, Dorset Horn, Shropshire and Ile-de-France for the Arcotts.

1982 all three Arcotts were recognized as distinct breeds.  Rideau Arcott mature quickly  grows rapidly and often have triplets. Although they are primarily a meat breed, their wool is described as a medium quality and variable. The Outaouais Arcott are also know for fast growing and often having triplets. There fleece is considered variable and there was a mention of good for milking. The Canadian Arcott is considered as a good meat breed with fast growth.  The fleece was listed as Soft, lustrous 3-4 inches long and a 25 – 33 micron count.

I unfortunately do not have a photo of the rams who produced these fleeces. If this was in smell-i-vision you could experience the lovely sheepy aroma. Some rams are a bit aggressive aromaticly, but both of these fleeces have a more normal sheepy smell.

8-11  Fleece #1- Ram professionally sheered and well skirted. The crimp is tighter than fleece #2. The locks I used as an unwashed sample are about 3.5 inches long.

12-15   Fleece #2 – Ram professionally sheered and well skirted. Not as crimpy as Ram #1. The stale length is about 3 inches on the unwashed sample I pulled.

Both these look like they would make fun spinning fleeces and I look forward to sampling them for felting. I have not worked with a Canadian Arcott before so this will be both fun and educational. There will be samples to share but first I have to finish cleaning up the side yard so I have space to wash and dry the fleeces!

Coming up on Monday will be our guild A.G.M. We will also be having a fiber poker challenge. This year as well as Spinning and Weaving there will be a deck for Felting! I will tell you about that in a future post.

Have fun and keep felting, spinning, weaving, fleece washing! So much to do we need to make the days longer! Oh yes its summer, that will help!!


Olive Sparrow Giveaway Winners and Second quarter challenge, stitching all done

Olive Sparrow Giveaway Winners and Second quarter challenge, stitching all done

First things first:

The winner of the 100 grams of premium washed Teeswater locks is Sttamburo

The winner of the 150 grams of Swiss mountain batt in your choice of colour(s) is Darrel

Congratulations! Monica will contact you via the email you provided.

Now my stuff

My heat erasable pens arrived. They come as a pack of refills and some empty pens. I got one that came with 4 colours, white, red, blue and black. That should cover all possibilities.

I picked the white. I think red would have worked too.


Onto the last part of the design. Diamonds were a popular repeating pattern. I better check to see if this will work the way I think it will. I did not do my usual quick sketch but using a ruler. Are you amazed?

Yes, that should work fine, real diamonds and not just squares on point. Now let’s see if those pens work. A straight line to work form. I may stitch that in too. I wasn’t sure it was going to work, even smooth felt is very textured.  The tendency when a pen doesn’t write is to press harder. That didn’t work. A light touch was much better.


A couple of weeks has passed since I did the lines. I decided to use yellow for the lines.


I really like how the yellow looks against the green but it didn’t look complete so I added some red and black french knots in the middle


Next was finishing the sides. I decided to use double-fold bias tape. I like double fold because it’s easy to sew on invisibly. the bias I like to use with felt is a fleece bias. It blends with felt so nicely but isn’t as bulky as using felt. I had black and green that would work. I chose the green as it was such a good match.

If I had easy access to my machine I would have stitched the first side with it. You can stitch in the ditch of the fold and it’s invisible. That is the way I do it when I put a bias tape on the brim of a hat. As it was, I just stitched both sides by hand.


I think it looks good.


Next is sewing the pockets and filling them up. I should have that done by next time. I have almost a whole month to get it done and still be on time.


Twilight – Nuno Felted Landscape

Twilight – Nuno Felted Landscape

I recently sold several pieces of work at Bigfork Arts and Cultural Center in Bigfork, Montana and I took a new set of framed pieces down. But summer, the tourist season is upon us and I needed to stay ahead and create some new work. I found some pieces of hand dyed silk that I had in my stash and put a stack of prefelt and the silk together so they are ready to felt.

I started with this piece of silk which has been nunofelted to white prefelt. I fold over the edges and what doesn’t stick to the back with felting, I hand stitch in place so I have a nice edge. This piece is approximately 7″ x 11″. Once felted, I look at the piece from different angles and “find” my landscape.

Next up, I free motion machine stitched the background picking out the mountains in the background and some rocks in the foreground.

Next, I decided to add a foreground tree, my go to foreground. I used a variety of hand dyed cheesecloth layers for the main branches and trunk of the tree. But the result wasn’t what I wanted. The background didn’t have enough depth, I needed more change in value and contrast. So I peeled off the tree which luckily came up in one piece.

Then I used a thickened acrylic ink to add darker values and contrast to the landscape. That definitely adds more depth.

Now to look at the tree in place on the background. Much better! Now to stitch the tree. I tacked it down with hand stitching to keep the cheesecloth in place. You can skip that step but it is harder to keep the foot of the machine from moving the cheesecloth out of place. Once it was hand stitched and holding in place, I went back to the machine.

And here’s the finished piece. I am calling it Twilight as it reminds me of a sunset in the mountains. I’m happy with it and I’m glad that I took the time to add some depth to the background before I stitched the tree.

Sewing a pair of trousers

Sewing a pair of trousers

Lately, I’ve been keen on the idea of creating some staple wardrobe pieces to replace some older garments (*cough cough, Pandemic Body is larger*) and maybe have a go at creating a Capsule Wardrobe. If you’re not familiar with the concept, it’s when you have only a limited number of garments that you can mix and match to create new styles. The operative word here is “limited,” since the idea is to only have clothes you’ll wear and not clutter your wardrobe.

Enter the Arthur Pants by Sew Liberated. They are a wide, lose-fitting sort of trousers, very comfortable. I wanted to have pieces I could wear at home but still look good in outdoors. I’m a fiend for grabbing my pyjama bottoms when at home, but this hinders how quickly I can just nip out to the Post Office!

Whenever I sew a garment, I always like to create a mock-up to see about fit. If you sew, you’ll know pattern sizes don’t always conform to your own body and tweaks might be necessary. A mock-up helps me familiarise with the techniques the pattern requires, and I can see if I like how I look before cutting into the nice fabric.

Bathroom picture glamour

After creating the mock-up, I went on Instagram to ask for opinions. As you can see, not everyone was keen on the style! That’s exactly the type of honesty I was looking for. You see, I wasn’t too sure about the width myself, and having someone else confirm this for me really helped.

I tweaked the mock-up to make it smaller and, happy with the results, saw that I needed to change the sizing on the pattern to fit my needs.

I usually keep the original pattern with all the measurements and simply copy my size to use. This means I’ll be able to sew this for someone else in the future without having to reprint. The pattern piece on the left is the original one, the transparent ones are what I’ll be using. I had to shorten the legs (by folding) because this was meant for 5’7″ people, which is definitely not me – on the wonderful side, the pattern called for at least 3 meters of fabric and I only needed 2, with enough to spare.

Time to cut the fabric. Here you’ll see Marshmallow being “helpful.” It’s definitely true that if you leave a piece of paper in a stadium floor, eventually a cat will sit on it.

I was already familiar with what I needed to do, so the sewing should be smooth sailing. I hoped.

I did make a couple of mistakes, but nothing very serious. At some point, the pieces of fabric did start to look like trousers indeed.

I got pleats, I got a zipper, I got pockets – I’m very proud of myself.

Finally, I needed buttons. I narrowed it down to two styles and my other half made the final decision: the left one.

Of course the buttonhole foot on my machine worked splendidly when I tested it, only to turn demonic with the proper fabric. Luckily nothing got damaged or I’d have had a breakdown. I was almost done…

Ignore the weird background on the left, I tried to remove shoes with an app and it went wonky.

Voilá, a pair of comfortable trousers! I’m so happy with them, I’ve already started another pair in yellow linen.

So there you go, my first ever journey into making trousers, adding a zipper and pockets. Nothing exploded, my mental health is seemingly intact, so I guess all is well.

Finally, just for Ann, I have a photo of some cheese scones I ate a few days ago, because we had a chat about the difference between English and American scones 🙂 Yes, they were delicious.

Have you sewed anything lately? Share what you made in the comments section, I’m always keen to talk shop. Have a great week.

A Redshank and Other Felt

A Redshank and Other Felt

As shops, galleries and exhibitions start to reopen in England and I have quite a few sales & exhibitions coming up, I decided to make another picture based a local coastal bird.  I’ve seen quite a few redshanks recently walking along the shoreline and haven’t done a redshank before so I think that would be interesting.

I start by making some prefelt for the back and tail feathers in a muted pewter and white tone, plus some firm felt I will use for the orange/red beak and legs. (I forgot to take a photo of these.)

I have a composition in mind and I make a quick sketch to get the shape, stance and size of the bird then lay out the bird’s body using a base of white merino tops and the prefelt feather shapes.  There’s not much detail as I will needle felt this in later.  I haven’t tried this before but I needle felt in some of the feather detail part way through wet felting then finish fulling the bird.

I’m not sure what I was thinking (if at all) as I’m not happy with the loopy-ness of the needle felting or the direction of some of the feathers.  I park it for now and get on with the background. One of the many things I love about felting is that you can usually continue to work on it until you’re happy with the result.

Redshank body: wet felted with some needle felting added part-way through

Onto the background: I have bits and pieces of natural coloured prefelt that I cut into pebble shapes ready to form the beach.  The redshanks I’ve seen recently have been walking close to the water’s edge, either in the water or on the pebbles.  Thinking about the water experiments I did last year I lay out 2 layers of pewter-coloured merino for most of the picture with a white and rusty orange section where the wave and beach will sit.  I put long strands of blue tops in two colours running horizontally to represent the light reflecting off the water.  I leave a darker section near the top with some of the pewter wool laid at an angle as if there’s a small wave coming in there, though in the final picture you can’t see most of this because it’s behind the bird.

Next come the pebble pieces and finally the foreground wave, as it sits on top of both water and beach.  I haven’t tried using mohair for wave crests before so I run a wiggle of mohair tops along the water’s edge and onto small sections of the sea as if small waves are cresting there.  I’ve spent a lot of time looking at the water in my local sea / estuary so I know the colours and shapes well.  The water is often choppy like this with small waves.

Background layout, ready for wet felting

I wet felt the background then try out the bird body to see how they’re going to fit.

Background and Bird body – trying things out for size

I needle felt the redshank’s body onto the background then add the legs and beak which I’ve cut from the red/orange felt. Then I add the eye and fiddle for a while until I’m happy with the bird.

The final redshank picture ready to frame

The finished picture is about 50-55 cm square and will go into an oak veneer box frame that’s 64 x 64 cm. I took this photo in the evening, with electric light, so it’s a bit less yellow in reality.

As I didn’t take a lot of progress photos for my Redshank, I thought I’d add a few other things I’ve made recently. Like my felting friend Antje (who posted here recently) I took Judit Pocs’ milkweed pod workshop on 1 & 2 May. I direct dyed some 18 mic merino tops and some fine ponge silk for my pod.

It was a good workshop and I’m happy with the result. I got my dye ratios wrong which resulted in a lot of bleeding and dyed hands but thankfully it’s not a wearable so it shouldn’t now be a problem. I hope to use this silk pleating technique in future projects.

I realise the colours are very similar to the ‘hippy trippy’ Corriedale bag I was making when I last posted. It’s still work in progress but I’ve done some additional ink work on some of the silk patches and am part way through adding some stitching. I’m now adding some french knots in the rectangle near the top left. This combines some of the techniques I learned in Terri Berry’s bag class with some from Fiona Duthie’s Ink + Cloth workshop and my new venture into direct dyeing (using the Felting & Fiber Studio tutorial).

Previous picture on the left, current on the right.

As part of Fiona Duthie’s Paper + Fibre workshop I made a lamp shade (actually a sleeve that fits over a lamp). It’s interesting how the paper sections are barely visible when the lamp is off. I think I will make more lamps when I have time.

Finally, I’m making some smaller pictures to take the little beach hut gallery in Whitstable Harbour where I often sell my work. I’m in there from next Wednesday for 2 weeks. I’ve wet felted some mussel shells and am making backgrounds to set them into small box frames (without glass). They’re about 19 x 19 cm. Here’s one that’s nearly ready to go. The background is nuno felted with recycled silk and old curved lace. I just have to decide where to stitch the shell. What do you think?

Busyness and Books

Busyness and Books

As it often happens in Ottawa, the transition out of winter into spring can be quite sudden. Some years when it’s quick, we get to experience the river’s quick rise and many homes discover they unexpectedly have indoor swimming pools.

Ottawa geologically was at the bottom of an inland sea, it got up and suddenly left long before I arrived in Ottawa. Its departure left patches of Leda clay (an unstable marine clay) and locally 3 raised beaches where the waterline sat for a while before exiting the Ottawa valley leaving us a river that occasionally wishes to try to reclaim its distant glory of being a sea. I am 1 raised beach above the present flooding area for the Ottawa River and am slightly uphill from the creek down by the transitway, which is moving to a deeper but closer canal so the new train can go in. I understand the train will be wonderful but It seems to have a fear of heights since it is incapable of climbing much of a slope. I hope they asked the train’s thoughts on winter since we have a lot of that as well as a few too steep for the train slopes.

Some years we are lucky and have a slow spring, no flooding and we get to enjoy the tulips. That was this year! I suspect summer got annoyed having to wait and we have now been enjoying August in May with +30c and heavy humidity.  This is providing the plants with a bit of a panic! “Oh no, I am missing my display time! Quick, Flower!!”  It’s a bit confusing at the moment in the front and back garden.

We got word the garden centres would be deemed essential services and be open with restricted numbers and access. I was able to get most of what I was looking for. I have been frantically doing and overdoing the potting out, removing and replanting stray catnip and some of the self-seeded lettuce (have you ever considered Lettuce as a ground cover?)

As I think I told you when the Raccoons were being evicted, we need to replace the roof as well as working on fixing the garage.  Then we found out that the chimneys (I am lucky and have 2!) need to be unbricked then rebuilt. The face of the brick has been falling off and it is in very rough shape. That needs to be done before the new roof. It also explains the mysterious pieces of brick that I find in the garden and on my patio…. I was reasonably sure it was not the birds dropping them on their way to build a nest. On further consideration, that might not be a bad nesting material, good against cats, raccoons, and other birds. They would get a reduced price on nest insurance but would need a strong tree. It would be quite cozy lined with some wool. (I would say my musings are due to sunstroke but it’s cloudy and looks like we are about to get an impressive and windy rainstorm.)

1-2 the newly rebuilt front chimney and the about to be rebuilt back chimney.

3-4 the portable forest, herb and Vegi garden  &  the extra catnip on the old bench

This slideshow requires JavaScript.

5-10 the confusion of spring and early summer flowers all trying to get your attention

  11-12 the Japanese lilac is particularly impressive this year!

I wish I could share the aroma coming from my Japanese lilac and the adjacent thicker sweet scent of the flowering Honeysuckle vine. I was going to get a new hummingbird feeder for beneath the vine but with stores closed, I have missed the setup time so I hope the hummingbirds are enjoying the honeysuckle this year. While I was sitting on my (sorry Miaka’s) swinging garden bench, the perfume from the Lilac drifted over in waves on the gusting wind. I wanted to sit there longer but still have a lot to do today. More work on the Guild Library database and the year-end report as well as a blog post to write, but after taking pictures of clematis, bachelor buttons (the fancy ones) and trying to get a shot of the lilac as its flower-filled branches bounced in the wind. I still have raspberry’s to relocate or rehome, topping up the soil, some pruning of the back hedge and the grapevine (I saw more grapes starting than I have ever seen!! But the raccoon doesn’t share, it likely following the example of the chipmunk that eats all my strawberries!)

13-14 Grapes and Strawberries!

So it’s been very busy but not a lot of felting since Mother’s Day. (Ah I have finally got to the felting!)

15 Two of my felting books I wanted to tell you a bit more about

Although I have not found a book solely focused on wire armatures I have found a number of books that have small sections, to a brief mention of how they use armature wire. Recently I have picked up a couple more books that discuss armatures. The most recent was “Adorable Felted Animals: 30 Easy & Incredibly Lifelike Needle Felted Pals” by Gakken Handmade Series. This was originally a Japanese book translated into English in 2015.  80 pages, softcover, I was able to pick up a second-hand copy labelled as a knitting book. There is no knitting but 30 small scale animals to make.

It starts with posed pictures of the finished animal projects giving the name of the maker, the page numbers for the instructions and the size. The size of the pieces are interesting to note, with the largest just over 6 inches long but most are half that or smaller. This means they are excellent travel projects or you can just absorb the techniques and work on a bigger scale. There is a short section on the method used to create the golden retriever with lots of photos. This includes a layering technique for creating the fur look outer coat. The rest of the book is instructions for each figure. They have templates at the finished size to check your felted piece against as well as any special instructions such as a pattern for laying in the fur coat if needed or markings to add. The wire used varies from the full body to just the forelegs or tail.

I suspect a beginner who has never felted could be a bit hesitant to dive in, but if you have done a bit of needle felting and are comfortable with how the needle moved the fibre this may give you some ideas to take the information and use it for your own projects.

If you are interested in creating realistic fur you may want to look at “Needle Felted Kittens: How to Create Cute and Lifelike Cats from Wool” by Hinali.  96 pages, softcover with dust jacket. The author has more in-depth step-by-step instructions on each part of the creation of the cats. Although this book looks like one that an intermediate felter would choose, a newer felter would likely still be able to get a lot from this book because of the excellent photo instructions.

There is information on how to trim the fur to make it even more life-like. (Yes scissors and fibre can be used together much to the horror of the spinner in me!) There are both full and partial armatures used with good descriptions.  The suggestion of using yarn tightly wrapped over the armature to give the fibre something to stick to is interesting too (more experiments to come!). There are excellent examples of naturalistic shading to create a more life-like coat.

16 three more of my felting books I will tell you about

I have bought 3 more books dealing at least partly with armatures

  • Making Needle-Felted Animals: Over 20 Wild, Domestic and Imaginary Creatures by Steffi Stern,  127 pages softcover. this book has a couple of projects which use armatures.  It has a good beginner section of tools and some basic techniques before the project instructions. Pipe cleaners are used in one example as an armature which I would switch to one of the finer aluminum wires to reduce sensitivity to humidity. Scrap wool wrapped in yarn and used as an example for a possible core to felt over. the use of glue over bird’s feet is also shown.
  • A Masterclass in Needle Felting Dogs: Methods and techniques to take your needle felting to the next level by Cindy-Lou Thompson, 128 pages, softcover. (This one I liked immensely for all the extra tools and  techniques she suggests) She shows her starting armatures and thoroughly depicts how the four dogs were made. Many of the techniques I had not run into before.  Make your own Taxidermy like eyes, the uses of added colour; pastels, markers, paint, using mog-pog and clay. This is one I would suggest checking out if it crosses your path!
  • Next Level Felting: Professional needle-felting techniques to take your felted wool creations to the next level by Nancy Wesley. 90 pages, softcover. There is limited use of armatures, but good examples of blending fibres for a more naturalistic looking skin colour. she shows techniques to create a sharp edge when changing skin colours as well as subtle transitions. She has included many felting Tips scattered through the book.  If you have the opportunity to look at this book in person, check out the anatomical detail in her humped back whale.

and I have one I am waiting to order, so I will update you on it shortly.

  • The Natural World of Needle Felting: Learn How to Make More than 20 Adorable Animals by Fi Oberon. 144 pages, hardcover. More details to come on this one, but the preview bits I can see on Amazon.ca have multiple mentions of wire armature so I am quite hopeful and excited.

Have you found books about needle felting that have information on wire armatures that have helped you? Please point me in their direction if you have! If you are interested I can show you the Felted picture books I have collected over the past few years in another post.


Meet the Supplier: The Olive Sparrow

Meet the Supplier: The Olive Sparrow

Fibre 3, 2, 1

Q-3 Three types of fibre you can’t live without?

  1. Swiss Mountain Sheep (Walliser Sheep – Valaise Blacknose —

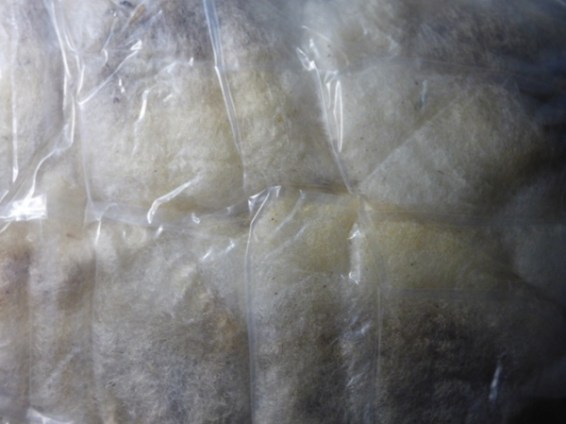
I just love this fibre because it makes both amazing wet and needle felted items. It comes in batt format in 49 dyed and 9 natural colours. At 27 micron it is a rougher fibre and has a moderate staple length of 3-5cm.

I fell for this fibre not just because of its felting qualities, but also because the product is made by happy sheep that spend their summers up in the high Swiss alps — travelling on ancient roman roads to get there. After they are shorn in a traditional manner, the wool is transported to a small Swiss family business where it is washed only with washing soda (aka sodium carbonate or soda ash is a natural cleaner and a powerful water softener. It’s very basic with a pH of 11). The washing process is environmentally friendly and the wastewater is safely returned to the local mountain stream. The wool is dyed carefully and without any harsh chemicals — using just natural vinegar and acid dyes. The wool is dried outside on warm metal roofing (weather permitting). In winter the warmth created by the dyeing process is used to heat the building.
The fibre is exceptionally clean as the carding machines have special vacuums installed to remove VM (Vegetable Matter naturally occurring in sheep fleeces) and ensure it doesn’t get back into the wool.

This slideshow requires JavaScript.


Due to the ease of felting with Swiss Mountain Sheep wool, kids love working with it. The fibre can also be laid out very thin to create transparent felts.

Combine Swiss Mountain sheep with Maori or other Bergschaf yarns. You can also combine it with 18/19 micron to create an inner layer that is next to skin soft when making garments. I love making slippers with an inner layer of 18/19 micron merino batt or Kap Merino and the outer layer being Swiss Mountain, combining softness with hard wearing wool.


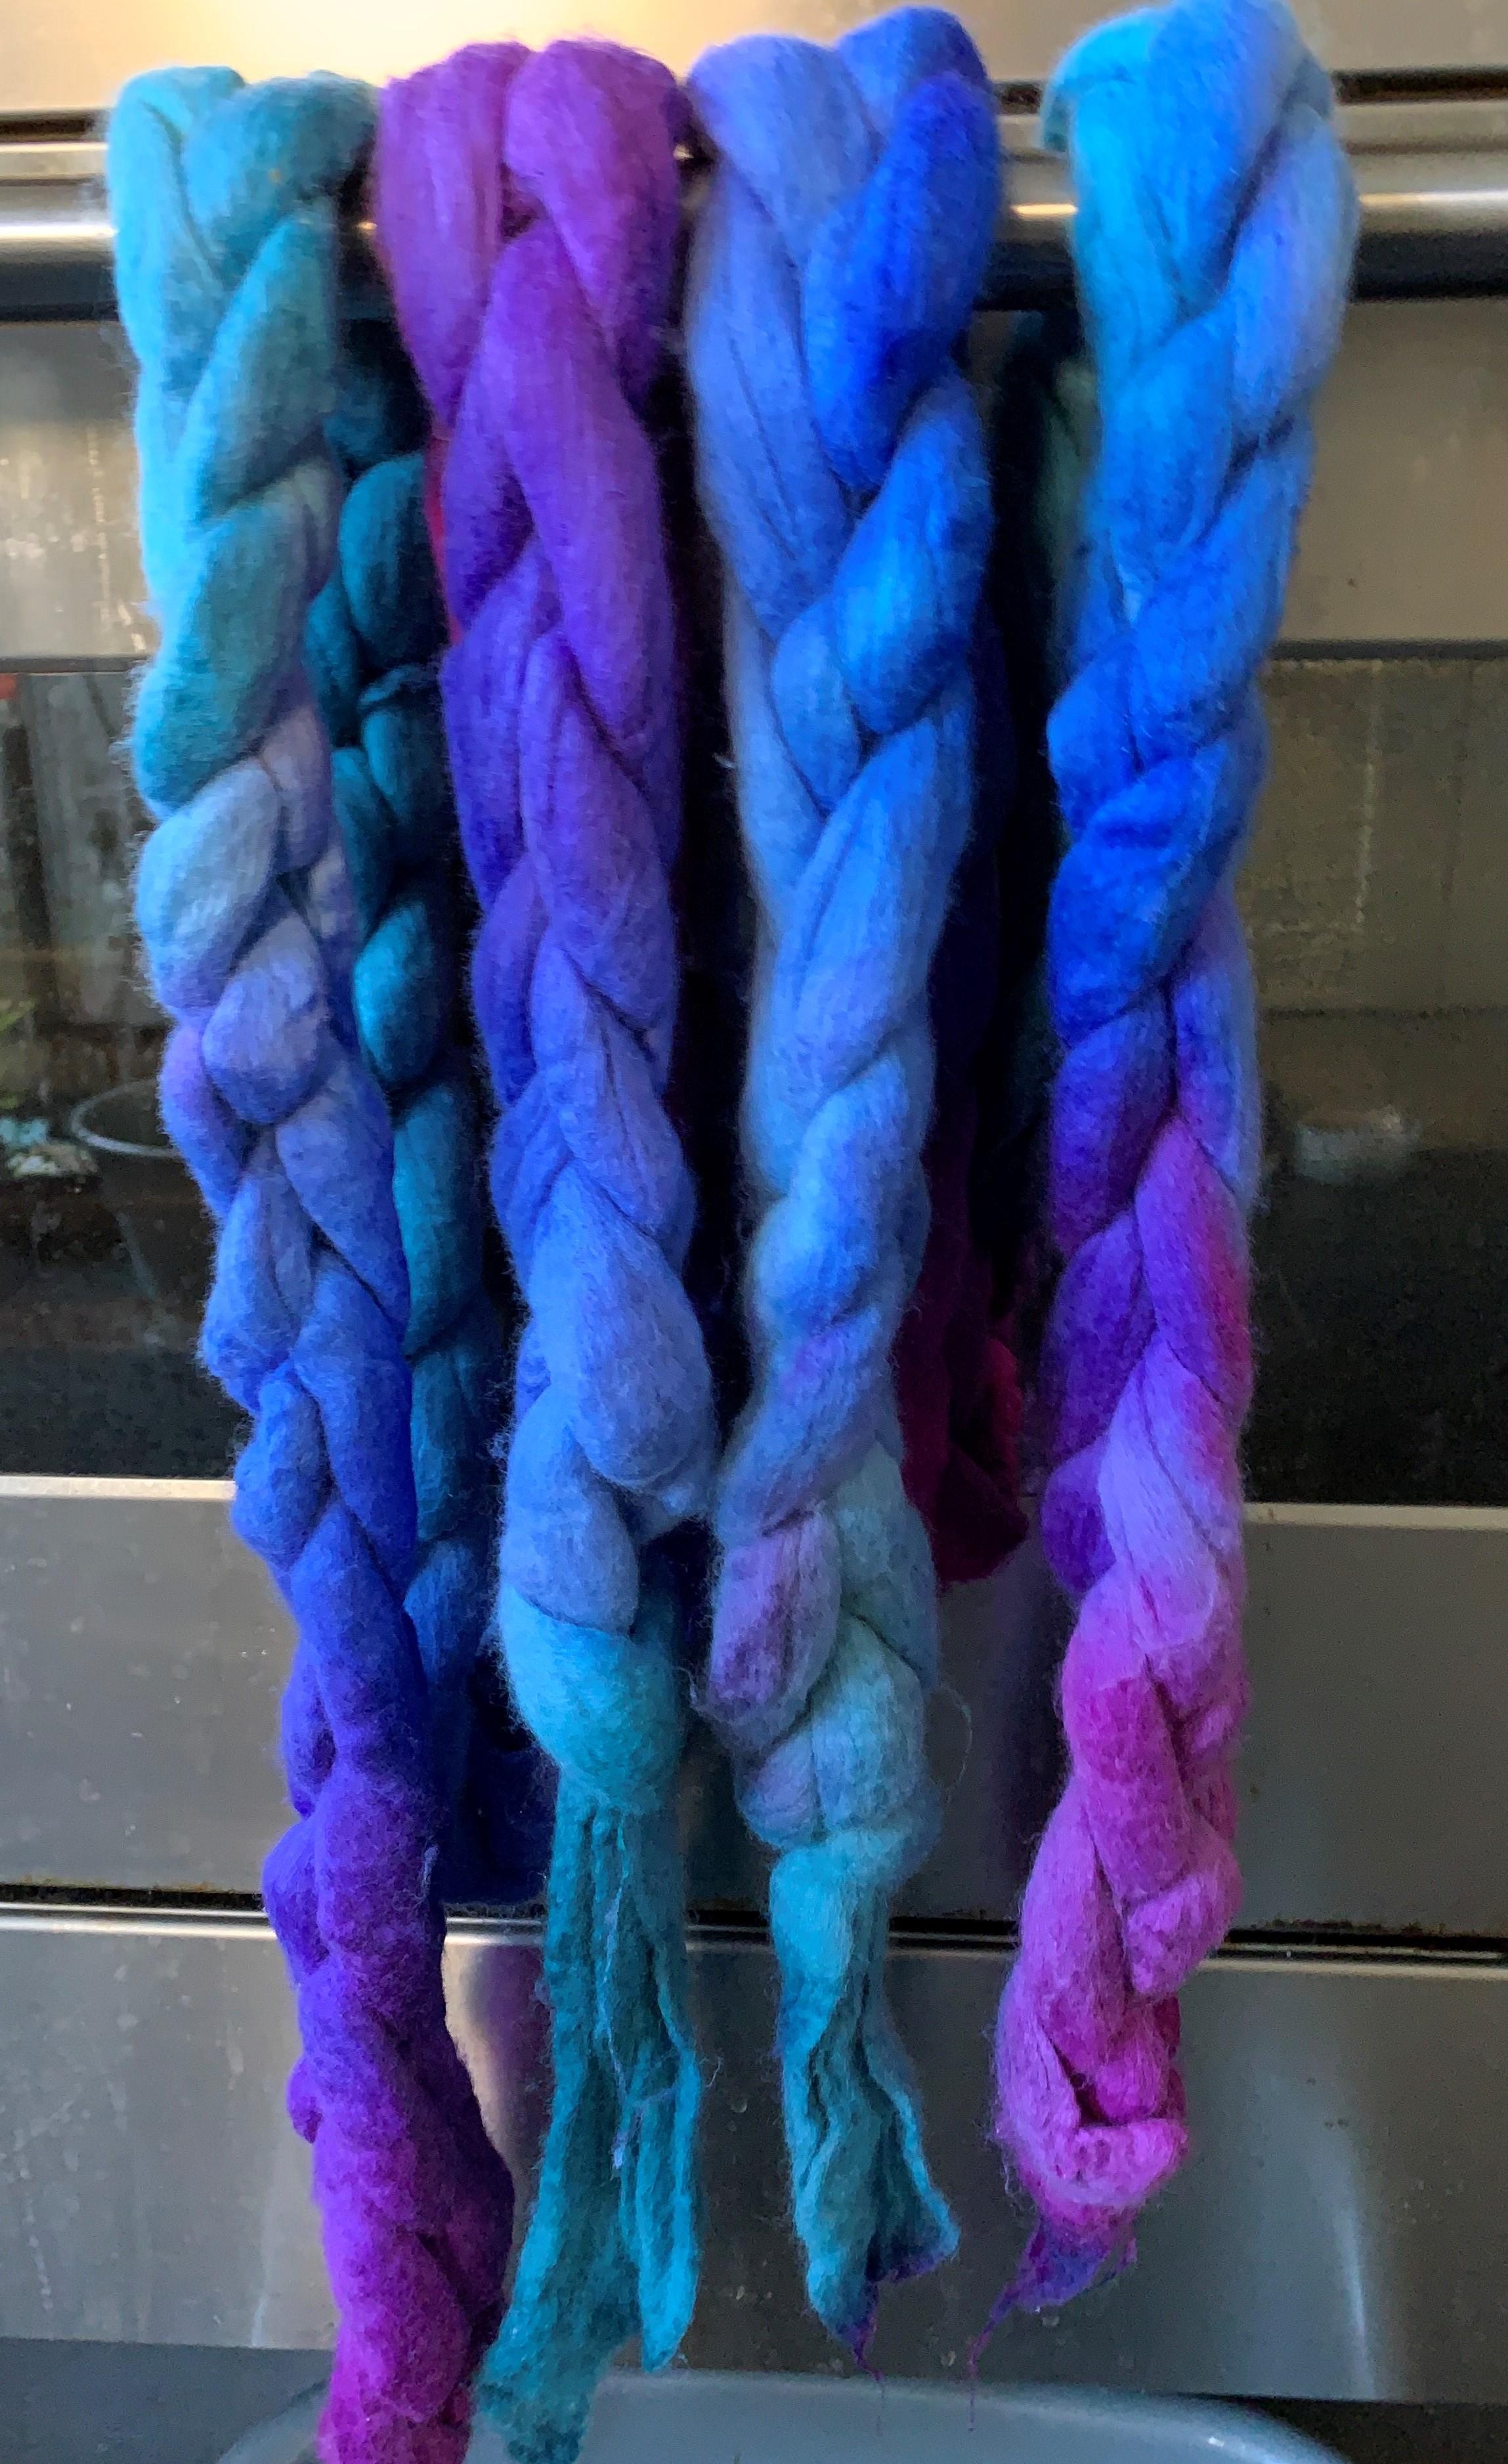
  1. Yak and Mulberry Luxury Roving

A custom blend made for The Olive Sparrow — this is a commercially triple-blended roving/top which mixes the silk with the yak to create a lovely variegated roving. Although it requires some gentle coaxing to wet felt due to the high content of mulberry silk, the resulting felt is an absolute dream to wear right next to the skin.

The yak fibre is naturally fawn coloured, the mulberry silk is undyed.

This slideshow requires JavaScript.


To produce yak fibre for felting, the soft fine under hair is the desirable element of this animal’s coat and is removed commercially by dehairing, which separates the soft under hair from the coarse outer hair, known as guard-hair.

This also makes a lovely spun yarn.

Using acid dyes on this fibre is very interesting — the yak and its brown/yellow undertones combined with the undyed silk to absorbs colours differently and will make mottled/variegated tones. As the fibre is very fine, it lends itself to be dyed after felting or spinning.


  1. Mint Fibre

The fibre length is 75-80mm.

I love using mint fibre in the same way as mulberry silk — the softly off-white colour and the slight mat sheen give a look between the extra shiny mulberry silk and the much softer gloss of tussah silk.

This slideshow requires JavaScript.

Mint is a new biodegradable cellulose fibre that is infused with mint powder that is extracted from peppermint leaves. It does not smell of mint and has a lovely soft and cottony texture. This soft golden fibre has antibacterial properties and natural cooling properties. Mint infused roving can be dyed using natural plant dyes and mordants or other dyes suitable for cellulose fibres. Perfect for spinning and blending with fibres such as cotton, silk, wool and Linen. Great surface inclusion for wet felting. A wonderful vegan needle felting alternative.


Q-2 Two tools you use all the time?


I use my ball brauser — I generally have two on the go at the same time. I also love the hand-pumped vegetable sprayers from the garden centre to wet-out large areas. When doing a sculptural piece, handheld massage tools make shrinking of specific areas very fast. Thin painter’s plastic as one layer on bubble wrap — and I always use the bubble side down when initially starting to felt.

Q-1 One fibre art technique you love the most?

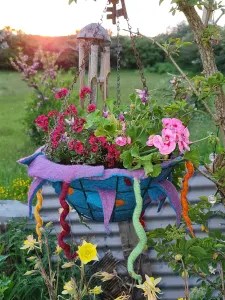
Having been blessed with learning handwork techniques from grade 2 onwards, my arsenal of techniques means that I often will blend them all together in a project. Because of the shop keeping me quite busy and still being needed as a mother, most of my creative time I spend making dolls or knitting simple items. Yet especially in doll making, I frequently wet felt garments for the dolls. Doll making lets me use all my skills. In wet felting, I love making long voluminous shawls — generally using at least a 4m length and 30” width. I also love working with Teeswater locks — washing, sorting, dying them. I sew them into wefts for my dolls and use them as fringes in shawls.


General Questions

What is your business?


The Olive Sparrow.

Good Hand-Made Goods made by You and Me

Here is a bit of background information about how this all came to be:

The Olive Sparrow is me, Monika Aebischer, I am a felter and a natural fibre doll artist. I quite proudly call myself a crazy when it comes to collecting books about wet and needle felting.  In a previous life, I was a mixed media artist with work in galleries across Canada. Sadly during the 2008 financial crash, the art market collapsed and I was forced to re-invent myself. As I had fallen in love with felt making during my student years at the Ontario College of Art and Design and had taken some wet felting workshops in Switzerland, it seemed to be the right direction to go. It also worked very well with my doll making — I needle felt the heads of my dolls and also make felted clothing for some of them. While growing up in Switzerland as part of my apprenticeship in selling women’s clothing, I studied fibres and textile manufacturing.


The Olive Sparrow shop started as a way to bring supplies to my felting students — I taught a 5-day felting intensive workshop at Loyalist College for 4 years every summer from 2011 – 2015. Every year I would import specialty felting fibres from Europe for my students. These students then wanted to purchase fibre after the workshop. Learning that there are several Fibre Festivals around Ontario made me realize that there was an opportunity to share these fibres with other felters. My painting studio slowly turned into a shop — alongside my selling on Etsy. I decided that the shop was going to focus on Felting supplies and not be another general fibre shop. I also decided that the focus will be on European felting fibres, rather than local fibres.


After 20 years in that space, I was forced to move in 2018, as the old building was being turned into condos. Now located in the East end of Toronto, the shop is in an industrial building — and open by appointment. There are about 600 square feet full of fibre, commercial 100% wool felt, Waldorf doll supplies, Sajou notions from France and select other items. The shop is also somewhat flexible, in that it can be transformed into a workshop space for 1-3 students.

Before we were in this Pandemic, the Olive Sparrow could be found at various fibre festivals — Twist, Picton, Woodstock, Peterborough, Knitter’s Frolic, Kitchener/Waterloo knitters festival, and other smaller events. 2020 has meant a focus on building out the online presence and extending inventory.

This slideshow requires JavaScript.


What kind of items do you sell?

Too many to list, however, here is a sampling —

18/19 micron roving in over 100 colours

24 Micron roving

Swiss Mountain Sheep batt

Kap Merino

19 micron merino Batt

Pre-felt (both in 40 x 40 cm sheets) and by the meter

Margilan silk

Maori and Maori/Bergschaft batt

100% wool felt by the sheet and many colours by the meter

Unicorn Power Scour

Premium locks – Teeswater extra length

Wool felt balls/hearts/stars from Nepal

Silk – Mulberry, Tussah

Viscose

The Olive Sparrow is an official DHG Dyehouse reseller — carrying all of the pre-felt colours, as well as an extensive selection of 19 micron roving, 19 micron batt, sari silk waste, mulberry silk and a variety of other fibres.


What do you think makes your business different from similar ones?

Unique premium products from Europe — all our goods are imported from Europe. Volume discounts to help small-scale makers. Teaching workshops – private and customized — creativity counselling. Very hands-on knowledgeable. A brick and mortar shop that is open by appointment and sells online.

Where are you located?

Toronto, Ontario, Canada – at 19 Waterman Avenue — which is an industrial area just south of Eglinton and just off the Don Valley Parkway.


Where can we find you on the internet?

www.theolivesparrow.com


Monika is doing 2 Giveaways

To enter leave a reply below. Do not post your email but make sure there is one associated with your post. You can’t win if we cant reach you. The two winners will be announced on June 4th


Giveaway #1 — 100 grams of premium washed Teeswater locks 12″ undied/unsorted ready for you to decide what you want to do.

Giveaway #2 – 150 grams of Swiss mountain batt (you can choose the colours if your name is chosen)

Second Quarter Challenge Part 2

Second Quarter Challenge Part 2

In Part 1, I showed you my design process for this challenge. It’s based on Art Deco ideas and color schemes but I created my own design.

The first thing I needed was to buy some black wool yarn. I was going to order unspun yarn, which I think would work best for this technique but I didn’t manage to get it ordered. Instead, I went to Michaels (hobby/art store) and purchased this cheap, wool yarn. At least that made it so I could move forward.

Next I placed my enlarged design under a piece of plastic so I could follow the lines with the black yarn first. You need to work upside down with this technique. So the black goes on first. I wet down the yarn per Ildi’s instructions on her recent felt wall hanging post. If I had been paying more attention, I would have looked back at Ildi’s design and seen that it was much more spread out than mine. But on I went.

Here’s the layout after I had laid down all the wet black wool yarn. I found it was easiest to cut all the lengths that were similar and wet them down at once. The yarn had a tendency to just lie on top of the water and not get wet. So I took 6 cut lengths at a time and dunked, patted and pushed the water into the yarn. Then I laid the yarn length along the pattern, sometimes squeezing the ‘corners’ to get a sharper turn in the yarn. I cut off the extra lengths as I worked.

Then I started laying out the colored wool. This was wet down in advance too. It was a bit awkward filling in the areas to start but I soon got the hang of it. I pinched off a bit of fiber, got it wet and then ‘smooshed” (that’s a technical term) it in place. My estimates of the amount of wool needed also got better with practice. I filled in the background color too to make the first layer of wool level. I did look at Art Deco color palettes and chose one that was similar using what I had on hand.

Then I added more of the background wool on top. I wanted it fairly thick so that it wouldn’t shrink too much and squeeze the design down even more.

I covered the wool with a sheer curtain and pressed the air out and added a bit more water to get everything flattened out. From the blue green side, I folded over any stray fiber and made a kind of circle with the background. I figured I would cut it later if I wanted everything to be even.

Then I spent most of my time rubbing and putting pressure on the blue green side. I didn’t do much rubbing on the front design as I didn’t want it to shift. I always use a piece of corrugated rubber underneath the felt while I rub and have the felt covered either with plastic or sheer fabric. Once the design was set and everything was staying in place, I fulled the piece with a rolling pin and with hand pressure. I didn’t do any throwing, rolling or heavy rubbing.

Here it is after felting and fulling. I was surprised at how straight my lines stayed. I did do a little stretching along the length of the lines if they started to get wonky. But all in all, I thought the method worked great. It does take a long time to layout but the design stayed put. The cheap wool yarn worked fine so I didn’t need the more expensive unspun yarn. But I think unspun yarn would felt in more easily and perhaps have less “hairiness” when felted.

And here it is after I cut the edges. It would make a nice hot mat or a design on a bigger felt piece such as a large tote bag. The piece is about 10″ in diameter (if it was a circle). I’m not sure what I am going to do with it. Thanks Ildi for the idea and thanks to Lyn and Annie for another good challenge. Art Deco is an interesting time period to use as an inspiration!