The loom has been sitting there needing attention for ages and I finally stopped procrastinating. Winter is a real challenge to get stuff done. I knew there would be threading errors; there are always threading errors when I do a loom. So I cracked out a good light and checked over the warp and found two. One required that I undo about four inches and re-thread everything, yuch. But the other was much easier. I just needed to move everything over by one thread in the reed. Very easy to fix.
All that needs to be done is wind 4.5 yards of warp yarn onto a bobbin, weight it, thread it through the empty space available in the reed and the harness, and let it hang out the back of the loom. The harness is the part of the loom that goes up and down and raises the threads and has wire “eyes” for each thread. I just use a very lightweight to keep the bobbin dragging a little. In this case, I used napkin rings.
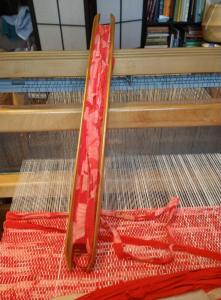
Next, I had to load up the really nice ski shuttle specifically designed for rag and rug weaving. The tools for weaving are sometimes the most beautiful things you can imagine, really beautifully made with an elegant design.
After a few passes, I noticed more threading errors. I fixed them and then noticed another. It became obvious the problem was the lovely ski shuttle was damaging the warp. I did a bit of research online and found out that the shuttles need to be maintained to a very high degree. The bottom of the shuttle needs to be polished and extremely smooth, none of my hand me downs were of that quality. I’ll fix them later, but for now, I needed an alternate solution. Back to fixing the warp.
I dug around in my baskets and found a different sort of rag shuttle along with several stick shuttles. The stick shuttle is a slower method of weaving, but it is all I had. I was really pleased with how well it worked.
The silk is weaving up softer and more flexible than I thought, the colours seem very compatible and I’m pleased with the results. The strips are attached with small knots and these are being used as design elements. I like the way they look when they pop up out of the warp. Because this is an experiment I will try to hold in my optimism for this to become the jacket I had hoped for; that might be too aspirational, but I am aiming in that direction if I can get enough yardage, but for now, I’m really pleased with how things are moving along.
Mr. Mer has spent another week making subtle comments about wanting an upgrade on his muscles…the fishy ones this time. His fishy bits are based on a Northern Pike which is common in the lake at my parents’ cottage. I have been beefing up his fishy bits but he says he is not ready for his close-up. I will keep working on his upgrades and try to tempt him to show you as soon as he feels he is done. SO we will get back to him in a blog or two.
1 Northern Pike reference
While we wait for him, I had something else I wanted to show you.
For the last week, I have been watching non-felting related videos from curios mondo. They seem to mostly have crafts to do with fabric stiffening products, that they sell, but have had some other interesting topics too. I did catch parts of the nine-class, workshop series on making a wire-wrapped bug necklace with beads. (They do the live broadcast free or you can buy the workshop and watch all of them at your leisure. So far I’m cheap and have so far only watched the live ones.)
You never know what you will be able to pick up while watching or taking a class. This includes topics that are not actually on the topic you mainly do. Even with missing large parts of the workshop, it gave me some odd ideas I wanted to investigate further. (yes, I will get back to that in a moment)
The instructor, while teaching, used the stepped pliers. I had been curious as to what their original purpose was. He used them while making a bail (it attached the bug to the chain). He also had some very tiny-nosed pliers that might be quite useful for rolling ends of finer gauge wire. I have got to track down a pair of those! He showed an interesting technique of locking the bail and a similar way of making links on a beaded chain that I likely should have written myself notes on.
Another good suggestion he had was putting a mark on tapering rounded pliers so you will get the same size ring on each turning of wire. This would be more important on wire-work that shows but could affect your armature construction if you were working on a smaller scale.
He also work-hardened the antenna of the bug with a hammer (I would have suggested the smallest flattening hammer from the blacksmithing hammers around here which would have been more effective.) This might be useful in armature construction for the tips of claws if they are exposed? Or stiffening antler wires? You don’t want to work-harden the wire too much or it will be more prone to breaking when bent or posed. So, an area that will not be repositioned frequently like tips of claws or antlers may be fine.
Now back to what I got distracted thinking about while I was suppose-to-be learning to make wire-work bugs necklaces (with beads). It just doesn’t seem fair to give Mr. Mer a tennis ball but not give him a tennis racket.
Oddly, In last weeks guild social one of our members had made a tennis racket and was next going to felt a tennis ball. I seem to be working opposite to her as I had Mr. Mer’s tennis ball (which I used as my show and tell) so now it’s time to make him the racket to go with it.
I have tried to play tennis in my much younger days. It did not go well. My glasses move if I run or suddenly change direction so I can’t see anything beyond blurs. This makes it hard to hit or dodge a moving object. I also got tennis rackets that tennis balls seem to be able to go right through!! That doesn’t seem fair at all. But if Mr. Mer would like to try then I should let him. It may go better for him than it did for me. I am not sure if there are different rules for water tennis. I should ask my niece about that. She might know. (She is very good at swimming, which I am not)
Now how to make the racket. It will be wirework! The gauge will be important. With Something larger for the rim and much finer for the stringing. I will also need to have a wrapped handle. The black floral tape should work. If it is not adhering well I could try black acrylic paint, mog-pog or clear glue to finish it off.
Wire gauge selection
I pulled out and considered from 6 to 14 gauge aluminum for the outer rim. I decided on 9 gauge. The little section of the inner rim had to be finer. After a bit of looking and debating, I felt the 12 gauge – 2mm Dollerama aluminum would likely work. For the lacing I selected the 26 gauge (steel?) coated gardening wire. After making the first racket I can see a way of making the lacing a bit neater but I am content with the first attempt.
2-3 two of the wires gauges I will need
The handle needs to be wider than the width of two 9 gauge wires. I debated between four or three wires and found 3 more in scale.
4 Three 9ga wire looks better than four
Since I didn’t have a bending jig I gently shaped the oval by hand at the top of the 9 gauge wire bringing the handle ends together and adding the middle piece of wire. I added floral tape to hold the handle in shape as I measured, cut, then shaped the lower curve in the 12 gauge wire. I added a wrap of black floral tape before taping it in place on the racket.
This slideshow requires JavaScript.
5-6 Lower rim of racket added
I cut off a couple of lengths of the 26ga fine coated steel wire. ( If I did this again I would have made each vertical a separate piece and wrap to give the spacing between each string.) I wrapped then laid in the vertical longer strings (9 in total). Then, used the back of the felting needle to create a shed to pass the horizontal strings through. (Why did I not grab the large darning needle hanging from my desk lamp? It would have worked even better.) I added extra wire wrapping around the perimeter which would likely not have been necessary if I had done the wires individually.
7 the strung racket
At this point, I needed a bit more stabilization of the handle. It was compressing towards the base of the racket (The three wires were not sitting flat. One was trying to lift up between the other two.) I can fix such errant behaviour with more wire!!! I pulled the lengths of the 22ga black steel floral wire and carefully positioned and wrapped the thin wire around the parallel 9ga wire. This required another layer of floral tape over top and all looked much neater and more like a tennis racket!
This slideshow requires JavaScript.
8-10 Adding wire to strengthen the handle
Mr. Mer was thrilled with his new acquisition! Which he held and posed with trying to get just the right look.
This slideshow requires JavaScript.
11-15 The photoshoot!
Here is a quick idea of scale as I hold his new racket and ball
16 To get a sense of scale
He has put away his racket and ball carefully and wants me to get back to work on his fishiness. Then, maybe finish off the muscles of his arms….maybe some hair…… (Mr. Mer is getting demanding).
17 Good Job Mr. Mer! toys should be put away after you’re done playing.
This last week I joined a free to everyone stitch camp not knowing what we would be doing. The idea being that you get a short instructional video every day for 5 days and it will be a surprise and inspirational and push you to think outside the box. I knew there was cloth and pain and stitching so it seemed interesting.
I gathered some cloth and paint and things to make paint marks.
The idea was to make one painted piece leaving lots of open or negative space and one with only a little negative space. separate colours with a little of the other colour in each. I picked a white background and yellow and blue as my other colours as I could get that paint and had other pieces of cloth in those colours too. I was going to do turquoise but the store was out of it.
I like the one with more negative space the best.
Next was to cut them up and piece them back together. I cut them into 3×5 inch pieces. I was going t make one long piece and then do stitching on the whole thing. as I tried to piece them together I was not happy with them so I made two shorter strips. I didn’t really like them and wasn’t sure I would bother doing the stitching. Ruth suggested making a book with the pieces instead of a long strip and I think I like that better. I forgot to take a picture of them before I unpinned them.
I reassembled them as pairs to sew together. I will do some stitching on them and then attach them to a backing and make a book. Not sure if it will be a regular book or maybe an accordion book that could stand up on its own. I will see how it goes.
and these are some individual pieces I liked but couldn’t find matches for
I enjoyed the process and the camp Facebook group was inspirational. If I was going to do it again I wouldn’t use a white background. I would make fewer blocks of paint and more shapes. I would also mix the colours more and aim for something between a little and a lot of negative space. I know some of you joined the stitch camp. Did you enjoy it? how far along have you gotten?
In my last post, I showed you this nuno felted background and asked for suggestions. Everyone’s ideas were so interesting and different than what I see in this randomly dyed piece. I loved hearing your suggestions but to me, this was definitely an autumn forest scene. I wanted to try and make it more abstract and less “real”. So I started off just adding some lines in free motion embroidery that were to symbolize tree trunks. I forgot to take any in process photos. Once I get started on the machine, I get engrossed in the process. Then I got to the stage of “really ugly”. Do you find when you’re working that you go through that stage of “this is awful and I should just toss it”? But I kept going and ended up going more realistic than planned but that was the only way forward that I could see that would work.
I added tamarack trees, a fallen trunk and some foreground leaves in the upper right corner. The small trunks in the back left were too white so I took a gray colored pencil to them so they wouldn’t stand out too much. I then hung the piece up on the wall so I could look at it from a distance and to see what else it needed. I decided to add more foreground leaves so they came down into the distant aspens in the lower right.
Here it is with more leaves added. That pushed the aspens back further into the distance and made the piece feel a bit more cohesive.
Here’s a couple of close ups of the free motion stitching. I don’t usually use the zigzag stitch when doing free motion but I liked the more abstract effect on the tamarack trees. If you don’t have tamaracks (also called larch) trees in your area, they look like pines/evergreens but their needles turn a bright yellow orange in the fall and then they shed all their needles. So they are a deciduous conifer. They are a gorgeous addition to the landscape in the fall.
I continued my new “habit” of finishing the piece at the time I made it. Here it is stitched down to a tan matting fabric and laced over matte board, another piece ready to frame. It does have some abstract qualities to it and I like the end result. Sometimes, you just have to keep pushing through and ignore that inner critic.
I wanted to make a special Christmas gift for my fiber friend Lisa. It’s hard to create something original, for someone who does the same crafts you do; and many, much better. She was certain to get hand dyed yarns, and the cute trinkets we buy each other every year, but I wanted something different. I searched Pinterest for something that struck my fancy, and used some crafting items I already had. (Actually, I’m smiling quietly, as the hubs is right here.) Who am I kidding? There’s always something I need. 😆
I eventually found some beautiful projects, using beads, findings, Shrinky Dink plastic, and some art supplies. I had all of it. ✅ These items were combined to create some beautiful pieces of shrink jewelry. Julie Haymaker is an artist who came up with this method in a day dream. She used some tools she had on hand, and manipulated the warm plastic into shapes and eventually flowers. [Julie’s website: https://www.juliehaymaker.com/story%5D The beautiful thing about shrink plastic; if you don’t like your first attempt, you can heat it up and try shaping it again.
Julie Haymaker’s Home Page
I have been having fun with this versatile material ever since. Who would imagine this product, formerly used by kids, to make magnets for Mother’s Day, could be turned into art or mixed media components. With all the possibilities…my “bunny butt” was down another rabbit hole. I purchased Julie’s set of 4 silicone molds; my favorite being the pink one, followed by the green. Here’s my first attempts: made with stencils and Tim Holtz’s Distress Oxides.
Shrinketsmade with stencils, ink, and color pencil lines: using Julie’s bead patterns and Shrinkets molds (below)Julie Haymaker’s 4 Piece Shrinkets Silicone mold set
I made several of these prior to Christmas, mixed them with findings; had and bought. (Rabbit Hole) I made several pair of earrings, and pendants, that I gifted to friends.
Earrings and Pendants made with Shrinkets
After making all these pieces, I wanted to take my lessons to a new level, at least for me. I found some vintage broach backings on Etsy, and went to work creating. Since our friendship started with knitting and fiber, I wanted to incorporate my felted fiber into her special piece. I thought: why not attach the broach to a felted backing.
Felted piece recycled from a sample piece made last year.
You can see all the end caps and beads used: there’s even a crocheted piece under the yellow flower for additional texture. Everything is attached to the broach back with wire. My engineer husband Brian, is much better with wire tools, than I am. He put a series of 3 jump rings, on either side, to make it hang correctly from a chain. Then we attached a large jump ring on either end. Then to add a bit of panache, I attached hand dyed silk ribbon ties, to each end. This is the result:
Lisa’s Necklace
I didn’t know I would be using this photo in an article. I snapped it to remember what I did with the necklace. But, I think you can get the idea, and hopefully you will see many more possibilities, with your own fibers. I feel the possibilities are endless. Let me know your thoughts.
Capi
P.S. I intended to continue with my hexagon story, and show how how I connect them, but they have been in timeout, to prepare Christmas gifts. Then we picked up this little guy, Porter, who keeps us entertained, and on our toes. He likes to nibble on those too!
In this post I will show you some wet felted samples I’ve made in response to the challenge, and my thoughts so far on what I might do next.
The quarterly challenges are supposed to push our boundaries. At first glimpse, I do this all the time. I rarely write a blog without using charity-shop bought fabric and bashing on about how much I love using recycled materials, so maybe it’s a bit of a cheat for me? Well, maybe. But while I scour the local charity shops for silk scarves or old lace for nuno felting, I also pick up some second-hand fabrics asking myself – ‘what would happen if I tried to felt that?’ Although my intentions are good, I often don’t get round to trying out the more unusual fabrics. So, I decided I’d use the Q1 challenge to dig out a few second-hand fabrics I’ve bought in the past but not used and make some samples.
I like the colours and am interested to see what happens to the texture. As you can see, the background is quite sheer.
First I cut a square, based on the width of the scarf. I laid out 2 fairly thick, even layers of midnight blue merino at right angles on the back.
Velvet scarf sample: cut square and back layout
Here’s the final sample. Shrinkage was about 50%
Final velvet sample
It’s interesting how much the velvet has been integrated into the felt. I’d expected more texture. I like the result but immediately wonder how it would look with a lighter colour wool behind it. Maybe I would be able to see more of the original velvet’s pattern? Ideas for a future sample.
Next up is a black and silver sequin dress. I bought this because I like the way the sequins are distributed on the backing fabric: not packed very tightly and not widely spaced. Also, I like the way the black and silver sort of drip into each other.
Sequin dress bought in a charity shop
I cut a 20 x 20 cm square: I like this size as it’s big enough to see what happens and small enough to felt reasonably quickly. It also leaves enough of the original fabric if you decide you want to make something from it. I laid 2 fairly thick but even layers of black merino on the back and wet felted.
20 x 20 cm square cut out and back layout
Shrinkage and final sequin sample
I achieved about 45% shrinkage. I liked the result and started to think about how I could use this fabric – more of which later.
Here’s a second velvet scarf I wanted to have a go with
Gold and black velvet scarf sample
Unlike my first velvet sample, the background didn’t integrate so readily into the wool, so sat more on the surface. Maybe that was predictable as the background was less sheer but for me it highlights the value of making samples – you can’t really be sure what you’re going to get until you try it. Especially as my charity shop fabrics rarely have labels telling me what they’re made of. I like the texture: maybe this would work well to represent an animal. Shrinkage was about 45%
Sample 4 was a light pink fade-dyed silk scarf with lurex stripes. I used 2 thin, even layers of natural white merino on the back.
pink silk scarf with lurex stripesFinal sample: from square to rectangle
One of the most striking things was how much more it shrank in one direction than the other (about 45% in one direction, 30% in the other). The ripple of the lurex also gave great texture.
I could have fulled this harder but decided to stop. I wondered whether the uneven shrinkage was just because of the lurex stripes, but looking again at the original fabric I saw that the silk was much more densely woven in the direction of the stripes rather than at right angles to them. When wet felting, the more dense things are, the less they tend to shrink. I think this would make some fabulous fairy wings maybe. Alas I have no call for fairy wings at the moment. Put that on the back burner for a future venture.
Sample 5 is a section of a loosely woven silk fabric with a distinctive pattern. I wondered what would happen to the motifs.
Shrinkage was 40%. Given it is loosely woven, I was surprised by the amount of ruching. The fibres retained a nice sheen. I regretted my choice of natural white wool for this one. I wished I’d used a turquoise blue or maybe tried 2 different colours to test how to show up the silk’s colours. I’ll put this in the samples box and maybe I’ll come back to this another time.
Sample 6 – I found this scarf particularly intriguing. Clearly a woven fabric but no information about the materials. The weave made the fabric very stretchy but the threads themselves had almost no stretch in them. I thought maybe cotton or linen. Using the same method I went for 2 fairly thin layers of undyed white merino on the back.
Blue woven scarf of unknown fibres
It was a bit tricky to decide how much to stretch out the fabric when laying it out so I ended up with a slightly larger sample than the others. Also, I don’t have an iron in the studio so I wet the particularly creased sections to help flatten them.
Blue woven scarf final sample
Shrinkage was 45%. I really like the texture here. Maybe I will use this when creating waves / sea water in a future wet felted coastal picture. I could lay it out in wavy lines with dark blue or pewter-coloured wool.
A small aside. Why do I keep talking about shrinkage? I’ve been felting for over 10 years now but it took me a long time to understand how to full felt properly. It’s very tempting to stop fulling when you get to about 25% or 30% shrinkage. And for some things, like pictures behind glass, that may be OK. But in my experience, the more you full things the better the quality, strength, appearance and durability of felt. And the best way of checking how well you’ve fulled or felted something is to aim for a high shrinkage rate.
Sample 7 – a silk scarf with a dense feather pattern. I was interested to see what would happen to the pattern when felted. I put silk on both sides, with wool sandwiched in between.
Feather pattern silk scarf – made into double-sided book marks
I wasn’t sure about the white wool but think the silk has potential to represent something like lichen in a felt picture or sculpture – maybe using sage green wool. Or maybe marble? I cut this sample into strips to make bookmarks.
OK. These are the seven samples I made specifically for the Q1 challenge. The next question for me is ‘so what?’
I’ve included some thoughts on what I could make next with these fabrics. I decided to investigate further the potential of the sequin fabric. I tried some 3D drop-shaped pieces, using a resist with the sequin fabric inside. The first has potential for earrings, though I need to think about the earring fixings. Or maybe part of a neck piece.
The second is a prototype for 2022 Christmas decorations. I think this has potential but I would include more colour and maybe texture in the outside. Also, I must remember to mark the front as I couldn’t tell which side to cut into. It’s difficult to see the scale in the photos – the earrings are 7cm top to bottom and the decoration 11cm.
Developing sequin sample: prototype earrings and a Christmas decoration
Here are a couple of fabrics I’ve sampled in the past and how I’ve learned from the samples to make things – in this case plant holders.
This was a loosely knitted shawl. I made a sample and loved the mossy look of it. In the sample-making process I cut off the ribbed edge and included it in this plant pot holder, to give a textured band.
Felting a knitted mohair shawl
Here’s another charity shop scarf that I incorporate into plant holders
Felting an open-weave silk scarf
Final thoughts:
re-using, recycling or up-cycling are not just good, eco-friendly ideas but can be really fun and give unique results.
small samples are fairly quick to make but give you loads of information about how fabrics will felt or work with other processes
making samples is a great way of sparking ideas about future projects
make sure you full wet felting really well
keep your samples as you never know when the learning and ideas might come in useful
The Q1 challenge is not just about felt-making: it’s about different ways of recycling fabric. There isn’t a right or wrong answer with samples – just lots of things to learn. Do join in by posting your recycled fabric samples on the forum.
This week I got my Moderna booster shot. Then crawled into bed. I know it’s working from the immune response; not as horrible as AZ but definitely more kick than the last Physer dose. I’m still tired and seem to be a bit sluggish but I know it’s working. This may be a bit short and if the spelling goes really strange I have likely fallen asleep on the keyboard.
Mr. Mer has immensely enjoyed his week out of his project bag. But he had something he wanted to discuss. It seems he may have been folded into an odd position in his bag for too long and has developed a trigger point in his rhomboids. As we discussed last time they are a fabulously cool muscle that stabilizes your shoulder when your arms are out in front of you (so, most of the fun things you do and dishes).
Now you may be wondering what a trigger point is. (A discrete, focal, hyperirritable spot located in a taut band of skeletal muscle. They can produce pain locally or in a referred pattern.) Think of a muscle like a bundle of straws. To use the muscle you can ask for a few fibrils (the straws) to contract or you can use more or all of the fibrils to contract. This is the difference between holding a fragile, hollow egg (using a few) or crushing a beer can (using Many or all, some beer cans are tough). As you hold the contraction for an extended period of time a few fibrils may get stuck in the instruction of “I must contract” even after you have told them to stop and relax. The Fibrils will say “don’t bother me I’m busy working!” and refuse to follow your new instructions.
There are a number of ways to try to treat one, from needles to cold sprays to manual therapy (Ischemic Compressions). Stretching can help a bit by calming down the neighbouring muscles but there is a way to have a more effective chat with a trigger point. In this case, rhomboids are not in an area that is easily self-massaged! Ok, Mr. Mer says he can almost reach the spot but I have an easier way to get there than your fingers.
Ischemic compressions sounds really impressive and very expensive. Let me try to explain it a bit. So we have a spot in the bundle of fibrils that is holding its calcium and maintaining the unwanted contraction, long after you told it to stop. Remember the Fibrils will say “don’t bother me! I’m busy working!” As you apply an ischemic compression you are pressing on the spot of the trigger point. This will deprive the area under your finger of local circulation (food and oxygen) while you press your finger there. As you hold the pressure the fibril says “I can’t breath!” it releases the calcium that it was using to maintain the contraction, and relaxes. When I palpate this it feels like a frozen pea size bit of butter that melts under my finger. As soon as it’s melted, lift your finger and return circulation to the spot. (Ischemic – without oxygen, Compression – push on it). But I bet you still can’t get your own fingers back there to chat with your own rhomboids. (I have a plan! Now it’s time to go look in your backyard or front yard for a tennis ball. Even if you don’t have kids or a dog they still seem to drop in from somewhere!) if you don’t find one lying around, the Dollar store sells Smelly ones. The less smelly ones can be purchased for a bit more at other stores.
So, what I did promise Mr. Mer and actually made this week was a yellow tennis ball. I had a bit of white, very fine possibly merino or Rambulay batting that is full of vegimatter and some absolutely horrid bright intense yellow of unknown origins.
1-2
With a bit of rolling and poking, I had what I hoped was a close size. Mr. Mer would like it a bit firmer and more of a yellow colour.
3
I added the tail into the ball body, giving it a much firmer core. Then started to lay over layers of the hideous yellow. (it’s just too bright and sunny a colour!!!)(I almost always cheer for the guys with the garlic allergy!)
4-5
I checked for size and it seems to be right.
6
I need to add a bit more detail on the ball while I waited for the other imperative ingredient to this therapeutic tool.
I am sure you have seen diagrams and pictures of people rolling around on tennis balls on the floor….. You do know there is a more comfortable way to do that right?
7
Mr. Mer tried the tennis ball on the sore spot but it rolled off as soon as he stood up! (It would have floated away in the water so that isn’t the answer).
I got Mr. Mer to practice without the tennis ball until the missing ingredient arrived.
Take the hand from the sore side, bring it across the body in front of you and rest it on the opposite shoulder. (This position opens the scapula and will help get the tennis ball to the sore spot).
8
The Final Ingredient has arrived!!!! Mr. Mer is now Very Confused!!!
9
His “legs” certainly don’t look like that! No NO!! Don’t try to wear them! Put the tennis ball in the toe of the knee highs (you can use one leg from a pair of full sized nylon if you need to get further down the back or work on the glutes) Yes this works for trigger points in Piriformis which can give sciatic pain.
10
Here Mr. Mer has a very short length of knee high so the ball is sitting quite high on his upper back. This is great for Upper Traps, Levator Scapula and the Upper Rhomboids. By loosening his hold on the nylon and leaning forward slightly the ball will slide further down his back. This will allow access to a different set of muscles.
11
Yes that’s better! Now the last part is to find a nice solid wall where you can to lean into the tennis ball.
Mr Mer is trying to show you how the tennis ball is between him and the “Wall” (really it is a stack of fiber bins). He is not very see through so it may be hard to see what he is trying to show you.
12
Oh, it looks like he has moved his shoulder/arm and adjusted the tennis ball to find just the right spot! With this method you can adjust the position of the tennis ball and the amount of pressure you are using easily. Trigger points are painful but when you have the right spot it is described as a “Good Ache”. If it gets more painful you are not on the right spot. Trigger points do not occur in BONE. Do not use the tennis ball on a bone!
The tennis ball in a sock, knee-high or leg of a nylon often feels really good even if you don’t have a trigger point.
13
I should be feeling back to myself by tomorrow I hope, but now it’s time to either face plant the keyboard or go have a nap as this is translated out of dyslexic for you.
PS This morning Mr. Mer decided to follow the instruction on the packaging for the Knee highs. He can not find any high heeled shoes in the house and he didn’t fit in the stiletto boots (i don’t think I fit in them anymore either). He decided to try the knee highs on, he only needed the one.
14-15
He is not convinced this is the look he wants, it restricts his fins. He may stick to just keeping his tennis ball in the knee-high. He does like his new Tennis ball!
I am still slowly packing up the studio. The hard part is deciding what to leave so I can still do some work while we slowly work on the new space. slow is the operative word. It has to fit in around other things that are a more immediate need. It is looking emptier. I am not sure the picture really shows that. The pile to go is different stuff.
We have had several more lambs. I think we are at about 15. So the barn needed reconfiguring to make a group pen and space for lambing pens. they are so cute and of course, they can not wait.
This slideshow requires JavaScript.
I signed up for a stitch camp online. It starts tomorrow (17 January). It’s free but I thought it sounded fun. It’s one video a day for 5 days and they are available for a week after that. Seemed like a fun thing to try and maybe get some creative juices going. It’s here if you’re interested. https://training.textileartist.org/stitchcamp-signup-1/In
In the meantime, while sorting and packing I found some thread I got a long time ago. It is on cardboard, old-style spools. It says FILTEX on the top of some. From what I can find online it is a 40/2 polyester embroidery thread. It is very shiny. I thought I might use it to stitch on some felt balls just for fun.
And I can’t forget that it is Ava’s Birthday on Monday, Jan 17. A big 1 year old.
I added quite a few more branches with couching in a variety of colors to give the mottled appearance of these type of branches.
I decided not to procrastinate with the finishing work, so I chose a “matte” fabric of medium value gray, stitched the nuno felt to the fabric and laced the fabric around matte board. The piece without a frame is 11″ x 18″ approximately. It’s now ready to take to the framers when I have some other pieces completed to go with it.
Here’s a closer look at the hand stitching. You can click on any of the photos to enlarge them.
Next up are two more nuno felted pieces that need embellishing.
I think the one on the left will become free motion machine stitched with tree trunks and perhaps more orange leaves in the upper right corner. I am going to try and keep it fairly simple and not overdo the stitching. I want it to stay fairly abstract as landscapes go. The piece on the right may have cone flowers added to it with applique. I haven’t made any final decisions on that one yet. How would you finish these? I’d love to hear your ideas.
With the weather warming up, we have been looking for some garden furniture ever since the most severe lockdown restrictions began to lift in September, but almost all of reasonably priced wooden furniture has sold out and no-one knows when more will be delivered. Living at the bottom of the world has its advantages but access to products and materials while shipping containers are in disarray all over the planet due to the pandemic is not one of them. Most imported items, from cars to sofas, have been subject shipping delays of a year or more.
We ended up settling for a garden lounge set that isn’t as comfortable as some of the display sets we looked at, the seats are a little too long in the base but that is easily fixed with some additional cushions. I spent this weekend making a set of cushions and some matching fabric coasters / “wrist-warmers” for the the chairs.
Cushion covers are very easy to make and a great beginner’s sewing project so I thought I would share my method with you. I hope this isn’t too patronising for the more experienced sewers among you.
I started by cutting 2 squares of fabric, the same size as the cushion inserts, plus a 1cm ./ 0.5″ seam allowance on all 4 sides. A 60 cm sqare cushion needs 2 pieces of fabric measuring 62 x 62 cm.
Placing right sides of fabric together I stitched along what will become the bottom edge of the cushion cover, leaving a 1 cm seam. If the pattern on your fabric has a right way up, making sure this seam is on the bottom will ensure your zip is out of sight on the finished cushion.
Press the seam open with front of the cushion facing towards the table (I was lazy and pressed it open with my fingers rather than getting the iron out, as you can probably tell from the crumpled state of my fabric! 🙂 ):
Lay the zip, right side down, so the teeth line up with the line of stitching. Pin into place and using a zipper foot, sew down both sides of the zipper tape. Tip – the zip does not need to be the full width of the cushion, I think the zipper looks more professional if it stops an inch or two before the edge of the cushion. You can cut the nylon zips to make them shorter if you have one the right colour but it is too long.
Sew across the top and bottom of the zip so the zipper will not be able to run as far as the metal staple.
Using a seam ripper, remove the stitching holding the two sides of fabric together, stopping approximately 2 inches before each end (and before the line of stitching you placed across the zip).
Open the zip enough that you can easily pass your hand through the hole.
Fold the 2 squares of fabric so the right sides are together again, pin into place and stitch around the 3 reamining sides, leaving a 1 cm seam allowance from the edge.
Open the zip the whole way and turn the cover the right way out, I like to use a chopstick or pencil to push the corners out so they are nice and square.
Insert your cushion and close the zip! et voila!
I also made some fabric, wrap-around coasters to protect the arms of the new furniture from the condensation cold drinks often shed in our warm, humid climate. I started by making a sheet of felt and cutting it into four rectangles.
Then, using the chairs as a guide, I cut out a rectangle from each end so they would wrap around the arm either side of the upright piece of wood.
I cut a slightly larger rectangle of fabric and trimmed it so it was about a cm wider than the felt shape (see the piece on the left) before using fabric glue to fold over the edge of the fabric and tack into place on the felt.
Once the glue had dried, I stitched around the edge of each shape before attaching a piece of velcro to 2 tabs on each coaster and wrapping around the arm of the chair.
I am looking forward to spending the rest of the summer sitting in our “granny and grandpa” chairs on the veranda now 🙂 Fingers crossed the chickens don’t roost on the chairs and poop all over my new cushions….


 1 Northern Pike reference
 2-3 two of the wires gauges I will need
 4 Three 9ga wire looks better than four
 7 the strung racket
 16 To get a sense of scale
 17 Good Job Mr. Mer! toys should be put away after you’re done playing.
 18 A final shot


 1-2
1-2 3
3

 6
6 7
7 8
8 9
9 10
10 11
11 12
12 13
13

 16
16


