Meditative stitching.

Meditative stitching.

My post this month, is about how some hand stitching can be both calming and mindful. It really does not need to be complicated, and any design element choice can develop as you work on the piece.

I am often on the hunt for fabric to reuse, and in my favourite local charity shop in May this year, I found a linen bed sheet. I could not believe my luck, not a mark on the sheet either. I thought this would be ideal for some stitching and/or embroidery, so I washed, ironed and put it safely away. This is the sheet half opened on my bed. Not the best photo, just lovely, lovely fabric.

I cut a piece of fabric that I thought would be neither too big or too small for my exercise. It did feel quite wrong to be cutting the sheet.  The piece I cut measured 18 inches square. I have some embroidery floss in various colours, and I started with a running stitch from one corner of the fabric. I decided to do 3 or 4 lines with each colour, and to stitch down a little piece of cotton fabric as I went along in the manner of ‘boro’ stitching. I used 2 strands of floss throughout. A grid seemed to develop, and I marked the grid with a thread colour that I was not using for the stitching. Each square of the grid is approx 4×4 inches.


I continued around my work with the only other decision to make was the direction of the stitching on the opposing sides of the work, and what, if anything, should I do in the middle?

I really enjoyed stitching like this, I think the little pieces of fabric really add interest, and I will continue to do some meditative sewing next year. I will probably use one or two other stitches to add some variety. I really like using different colours too. This is how the finished piece looks now that it is ironed, and all the wrinkles removed. I have left the centre free for now.

There are any number of women (men too, probably) online who stitch, or who do some ‘daily stitching’, I am not in any way aligning myself to these artists; here are two women stitchers I follow on IG, or became aware of during the last year, and one article (of many) about ‘boro’.

Karen Turner   https://stitchinglife.uk/

Claire Wellesley-Smith  https://linktr.ee/cwellesleysmith

Boro stitching is a popular method of visible mending today. The method has a long history, this is from the V&A https://www.vam.ac.uk/articles/make-your-own-japanese-boro-bag


November challenge: knitting for charity

November challenge: knitting for charity

As I was scrolling through Instagram one day, I saw this advert by Dementia UK asking people to join their November challenge: to knit every day for that month and raise money for their charity.

I’d never done this sort of thing before, and felt compelled to join and see how I’d do. It’s a worthwhile cause, and charities are always in need of money.
It has to be said that, in the past, I’d probably shy away from such a challenge because I’d fear “not reaching my goal,” which Present Me finds silly – I’m not doing this for brownie points, it’s not a measure of my self-worth and, more importantly, if I only raise £10, it’s ten pounds more that Dementia UK will have to help those in need.
Present Me is wiser than Past Me, don’t you think?

A dark grey hand knit jumper on a mannequin

Here is my first make, which I finished in, I think, 5 days. It’s knit with super bulky wool, so it goes along super quickly.
This is a free pattern by Drops Yarn – very fitting, because the yarn is also by Drops – and it has to be said, the instructions could be better. There were a couple of techniques I had to look up in video format because the written instructions just didn’t make any sense (to me, anyway). I also made a few changes here and there, one of them being some waist shaping. I also changed the sleeves a little to adapt them to my small frame.

A closeup of my hand knitted grey jumper, where I show the shoulder detail.

It’s a very warm jumper and I’ve worn it several times to help with having lowered my thermostat at home.
On a side note, I might add a few more rows to the sleeves just to make them extra, extra cosy.

A hand knit grey beanie hat on top of a mannequin.

I had a lot of wool left after finishing the jumper, so I decided to knit a beanie hat. This was knit in an evening and I can attest it’s kept my noggin’ warm when venturing outdoors.

Finally, a bit of a cheat…

Remember my Dead of Night jumper, that I showed you in my previous post? (Apologies for the lack of link to said post, I can’t find it at the moment of writing!)

Dead of Night jumper, pattern by Dear Ingenue, on a mannequin

I had “finished” it a few weeks ago, but hadn’t woven in the ends. I took the opportunity to do so and therefore count it as another November make – hey, it’s not done until all the tiny details are finished, correct?
It did turn out to be too large for me as had previously mentioned, but in a lovely twist of fate, my mother loved the pattern and wants it. That’s one Christmas present sorted!
It’s not blocked yet, as I want Mum to try it on and see if I need to coax its shape in any particular way. This is why you can still see yarn sticking out on the sleeve, I only cut the woven-in ends after I’ve blocked the garment.

So, that’s my November knits. The more observant of you will notice I probably didn’t knit every day for 30 days. Sadly, you’re right! Life got in the way and I was unable to keep up, but I did share what I was doing on my social media and managed to raise around £70 total for Dementia UK!

Not bad for a first, and not very persistent, try.

Have you ever knit for charity? Share your experience with me. If you have any fundraising advise, I’d love to read about it.

Finally, happy holidays, everyone! I hope you have a nice season whether you celebrate or not. See you next year.

Weaving Overshot all wrong

Weaving Overshot all wrong

Many years ago, I finally got to try weaving. I took the Beginning to Weave workshop through the Ottawa guild. At that time, 1989, the OVWSG did not have a studio space to house what guild equipment we had acquired. (The Guild had an old second-hand 100 inch loom and 6 or 7 table looms. There may have been a floor loom too but I was distracted by the 100 inches of loom, so do not remember). All the looms lived in one of our guild members’ very big basements. On weekends, she either taught weaving workshops or hosted weavers working on the 100 inch loom. It sounded like a busy basement! I remember 4 weekends of driving to a little town just east of Ottawa. I took the table loom home each week to do homework. I still remember the sound of the mettle heddles rattling as I drove down the highway, back and forth to the classes. Then I think there were two more weekends of Intermediate weaving and Dona sent me off and I was weaving!

It all starts with yarn, wind it carefully, attach it to the back beam, wind on, thread the heddles, slay the reed, tie on to the front beam, check the tension and then start to weave. It sounds like a lot of work but it is all worth it as you start to pass the shuttle through the shed and the cloth begins to appear. Weaving was like Magic! From a pile of string to POOF, actual cloth!!!

During the workshop, I found pickup seemed strangely familiar as my brain watched my fingers happily lifting and twisting threads for the various lace and decorative weave patterns. The other thing that my brain went “ooh this is cool!” was Overshot. It is a weave structure that requires a ground and a pattern thread, (two shuttles). One is fine like the warp and the pattern thread is thicker and usually wool. I was still reacting to wool so I used cotton for both.  My original goal was to draft and weave a Viking textile for myself but I put that aside for a moment, I will get back to that later.

The first thing I wove after my instruction was a present for my Mom. she had requested fabric to make a vest. I looked through A Handweaver’s Pattern Book by Marguerite Porter Davison and found an overshot pattern that I thought we both would like. I wove it in two shades of blue (Mom’s favourite colour), at a looser thread count than usual. (Originally the overshot weave structure was used to make coverlets, so were tightly woven and a bit stiff, while I liked the pattern I wanted the fabric to be much more drapey.) Even worse, I did not want it to be as hard-edged in the pattern as it was originally intended so I tried a slub cotton as a test and loved it.

1-3   Cover of Marguerite Davison’s Book, an interior page showing overshot patterns, and a close-up of “Weaver Rose’s Coverlet no.28”

So, for any sane weaver, it was all wrong! Wrong set, wrong fibre, wrong colour choices! It was fabulous and perfect. I kept the sample as a basket cover and at either the end of 1989 or the beginning of 1990, I gave Mom the yardage for her vest. “Oh this is too nice to cut” Mom Said, so it lived on the back of her favourite reading chair as a headrest until her most recent move (2015?) it never did get to be a vest but it has been well enjoyed.

I don’t have a picture of her yardage but I do have pictures of the sample I kept.

This slideshow requires JavaScript.

4-7 My demo basket with cover at Plowing match demo, Algonquin demo, Richmond fair, Carp fair and Farm show.

My sample piece, which became my main demo basket cover, has been in the background of many demo photos. This year it was used as an Old example in part of the guild Exhibition. You can see the subtle distortion of the pattern when a slub yarn is used.

Overshot sample of overshot cloth in blue and grey on Left and Inkle woven band in purple and blue with suplemental warp of fuzzy slubs.8 Exhibit from the 2022 guild Exhibition and Sale

In the Exhibition The Inkle band, hanging beside the overshot, I wove much more recently. I used an Inkle loom and a supplemental warp thread. This means weaving with an extra separate thread that was not part of the main warp on the loom.  I used a yarn with a fuzzy caterpillar-like slub.

Close up of Inkle woven band with slubs woven in Inkle band on Inkle loom. suplemental warp is weighted and hangs over back peg, 9-10 close up of Inkle woven band with inserted slubs from the supplemental warp, Inkle loom set up with the supplemental warp slubs.

You may be able to see how I wove the weird slubby supplemental warp. The yarn is weighted and left hanging over the back peg of the Inkle loom. It comes over the top peg (usually labelled B in diagrams) and floats above the weaving.  In the areas where the Caterpillar (Slub) is not present I catch the yarn with the shuttle and weave it into the band. In the area the caterpillar appears I would leave the yarn above the warp and then start weaving it in again as I reached the end of the caterpillar. I hope that explanation doesn’t sound like mud and makes a bit of sense. Using a supplemental warp on an Inkle loom is not quite normal but it is a lot of fun.

Over the years I tried out other two harness techniques that you normally don’t see with an Inkle loom. It turned into an entire 2 day, with a week in between days, workshop (with a homework assignment) and lots of samples!! I think it’s the fault of my dyslexic brain wandering off into odd thoughts again.

I was going to tell you about my original goal in learning to weave, the mysterious Fragment #10 from a Viking excavation from around the year 1000, but  I have likely confused you with weaving enough for one day. So I will save that for another chat. (don’t forget the Inkle loom I would like to tell you a bit more about that in another post too. I promise I will get back to felting in the not-too-distant future)

A new spindle

A new spindle

Both Jan and Bernadette have told you about our guild sale and exhibition. Now it’s my turn. I didn’t have my own booth this year so I got to wander around and fill in and help out wherever I was needed. It was really nice to not be assigned anywhere and just enjoy the show and chat with everyone after not seeing so many in person for a couple of years.

I am not a big spender at these things. I look for new fibres and add-ons and how people are combining things. Then I  go looking for the ingredients to make my own.

The one thing I do buy is spindles. I bought a new spindle from Judy Kavanaugh. https://www.etsy.com/ca/shop/JudyKavanagh  She makes all kinds of tools and patterns.  This one is a bedouin-style spindle.  It has 4 arms and is a top whorl spindle instead of a bottom whorl spindle I usually use.  The wood is beautiful.


Bedouin Spindle

People kept asking if it was a Turkish spindle but you can’t take the arms off this one and you don’t wrap your yarn around them. this is the other way up so you can see the wool cob on it. The angle makes it look small.

close up of the wool yarn on spindle

I am enjoying spinning on it. and that brings up to the other things I bought. I bought 2 batts from Bernadette. I like to buy them from Bernadette because she isn’t recarding wool tops. She is using wool she processed herself and it is really nice to spin.

blue wool batts for spinning. a bedouin spindle

The Darker blue is what I am spinning on my new spindle and it’s marked as mixed fibre. It’s soft and a little shiny.

The brighter blue I am spinning on another spindle.

bright blue wool batt and drop spindle close up of yarn of a drop spindle

The wool is much spongier and I have lost the label but I am betting it’s Coopworth. It’s very nice to spin too.

This post is a bit backward because I bought the wool first and the spindle second. The new spindle is more exciting to chat about so it got top billing. It really went like this. I started to spin the bright blue batt first. Then I decided that a blue spindle that Judy had for sale really was calling my name. When I went to get it, someone had already bought it. You snooze you lose. then standing there chatting with Judy I saw her spinning on a Bedouin spindle and gave it a try and decided it was just as well the other one was sold. I picked out the lovely one at the top. So then I abandoned this lovely fibre and started spinning on my new spindle with the other batt.

All in all, I think I was very restrained in my buying. There were so many pretty things I could have bought.

Here is a picture of me spinning at the show. And yes I really did chop my hair off. It was time for a change and it will grow again.

28 Ann took her new spindle for a spin!


Handmade Book Continued

Handmade Book Continued

About a month ago, I showed you my handmade book that I created at our annual art retreat. I have since then been slowly adding “stuff” to the book. The theme is the forest and I am having fun finding things to add to the book.

Handmade book open to page spread with fabric photo of trees in morning light stitched to page and small torn piece of paper below photo with definition of woodland.

I had this photo of morning light on trees printed on fabric for my class homework but hadn’t used it. I decided to hand stitch it in place on this hand dyed page. I then glued a piece of handmade paper to the page spread and added a definition of woodlands scrap of paper that Paula gave me. She had a bunch of definitions printed out on “old paper” and she kindly gave me the ones relating to the forest. As you can probably tell, I am not starting on page one and working through the book. I am adding things randomly through the book depending on what the page looks like and what I think works best. This way, I’m not stressing about each page being wonderful. I just find something that I like and add it in. So these pages may have more things added as I go along or not.

Handmade book open to inside cover and first page. Specimen label on cover and small piece of handstitched "moss" on first page.

Paula also had some “old” labels and I used the Specimen Book label on the inside cover. And then I took a small piece of machine stitched “moss” that I had made for my moss covered branch and glued it on to the first page.

Handmade book open to page spread with a charcoal sketch of an aspen tree on plaster coated page.

The pages that have been covered with a mixture of plaster and gesso will all end up with some type of drawing or sketch. This Aspen tree sketch was done with a charcoal pencil and then I sprayed the page with a fixative so hopefully the charcoal won’t smear.

Handmade book open to page spread with lattice type handmade paper and feathers woven into paper.

I collect a lot of “stuff” when I walk through the woods around my house. I have a lot of turkey feathers but they were a bit too big so I used these smaller orange veined feathers to weave into the page of hand made paper. I’m not sure what bird these are from but they are much more rare to find on the ground than the turkey feathers.

Handmade book open to page spread with a torn edged photo of chickadee artwork pasted on dictionary page.


I wanted to try a photo transfer on some pages. I thought this would work on the regular paper of the old dictionary page. So I tried to transfer a photo of this painting that I did of a chickadee. The transfer did not work out so I ended up printing the chickadee on to regular copy paper, tearing it out and gluing it on to the page.

Handmade book open to page spread with transfer of a photo of a sketch of an Oregon grape leaf.

Here’s another attempt at a photo transfer on to a watercolor paper page. It worked slightly better but came out very lightly. I used a black marker to outline the Oregon grape leaf but decided to just leave the lighter colors as they were from the transfer. I am not trying for “perfection” in this book. It’s about collecting “stuff” about the forest in one book. The rocks on the page in the photo above are just there to hold the page in place so I could take a photo. But perhaps I need a sketch of the rocks added in? I’ll keep that in mind for another page idea.

I’m enjoying this process of working randomly in the book. It’s a storage vessel for all my forest “finds”.

A Robin, Snowmen and a Gingerbread House

A Robin, Snowmen and a Gingerbread House

Lyn

For the fourth quarter challenge, the Robin is made from ‘stash’ only and is seasonal, and as sometimes happens, my original plan changed after I’d started the project!

I had decided to make a white Merino base, place open weave fabric on it in the shape of a robin, add some sparse Merino wool tops and more tiny pieces of fabric then finish off with a bit of needle felting to make the eye, beak and legs.

I chose some scraps of open weave fabrics …

… and wool in robin colours.

I started by re-using the white Merino wool that had formed the ‘snow’ for the snowmen Christmas card diorama (shown later in this post).  I’d gathered up all the bits of white Merino into a bag with the intention of running it through the carder but then the lazy part of my mind told me to not bother – so I did a very rough layout for the background of the Robin, using the messy white wool, and crossed my fingers.

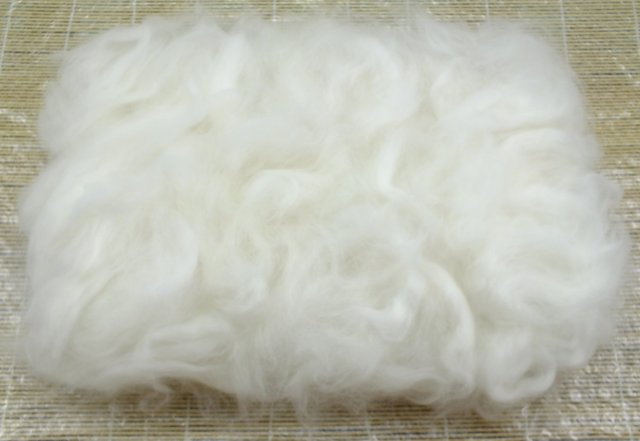
I netted it over, wetted it and soaped it flat.

Then I cut the robin body shapes from the very open weave fabrics from my stash, then wetted them down onto the white background – I like using these fabrics as they stay flat in nuno felt.  Shown below is the layout before felting.

I tried several times to put a thin, messy layer of the ‘robin coloured’ wool fibres over the fabric so that it would still show through but enable me to add more fabric.  I was hoping to achieve a textured finish with very small scraps of fabric but I couldn’t make it work so I just made the nuno felt and decided on plan B – to embellish with “scribble” stitch.

When the nuno felt was rinsed and dried, I ironed interfacing to the back to make the felt easier to stitch into.

My snow-people family decided to ice a gingerbread house this year and I photographed the diorama for my Christmas cards.  Again, this fits the challenge as it’s made completely from ‘stash’ and is seasonal.

The snowmen are made from white Merino wool tops wet-felted into balls then stitched together.  Their noses are made from orange Merino wool, their arms from floristry wire and I had a great time knitting and sewing their hats and scarves.  Thanks to Annie for suggesting the holly in the hat – it was made from fabric and red Merino wool.

The gingerbread house was made from cardboard covered in silk fabric and the icing is hand-stitched yarn.  The icing bags are made from corners of a plastic bag and filled with Merino wool fibre.

The snow is a layer of white Merino wool tops and the sky is a grey board.

Should you make anything for this challenge, please post your entries on the Felting and Fiber Forum.

Weaving with hand spun, again!

Weaving with hand spun, again!

Jan Scott documented the Sale and Exhibition put on by our Guild in early November, kudos Jan.  It was a great success and inspired me to try to answer a recurring question asked by so many of my clients.  I was embarrassed that I didn’t have the information for them.  Will this skein make a hat, scarf, mittens, socks, etc?  The response was always – ‘that depends’ and it does.  It depends on technique, the width of the weaving, stitch size, needle size, size of hands for mittens, and all sorts of variables.  It’s so frustrating to not have an empirical answer, so I decided to use my handspun and make a scarf, standard 14 inches wide by 40 inches long.

I calculated I had 234 yards/215m of brown and 495yds/457m of burgundy and silk.  I would need 106yds/98m brown for the warp and 214yds/196m burgundy and silk for the other part of the warp.  Based on that I had lots for the weft.  We’ll see. Math and I are not on speaking terms.

Just to keep the learning curve vertical, I also decided to use a warping mill along with my sectional beam.  If you have ever watched videos of industrial weaving facilities you will see huge walls of bobbins feeding into the back of looms.  A sectional beam is one step down from that.  All the threads you want are wound onto a single inch of the back beam of the loom.  So if you want to weave something with 20 threads per inch you need 20 bobbins full of thread to wind onto that little 1 inch spot.  You wind on for as many yards/meters as you want, then move to the next slot in the beam, wind on another twenty threads/inch and continue on.

The warping reel lets the weaver measure a single thread for the whole length of the project, change the colour as needed and then keep measuring for the whole length of the project.  It’s perfect for smaller projects. The craftsperson will have to decide when it’s time to move onto a different warping technique to suit their purposes.  This time I wanted to try a hybrid method of warping.

When using a warping reel you must keep the warp from tangling.  It can become the weavers’ worst nightmare.  I know in my early days I did lose the cross on one of my warps and nearly lost my mind.  It did get untangled but I swore it was never going to happen again, so I do double crosses on all my reeled warps.  Tie the cross at both ends of the warp.  Better to be safe than very, very sorry.

I also didn’t want to waste any of the handspun if possible since it was in very, very short supply, so I used a salvage technique of tieing onto an old warp.  This can save up to 24 inches or nearly 3/4 meter of handspun wool per thread.  That’s a huge amount of handspun. It’s also a ridiculous amount of work, so I’ll have to rethink this, but once done I was pleased with the result.

I still had to check for threading errors and there were some.  Don’t thread the loom late at night, don’t thread the loom late at night….and don’t thread the loom late and night.

The next morning, a quick check of the basic threading by lifting the threads at an angle shows that everything is in order, literally, and the threads are ready to be tied up and woven with a test thread.

And finally woven with the real stuff. I wish you could see this in real light, daylight, oh my goodness, it shimmers.

What a load of work, and what a great result!!  I had no idea my hand spun could be so lovely, I’m so pleased, but there is the last bit of finishing that I need to do and hopefully that will be successful too.  This will make a great display piece for the next Sale and Exhibition!

2022 Landscape workshop

2022 Landscape workshop

Landscape workshop

It is fabulous to get back to felting!

Last week I spent a lot of time looking through my fibre stash, rereading my notes and finding all the supplies in preparation for Saturday’s needle felting workshop. I sorted out and made sure the supper wash was labelled and in a separate bag, yes I do have superwash merino, it’s just too tempting in all sorts of fabulous hand-dyed colours. Most of which has come from the black lamb. She has been selling small balls of fibre at various fibre fests, such temptations of colours! I admit I have caved and purchased supper wash!! Luckily with a bit of extra poking or a bit of blending, we can needle felt with it.

I found the box with the supplies I would need. Hum, I had this ready to go for 2020 so that makes the markers only…..2 years old… better get new ones just in case.

Six sets of 21 pages of note, and 4 versions of each picture chosen by each student, oh no the printer finally actually means it’s out of ink….it has been almost a year of saying it was going to run out at any second. Ouch! The price of new toner has gone up and needing to replace all the colours at once is painful!

Early Saturday morning arrived and Glenn loaded up multiple bags of wool, the box of supplies, a bag of frames and notes and finally the important bottle of Mountain due and off we went to set up the Ottawa Guild studio for the workshop. He was able to extract three six foot long folding tables from behind the looms one of which wound up covered in bags of wool.

1 large clear bags of little bags of wool, separated sort of by colour. There are also small dog brushes, scissors for paper and mettle rulers ready to use in the workshop1 large clear bag of little bags of wool, separated sort of by colour. There are also small dog brushes, scissors for paper and mettle rulers ready to use in the workshop.

It took me a while to get all the parts of the student’s kits organized on the table. Last I set out 2 packages of the mini chocolate bars.  I got half of a cheese and cream cheese bagel eaten and I was ready for the students to arrive.

2 student supplies pile sitting on the table; foam pad, picture frame, notes and photos, needles, name tag stuff, project bag, cheap craft felt, 100% wool felt.2 student supplies pile sitting on the table; foam pad, picture frame, notes and photos, needles, name tag stuff, project bag, cheap craft felt, 100% wool felt and thick 100% wool felt for name tag.

3 the tables, with the supplies, sitting in a C shape so I could sit in the center and see what each student was working on3 the tables, with the supplies, sitting in a C shape so I could sit in the center and see what each student was working on.

I had purchased foam kneeling pads from Dollerama but had brought a few other work surfaces to show the students.

4 Samples of different types of works surfaces; wool pads, wool ironing pad, cellulose sponge, foam cushion4 Samples of different types of works surfaces; wool pads, wool ironing pad, cellulose sponge, foam cushion

When I first did needle felting a cellulose sponge was the surface suggested.  (WARNING; Do not leave needles in a cellulose sponge, it will absorb moisture and humidity and rust the needles). The foam cushion (this one is 18”x18”) worked very well for pictures and later sculptures.  I also brought the thicker soft wool felt mats (Grey and white) and the thinner ironing 100% wool pad. In a previous post, we chatted about some of these felting surfaces.

In the week before the workshop, I had emailed a selection of photo options to the students most let me know which one they wanted to try. I had four photos for them printed off in approximately 5”x7”; two with no alteration, one version that was colour blocked and the final version was done in extreme colour saturation. The colour blocking gives suggestions of colour value and the extreme saturation gives suggestions of hidden colours. Both can be helpful when looking at and assessing the original image.

The students arrived and we started on time.

Some of the students had felted before while others had not. To get them started I had them make a name tag using a thicker 100% wool felt made by the black lamb and a fine sock yarn. I had a scrap piece of paper for them to get the correct size of name to fit the tag. This is a good way to practice eye-hand coordination and fewer Band-Aids are needed later in the workshop.

In the notes, I covered multiple ways to transfer images to the felt base.  A couple used the template method (good for thinkers or darker felt ground) and a couple used the window or lightbox method (easy if you have thin or light-coloured felt ground).

5 Two of the students getting started, cutting a window in cardstock, used to check the size of your image so it will fit in the mat when you’re done felting. The table is cluttered with their supplies including photo reference and tiny chocolate bars5 Two of the students getting started, cutting a window in cardstock, used to check the size of your image so it will fit in the mat when you’re done felting. The table is cluttered with their supplies including photo references and tiny chocolate bars.

6 three of the students starting their pictures. There were 2 students per 6 foot table6 three of the students started their pictures. There were 2 students per 6-foot table.

7 two of the students now a bit further along working on their pictures7 two of the students, now a bit further along, working on their pictures

A couple had combined images or added elements from one picture to another. So we had a quick chat about light sources (but there was more about light sources in the notes).

8 using the original photo of 3 sheep and a round hay bale in snow and replacing the sheep with her own goats. She had emailed me the goat photos and I had shrunk them to a size similar to the sheep.  I had also made mirror copies so she could rotate them if she wanted in the composition.8 using the original photo of 3 sheep and a round hay bale in snow and replacing the sheep with her own goats. She had emailed me the goat photos and I had shrunk them to a size similar to the sheep.  I also made mirror copies so she could rotate them if she wanted in the composition.

9 The sheep are gone and the goats are almost done!9 The sheep are gone and the goats are almost done!

Goats were replacing sheep and a few others made changes to their landscape.  I had told them they are the God of their landscape! If a tree offends you then you can banish it from the picture, “Be gone Tree”!! If you would rather it was a different kind of tree or if you would like your tree to gain or lose weight that was up to you too!! (The power is Heady!!! < Maniacal chuckling in the background! >)

As I mentioned before I had brought in a number of different types of working surfaces to show them or let them try.  There was a bit of interest in the wool felting pad, this is the one from amazon that has gone up to exorbitant prices (wait for the price to drop since it was about $13.00 when I got it and it was $53.00 when I checked last week). There is a similar but much cheaper version out of china too.

10 students hands trying out the 100% wool felting mat with her picture. She Liked the darker grey mat better.10 students’ hands trying out the 100% wool felting mat with her picture. She Liked the darker grey mat better.

The sheep and hay bales were popular, both in their original form and also used with other photo parts of landscapes. Even with the same picture, the interpretation was quite different but definitely the same image.

11-close up of student working on sheep with hay bales picture. 12 another interpretation of the sheep and hay bales picture. Showing more of fiber around pictuer on table11-12 another interpretation of the sheep and hay bales picture.

I chatted about approaching wool painting like a watercolour, washes of thin layers of fibre or like an acrylic, blending to match the image then affixing the colour to the ground.  They worked from the background to the foreground.

13 one student holds up her picture and she and two other students look at her progress.13 one student holds up her picture and she and two other students look at her progress.

By late in the afternoon most were to the point that they were ready to put their pictures into their frames. This is the first time I did not have any of the students stay a bit late to finish the last bit of their picture. It took me a while to finish packing up and cleaning up the studio so it would have been ok. There was a threat of more snow so with a few having a long drive home everyone made a break for it at the end of class.

14 close up of the tree with fence felt picture now in a black frame14 close-up of the tree with fence felt picture now in a black frame.

Working from the back to the front is particularly helpful in this image. Having the background done behind the tree and then adding the tree on top is much easier than trying to fill in all the background between the many little branches.

15 matted picture of sheep with hay bales held by the artist and admired by a fellow student. She used small locks to create curls on the sheep. It was very cute!15 matted pictures of sheep with hay bales held by the artist and admired by a fellow student. She used small locks to create curls on the sheep. It was very cute!

16 the finished framed  hay bale with goats! Also very cute!16 the finished framed hay bale with goats! Also very cute!

17 one student framing her picture while one keeps working on hers.17 one student framing her picture while one keeps working on hers.

18 the picture of sheep and hay bales framed18 the picture of sheep and hay bales framed

The students seem to have enjoyed the experience. there was a bit more work to finish for two of the students but I made sure they all had enough fibre to finish and get them started on their next picture. I hope they will drop into one of the guild socials or post on the guild’s Facebook page so I can see what they are up to.

Tomorrow I am off to the basement to find some of my inkle looms because next weekend I switch gears and I’m teaching introduction to inkle weaving. That workshop involves boxes of smarties candies (but you have to take the workshop to find out why!!)

I want to thank my students for a wonderful workshop, I was very impressed with what they accomplished in just a few hours of happy stabbing of wool! (and only one finger) I hope they will continue felting (Dry or Wet or Both) and find images to inspire them. I hope the photos from this workshop inspire you to think about small landscapes, they make excellent Christmas presents!!

Making Waves

Making Waves

At the Waltham Textile group we have a biennial exhibition with a main theme, supported by any other smaller works we’ve produced during the two year lead up. Our current theme was launched in August and I was really happy to get a thumbs up when I suggested we have a nautical/coastal vibe…..if you know how much I love to create rockpool themed work you will know why I chose it! Within this theme we each get a metre width of wall space for a large hanging or several smaller ones and we’ve agreed a few specific group projects such as we all make a 3D fish, a 3D jelly fish, a decorated box and contribute to creating an Octopuses Garden.

Coming up with a title is always going to be tricky when it’s done by committee and, believe me, we debated many of them! Eventually we settled on “Making Waves” as its catchy, links to the ocean/shoreline but of course it can also be interpreted as rocking the boat or doing something subversive. Strange but no one in the group has mentioned this meaning so far, surely I can’t be the only one who’s planning on being subversive with (at least one of) the group challenges?

The general consensus is that the fish be attractive but my immediate thought was “angler fish“ due to its dramatic and sinister appearance. However a bit of Google research has opened up a whole new world of ugly fish, these are just a few that grabbed my interest. The red lipped batfish is probably the weirdest one of them all, I can’t help thinking it looks like someone’s added a face and four legs to a mushroom! That really is a face that only a mother could love! Collecting images of ugly fish is a whole new rabbit hole opening up so best to get back on track…..

It’s been a busy time recently with shows and workshops, plus playing catch up after being knocked off my feet for a couple of weeks with Covid. This has meant I haven’t made much progress but I have at least started one exhibition piece. If you visit the Felting and Fibre Community Photo page you may already have seen this as it’s made entirely from materials I had to hand and therefore fulfils the criteria set for the last challenge.

Making Waves vessel.

My aim was to create a wet felted vessel with a blue/green colour theme, an undulating surface and lots of texture. A student had recently commented on one of my necklaces saying it reminded her of rocks and coral and this passing remark inspired me to use the same technique and materials for my “Making Waves” vessel.

Detail of the felted necklace that inspired the vessel.

Using differential shrinkage is a great way to manipulate the surface of your felt. Thin areas have the potential to shrink much more than thick areas thereby creating hills and valleys in your work. These can be symmetrical, as in the yellow/grey bowl, or asymmetrical which was my aim for the necklace and this vessel.

The grey and mink fibre used is mostly World of Wool 23 micron Merino although, because I was using up left over short lengths from previous projects (remember the F&F challenge), I think there’s oddments of superfine in there too. The thicker areas are prefelt covered with hand dyed silk fabrics, printed viscose paper towels, sari yarn and wool yarns to create a variety of textures and after felting it measured 36cm x 17cm.

The eagle eyed might spot two pieces of lace which are on the layout but not the finished vessel, these didn’t look right so were pulled of. I’m now looking forward to some spare time next month to complete it with more hand embroidery, beading and shells.

Mossy Driftwood Continued

Mossy Driftwood Continued

Last time I posted, I showed you a piece of driftwood that I had covered in green felt to represent moss. It definitely needed more work to achieve the natural look that I desired.

I took a small pair of sharp scissors and cut out some holes as well as making the ends not so uniform and straight. I then decided to use the left over cut out pieces as padding for stitching. I added the left over pieces in a couple of places and hand stitched them down.

I then decided to try adding more texture with needle felting. I had a pile of little wet felted scraps which you can see on the left and I needle felted those down. Then I added some wool from my carded batts that I had left over after wet felting. I needled those down but not too firmly. I still wanted the texture of moss, which you can see in the right photo.

Driftwood covered with green felt, stitched layers of felt added, needle felted layers added

Here’s what it looked like after I finished the lower layered bits. I left hanging threads as this will be the “grassy” looking bits sticking up between the moss.

Work bench covered with variety of green thread and driftwood covered with felt.

Next was looking for different green threads. Here’s what I came up with. You can also just see on the left side that I found some of my photos of moss and printed those out for reference.

Close up of French Knots stitched on green felt covering driftwood.

I then started adding some hand stitching. These are “wonky” French knots with hand dyed lace weight wool thread. This is going to take a while. I have another “slow” stitch project on my hands.

Next up was to try some machine stitching. I made a sandwich of the threads on the left between two layers of water soluble fabric. I then machine stitched a random branching pattern. The photo on the right shows the result after washing out the soluble fabric.

Close up of machine stitched threads on top of felted driftwood.

Here’s a small piece of the machine stitched moss by the French knot section. I haven’t stitched it in place as I think I will do more of the hand stitching first. I’m loving all the different greens as that is definitely what you find in nature. I will keep you updated on my progress.