It is time to do some stitching on my visor cover. Stitching on felt is something I really enjoy. It feels nice to stitch on felt, It has texture even when it is smooth. You can feel the needle pass through the thickness of it.
I had people at my guild comment that the actual piece looked a lot more vibrant than it did on the screen. I fiddled with the colour a bit so I hope it looks a little better this time. It looks very bright on my screen. The crazy thing is it is sitting on the black, top of my laptop. I am getting some serious light bounce off the black.
I picked out some threads I think go with the colours. I need to find a “greener” green something in the middle I think but that requires digging in the mostly unpacked studio so it will have to wait.
I am a slow stitcher. I know I am not alone in this. There’s a whole movement called slow stitch. It suits me, stitching when I have a bit of time but with no deadline in sight.
I started with the turquoise green on the forest green part of the leaf. I thought it looked like a nice contrast even if it was still green. then I forgot to take a picture of just that stitching or rather I was probably intending to take a picture of just the stitching and forgot what I was doing. So you get to see the contrasting orange I picked for the next part too. It’s a deep orange leaning towards burnt orange.
I did the first part in rice stitch. It’s fun to do but harder than you think to make it look random.
I tried an uneven long stitch for this part and didn’t like it. It was messy but not messy enough to seem like I did it on purpose just unpractised. Of course it was but we don’t want to advertise that too much, so I removed it.
The other nice thing about stitching on felt is when you take out stitches, it doesn’t show like it would on muslin or cotton fabric. I decided to do something else with the dark orange and a lighter orange for the cross stitching. I am not sure it is busy enough. I will leave it for now. I am also not sure it was worth changing oranges either.
Now I am onto wonder woman. I am hoping to stop it from looking like wonder woman and more like a flower with the stitching. However, I started with the “cape”. I am using the lighter orange. I am adding X’s as I liked the way they looked on the leaf. I tried looking online for open background or filler stitches but I am calling it the wrong thing, I think. Everything that Google gave me, were stitches to completely cover a space. I know I have seen them before. Does anyone know the right term?
That’s as far as I am. Well maybe a bit farther as I am writing a bit ahead as I will be busy baking for the Thanksgiving Day farmers market. In Canada, we celebrate earlier than our American friends and this year is earlier than usual on October 9th. with any luck, I will have a little time to do some stitching.
The fourth quarter challenges are for all fibre lovers – felters, sewists, knitters, crocheters, weavers and mixed media enthusiasts – so let’s get creative!
One of the challenges for this quarter is a bit predictable – but hey it’ll still be fun 😊
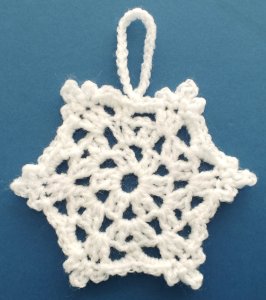
Make a Christmas decoration! Here are a few ideas: something to hang on a tree; a table centre or runner; ear-rings; hats; window display; door wreath … but there are many more.
This tree hanging decoration is a crocheted snowflake stiffened with dilute pva.
Textile wreaths don’t have to be traditional.
This holly wreath, plant stars and decorative pudding are all made from handmade felt and embellished with free motion stitching.
This knitted stocking was hung in the fireplace just waiting to be filled with little gifts.
It’s a magical time of the year for trees – any that are not evergreen will give a dazzling display of colour.
So continuing the tree challenge for this year, use the autumnal inspiration to make a piece of textile art of your chosen tree – or a different tree if you’ve had enough of the one you’ve been working on 😊 and of course it doesn’t have to be the whole tree!
There are several online classes happening in October and now is the time to register. You don’t want to miss out on these excellent classes. You don’t have to be present at any certain time but you will receive plenty of support from our two instructors on the class website. Click on the links below to register.
This beautiful felted spiral is the result of Helene’s exploration of movement in felt art. She has developed a method to create hanging spirals which look so beautiful wherever you hang them, whether indoors or out. Do you want to expand your knowledge of creating three dimensional felt? If so, this is the class for you!
Hanging Felted Spiral with Helene Dooley is now open for registration. Click on the link for all the course information and to register. The class begins on October 13th and you will learn how to create these beautiful spirals. The class is four weeks long and includes PDF’s and videos for the coursework. A knowledge of book resists is preferable, though not essential. Previous experience working in three dimensions is essential. Also required is a basic knowledge of needle felting and sewing. Check out the student’s gallery for spirals created by other students from Helene’s previous classes.
Is hat making on your list of what you want to learn in your felt making journey? (Click on the following link for more information and to register.) Teri Berry’s Felted Concertina Hats is the place to start. You will learn about hat blocks, sizing, creating brims, and shaping as well as improving your layout skills and color blending. The content of this workshop is suitable for felters with some experience, you do not need to have made a hat before but if you are confident making felt pods, bowls, bags etc. over a resist you will be able to make these hats.
Teri’s other online class is learning to create felt bags. You will learn about using multiple resists, making closures from wool, adjustable shoulder straps, shaping bags, and many more tips and tricks for creating your personal small bag, shoulder bag and backpack. Felted Bags with Teri Berry registration opens today. Click on the link for further information and to register. The content of this workshop is suitable for felt makers with some experience, you do not need to have made a bag before but if you are confident making felt pods, bowls etc. over a resist you will be able to make these bags.
As always, our beginners course is available at any time. If you are just starting on your felting journey, this is the class for you. You can register any time here.
To register for classes, click on the corresponding link below:
How many of us have created and created, to the point where our creations are taking over our homes?! I know I certainly have, and my partner Peter is reaching the point where he is considering moving into the garden shed! I think there comes a point in everyone’s journey, when they realise that their hobby is taking too much room in their home, leaving little room for anything else. Does this ring a bell or am I the only one who is feeling swamped by my creations?!
Talking with my friend Debi (who is a fellow crafter), we both realised that we have so many lovely creations that we will never use, never wear and have both saturated our gifts to family and friends. So where do you go from here?
A while ago, I tried creating an Etsy account but I didn’t have much response. When people searched for items like mine, my items were always at the bottom of the list. Not being very experienced with online selling, I don’t have a clue how to promote my goods without spending a fortune. But over a glass of wine (or two) one evening, Debi and I decided we should try dipping our toes into the world of Craft Fairs. The thought of doing this on my own was terrifying! But with my buddy by my side, the prospect didn’t seem half as scary, and I thought yes, we can do this!
Around the same time, I had created a new Facebook page entitled ‘Welsh Felters’ (what else would I call it?!!)
If you’d like to see my new Facebook page, please click the link: https://tinyurl.com/yvytnpkx I’d love to know what you think?
Then, a day or so later, I was contacted by a lady called Jill, who has run a craft fair called ‘Made it Market’ for the last 8 years or so. Jill introduced herself, and invited me to join in her next craft fair, which was to be held in St David’s Church, Neath on Saturday 23rd September. Having shown the invite to my friend Debi, we agreed that we would give it a go. How better to relieve our bursting homes of creations, with the prospect of meeting lots of like-minded people into the bargain?!
We both began sorting through our wares, to gather items we thought people might like to buy. Debi, being a big crocheter, knitter and weaver, found a multitude of beautiful scarves, hats and Santa hats for wine bottles (bit of a theme here?!) I gathered together various felted soaps, scarves, hand spun yarns and art yarns I had created. I also had an idea to add to my wares by making wet-felted key rings…funny little creatures with googly eyes and hats! Having started making the key rings, I discovered that they were really time consuming, so I quickly changed plans and decided to turn my wet-felted balls into cat toys instead…(yes, I probably didn’t need to think about making anything new but it’s so much fun to create!)
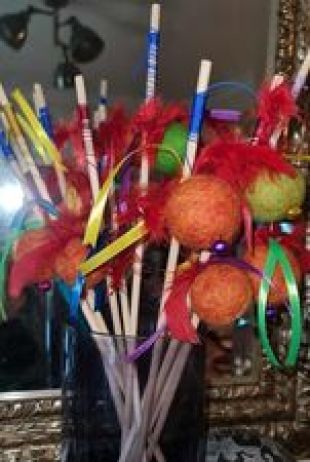
I found lots of feathers, ordered some ribbons and bells, and set about creating some cat toys. I know, this was supposed to be about offloading some of my creations, not adding more to them, but I just couldn’t resist! They were so much fun to make and far less fiddly than key rings!! I think they turned out pretty well. I took one to Debi’s for her kitty to road test for me, and he absolutely loved it! It also stood up pretty well to his best mouse-mutilating tactics! So, having been thoroughly tested by Zeek, in the Quality Control Department, I was satisfied that they were good enough to sell in the craft fair.
A colourful array of feline entertainment toys!
Zeek the Tabby in full testing mode; he makes for a suitably qualified quality control employee!
One thing I hadn’t really thought about was the need for insurance. However, once I received Jill’s paperwork, I realised that of course, we would need insurance!! Have you looked at the cost of insurance?? Wow, it is expensive. But, I then remembered that I am a member of the International Feltmakers Association. I joined the Association about two years ago, when I heard they offer very good value for money, including a quarterly magazine… AND… included in your membership is insurance cover. I had a look at the policy, and sure enough it would cover my stall, goods and also anyone with me (which included Debi!) Having read and re-read the policy, I was satisfied that this insurance would suffice for any craft fair, so I was a very happy felter! Having completed all the required documentation, we were duly booked onto the craft fair!! This was going to be soooo exciting!!!!
Having sorted out and prepared all of our wares, Debi and I were ready. We had to have an early start, so we could get to the Church on time, in order to unload and put together our stall. Jill’s husband Gareth had been tasked with the job of marshalling everyone on arrival, directing cars and ensuring that everyone could ‘stop, drop, park and then set up’! It was clear to see that Jill was a school teacher in her previous role, as she had everything planned down to the minutest detail, including stall plans and directions for us all. I was impressed with Jill’s level of organisation. But to be fair, when you have a multitude of crafters arriving around the same time, you have to be organised or things could easily descend into utter chaos!
This is our lovely organiser Jill, with her husband Gareth.
Once we had set up our stall, I took some photos to mark the occasion….
Here I am, all ready for the 10am start!
My very talented fellow crafter and friend extraordinaire, Debi
Some close-up shots of our stall….
A few stalls at the top end of the church
Our venue, the beautiful church of St. David, the Patron Saint of Wales (very fitting for Welsh Felters first craft fair)
We had a lovely time at the craft fair, meeting lots of new people and of course, selling our wares. I even got approached by a lovely man who has opened a cafe, and who asked whether I wanted to rent a shelf to sell my creations…real networking in action!
After the craft fair was finished and we were at home relaxing with a well deserved cup of coffee (yes coffee, not wine!), Debi and I evaluated our day and considered what we would have done differently. We both agreed that next time, we should have a table each in order to showcase our wares better. The worry we had was not having enough to fill a stall, but having done our first craft fair, it was evident that we had more than enough!!! We also agreed that we needed a neater table cloth, one of those stretchy cloths that hook underneath the table legs. The lady in the stall next door informed us that they are available to purchase online for around £10. We also agreed that because we both have multiple health issues, the purchase of a wheelable trolley would be a definite asset to make loading and unloading far less challenging for us. We agreed that we would definitely do this again, as it was a very enjoyable day, if very tiring! I have to admit to falling asleep as soon as I got home! But all in all, we agreed that the day was a success and we are looking forward to our next craft fair!
I’m not a huge fan of piecing traditional quilt blocks together. I do, however, have a great appreciation of their beauty and craftsmanship. It’s really hard to sew all those ¼” seams together and make everything match up correctly! So much easier to make Art quilts where all that precision may not be necessary. And who doesn’t love having a handmade quilt on one’s bed??
I’ve been attending a quilt retreat (which gathers three times a year) near my home for over 10 years. One of the attendees used to work in a quilt store and made LOTS of quilts. I got to admire them from across the room as she built them and put them up on her design wall. One pattern I fell in love with was the Hunter’s Star. There are so many variations to this pattern. I vowed to myself that if I ever made myself a bed quilt, I wanted it to be using this pattern.
Fast forward a couple of years…a quilt shop near me was going out of business and had great sales on all their fabric. I knew if I was going to make a Hunter’s Star quilt, I wanted it to be blues on a white background. So, I bought a bunch of bolt ends in blues at a great price. Then they sat for a couple of more years. I finally decided to start working on it about 3 or 4 years ago. I mostly worked on it at the retreats, so it has been fairly slow going.
At my last retreat in August, I finally got all the blocks sewn together. Yay! I have to fess up and say that all the points aren’t perfect, but I was pretty pleased with how flat everything laid.
I was also happy to have it sewn together at the retreat so I could get input from the others about the borders. What fabric to use and how wide should I make the borders and do I need two borders. Always good to have other eyes look at it.
I decided to go with two borders, the inner border being a solid dark blue that is different from the fabrics in the blocks and making it 1” in width. The outer border will be 5” wide and I will use the solid light blue that is used in the block. I’m hoping I’ll have enough of that solid light blue to use for the quilt binding. Heaven forbid I have to buy MORE fabric!
Here is a photo of the quilt after sewing the first border on.
Sorry about the background and wonkiness of this photo. I was standing on a rickety ladder trying to get the whole thing in the frame. At this point this quilt measures 82 ½” x 82 ½” so it’s quite large.
I ran into a dilemma after I took this photo. I decided to audition my outer border choices again before I started cutting fabric. I tried the medium blue speckled fabric that is in the block and was kind of intrigued with how it looked.
Here is the medium solid blue.
And here is the medium speckled blue.
I then got the bright idea to lay the quilt out on my bed and see how those two fabrics looked with the bed skirt I have. Good thing I did that! If I was going to hang this quilt on a wall, I’d probably go with the lighter blue as I feel that one pops the colors a bit more, but on my bed things looked different when placed next to my dark blue bed skirt!
Here it is with the solid blue border. The bed skirt is navy blue.
And here it is with the speckled blue border.
I think I might go with the speckled blue after seeing it on the bed. And now I’m not sure I like the 1” dark blue inner border. It’s all looking like I have three borders on the quilt. Maybe the inner one needs to be a tad bit thinner. But I’m not sure this mid blue is THE ONE either.
Guess this project will remain another one of my UFO’s until I can get back to it. And here I thought I could get this done in one sitting. Joke’s on me!
I’ve always been told to make design decisions visually and I think that rule helped me out a lot on this one. I’m glad I haven’t cut the lighter blue into border lengths yet. I’ll need more thinking before I figure this one out.
My sister suggested that I may need another color bed skirt OR I could add another 2 rows of blocks to each side (ugh!) and don’t have borders, just the binding. The new bed skirt idea sounds more appealing than making 16 more blocks!
Which border do YOU like best and why??
Here is another bed quilt that I made from blue Japanese fabrics that I had collected over the years and finally got to use. No border on this one so it looks okay with the bed skirt. I should have thrown my matching pillowcase covers on so it looked more like a bed! I love this quilt.
And another bed quilt I made and have not put on the bed yet. It seems like it should go on a wall more than a bed. It was a UFO that I started years before the Hunter’s Star quilt and finally finished. Not my favorite but it’s DONE! Not sure it would look very good with my navy blue bed skirt either since the background is black. Again, sorry for the crummy photo.
I’ve got one more bed size quilt that I want to make and it is about ½ way finished. I’ll get it done someday. It won’t look good with my current bed skirt either!
So, until I can get back to my Hunter’s Star quilt, I’ll put it back into the UFO pile along with these other projects I hope to get to one day.
As much as I enjoy felting and working with natural fibres I also love mixed media work and getting creative with heat manipulative, man made fabrics. It’s all the more enjoyable when you ask at the start of a class if anyone hasn’t worked with a heat tool or a soldering iron and you see the hands go up. You just know there are going to be some “ooohs and ahhhs” and huge smiles coming from excited students once they get melting their fabrics! Last week I was invited to teach a group at Stainfield Village Hall, just a half hour from home. The groups organiser, Clare, had attended my Layer, Stitch & Burn workshop a few months previous in Sleaford and had so much fun creating this sea shell inspired piece she asked me to repeat the class with her group.
This technique was developed by the Canadian mixed media textile artist Susan Lenz. It involves layering synthetic fabrics on a background of acrylic felt before adding free motion stitch using cotton, viscose or rayon threads. The last stage involves “melting” the background fabric with a heat gun to create a lace like effect as seen in Susan’s In Box and Stained Glass Series
You would imagine all acrylic felt would melt and therefore be suitable for this process but I’ve discovered the hard way that’s not the case! If you’re going to try this technique I would suggest testing your background felt before stitching as some simply discolours and singes rather than melting! Having been caught out once I now order a sample before purchasing by the metre. My latest supply came from Empress Mills and melts a treat! In the workshop, although everyone is given the option of working with simple geometric shapes, I like to encourage students to think outside the box (pun intended!) and create a piece that’s unique to them. In the past I’ve had ladies using fossils, gum nuts leaves and all sorts of other motifs as their starting point for a design as you can see from these three examples…..
Working with a more organic design is also great for those who haven’t done free motion before, or maybe are not as confident with it, as your stitching doesn’t have to be precise. In fact a “sketchy” approach, similar to the leaf design, looks great!
At Stainfield not everyone got finished on the day but I’ve been told that, at the groups meeting this week, not only did they finish off what they had started with me but most of the ladies also began working on a second piece! The size we worked to was approximately 23cm square so it fits the square IKEA box frame.
Another heat manipulative workshop I teach is the Lutradur Leaves. This Wednesday evening I loaded the car and drove up to East Ayton near Scarborough, a really beautiful part of the country, ahead of Wednesdays class for Anita Cassidy and the Textile Experimental Group. I knew we were going to get on like a house on fire when I heard the name of the group! The village hall was very light, airy and spacious, perfect for this type of class. The group were encouraged to bring some leaves to use as inspiration and I supplied sketches for those that wanted them. Everyone worked with a medium weight 70gsm Lutradur and once again the ladies produced some fabulous work which sits nicely with their current theme of “decay”.
Between my last post and classes starting up again after the Summer I’ve done a bit of dressmaking, or “top” making to be precise. I’ve got a very simple linen, sleeveless, dart-less, top that I really like and I decided to clone it, adding darts to make it more fitted. Not having made anything with darts before I figured YouTube would be a good move….and it was! I tried the pattern out with a very cheap floral fabric from Boyes. I think it’s viscose, it’s not silky but it shifted constantly while I was working with it so I’m amazed it turned out wearable! The “palm tree” fabric is 100% cotton and was so easy to use, it’s definitely the better of the two.
The following week I had to create a wet felted shoulder bag to promote a forthcoming workshop. In the past I’ve sometimes deliberately used colours that I’m not that keen on to ensure I keep a piece as a sample and not be tempted to use the item myself! This time I did the opposite and carded Dream and Granite Corriedale slivers from World of Wool’s Hefty Hues range to make a bag that won’t be living in a box until the workshop in the new year!
I’ll finish with a quick update on the Making Waves fish. Jane has made this fun Pink Punk fish complete with studs, chain and wire specs…..
…..and Pip has almost finished her Scorpion fish. I’m told there’s just a bit of needle felting detail to add. Producing work like this it’s easy to forget that neither of these ladies have been felting for long.
I haven’t managed to get to the Waltham meetings for quite a while so I’m looking forward to catching up next month and seeing what else the members have been up to.
Ok, what is a “nal” and why would I bind one? Well, if you have an interest in Viking textiles (yes I have the Icelandic variant warp-weighted loom to prove it!) then you may want to learn how to Nalbind. (yep that would be me please!) This fall the local Ottawa Valley Weaver’s and Spinner’s Guild offered a workshop on 4 Wednesday evenings to teach an introduction to Nalbinding.
So now you know the where but may still be a bit confused by the what (it is) and why (would I want to do it).
“Nålebinding (Danish) literally ‘binding with a needle’ or ‘needle-binding’, also naalbinding, nålbinding, nålbindning or naalebinding” I first saw it spelt with the double A (I have always liked words with double A’s). * I already love this word, look how many different ways you can spell it and still get it right!
The what: there are multiple spellings depending on your location. It is usually described as a “type of single needle knitting” which is not at all like knitting. it is produced by a series of interlaced loops but unlike knitting it creates a more dense and stable fabric. if you use a pair of scissors and cut knitting it unravels, if you get a hole or slice in your nalbinded it will remain intact and not run or unravel.
When I first bumped into Nalbinding it was in the early 1980’s in articles on early medieval archeology. I was not able to find much information in English and it was mostly flat pattern analyses that were too much like some of the knotwork patterns to consider a true road map of instruction to recreate the process. Keeping the yarn looped and flat, while trying to stitch into the previous loops, was a bit of a disaster. It was well before the helpful Mr. Google and the wonders of YouTube. So, I put the hope of learning to make warm socks and cool hats aside and focused on my beloved Fragment #10 from Birka Sweden (Broken Lozenge Twill!) and making a ¾ size Icelandic variant warp-weighted loom. I measured from the inside of the trunk of my hatchback to the back of the seat, to get the height of my loom. It’s good to think ahead about how you are going to transport it.
1) Flat pattern diagram of Nalbinding similar to diagrams I was looking at in the 1980’s you can see working flat would be a difficult way to work with yarn.
The next time I bumped into the opportunity to take a workshop in January(?) 2010, with a fellow Medieval enthusiast who had kept researching and been introduced to the thumb method of working the loops (so much easier than the flat table method!!). She brought in samples of her work including a sock, mitts and a hand puppet
This slideshow requires JavaScript.
2-4) Samples from the first 1 day nalbinding workshop, laptop and samples with notes and nalbinding, close-up of the blue and grey sock, mittens in two patterns (thumbs to the side and thumbs underneath)
We used big lofty yarn and made a rectangle, which we were to join one end to the other and make a tube.
5) getting started with a needle and a single wool yarn
Well, that took an odd turn…. I seem to have developed a Mobius strip, not a tube! But I had a lot of fun so it was all wonderful!
6) My tube was not tubular… it just kept going and going.. it was a Mobius tube!
7) close up of Mobius tube
8) Mobius tube
9) following the working edge of the Mobius tube
Life got busy again and I did not keep practising (how can you do better than create infinity?) so I forgot how I was doing the loop and where the needle was going. Later that year I did take a hat workshop with Ann McElroy. It also did not turn out as she expected but I loved it. someone else loved it too since it disappeared while I was eating at a restaurant.
10) Bad photo of me smirking while wearing the new hat
I also got a Road Bug travel wheel from Merlin Tree out of Vermont for Xmas, from my husband….
11-12) Both sides of the new travel wheel “Road bug” by Merlin Tree out of Vermont, wet felted hat and edge of nalbinding at guild show and tell.
Time passes:
So speed ahead to last week, and I again attempted to overcome my befuddlement and learn to Nalbind hopefully without the infinity component! I again arrived extra early (about 7:30 a.m. for the 7 p.m. workshop, that’s ok I had lots of library work to do before the workshop started.) I had cleaned up the library work, neatened up the studio and had it ready for Meriam, our teacher. She set up a display of her work and a few books that might be helpful.
13) The display of samples and reference books.
14) The class notes, water cup (yes that is a skull), my scissors and pen, as well as the yarn we will be using
For our first night, we started with the Oslo stitch. Tail by the palm, wrap around the thumb making an x and pinch it with your first finger and thumb…. OK, I have nails, long nails at the moment. At this length, they should brake and be short in a week or so. In the meantime pinching it as required is a bit awkward but not impossible. We progressed from practising the starting loops to making the first few stitches. Oh no! I have got to work on even tension!! We also were shown and then practised, splicing our singles wool yarn. At the end of the workshop, we were sent home with homework (Practice starting, making a line of stitches and making splices.)
15) First night’s class and homework
I was pleased with the homework, it did look a bit better than the first try but I was very slow. I am still working on getting an even tension.
Today I went in early (8 a.m. or a bit before?) to keep working on sorting, checking and pricing the donated books given to the guild library. I have already written a separate database to help sort and track the books. I have been checking the library database and the shelf location to make sure we have a copy and that our copy is in good condition then checking online for the price range that the book is selling for. (Some are out of print, some are rare so I can’t find them and most I get a good idea of a reasonable price) I am getting them prepped for members to look through at the October meeting, (which is getting very close!!) Lastly, each book is tagged with an ID number and its price.
The studio also had a new loom being set up and the drum carder in use in the morning. there was a team for the 100-inch loom working upstairs too.
I took a quick break to watch and chat with Marie from Living Felt in Texas. I would like to make the bat she was making today but I can see a few modifications I would like to try! (Maybe if I get my blog post finished early I will get that started and maybe finished before going back in to work on the library?)
About an hour before the second night of the workshop was to start, the strange loud noise I had been hearing outside finally appeared in the studio window. Isn’t that a pavement stripper? (No not that other kind of stripper just working on pavement) sure enough, it started in the bike lane, pealing the pavement away. It wound up working straight through the class but moving farther down the street so it wasn’t too disturbing.
16) Stripper of Pavement, the things you see looking out the studio window!
Tonight we reviewed starting and making the Oslo loops (I unknowingly had been doing a Danish version which seemed completely right at the time.) We then learned how to make our first line of stitches attach at the beginning and end to try to make a tube (not the Mobius strip I had created last time). We then were shown how to add the next layer of our tube.
17) Example of increase used to create texture as well as make the circumference bigger.
18) reviewing starting
19)showing where to start the second row
20) My second row looks much better than the first row did
21) my yarn splice. I seem to be good at this part!!!
I likely had too much fun today since my thumb and index finger kept spassumming toward the end of the workshop, while I was pinching the yarn. I will have to do more hand and finger stretches before nalbinding. (Maybe not shift and lift books all day before class!)
Before heading home, we were shown increases and practised increasing on every stitch. This gave a wavy edge.
22) Increasing in every stitch gives a wavy edge
When increases are used in a less extreme way (not in every stitch), you can make a hat.
23) hat made with increases in nalbinding (it has a different beginning but we will look at that in lesson 4
By the end of day 2, I have gone from absolutely no tensioning to a bit more consistent to adding a second row. We were sent off with homework to start another length of nalbinding single-layer chain and use it as the basis to make a tube. Then do that again and again! Practice makes…. well it’s getting better..
I will continue my homework, interspersed with more Library work and maybe this afternoon I will take a little time and make that bat Marie was showing on YouTube yesterday. (It was very cute… but I think it needs a bit more bite! Have fun and I hope our weather doesn’t look at the calendar and we wind up in a chilly wet fall. I prefer the slow lingering end of summer with warm days and cool nights (but no frost, I am so picky!)
This last weekend I taught a Felted Birdhouse Class. A group of ladies and one daughter. We were at one of the lady’s houses, working outside and the setting was lovely and the weather was very cooperative.
Here are all the embellishment fibres set up on the deck.
And here they all are working away on laying out the fibres for their birdhouses. although some wanted bird feeders and some thought a plant might go well in one. That is why it is only a sort of birdhouse class. everyone chose a gourd except we morphed one into a teardrop shape.
They had lots of fun deciding on embellishment fibres and adding them to their pieces
This one looks sort of dull but it is the green Merino and multi-coloured tribal nylon mix from the world of wool.
This one was all silk I think.
This one is sari silk waste
This was just the beginning it had lots of stuff on it in the end. You will see it later.
This one had lots of the sparkly triloble nylon.
Then of course there was the rubbing and rolling
And then the scrunching and throwing to get it well filled.
Here everyone is with their finished pieces. They have balloons inside to help them have a good shape when dry. You will notice one was cut in half to become 2 plant holders but the one half is looking very much like a hat.
I got sent a couple of pictures of what they looked like now they are dry. I was right it did look a lot like a hat. the class was Sunday and today is Tuesday( Wednesday when this goes up) so not much time for them to get me pictures. If I get more I will edit them in.
It was a fantastic warm September day and a great way to spend it.
Many people ask me to show my artwork after it is framed. So that’s what I am sharing today. This post will be short but since I wrote an extra post, I thought that would be okay.
Calling Down from the Branches – 23″ x 34″
Thick with Green – 8″ x 12″
Winter Colors – 13″ x 16.5″
These are all framed with a simple black wooden frame. I don’t use glass as I like the texture to be visible. If people ask about cleaning the artwork, I suggest using canned air and to avoid hanging them in the sunlight.
All of these pieces are going to 4 Ravens Gallery in Missoula, MT. You can see the prices of each piece on my personal website Ruth Lane Art. If you’re interested in making a purchase, please call the gallery or use my Contact Us form.
I have been very busy during my recent summer holidays, unfortunately not busy felting, so I am a bit behind with my felting experiments and learning right now!
That is because I lately have used my holidays to challenge myself with something different, taking with me only a few of my stash wool and supplies, and focusing on a single idea that I wanted to try and learn better. The fact that I can’t bring with me my usual tools and implements is a challenge in itself: I have to use whatever I can scavenge around, and I feel that it teaches me to be less reliant on my routine and my favourite tools. I do not truly need any of those, I found out that you truly do not need any fancy stuff to felt, it just takes a bit more effort sometimes, and understanding companions that will put up with you grabbing the rolling pin and all the bin plastic bags from the kitchen.
On my first year, I tried to wet felt vessels and pouches.
I had never gone that thick before, and I tried a sander for the occasion: that was a first as well! I managed to felt two vessels, one with a basic truncated-cone resist, and one with a strange resist (a truncated cone with add-ons at the corners, do not ask me why, spur of the moment thing). I understood that you need more than 4 layers: it was a concept that I did not readily welcome, as I realised that I did not have enough wool with me for more trials!
I used my newfound awareness about thickness to wet felt an almost A-4 sized pouch: it was my first one ever, and I was terrified that I would not be able to find the resist of the pocket in the end if I included one, so I just went for the basic shape! I had never done a rectangular shape before, so that was a first also: learning how to make straightish lines and corners! I also understood that it takes a lot of elbow grease and time for a wet felted vessel or bowl, and you need to add quite a bit to your resist size if you work with merino wool and you want your vessel to stand upright in the end!
My first vessel, made on my first Learning Summer Challenge
The inside was white, and I was surprised about how much of the pink wool migrated into the white layers. You can appreciate the thinness of this first vessel from this pic. But it stands upright.
My first wet felted pouch ever! I went for a felted cord to close it, so that the person I gifted it to could close it well both when empty and very full.
The pouch was white inside, and not very thick, partly to keep it soft and partly because I did not have wool enough to make it thicker.
On my second year, I was back on holiday after Covid had forced me to skip a couple of years of travelling: I had to isolate myself for a while before being able to move around, so I practiced patience! That is, laying fine layers of wool: I mean, extra fine layers!
That helped me enormously with layout control, passing time very pleasantly, and also solved my problem of what to gift to my various friends and sisters-in-law: I made a lot of extra-lightweight scarves in merino wool with accents of silk fibers. Everybody was so happy, it was a win-win. Afterwards, I was able to make more uniform felt, and tackle other challenges such as wet felting kids mittens.
Two of my many lightweight scarves in progress on a kitchen table.
Three scarves drying on the garden bench. We had a constant procession of my husband’s relatives coming to wave at us from the other side of the garden and exclaiming over the scarves drying on the bench.
This detail will make apparent the extreme thinness of the scarves.
In this one, I was experimenting with laying the wool in a grid pattern.
This one had silk fabric strips and silk fiber accents helping to hold it together.
The left side scarf was made with the thinnest layer of white merino as background and a thin layer of multicolored sari silk over it: I loved it and gifted it to a very dear friend. The other one is merino with swirls of silk fabric and accents of silk fiber.
This is a second blue one, the difference from the other is in the accents of colour, that in the previous one were red and white silk fiber while in this one were yellow and white.
Here is a detail of this last blue scarf. The white accent was merino, the yellow was silk, and the swirl silk fabric.
I also enrolled in a yearly subscription to Lena Archbold’s online classes (here her website): I was eager to learn a lot from her, although I find her voice and manners the uber-treatment for insomnia! I managed to complete three or four of her online classes and to actually try making 2-3 of her suggested coursework designs, mainly during or right after my holidays (of course), but then did not have time for more. Pity, because I learned quite a lot from her (she also helped me sleep most evenings, that is not to be sneered at). Only a couple of the suggested designs really worked for me, the others that I tried I did not like the results, and I had major failures on a couple of occasions! That was totally my fault, because I tend to , ahem, be creative with instructions sometime. Also because I do not really like her style of fashion, so I often change materials and combinations with supplies I own and like. Anyway, when I had the patience to try again and understand from my previous mistakes, I got very good results. More importantly, I learned some good techniques and tips from her classes.
Mittens that I made following Lena Archbold’s online classes, using a sander as she teaches
On my third year, I managed to scrounge some me time to enroll on Felting&Fiber Studio member Ruth Lane’s great online class on Embellishing Felt with Surface Design Techniques: fabulous!
I managed only the module on Printing, Stenciling, and Playing with Thickened Dye on Felt, as my time is always limited, but it was very inspiring and I had a real learning summer, full of ideas and experiments. It was challenging, because I had to learn a whole new set of creative tools, and I am by no means finished with the learning about it. Still, summer is short and I need to pace my creative work during the year, unfortunately: I am constantly adding to my printing stash the odd interesting surface, waiting for the time to play with dyes in future! I would love to take other Felting and Fiber Studio classes in future: during holidays, of course!
Work in progress of my cut out stencil on mylar sheet for my class with Ruth Lane.
My first cut out for stencil.
I tried it on paper, as it was my first time and wanted to try the printing paint.
My first burnt stencil, and I still have a bit of work to do on that, as you can see from the printing trials of this.
My experimenting with the burnt stencil was not as successful as I may have desired, as the sheet should have been scraped for residues of plastic around the holes.
The flower on felt is even less defined, not what I was aiming at.
Another cut out stencil that I made for the class.
I got inspired while trying the stencil on paper, it made me think about seaweed, and I added a red and blue fishish shape by scraping paint with random implements.
I ended up making a small sample of seaweed and “fishes” shapes on a leftover piece of blue and white felt that I had left from a bowl…
This is my print trial of a handmade stamp with foam sheets, on paper. I was pretty pleased by the result. I have not tried it on felt, yet.
My experiments with mark making on felt were variously successful, and great fun!
I had so much fun that I am afraid I kept on quite a bit with mark making on felt, trying out different broken kitchen implements, plastic packaging, and various plant parts, even!
I also had some ideas on surface embellishment through stitching and embroidering to try: I wet felted a couple of small key trays in blue to try my hand with.
I tried the circular key tray shape first, using up quite a bit of white locks as embellishment.
The bigger one was actually blue and black.
This is where I tried stitching for embellishment on a small shallow bowl. More challenging, I did not have embroidery floss and embroidery needles, I just made do with darning thread and a random needle found in a drawer.
A work-in-progress pic of the stitching, white on the blue sides of the small bowl.
The finished bowl has been left in my mum’s care for her keys and glasses and small stuff that tends to wander around.
And, lastly, this summer I have been wanting to experiment with differential shrinkage and manipulation.
I only brought white merino wool with me, with a bit of other colours and silk, a small bag of orange locks, and I came back with a good half of what I brought untouched: I had very little time and I managed to complete only one vessel. I really like it though, and I think that I would like to follow through with my other ideas to try. I found the layers felt easier than what I remembered from my first tries without sander (I lately always use my sander when felting thicker felt, but I did not use it in this occasion): maybe I am just becoming better at wet felting or I get less impatient with my rubbing and rolling and fulling. I did not find the manipulation part of the project as exhausting and boring as I was afraid: possibly because I had to complete the job in two times, a week apart, and it felted faster and better because of that?
This is the still wet bowl that I wanted pretty ridged. I used only merino wool on that one. Sorry, I do not have another photo, as I left this vessel with my mum, as she loved it and said that she needed to have around beautiful things: I could sympathise.
It was a bit of a complicated summer for me, and it does not signify that I could not felt as much as I originally planned: I am sure that next year will be different!
I find that summer is a very good time for me to try one or two different things and learn, as bringing only a few supplies forces me to focus only on one aspect of my felt, and I very determinedly embrace the idea of learning something each summer. I tried taking online classes during the year, but it gets too much for me with my family commitments and job commitments, it just does not work well for me.
Do you set aside a time specifically for learning or experimenting too?


 1) Flat pattern diagram of Nalbinding similar to diagrams I was looking at in the 1980’s you can see working flat would be a difficult way to work with yarn.
 5) getting started with a needle and a single wool yarn
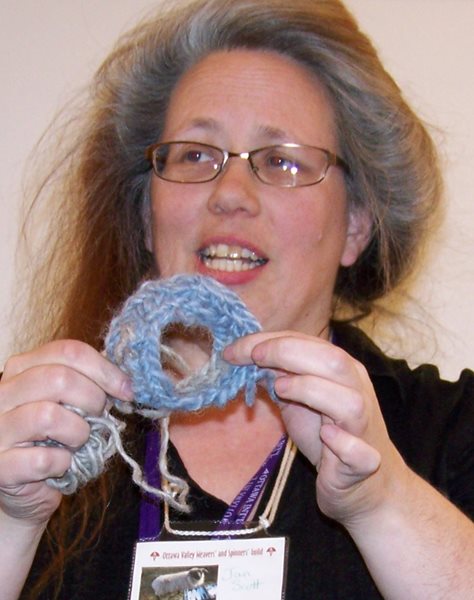 6) My tube was not tubular… it just kept going and going.. it was a Mobius tube!
 7) close up of Mobius tube
 8) Mobius tube
 9) following the working edge of the Mobius tube
 10) Bad photo of me smirking while wearing the new hat
 11-12) Both sides of the new travel wheel “Road bug” by Merlin Tree out of Vermont, wet felted hat and edge of nalbinding at guild show and tell.
 13) The display of samples and reference books.
 14) The class notes, water cup (yes that is a skull), my scissors and pen, as well as the yarn we will be using
 15) First night’s class and homework
 16) Stripper of Pavement, the things you see looking out the studio window!
 17) Example of increase used to create texture as well as make the circumference bigger.
 18) reviewing starting
  19)showing where to start the second row
 20) My second row looks much better than the first row did
 21) my yarn splice. I seem to be good at this part!!!
 22) Increasing in every stitch gives a wavy edge
 23) hat made with increases in nalbinding (it has a different beginning but we will look at that in lesson 4


