Ok, what is a “nal” and why would I bind one? Well, if you have an interest in Viking textiles (yes I have the Icelandic variant warp-weighted loom to prove it!) then you may want to learn how to Nalbind. (yep that would be me please!) This fall the local Ottawa Valley Weaver’s and Spinner’s Guild offered a workshop on 4 Wednesday evenings to teach an introduction to Nalbinding.
So now you know the where but may still be a bit confused by the what (it is) and why (would I want to do it).
“Nålebinding (Danish) literally ‘binding with a needle’ or ‘needle-binding’, also naalbinding, nålbinding, nålbindning or naalebinding” I first saw it spelt with the double A (I have always liked words with double A’s). * I already love this word, look how many different ways you can spell it and still get it right!
The what: there are multiple spellings depending on your location. It is usually described as a “type of single needle knitting” which is not at all like knitting. it is produced by a series of interlaced loops but unlike knitting it creates a more dense and stable fabric. if you use a pair of scissors and cut knitting it unravels, if you get a hole or slice in your nalbinded it will remain intact and not run or unravel.
When I first bumped into Nalbinding it was in the early 1980’s in articles on early medieval archeology. I was not able to find much information in English and it was mostly flat pattern analyses that were too much like some of the knotwork patterns to consider a true road map of instruction to recreate the process. Keeping the yarn looped and flat, while trying to stitch into the previous loops, was a bit of a disaster. It was well before the helpful Mr. Google and the wonders of YouTube. So, I put the hope of learning to make warm socks and cool hats aside and focused on my beloved Fragment #10 from Birka Sweden (Broken Lozenge Twill!) and making a ¾ size Icelandic variant warp-weighted loom. I measured from the inside of the trunk of my hatchback to the back of the seat, to get the height of my loom. It’s good to think ahead about how you are going to transport it.
 1) Flat pattern diagram of Nalbinding similar to diagrams I was looking at in the 1980’s you can see working flat would be a difficult way to work with yarn.
The next time I bumped into the opportunity to take a workshop in January(?) 2010, with a fellow Medieval enthusiast who had kept researching and been introduced to the thumb method of working the loops (so much easier than the flat table method!!). She brought in samples of her work including a sock, mitts and a hand puppet
This slideshow requires JavaScript.
2-4) Samples from the first 1 day nalbinding workshop, laptop and samples with notes and nalbinding, close-up of the blue and grey sock, mittens in two patterns (thumbs to the side and thumbs underneath)
We used big lofty yarn and made a rectangle, which we were to join one end to the other and make a tube.
 5) getting started with a needle and a single wool yarn
Well, that took an odd turn…. I seem to have developed a Mobius strip, not a tube! But I had a lot of fun so it was all wonderful!
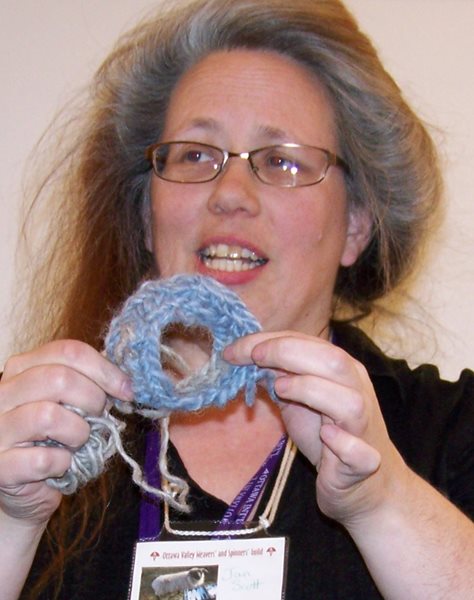 6) My tube was not tubular… it just kept going and going.. it was a Mobius tube!
 7) close up of Mobius tube
 8) Mobius tube
 9) following the working edge of the Mobius tube
Life got busy again and I did not keep practising (how can you do better than create infinity?) so I forgot how I was doing the loop and where the needle was going. Later that year I did take a hat workshop with Ann McElroy. It also did not turn out as she expected but I loved it. someone else loved it too since it disappeared while I was eating at a restaurant.
 10) Bad photo of me smirking while wearing the new hat
I also got a Road Bug travel wheel from Merlin Tree out of Vermont for Xmas, from my husband….

 11-12) Both sides of the new travel wheel “Road bug” by Merlin Tree out of Vermont, wet felted hat and edge of nalbinding at guild show and tell.
Time passes:
So speed ahead to last week, and I again attempted to overcome my befuddlement and learn to Nalbind hopefully without the infinity component! I again arrived extra early (about 7:30 a.m. for the 7 p.m. workshop, that’s ok I had lots of library work to do before the workshop started.) I had cleaned up the library work, neatened up the studio and had it ready for Meriam, our teacher. She set up a display of her work and a few books that might be helpful.
 13) The display of samples and reference books.
 14) The class notes, water cup (yes that is a skull), my scissors and pen, as well as the yarn we will be using
For our first night, we started with the Oslo stitch. Tail by the palm, wrap around the thumb making an x and pinch it with your first finger and thumb…. OK, I have nails, long nails at the moment. At this length, they should brake and be short in a week or so. In the meantime pinching it as required is a bit awkward but not impossible. We progressed from practising the starting loops to making the first few stitches. Oh no! I have got to work on even tension!! We also were shown and then practised, splicing our singles wool yarn. At the end of the workshop, we were sent home with homework (Practice starting, making a line of stitches and making splices.)
 15) First night’s class and homework
I was pleased with the homework, it did look a bit better than the first try but I was very slow. I am still working on getting an even tension.
Today I went in early (8 a.m. or a bit before?) to keep working on sorting, checking and pricing the donated books given to the guild library. I have already written a separate database to help sort and track the books. I have been checking the library database and the shelf location to make sure we have a copy and that our copy is in good condition then checking online for the price range that the book is selling for. (Some are out of print, some are rare so I can’t find them and most I get a good idea of a reasonable price) I am getting them prepped for members to look through at the October meeting, (which is getting very close!!) Lastly, each book is tagged with an ID number and its price.
The studio also had a new loom being set up and the drum carder in use in the morning. there was a team for the 100-inch loom working upstairs too.
I took a quick break to watch and chat with Marie from Living Felt in Texas. I would like to make the bat she was making today but I can see a few modifications I would like to try! (Maybe if I get my blog post finished early I will get that started and maybe finished before going back in to work on the library?)
About an hour before the second night of the workshop was to start, the strange loud noise I had been hearing outside finally appeared in the studio window. Isn’t that a pavement stripper? (No not that other kind of stripper just working on pavement) sure enough, it started in the bike lane, pealing the pavement away. It wound up working straight through the class but moving farther down the street so it wasn’t too disturbing.
 16) Stripper of Pavement, the things you see looking out the studio window!
Tonight we reviewed starting and making the Oslo loops (I unknowingly had been doing a Danish version which seemed completely right at the time.) We then learned how to make our first line of stitches attach at the beginning and end to try to make a tube (not the Mobius strip I had created last time). We then were shown how to add the next layer of our tube.
 17) Example of increase used to create texture as well as make the circumference bigger.
 18) reviewing starting
 19)showing where to start the second row
 20) My second row looks much better than the first row did
 21) my yarn splice. I seem to be good at this part!!!
I likely had too much fun today since my thumb and index finger kept spassumming toward the end of the workshop, while I was pinching the yarn. I will have to do more hand and finger stretches before nalbinding. (Maybe not shift and lift books all day before class!)
Before heading home, we were shown increases and practised increasing on every stitch. This gave a wavy edge.
 22) Increasing in every stitch gives a wavy edge
When increases are used in a less extreme way (not in every stitch), you can make a hat.
 23) hat made with increases in nalbinding (it has a different beginning but we will look at that in lesson 4
By the end of day 2, I have gone from absolutely no tensioning to a bit more consistent to adding a second row. We were sent off with homework to start another length of nalbinding single-layer chain and use it as the basis to make a tube. Then do that again and again! Practice makes…. well it’s getting better..
I will continue my homework, interspersed with more Library work and maybe this afternoon I will take a little time and make that bat Marie was showing on YouTube yesterday. (It was very cute… but I think it needs a bit more bite! Have fun and I hope our weather doesn’t look at the calendar and we wind up in a chilly wet fall. I prefer the slow lingering end of summer with warm days and cool nights (but no frost, I am so picky!)
Like this:
Like Loading...


 1) White Maori Batt, wooden skewer, knitting needle, one mettle chopstick
 2) selected a chopstick and Maori batt
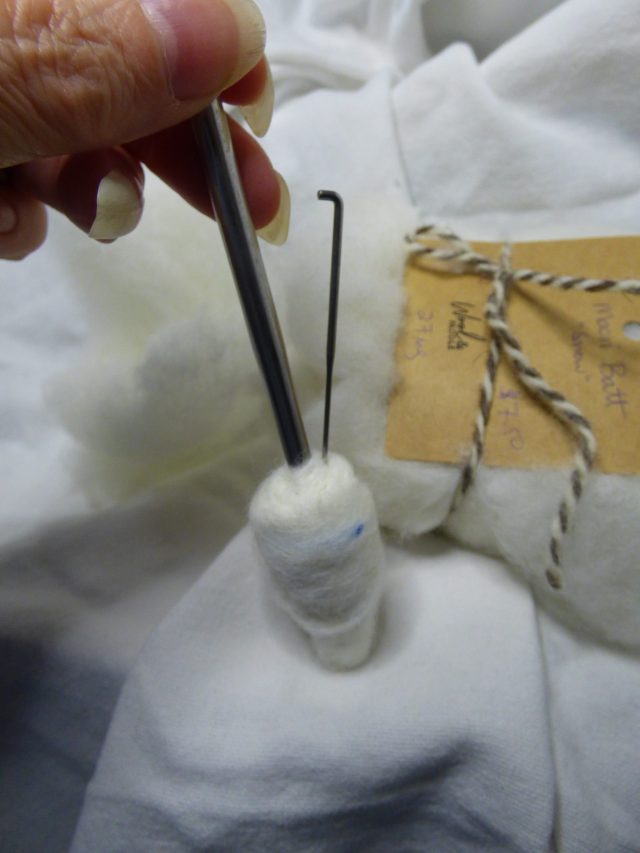 3) using a chopstick to wrap fibre around and build up the core structure.
 4) Tearing off thin strips from the batt then drafting them to a narrow roving. This shows the VM and makes it easy to remove.
 5) wire piercing body, centre body on wire and bend the wires
 6)folding each wing wire in half
 7) wing one armature with fingers added and wire bent ready to add to bat’s right palm loop.
 8) both wings have full arm armatures. note that the fingers have 3 different lengths.
 9) The Charcoal coloured Maori batt beside the small white Maori batt
 10) wing/ arm armature and body covered in the short staple Maori
 12) Ann checked how firm he was and laughed at his fabulous
  13)just a few of the magazines being prepped for sale.
 14)Thumbs up! Bat on his chopstick supervising from the shelf above the desk at the OVWSG Library.