Some Spinning and a New Loom.

Some Spinning and a New Loom.

Things are still very busy here with the bottle lambs. So there is not much time for felting.

I have managed to do some spinning. It all still needs plying.

This one I think will have to be plied with somthing else. I think that if I try to pull the yarn out of the middle as well as the outside it will get hopelessly tangled with all the curls.

Sunday I am picked up a new to me ( and Jan of the polar bear and bull frog). This is an upright tapestry loom. The loom has come all the way from Sudbury. It was transported down by a lady down to visit her daughter saving Jan or I from having to do the long drive up there. As you can see it is all in pieces in my van. I have to clear space for it. that will hopefully happen over the next moth or so as my husband builds his new space and I get to take over his old space. My plan is to make some fleece rugs. I think Jan is planning a Viking cloak.


Aspen Collage

Aspen Collage

I showed you this idea for a fabric/felt collage with my last post. I decided to change out the background fabric as it was too close in color and value to the piece of silk that I was planning on stitching an aspen branch.

I free motion machine stitched on the silk to create the look of my sketch of the aspen leaves. I backed the silk with a piece of commercial felt and cut it so it couldn’t be seen but still gives stiffness to the silk. I don’t mark the design when I stitch, just do it by eye. Once it was completed, I felt like the branch was too dark in comparison to the leaves and I liked the look of the dark leaves in my sketch.

So I colored in the leaves with a permanent marker in dark brown. That definitely was an improvement and gave quite a contrast with the lighter silk. The silk was dyed with natural dyes and was a failed attempt with eco printing. I am trying to use up all those scraps and class samples with these collages.

I chose one of my recently snow dyed cotton fabric pieces and hand stitched the printed aspen leaf on to the snow dyed background. Before I did that, I did outline the leaf with FME (free motion machine embroidery). I wanted to have some of the brown from the silk in other areas of the design.

The last detail was to outline some of the snow dyed “leaves” in the background. I didn’t really choose this piece of fabric because it had leaves but once I had attached everything, I noticed that the leaves were there, looking like aspen leaves. I just outlined them in a “sketchy” manner with a green fine tipped marker. I could have hand stitched them but I didn’t want them to be too prominent. You can’t see them from a distance but they do show up when you view the piece at a closer distance.

I haven’t decided how to display or frame this yet. I am going to make a few and then see if they work together somehow or if they are a series that will be treated similarly.


Nuno Felting

Nuno Felting

When I read this week that the second quarter challenge is to be Nuno Felting I thought I would share the first of the few Nuno projects I have done so far.  I say “few” because although I trawl the charity shops for silk and chiffon scarves on a regular basis most of them still reside in the plastic box under my table!  I’ve actually done very little with them so this next challenge should see some of these lovely fabrics being put to good use!

My introduction to Nuno Felting was in 2016 when I attended a workshop at Artvango with a lovely feltmaker called Clare Bullock.  Rather than taking the easy route (silk, muslin etc) we had been encouraged to try a wide variety of fabrics, some of which were going to need a lot of coaxing to get the fibres to migrate through.  Clare kept a watchful eye on us to ensure we weren’t taking any shortcuts which meant everyone’s samples were successful.  By the end of the workshop I took home five pieces of work incorporating a variety of fabrics including fine cottons, viscose, silks, wool and polyester.

Fabrics prior to fulling
Fulling complete


It seemed a lot of work at the time but there was something magical about seeing the textures emerging as the wool shrinks and I just loved the texture from the green woollen shawl…pity I didn’t get a “before” picture of the green/blue fabrics.

I came across the orange and the green/blue samples again when I was having a tidy up last year and decided, rather than putting them back in the drawer, to add some very simple stitching and frame them as landscapes.

Since then I’ve made several Nuno scarves but not really taken the time to be experimental with Nuno……this next challenge should provide the inspiration I need to have a play!

Throwback Post: Felt Picture

Throwback Post: Felt Picture

Sorting through a pile of paper templates recently, I came across one I’d drawn for a felt landscape picture before I had a laptop to work from. And funnily enough, my sister has been thinking of getting this piece framed, so here’s a throwback post from August 2015, and if you have any suggestions for framing, which will protect it from moths, please let me know!

I had an idea over the week to do a piece of felt for my sister to say thanks for helping me at MakeFest. I saw a photo she took and thought that would make a great piece. I haven’t told her or asked her, so I probably shouldn’t post the photo without permission, but I made a simplified version on Photoshop as a guide:

field field picI don’t have a computer downstairs (or working printer) so I didn’t have a photo to work from, but I did draw a guide 🙂

OLYMPUS DIGITAL CAMERA

I marked out the bands on a template and did the first layer, I’m afraid some of the photos aren’t the best, it was dark and I had to use flash at times:

OLYMPUS DIGITAL CAMERAI then started on the second layer:

OLYMPUS DIGITAL CAMERAI thought it was looking alright until I got to the bright yellow patch near the bottom, it’s a field of bright yellow rapeseed flowers, and I really wanted to capture the almost bubbly look it had. I blended Nylon and silk throwsters and Bamboo, and it looked great, but made the rest look really flat:

OLYMPUS DIGITAL CAMERASo, then I had to go over all the areas with more texture. I blended shades, mixed in fibres, fluffed it all up and filled in the rows:

OLYMPUS DIGITAL CAMERAI realise now if I’d taken photos of the blends etc, I could have used this for the 3rd Quarter Challenge 🙂 My favourite part is the bottom, it was a hedge with lots of colour to it, mostly greens, but the new growth had shades of red. I used lots of different shades of nylon staple fibre for this.

OLYMPUS DIGITAL CAMERAI added the details on next: hedges, trees, telegraph poles:

OLYMPUS DIGITAL CAMERAFor the trees I used black viscose top, I pulled lengths off, fanned out the top, then gave it a twist to make the trunk and branches. Then I added fluffy wisps of blended wool.

OLYMPUS DIGITAL CAMERAWet down:

OLYMPUS DIGITAL CAMERAFelted and still wet:

OLYMPUS DIGITAL CAMERAA few bits of yarn I used for tracks didn’t work, so I removed them. Here it is dry:

OLYMPUS DIGITAL CAMERAThe back looks good too:

OLYMPUS DIGITAL CAMERAIt’s completely the wrong shades, the original photo is more ‘acidic’, but I liked how it turned out. I’m not sure it’s my sister’s thing though so it might be back to the drawing board there 🙂

Second quarter Challenge, Nuno Felt Surface Design.

Second quarter Challenge, Nuno Felt Surface Design.

The second quarter is already here, I am not sure how that happened. I think using fabric as a surface design instead of a base is a good idea for the second quarter. Use cotton or silk or rayon or what ever you like to make some surface designs. You can make texture or pattern.

Try a mosaic? (I think one is Zed’s)

or making a picture? I made this to practice machine embroidery on.

Layer some silk

How about some texture?


Or let your imagination sore, have fun with it.  You can post your experiments good and bad over in the Felt and Fiber Studio Forum. http://feltandfiberstudio.proboards.com/thread/3708/2018-second-quarter-challenge


Felt and Textured Paper Collages

Felt and Textured Paper Collages

I usually don’t show a lot of my class homework here for my Level 3 Art and Design class that I am taking. But we did some really interesting textural collages in our last class that I thought might be appreciated.

This slideshow requires JavaScript.

I am still in the process of completing a bunch more collages but these are the ones I am satisfied with at the moment. I have also started a series of collages made from scraps of leftover printed felt. For my online classes (you can still sign up for those for the second quarter, click on online classes in the menu, then embellishing felt…), I have loads of scraps of felt that has been screen printed, stamped, stenciled etc. I wanted to put those to good use and also to practice my composition skills with collage. I also like to keep my free motion machine stitching skills in use so each collage will include some machine stitching and possibly hand stitching as well.

Here’s the first one. The background piece is one my friend Paula made with an old wool blanket and eco printing. I then added the two printed pieces. The one in the center is actually the back of the printing process. I liked it better than the front. I haven’t decided how I am going to use these yet. So of course it is an odd size and I’m not sure how I will frame or display them yet. Just decided to make them and then see.

Here’s one in the planning stage. I plan on stitching the piece of silk with an aspen leaf pattern as in my sketch on the left. Now that I am looking at the photo, I might change out the background piece of fabric as it needs a bit more contrast from the silk piece on the left. I will have to look to see what else I have, perhaps a mix of green and orange? I have loads of printed and dyed fabric and felt so I could keep these up for a while. You can take that as a warning or a threat 🙂

Two Dimensional Needle Felting and Wool Varieties

Two Dimensional Needle Felting and Wool Varieties

I love all things fibery.  So much so that I opened a store, Big Sky Fiber Arts.  It feeds my fiber addiction, and allows me to experiment with textures, colors, and types.   Customers  who are new to felting often feel a bit overwhelmed by the variety of fibers that can be used in felting.  With this in mind, I would like to share some of my thoughts on different wool types for two-dimensional needle felting in particular.  This post will mostly be of interest to those who are new to needle felting, but perhaps some of the information will be handy to people who want to experiment a bit more.  I thought I would use a few examples of my own two dimensional work to illustrate key points.

When I make a decision about which wool to use, I think about:

  • Color
  • Staple Length
  • Micron count

Staple length refers to the length of the fibers.  Micron count describes the thickness of the individual wool fibers.  Wools with lower micron counts are finer (thinner), and wools with higher micron counts are coarser.  For example, extra fine merino is typically 18-19 microns. It is quite fine. Given this, it is great for nuno felting as you want the thin fibers to interweave with the silk. Some people like higher micron fibers for needle felting as the needle marks are less likely to show. However, you can achieve a lovely painterly effect by needle felting with fine carded merino on felt, linen, and other surfaces (2 D needle felting).

A handy reference for wool types and their micron counts was made by Pat Sparks. You can see it here:

http://members.peak.org/~spark/feltingwools.html

The length of the fibers is important in needle felting. If you want to create 3-D fur, long fibers going in the same direction (combed top) is helpful.   But, if you want a relatively smooth surface, you will likely find that wool made into batts with short fibers is easier to use.  The short fibers can be felted into place more readily than the long fibers found in roving.

3-10-2018 4-04-54 PM

In the wolf piece above, I used Maori (carded Corriedale and Coopsworth) wool.  It comes in a batt, and it has short fibers that go in all directions.  I needle felted it over yarns and locks for the background.  For the eyes and parts of the nose, I also used Maori.  The coat of the wolf is made with Shetland, Corriedale, Romney, and Tasmanian Polwarth combed top.   I carded the wools together to get shades I liked. These wools have a micron count of around 27. The Polwarth is a little lower. The staple length is around 4 inches or so with the Shetland being the longest.   I added a little sparkle to the coat with some nylon (synthetic) roving.

To enhance the 3 D effect, I used core wool first.  For core wool, you want a malleable wool that holds its shape well and felts quickly. I needle felted the core wool with a short fiber length over the nose.

IMG_0344.JPG

I made the fur by stretching out a piece of roving at the appropriate angle and needling a line down the center.  I then flipped the piece on the left onto the piece on the right. I worked from the bottom and side of the piece up to the face so that I could blend in the hair.

I used a similar approach in this needle felted ram.

SONY DSC

I used core wool first to build up the ram’s antlers and nose. The tree is made from extra fine merino combed top.  I carded it into a batt, choosing cinnamon, bark, black, and coffee.  Carded Maori is used in the background.  The ram’s coat is made from Corriedale and Shetland combed top.  I used some lovely rare Asen locks from Sweden for the chest of the ram.  You can’t see it too well in this photo, but I felted in locks in the foreground. Maori is used on the face of the ram and on his antlers.

Sometimes it can be fun to work with fiber that has a short staple length and is quite fine.  I’ve recently begun experimenting with camel and yak roving and down (like a batt) for just this reason. Camel and yak come in nice natural colors that are suitable for a variety of critters. The micron count is 17-19, and it felts quickly. It is quite soft.

rabbit

Camel and yak are wonderful to work with for two-dimensional needle felting because the fibers are so short — just 2 inches!  This bunny was a bit more golden than my camel roving so I mixed it in with some lovely chestnut Romney.  In order to make the short fur, I cut up the Romney into shorter pieces.  To make the ends look more natural, I took the piece of Romney in my hands, pulled it apart, and re-laid the fibers on topic of each other. This prevents all the cut ends from being on the same side.

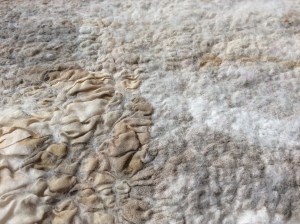
It is great fun to use locks and fleece for texture.  In this picture, I used Leicester locks.  They are thin, long, and grass like.  The purple locks are mohair.  Wensleydale locks also work well and look quite similar.

It is also enjoyable to needle felt two dimensional pieces with short fiber merino. Merino in batt form typically has a short staple length.  Because the fibers are short and fine, it is easier to to control, and you can achieve a rather painterly look.

Half the fun in felting, in my opinion, is opening yourself up to the variety of wools out there and experimenting!  Happy felting!

Karen@bigskyfiberarts.com

BigSkyFiberArts.com

Collage And A Case

Collage And A Case

When I’d had a tidy up over new year, and made enough space to get out all my offcuts, I chose some pieces for a new collage book cover. I made a start on attaching the pieces to some thin fabric, which I think is some kind of interfacing.

When the pieces are such irregular shapes, or at unusual angles it’s really hard to position the pieces so there isn’t one of the same or similar colour touching! I think I have enough bright colours to finish the piece, but wondered if some added texture might work too. Luckily, I have the nuno strips sampler from a few weeks ago, and another I made recently:

Even though I love this texturey scarf, I don’t think it’s suitable for a book cover:

I’m in two minds about this one, it’s not as ‘loose’, but still has potential to catch on something:

Last week at the well being centre, we were doing simple resists again, for our newest member. I was going to do the ‘usual’ simple case one which is about 22 – 30cm x 8cm (depending on whether a flap is wanted or not). But, since we both like drums, and she’s a really fast learner, I thought we’d be a bit adventurous and use a 61 x 6.5cm template to make drumstick cases. They both turned out really great, this is mine:

The drumsticks fitted snuggly and securely. They’re perfect … for new sticks, but after I used my sticks for only the second time this week, they looked like this:

Wool and fibres don’t make me cringe, but the sound of rough drumsticks dragging on felt is not pleasant! Luckily, because the cases weren’t very wide, we ended up with uneven shrinkage, and they shrunk less along the length of the case, and I cut a few inches off the end of mine. And it works just like the cardboard sleeve the sticks came in:

And I can slide it off the smooth end, no scratchy wool noises!

Techniques for Intermediate Felters Class-The Afternoon

Techniques for Intermediate Felters Class-The Afternoon

Last time I talked about the first half of the class, class-the-morning  In the afternoon they did one large sample of many things. They used foam tubes and lots of inclusions. There were two resists sticking up and spikes They added some silk and cotton squares, yarn,  some scrunched up silk and a silk flower.

See the cool little rolling tool I got recently. It’s a little massage roller. This was it’s first try out. It worked really well. I have some other kinds ordered so I will do a post about them later.


Here are a couple of shots of me teaching. The left one is talking about adding some scruched up silk and the right one I explaining how you make one of the resists into a flower.

Here Carlene and Jan are showing thier pieces at show and tell at our guild meeting.

and a close up are Carlene’s

We didn’t have enough time to do everything I wanted to do, so at the end I was doing quick how to’s.  The pine needle technique two ways  and I also explained book resists.

So now it’s a matter of deciding what to take out and what to add in for the next time I teach it. There was not enough time. I think adding an hour to the class would be good. I think I will drop the nuno part of the sample to make sure we got to the pine needle part. I am not sure about the book resist. It may take to much time. What would you want to see in an intermediate techniques class?


Snow Dyeing with Acid Dyes

Snow Dyeing with Acid Dyes

I have done snow (or ice) dyeing for a while now but I always used Procion MX Fiber Reactive Dyes. I did a quick how to post about it here.  But I have never tried snow dyeing with acid dyes. My group did a session of snow dyeing a couple of weeks ago and we used fiber reactive dyes. I dyed 10 silk scarves to sell at the store. I had 10 more scarves left when I got home but I had left my dyeing supplies at my friend’s house. What to do? I decided to try it with acid dyes. I didn’t find much online information about using acid dyes with snow except several people who said you couldn’t use acid dyes because the items needed to be steamed. Well, I’m never one to take someone else’s word for it. I have to experiment and see for myself.

Here’s my set up on the kitchen floor next to the heat vent. I used aluminum baking pans and put a rack on the bottom of three of them. The rack keeps the scarf up out of the melted snow and dye. The dark blue one in the foreground didn’t have a rack. You can do it either way but the rack keeps the color separation a bit more evident in the end result. I soaked the scarves in vinegar water first and then scrunched them up and laid them on the rack or the bottom of the pan. I then covered the scarves with snow. We’ve had plenty of that this year! Then I sprinkled the acid dye powder on top. It’s important to think about your color choices on these if you don’t want to come up with a yucky brown mess. I tend to stick with colors that are closer together on the color wheel. When you use black, it tends to separate out into its component colors so it is a bit unpredictable sometimes.

Now you must have patience and let everything melt. It’s easiest if you do this in the afternoon and let it melt overnight. Once it was all melted, I just picked up the scarves and put them into a gallon bag keeping like colors together. I had 4 open topped bags that I then put in the steam pot and steamed for 30 minutes. It also works best if you let the bags cool down to room temperature but I was out of time because I was heading out of town in two days. So I rinsed them in the sink until no dye was coming out, soaked them in hot water plus textile detergent, rinsed again and ran them through a delicate cycle in the washing machine and ironed them dry.


And it worked! I was very pleased with the results. You can’t really tell much difference between the acid dyes and the fiber reactive dyes. I had a few more variations than the photos above but couldn’t get good photos of all of them. These photos are fairly representative of the colors and patterns that you can achieve with snow or ice dyeing.

Have you tried any snow or ice dyeing? We’d love to see your results. Come show us over on the forum.