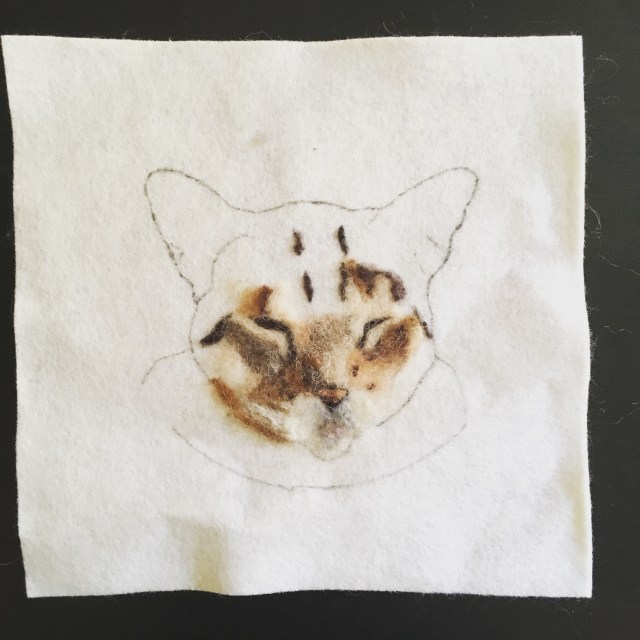
Fossils, Landscape and Sunlight
Now that I have completed the fossil piece, I have to decide how to finish and frame it. This is always my least favorite part of the process. I usually just want to do whatever is easiest. Now if I ever made a piece to size specifications, I could use the same backing and frame every time. But I never manage to do that. So I’m always having to look at custom ways to frame or finish. I got a lot of good suggestions from comments on my last post including:
- Use a larger matte board so the central piece is smaller than usual in the frame inviting close inspection.
- Mount on burlap with frayed edges.
- Use a piece of grey slate with jagged edges.
I actually like all of these suggestions but one of the first things I like to consider is the value of the matte or whatever will be surrounding the felt. I have some large pieces of grey scale paper that I use to help make my decision. Unfortunately, the light here has been nonexistent for taking photos. It has been rainy and cold. I finally resorted to taking photos with some can lights to provide the lighting.


Here’s the fossil piece on the grey scale paper from black to white (left to right). In these photos, the medium and light grey look very similar but they are different in person. Which do you prefer? I wish that the lighting was better for the photos, sorry.

I also found this piece of woven grey fabric that has a combination of values from light to dark grey. I already have enough of this fabric so since I am on the kick of “use stuff up”, I may have to go with this one. I didn’t have a piece of slate and haven’t gotten around to seeing if one piece of slate is available at the home/garden store and the burlap I have is a bright, yellow-green. That certainly won’t work.

Up next, I am working on another landscape. This is with some leftover cut pieces and scraps of felt that have various surface design techniques. Right now I am just in the process of laying out the background with a long way to go. I have decided that most of the lines seem too horizontal and evenly spaced and I need to add a bit more diagonal variety. Of course when I add stitching and foreground elements it will change. But back to the drawing board on the arrangement until I’m happy with it.


And since I told you about the poor sunlight available, I thought I would show you these photos off my front porch. I looked out the front door a couple of mornings ago and there was this beam of sunshine on the tree in front. It was amazing and only lasted for a couple of minutes. But I got some good photos. The tree is a larch or tamarack tree that looks like an evergreen but it’s needles turn golden orange in the fall, drop off and then regrow in the spring. They add some glorious color to the landscape. If you look closely in the background of the photo on the left, you will see a turkey family. And I got a closer view of one against the fall colors. He was making all kinds of noise as he seems to have misplaced his family for a moment. Feel free to click on the photos to get a closer view.