Browsed by
Category: Classes

Card Weaving Class

Card Weaving Class

This last weekend I took a Card weaving class at my Guild. Judy Kavanagh was the teacher. I am not a weaver but this looked so fascinating I wanted to give it a try.

After Judy explained generaly how it all worked and how the chart we would use to thread our cards worked we picked our colours and made our own charts for the colours we had picked.

We used playing cards to make our cards. First we cut them square and then we punched holes in the corners and labeled them so we could thread them correctly.  We wound a short warp (the long threads we put through the holes) I don’t have a picture but you just wound threads around the 4 corners of a warping board. We could have used anything with about a 1.5 meter circumference.

Then following our charts we  threaded the cards. It looked a bit of a mess to start, but after making sure all the cards were the right way and I straitening them we were all set.


Some of us tied to the cabinet doors and others to the looms.  We started weaving.  It got very quiet as we all concentrated. The shuttles we used were made by Judy. I bought this one because I really liked it and didn’t want to give it back.

We rotated the cards 4 turns forward weaving between each turn and then backwards 4 turns weaving between each turn so that we made lozenge shapes in our weaving.  We tried variations on that.

Here is a short video (taken by Judy) of me actually weaving…..  applause here. LOL

Ann doing card weaving from Judy Kavanagh on Vimeo.

You can see that mine is smaller than the others. Judy said to beat the weft (the cross fibers we are putting in) very firmly. It seems we have different definitions of firmly. No matter, the only thing I didn’t get to try because of it was making my weaving round like a tube. My weaving was to inflexible. You can see the little broken thread sticking out on the right hand side of the right hand picture. That is where I tried to pull it into a tube and broke the thread instead. if you click on the picture it will pop up bigger so you can see it better.

It was cool. This was only 10 cards but you can do as many as you like. There is a free program that you can use on line to make patterns for up to 64 cards I think it is. https://twistedthreads.org/ You have to join to play with it but its free. You can get very complicated, turning some cards forward and some back at the same time. You can spell out words and do very complicated patterns and pictures. If you google image card weaving patterns you will see so many. I couldn’t chose which to show you.


Sweet Nothings Retreat

Sweet Nothings Retreat

Sweet Nothings Retreat

I am thrilled to announce that I will be offering two wet felting workshops in France this coming July. The workshops will be held at Sweet Nothings Art and Crafts Retreat in the beautiful Charent region. The retreat is owned and run by husband and wife team Natalie and Lawrence, originally from the UK, and you can read how they came to be running a business in rural France by clicking here.

During each six day retreat there will be three workshop days and, with a maximum number of six students per class, there will be lots of opportunity for one to one time. A small class also allows for lots of flexibility so we can tailor each project to suit the individuals specific wishes/needs rather than all having to work on the same design or template. This also means we can accommodate absolute beginners alongside those of you who may have experience of Wet Felting but want to experiment or develop your technique further. 

15th – 20th July Nuno Scarf /Collar – In this workshop we will be working with Superfine Merino and silk fabrics, learning the basics of Nuno Felting, to create a beautiful, soft scarf/collar. Each student will work at their own pace and, once finished, you have the option of relaxing or putting your new found skills to practise on another item such as a Necklet or Bracelet. Being both practical and decorative, the beautifully soft, extremely lightweight Necklets bridge the gap between a scarf and a necklace and are ideal for wearing under a jacket on cool evenings. The bracelets introduce another technique, differential shrinkage, which allows us to create interesting, undulating surfaces on a flat plane. Once again, each of the additional projects will be totally unique and these can be further embellished with hand embroidery and beads. It’s your retreat…you decide!

Nuno Scarf/Collar
Nuno Necklets
Nuno Bracelets

22nd – 27th July Wet Felted Wallhanging – In this workshop we will be covering a variety of techniques including wet felting, needle felting, free motion stitch and hand embroidery to create our own unique wall hanging. It is suitable for any ability from absolute beginner to the more experienced felt maker as well as being a great introduction to free machine embroidery for those who haven’t yet tried it. 

Wet Felted Wallhanging

Using photographs or sketches as our source of inspiration we will begin by designing our layout and colour scheme. There will be examples to look at as we explore the different techniques we might use to create our pictures. The main body of our work will be wet felted, using loose fibres to “paint” our pictures. We will also explore the use of our own hand made pre felts, needle felting, hand and machine stitching to add areas of detail. Students can work to any size they wish, working on a large scale and concentrating on the one project, or working to a smaller scale and having the choice of an add-on felting project or simply enjoying more “free” time! 

Wet Felted Wallhanging

If you would like more information about the workshops I will be offering please use the contact form on my website to get in touch www.lincsinstitches.com  If you have any queries regarding the accommodation or would like to make a booking please do that via the Sweet Nothings Website.

Finished Slippers and Something New

Finished Slippers and Something New

I had planed to do a post about The Holiday Card I sent to Ruth  but it hasn’t arrived at her house yet so I don’t want to spoil the surprise.

Instead plan B. As promised  some pictures of the finished slippers. I made these for a sample for my slipper class a few weeks ago.

I left the one on the right flat so people could see how it was cut. I will steam or wet it and put it into the correct shape.  The one on the left is how is should look . I plan to make a leather sole for them.

The other thing I did for the class was leave one as it was when the felting was finished to show how the wool migrates through the decoration.

And the other one I shaved with a regular disposable razor to show how you can bring it back up.

And now for my something new. It is something I have  been talking about and thinking about for a while. Can you guess what it is.

How about now

or now

I am sure you know now

A new camera! It was on sale so now was the time. I had to use my phone to take the pictures because it is so new the battery is still charging. Now I need to figure out some good background and lighting I can use for pictures in my windowless studio. I am thinking some sort of shear on a frame to defuse the harsh light and some wight card for bouncing the light. Maybe a big light gray and or white felt sheet for background.


Felted slipper class

Felted slipper class

This last Saturday I taught a slipper class to 6 lovely ladies. I gave them a choice of templates, so there were different types of slippers being made at the same time. We used the one that looks like bunny ears, the one with little pointy the ears on the sides, boots and some pointy ones.  They used Corriedale wool for the slippers. I prefer something like Fin wool but it is hard to get it in colours and everyone wants colours. So Corriedale is a good compromise. After everyone made templates it was onto laying out the wool.

Then on to rubbing rolling

Once everything was hanging together well, it was time to take the resists out. You might remember Christine made one of the pixie hats in the hat workshop a few weeks ago. Hat Class. Hat Class She is planning for curly toes.


And on to fulling. There is scrunching and throwing of course and we had a washboard and a car mat to help with the shrinking.  Sorry I have no pictures of that.

You can custom fit your slipper right on your food of course.  You can really see how much it has changed compared to the one that hasn’t been fulled yet.

This one was almost done.

Judy’s are the only ones managed to get a picture of at the end of class.  She put a little of all the embellishment fibers on them to see how they felted.  She still wants to a just the top at the opening. She is going to make insoles and add a leather sole.

I am adding this in. Judy had some felt insoles and she needled some special supports for her feet onto it and fit them into her new slippers.

And Christine’s curly toes


Nuno Felting Class

Nuno Felting Class

Hi all, sorry for being late I am a day behind in my week. Probably to make up for me thinking it was Sunday all Saturday.
This last week end I taught a lovely group of ladies how to make nuno felt scarves.
This is what the set up looks like just before the students arrive.

After everyone picks their scarf blank and the main colours for their scarf they got down to laying out their patterns.

Here they are a little farther along.

After adding all their embellishments it was on to rubbing and rolling

and then the fun of throwing to finish the fulling

Here are everyone’s scarves front and back

This last picture on the right is a close up of the silk hanky flowers that were added to one end of this scarf. the look great but will look better when they dry. They will lighten up and some hidden silk will show up. I never get to see them dry. It was A good class and everyone seemed to have a good time.

Have you given or taken a class lately?


A show and Picture Progress

A show and Picture Progress

I had a show on the weekend. It was quite good. We put a big push on advertising on Facebook and Instagram and it looks like it paid off. There were more customers this year. It’s nice that everyone’s efforts paid off.

This is what my booth looked like.

I sat in the back near the mirror and worked on my Moy MacKay class picture. You can see it on the left of the table.  People were very interested and it helped to start conversations.

On the second day, I changed the table around a little to see if the little bags would go better.  It might have been a little better. people look at them a lot but they are not selling. Maybe the price is a bit high. I need to get my webpage set up to sell or get my Etsy page up and working.

This is what it looked like at the beginning of the day.

I added some more to the fences and some shadows for the ones on the left as the sun is on that side. added some purple to the left backfield to tone it down as it farther away.  The big thing I worked on mountains. The wool colours were running across, So they really didn’t look like trees. I added a thin layer of wool going the other way to make it look more like it is covered in trees. I used a greyer green so they will reseed more.


Now I need to add some shading to give the mountains some definition and mountainy shape. It’s coming along. At the moment I am working on the holiday card exchange. What are you working on?


This and That

This and That

My plan was to show you the needle felted sheep class I taught a few weeks ago but it seems I took a lot of pictures of my hand and only ended up with two group pictures at the end. So here they are:

That doesn’t seem like much so I though I would show you what my house looked like on Sunday morning. It was so pretty and I may do a felt picture of using one of the pictures for inspiration. It was only -2c and all the snow is gone now.

I have a couple of new felting tools. The first I am told is for sitting on to help with some hip problem but I found 2 of them (cheap) at the second hand store. Value Village for those who live in the USA or Canada. I will attach a strap of some sort and give it a try.

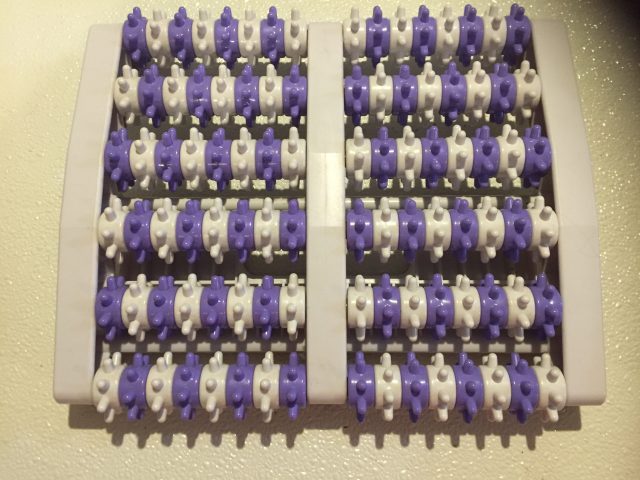
Jan Found this great foot massager for me. It should be interesting to try out.

Lastly If you signed up for the Holiday card exchange the partner names are now up on the forum holiday-exchange-2018

As you Read this I will be at my Guild Exhibitions and Sale. It’s in Ottawa Ontario Canada if you are in the area drop by and say hello. facebook.com/events/

Also, I would like to encourage anyone who would like to learn how to make felt bags to sign up for Teri Berry’s online class. Registration is now open and class begins November 22. For more information and to register, please click on the link to the Felted Bags online class.

Who could resist learning to make a cute bag like this?


Happy Felt Hat Makers

Happy Felt Hat Makers

Just after I took my Moy MacKay class I taught a felt hat class to 6 enthusiastic students. they wanted different styles but they all wanted folds in the top.

and decorating, I am sure I took more pictures at this point but something went wrong because they are not on my phone.

Then there was rubbing and rolling to do.

Here they are after some shrinking but not there yet.

The did shrink much to everyone’s amazement. I don’t think they really believed they would ever fit.

These brims on these 2 wide brimmed hats are to heavy to hold themselves up while wet. They will be fine once they are dry.

I didn’t get a picture of the last one but it turned out well too. It was a really fun day for everyone.


A class with Moy MacKay

A class with Moy MacKay

Last week I had the opportunity to take a 2 day class with Moy MacKay. I went with a couple of friends and we had a great time.  We did the wet felting on day one. We had 2 pictures to choose from for the landscape.

I chose the one the left.

Moy demonstrated and explained to us how to work and what to do. We got to ask questions. She told us to take lots of pictures as we went because you see things in the picture that  you don’t see in just looking at it. Still I didn’t take enough.

First we laid out the background

Then we added the foreground and details. The house is prefelt and the flowers in the front are chopped up curls

We wet them down and gave them a 2 or 3 min rub and then rolled them for about 3 min one way and then the other for another few min and we were done. They are very lightly felted but that’s ok because they are pictures not hats.

That took the morning. After lunch we did another piece, a still life, flowers. We had a vase of red flowers and babies breath to use for inspiration. We were not to copy it but to use it to see how flowers look. You can see it in the group picture. Moy demonstrated again and explained again and then we only had about an hour to put the picture together and then a short time to get it felted before we had to be out of the room for another group.

We started with the table then the foliage and then the vase and then moves some leaves around. Then we added the flowers. The babies breath is nepps.

I quite like it at this stage. Not as much after it was felted.

On day 2 we started the embellishing. Moy talked about and demonstrated needle felting accents and refining the pictures. Also some machine embroidery and stitching.  we could try the machine stitching if we wanted but my picture wasn’t ready for that yet.   This is what they are like now. No where near done but works in progress.

This is after I straitened up the house and removed the mangled fence and added a new one.

This is where it is now.  I added windows and ivy to the house. I removed the cobwebs from the trees. I added some shading to the trees. I added in some stems for the flowers in front and another fence. I think the field behind the left fence needs to be darker because it’s farther away. It doesn’t show well in the picture but right now it is lighter and more yellow than the front field.  It needs a lot more work but I think I know what I want to do to it.

And the flowers. I forgot to take a picture of when it was wet felted but had no embellishments.  But here it is so far. I am not as keen on the flowers but they are alright. I may like them better after I work on them some more. The table needs straitening up and lots more texture. And notice the nepps have stuck. We had chopped up some green fibers as part of the foliage and I think the short fibers under them made them stick.

And lastly a picture of everyone’s works at the end of the second day. the flowers we used are beside Moy.

It was a great class. I think it’s given me confidence to try some more. Jan will be doing more posts for us and I hope she will do one about this class too. She will have taken at least a hundred more pictures than me and be able to show you her works in progress too.

Don’t forget to sign up for the holiday card exchange on the forum. Read all about it here: https://feltingandfiberstudio.com/2018/10/10/time-for-the-holiday-card-exchange-again/


Nuno Felted Scarf Class.

Nuno Felted Scarf Class.

I recently taught a class about an hour north of where I live. I had 4 lovely ladies in the class and we had a great time making the scarves.

Here are thier layouts just before wetting.

And after much rubbing and rolling and a lunch break in the middle

They had some lovely scarves, this is the wool side.

And the silk side.

These where still wet so they will all lighten up as they dry. The difference in length is mostly do the lay out direction ( across or up and down) and some to how much fulling each person wanted to do. Everyone seemed happy with thier results so that makes me happy too.