Browsed by
Month: July 2022

Processing a really dirty fleece, I mean really, really dirty…

Processing a really dirty fleece, I mean really, really dirty…

So many of us can’t resist a decent free fleece.  We all know that with a little work and water most fleece can produce some lovely fiber, right?  Early summer makes for full on fleece washing season.  I have two cheviot cross fleece that need to be washed before fall.  I use rain water as much as possible to rinse the fleece.  By rain water I do mean torrential down pours from thunder storms.  But lately we’re not getting rain unless it’s accompanied with horrific wind.

When I wash a fleece I leave it dry where ever I can find a space.  This fleece was particularly large, so it took up a lot of the deck.  I had to improvise by using net hangers.

Old lawn chairs that were past their prime

And a plant trellis I found at the local discount store which was particularly useful because it expands and then fold up for easy storage.

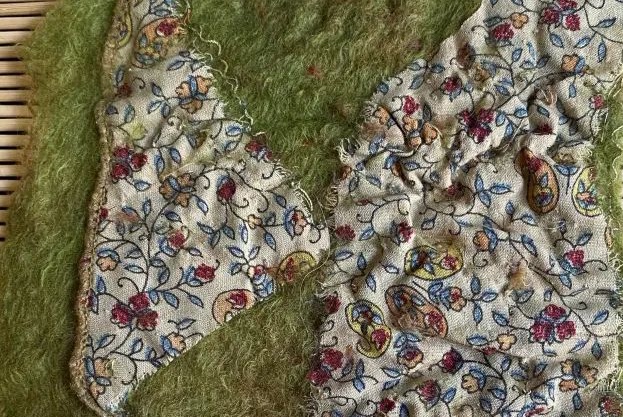
This cheviot is a cross with some other unknown breed.  It’s primarily for meat and was left to fool around in the fields and in the barn.  There is straw, and other bits of crud embedded in the top of the fleece, lots of lanolin protected the sides and under belly, so the majority of the fleece is decent condition. It was a lamb so there was amniotic tip damage as well as sun damage. But some of it was very nice, lovely and crimpy, as well as very soft.

Because the fleece was so questionable the only way I would ever consider processing this was with combs.  Combs have a tendency of breaking any fiber that is at all fragile.  This is exactly what I wanted to do with this fleece.  The combs would remove the damaged tips, trap the straw, manure, and other debris.  The major downside of using combs is wastage.  It would be huge on a fleece like this.  The other choice would be to hand tease the fibers from the debris, card and then spin the wool into yarn.  The end product would be a decent yarn, but I suspect it would be a bit fragile.  The fleece was just not worth that much work.  So out came the combs.

I have a few sets and am a firm believer in getting the best tools you can afford for the job at hand.  It won’t hurt you at all to get really beautiful tools either, its good for the soul. I did a test using my light combs, made by Roger Hawkins.  Sadly, these are no longer being manufactured, so I cherish the ones I have.  This is one of the reasons I only did a test with these little ones.  The wool was too dirty and too coarse for these combs.  The results were extremely good, but the output was tiny.

So I cracked out the larger set.  These need to be clamped to the table because they can take a lot of pulling and tugging when the combing gets a little rugged.  This set was made by Alvin Ramer, again these are not being manufactured anymore either.  One of the most important differences between the two sets is that the smaller set are relatively safe.  The tines are not sharp.  These are the ones I can safely and comfortably use while watching a movie or talking with someone.  On the larger set the tines are extremely sharp and must be used carefully.  Combing must be done at  90 degrees to the tines.  Some people think you comb down on the tines.  You do not; you comb across the tines.

This shows you the quantity of wool that can be loaded onto the larger comb.  It is locked into the block, which is clamped onto the table.  The other comb will be used in a downward motion to comb out the wool.  You can also see why this fleece is worth the work,  just look at that staple length!!

I did say there was lot of wastage – after three times getting combed this is what I threw into the compost, per combing.  So, I would comb once and there would be a tangled mess left behind.  That was removed and thrown out.  The wool was combed again, the tangle was removed and thrown out.  The wool was combed again, and once again, the tangle was removed and thrown out.  Finally the wool was dized off and turned into roving. The estimate for wastage is going to be 35% – 45% on the washed fiber.  The wastage on an unwashed fleece is anywhere up to 50% by weight. The final tally is wastage of approximately 65%.  I have to really estimate high because of straw, manure, lanolin and skirting.

The diz can be anything with a suitable hole.  Some people use buttons, I like this shell because it’s concave.  It needs to be turned as you diz to catch the little bits along the edge.

You need to see the difference in size between the two combs.  I have a third pair, but they are safely stored away.  They are the four pitch, sometimes called English wool combs that I used when processing Cotswold fleeces.

I really like the end result of combing.  It takes time and a bit of patience.  It also takes muscles that I forgot I had.  But it’s a wonderful way to salvage an unsalvageable fleece.  It’s a great way to enjoy a garden, park or private space while listening to birds, children playing in a pool, or a book, or music.  The fleece really was pretty awful, but the results are great.  I did a couple of test spins, singles, two ply and three ply.  The wool is resilient and bouncy.  It should dye nicely and ultimately be useful.


Late Summer and Fall Online Classes

Late Summer and Fall Online Classes

We have online classes coming up over the next several months. If you are looking for a new learning experience, please join us. The classes are listed below with a link to each class page. If you want to take the class but registration isn’t open yet, there is a place to contact us so you can be added to the student email list. You will then be notified when registration opens for that class. Make sure you include which class in your inquiry. You don’t need to be present at any certain time to participate in a class and you will receive PDF’s to keep with all the relevant information learned in the class.

Screen Printed Felt Journals by Ruth Lane

All four modules of my class, EMBELLISHING FELT WITH SURFACE DESIGN TECHNIQUES – A MIXED MEDIA APPROACH, will begin on August 12th. Registration opens today for these classes.

Nuno Felting with Paper Fabric Lamination

Experimental Screen Printing on Felt

Free Motion Machine Stitching on Felt

Printing, Stenciling, and Playing with Thickened Dye on Felt

Click on any of the links above to find out more about the class and to register and join in the fun.

Hanging Felted Spiral with Helene Dooley begins on August 26 and registration opens on August 12. Learn to felt this cool hanging spiral. Find out more here.

Felting Fantasy Fish with Galina Titova will start on September 6 and registration beings on August 23. Developing your own fantasy fish is such fun, will you join Galina?

Teri has two classes coming up in October. Creating a Felted Concertina Hat and a Felted Bags class.   Registration opens the first week of October and class begins on the third Thursday of October. So if you want to learn how to make hats or bags, this is a great opporunity.

Our Wet Felting for Beginners class is always available. You can start any time and follow along at your own pace. Register here.


MX dying silk scarf blanks.

MX dying silk scarf blanks.

Sorry to say I have been too busy to felt again. I am hoping to have a little more time now my mom’s house is in possession of the new owners. I thought people might like to see this post  I made in 2012 about dying silk blanks with MX dye. this method works with big things too. I did a dress for my much skinnier self once and some boxer shorts. something else I learned since I posted this the first time is that you can use these dyes as acid dies by using a mild acid and heat. the colours aren’t quite as vibrant but if you can only get one kind of dye this will do double duty for you.


I dye my own silk and one of the ways I do that is with MX dye. MX Dye is a fibre-reactive dye and works on cellulose or plant fibres like cotton, linen and hemp. It also works on silk. As far as I know, silk is the only fibre that you can use both weak acid dyes that are for protein fibres and the MX dyes.

Scarves blowing in the wind.

I like to use the low water dye method. With this method, you use a jar and just a little water. What I do is scrunch or twist or pleat up my silk to be dyed. In this case, they are all about 2 feet wide and 8 feet long. Then you pack it into the bottom of a jar that is big enough to hold the silk and the dye (1/2 a cup) and the fixative (1/4-1/2 cup). It is important that it be a snug fit for this method to work.

I mix up 2 colours of MX dye in 1/4 cup of room temperature water. Pour them over the silk in the jar one at a time making sure the silk is covered with liquid. If it floats, as you can see a couple of my jars did, you need to carefully weigh them down with something non-metal. Metal will affect the dye. This is another reason you want them tightly jammed in the bottom of the jar but sometimes it happens anyway. Once the dye is in the jar you don’t want to disturb them. You don’t want the dyes to mix completely and give you a solid colour.

dye in jars

I am very impatient. So I usually go do something else for 20 min to an hour then I come back and add the fixative. With MX dye you have to raise the PH to get the dye to stick. The cheapest thing for this is PH up from the pool store. You can use washing soda not baking soda (bicarbonate of soda) or order it from your dye supplier but pool chemical is cheap, especially at the end of the season. I add a tablespoon for each cup of water including the water you’re mixing with. Stir to dissolve and then pour it into the jar. You should leave it for an hour to react but I am impatient as I said and usually dump everything out after about 20 min. Rinse the silk in cold water then hot soapy water then one more cold. Here are some results.

I am sorry the pictures aren’t better but the wind wouldn’t cooperate. They were dry in about 10 min.

Here are some others I’ve done over the years. It is a really fun and easy way to play with dye. You should give it a try.


If you want really good detailed instructions I would read about it on Paula Burch’s site. http://www.pburch.net/dyeing/lowwaterimmersion.shtml


A SHORT UPDATE ON MR. MER

A SHORT UPDATE ON MR. MER

I was surprised (and pleased) at the interest in the crown needle post I just did. It is a cool little needle unequally suited to shallow detail work. Its low barb number, having only 3 in total all by the tip, does make it a slower needle but it’s not always a good idea to be in a rush.

The “not in a rush” has been impressed upon me again this past week as I shifted from needle review to a photo re-cataloging project for my husband. Nothing big, or heavy like arranging just the correct angle to capture in photographs his collection of Anvils (he is down to 3) or forges (he has 2, both on the back patio)!

What I was working with were Many, Many, Many tiny light objects. Unfortunately, I needed to sort through all of them, then spread pre-specified groups of them out to photograph.  The best spot to work for light was on the bed by the window. This put me in a working position of standing and bending forward. That is precisely the same position that I used to work in, which did not go as well as I had hoped. (Neuropathy is a neve yelling at you. It can scream –searing pain, it can lie to you –give false information, or it can refuse to talk to you –numbness or lack of proper function) the type of nerve and the location of its irritation give the location of where their displeasure is felt.  A nerve once annoyed can hold a grudge =this means if you irritate it then re-irritate it, it usually will take longer to forgive you and heal after each re-irritation.

I got help yesterday and am well over halfway on the first part of the photography project. Unfortunately, my leg is still intermittently lying to me even this morning, so no standing photography or poor ergonomic felting until that stops.

SO my plans for today’s blog are a bit on hold. I can bring you up to date with the project I had started with Mr. Mer. “The Quest for Hair”!  I have reminded Mr. Mer that Twist Fiber Festival in Quebec is only a few weeks away (Aug. 12th to 14th) https://festivaltwist.org/en/twist-fibre-festival/ .  If he would like to accompany me, he would have an even bigger selection of long locks to choose from. (I hope I can find vendors with 9 to 12-inch die or undyed locks that would be fashionable for a modern Mer person.) He seems very smitten with some of the locks from Bernadette’s stash but I think I can persuade him to wait till just after Twist.

Mr. Mer would like to send his thanks to Bernadette who raided her stash to help alieve his follicular challenges.  This is some of the fibre he has sorted through;

long fibers greens yelows long fibers Greens Purples long fibers with ruler1-3 sorting through the fibres from Bernadette

He has collected a small bag of fibre that he hopes goes well with his Northern pike lower half.

Mr. Mer (Merman) holds bag of long fibers in shades of green4 Mr. Mer’s Selection

Once he has a bit more he will have to decide on the hairstyle he wants. I am suggesting long since It would flow wonderfully as he swims. (vary Fabio if you are old enough – think historically inaccurate romance novel covers with beefy guys with long hair).  If he spends a bit of time online, he may find the Drummer Toll Yagami, from the Japanese band called Buck-Tick. He has an extra-long Mohawk hairstyle, it’s terribly impressive! I am not sure the ingredients to keep a Mohawk up would work in water. I may have to investigate if Mr. Mer seems interested. (There may be some Magic Mer hair gel I don’t know about.)

I got up extra early to work on my blog post and look who I found doing research on my computer! (Why does my computer freeze when I use it but he can spend all night browsing?)  I will show you what he was up to.

5 Compilation of research by Mr. Mer

Mr Mer thinks he should keep researching. It is a big decision and he is a bit overwhelmed with all the options! For now, he is on his way back to sitting in his project bag, clutching his bag of fibre, in deep contemplation.

Mr Mer with his bag of fiber ready to go back to his project bag and think

6 Ready to go to his project bag and have a think.

After all his research and contemplation he will likely want eyebrows and ears too! I will keep you updated on his progress.


Have fun with fibre and keep felting


Experimenting With ArtFelt Paper

Experimenting With ArtFelt Paper

Have you ever bought something, thinking “this will be great to use for…,” and then it sits on standby for a few years? Well, it’s even worse when you are a shop owner. Everything sparkles brightly, when you attend a vendor show, but then the product arrives and sits on your shelves. For me that item is ArtFelt Paper: but after a couple days of experimenting with it, I think it deserves more consideration.

ArtFelt Paper

ArtFelt Paper is a starch based product, created by Gerhard Schoppel, of Schoppel-Wolle in Germany. He invented it to make his daughter’s school felting project, easier. ‘Necessity is the mother of invention’ especially when helping a child with homework! This paper becomes a base on which wool and other fibers, can be fixed in place, until ready for felting. Designs can be made with shingled wool, or thin pre-felt material. You can draw on it with permanent markers, or outlined with pencil roving. Using a foam board or similar underneath, a barbed felting needle is used, to tack fiber to the paper. After the design is complete, it is wet with soapy water, rolled up in plastic and thrown in the dryer. ArtFelt paper can be used with wool and woven fabrics, like silk and cotton, with interesting results. We will be looking at all sorts of things, so lets get started.

My experiments began with batts I created on my drum carder. They were at least 70% wool with other fiber and fun bits blended in. I pulled shingles from the batt at first, and then thought, why am I not using the batt as is? So, I pulled a section off and thinned it out with my hands.

Batt on the left, Roving on the right

The following photos are labeled to show my process. I’m surely not an expert by any means, but there is very little information, on how to use the product. Most of the things I’ve seen it used for, are less than inspiring, so I am jumping straight into the fun part.

It is then placed in a low temperature dryer for 10 minute intervals; unrolling and turning 90 degrees as necessary. If you are like me, you put it in the dryer the second time and forget about it. No worries: it’s most likely still damp enough to reshape.
Zoom View shows the small tufts of fiber coming through cotton fabric.

I didn’t stop there… I used the same batt to test bulky wool yarn, sari silk yarn, and art yarn, simply layed across the batt. I applied to the thinnest amount of wool fibers over the yarns. (top photos) Then I went crazy with whatever I could find; blue bamboo threads, sequins on and pulled off thread, chopped up pieces of sari silk ribbon. (middle photos) Then I chopped up all sorts of art yarns to see what they would do. (bottom photos)

Then, I had to test out all sorts of silks on different fiber batts. The gold fiber batt (top photo below) is 100% merino wool. I used magenta silk noil nepps, hand dyed hankies (right side) under chopped sari ribbon pieces. The blue fiber batt, contained fibers that were obviously not wool: not much shrinkage. I applied silk lapp at the bottom, sari silk roving in deep blue, silk yarns, and a blue lock that fell off after felting.

I wanted to see how ArtFelt paper worked with silk fabric. To really test it thoroughly, I used 100% NZ Merino for both tests below. The top sandwich had; ArtFelt paper bottom/wool middle/silk fabric and sari ribbons on top. The result was not much shrinkage at all. The ribbons could easily be pulled off, and the silk fabric adhered, but felt very loose. The bottom sandwich…I didn’t take a photo of the other side!! The layer order is; silk fabric bottom/ArtFelt paper middle/wool and decorative bits on top. You can see the silk peeking out from the lower left corner.

The wool layer felted really well. Even the bits of fiber are secure. How did the silk fabric do? It adhered really well to the wool fiber. It looks the ruching on the cotton fabric, but it has a softer, genteel look.

ArtFelt Paper between the silk and merino layers.

I think the possibilities are definitely positive for this product. I think there are still more things that can be done with it. I did a couple more samples to see how it would work for pre-felt pieces. The green was some wisps of fiber I had lingering in my stash. It is very thin. I thought it could be useful, as trees or grasses, in a landscape. Then I carded a batt to create a pre-felt of sky and water or land. The last photo is a brooch by Louise Giordano, (http://scarf-it-up.net) who used ArtFelt paper to create the piece.

9/18/2022 Update: 35% ArtFelt discount period has ended for this article.

Capi

Learning to print on (wet) felt

Learning to print on (wet) felt

I’m learning to print onto felt so I thought I’d show you some work in progress.  I’m following Lindsey Tyson’s course ‘Transfer Printing onto Felt and other Fabrics’ so I’m focusing here on what I’ve made rather than how. Lindsey’s been printing on felt for some years and has developed her own techniques. She’s now moving away from felt-making and printing to focus on painting so has produced a comprehensive course to share her expertise. I first saw her work a few years ago and have been really intrigued ever since to know how she produces such lovely images on felt.

I do quite a lot of sales and exhibitions in my local area. I’ve long thought I’d like to develop some smaller decorative items I can make relatively quickly and so sell at a lower price than some of my other work (because it’s more time-consuming).  I thought printing might provide an opportunity to do this.

I hummed and hawed for some time before signing up as it involves quite a big investment – not only in the course itself but also in equipment, software, space (for the equipment) and time.  I’ve just had a milestone birthday and as my mother wanted to give me a milestone gift, I decided that this was it.  I do love learning new skills and developing ideas so I was pretty sure I’d love the course.  Thank you Mum!

My first venture was to source some free online images (this is covered in the course) and, along with a little oyster shell sketch I drew, prepare them for printing and print some samples onto scraps of felt.

Small test pieces

I was pretty pleased with the results. However, some of the prints had a rather plastic feel and very visible edge.

Lindsey was very helpful with her suggestions on how to improve – including highlighting that I’d overlooked one of the steps when using the paper I’d chosen, doh! That is now largely resolved though I’m still wrestling with myself about whether I should buy a new printer as I have an inkjet and apparently laser prints work better.

I made a little tea light holder cover using some commercial prefelt. I’ve never used bought prefelt before (I’ve always made my own) and although it produced a very lovely fine felt, I also managed to create a line in the cover where the sheet of prefelt joined that I wasn’t happy with.

I now know (from the course) that there’s a way round this but I’ve decided for the time being to stick with making my own felt from scratch rather than introducing new variables.

The course covers, in a lot of detail, how to design and manipulate images. It includes tutorials on using free software as well as paid-for software like Photoshop. I decided to buy Photoshop Elements ( a basic form of Photoshop with a one-off purchase rather than a monthly subscription). I have to admit I have not taken to it like a duck to water! Some of that is doubtless me (remember that milestone birthday!) but I’ve seen lots of reviews that agree that it’s not very intuitive and so not particularly easy to learn to use. Fate intervened with (as far as I know) my first dose of Covid-19 during which I confined myself entirely to staying at home for 5 days (as per our current guidance) and until I tested negative. After the first couple of days I started to feel better so decided this was my time to make Photoshop Elements work for me.  In spite of sometimes getting very frustrated, I actually quite enjoyed the learning and have to be impressed with the things I can now do with it (however slowly) let alone all the things it can do that I can’t yet.  There are some really good free YouTube tutorials too, which helped, and I have certainly put in the hours. Many, many hours.

Back to the felt-making.  I made two more little tea light covers – one from 2 fine layers and one from 4 fine layers of 21 micron natural (undyed) merino. I wanted to see how they’d look with a lit tealight inside. Surprisingly they were both OK.

By then I’d thought of using my own felted bird images which I expertly (!) extracted from their backgrounds. I like the redshank and curlew as they both have feet.  Often my felt pictures have birds (like the avocet) whose feet are in water or behind pebbles – both because that’s how I saw the wild birds they’re based on and because I find felting bird feet quite hard!

I then tried out 18.5 mic undyed merino and decided this was what I’d use as it has a lovely smooth surface, light colour and a fine translucent appearance. Perfect both for printing and for tea lights.

I started to dig into my vast collection of charity-shop-bought silk scarves and added silk strips to the lower part of the designs. This was partly because lit tea lights’ metal cases cast a shadow at the base of the cover (see the lit one above), partly because it adds to the decoration and partly because it can ‘ground’ the images – i.e. give those birds’ feet something to walk on.  Oh, it also eases my conscience about quite how many second-hand silk scarves I own.

Redshank with recycled grey silk scarf strip

And so here are some more of the results.  I’ve printed a design on the front and the back (apart from the one with a flock of birds – that goes all the way round). They also look nice as plant holders, ‘thought they’re not quite the right proportions for most plant pots so I have to add some small pebbles to the bottom of the glass container if I want to show them as plant holders.

Herons

Some of them are free images I’ve found on the internet; some are from my own large felted pictures and one (the honesty seed pods) is from photos I’ve taken of the seed pods and worked on in Photoshop Elements to create a composite picture.

And here are the first 6 I put in the gallery shop at Creek Creative in Faversham (it’s a gallery, café, shop and studios where I rent my studio), just over a week ago. Inside each there are comprehensive warnings about lit tea lights, some felt care instructions and the name of the image.

First shop display at Creek Creative

The redshank on the left sold within a few days – I don’t know about the others yet.

I’ve also made some cards – initially to use up all the little test prints….

Square cards made using test samples

…..and then some I made specifically to become cards

Long cards

And finally a couple of bigger purpose-made plant pots with metal pots inside, using 21 mic merino in green and white.

Next steps? I’m looking forward to a couple of in-person sales / exhibitions I have coming up so I can gauge people’s reactions. I will keep building a stock of tealight holders, plant pots and cards and developing new images so I have plenty of both stock and variety.  I will keep extending my knowledge and skills in both printing on felt and using Photoshop.  And I will definitely keep working through Lindsey’s excellent course and drawing on her extensive and generous one-to-one and group support to help me on my way.

Here’s a link to a promotional video for Lindsey’s course, in case you want to check it out.

A Question about Crown felting needles

A Question about Crown felting needles

A couple of days ago I was watching an online demo of Needle Felting Faces done by Marie from living felt out of Texas. She was using one of the new firmer wool felting mats (it looks similar to the ironing felt mats). She was using a 42Triangle (42T) needle. She said she chose this needle because she wanted to “have the fiber sit on top of the picture and not underneath”. I am not sure if she is using a triangle needle with 3 barbs per side (a 42T 333) or only 2 barbs per side (a 42T 222). A T42-333 would be more aggressive at moving fiber than a T42-222.

I asked in the chat; “Since you are focusing on adding the wool mainly to the surface have you tried a 40 or 42 Crown needle? A crown needle has the barbs very close to the tip of the needle so works with little (depth of) poking.” I did not get an answer from Marie but it started a side conversation about Crown needles with a European felter in the chat.

I was surprised that Crown needles were not well known. They have been available for a few years; at fiber festivals, online and if you are lucky at the local fiber arts stores.  I am sure most of you have bumped into them but may not have had the opportunity to try them out.

Let’s look at where they come from, the working parts of the needle, why would you want one and what is it good for?

Where the Crown needle comes from;

One of the manufacturers of felting needles is Groz-Beckert, who classifies crown and fork needles as “Structuring” needles.  A Structuring needle works on “structuring previously bonded nonwoven fabric” in a machine to produce a Velvety or grainy surface texture. They are designed originally to plunge through the felt pulling fibers to the opposite side as can be seen in this video. https://www.youtube.com/watch?v=aWE4tvHF0xU

As felters we tend to look at items not originally intended or designed for felting and turn them into felting tools. Bubble wrap, lids of Tupper wear jugs, pool noodles, garden kneeling pads and we look at the industrial felting needles and go “AH!! I could do this with them instead!”  In this case, instead of pushing fiber to the far side of the felt and through creating a surface texture, we can reduce the depth we work at and secure fibers close to the surface of your work.

Crown Needle diagram1) a close up of the end of a Crown needle.  https://www.groz-beckert.com/mm/media/web/3_felting_1/bilder_14/composings_3/FN_Composing_23.jpg

Parts of a felting needle 2) Parts of a felting needle

How the needle works and the structure of the needle

Let’s review how a felting needle works. As the needle enters the fibers/felt, its barbs (notches in the needle which can vary in number and placement along the working part of the needle) grab some of the fiber and as it is inserted drags the fiber with it into the felt.  Since the barbs are one directional the fiber carried by the barb stays at the depth it was pushed as the needle is removed. This repeated entanglement creates felt. The felt can be a 2D picture, a 3D sculpture or industrially the needles can create the non-woven fabric used to line the trunk or cover the door panels of your car.

With the Crown needle, the bards are located very close to the tip of the needle and are arranged one per each working side (3 working sides in a triangular needle). This means the working depth is the distance from the tip to where the barbs engage and entangle fiber into the web (felt ground). So on my crown needles, it’s about 1/4th of an inch. There are different styles of tips and different lengths of barbs so there can be a bit of variation if you look at the industrial options. But overall, the distance from the first barb to the tip is very close compared to other types of needles.

Where did I find mine?

Ann and I were both curious a few years ago and I bought a box of the Crown 40-111 from Doer out of china. The price for the needles (500 in a box) was good but the shipping cost was a bit painful (but still cheaper than a flight to China and buying them there!). At present, there are listings for 40, 42,43, and 46 gauge Crown needles from Doer. Groz-Beckert’s PDF lists Crown needles in gauges from 25 to 46. Some of the Groz-Beckerts range would likely not be useful to us but is an impressive amount of options!  With both companies, the working part is triangular as you can see in the last picture from the group below.

box of 500 Crown needles3) box of 500 Crown needles

the designations for the 40gauge crown needles I purchased4) the designations for the 40gauge crown needles I purchased

needle are wrapped in bundles within the box
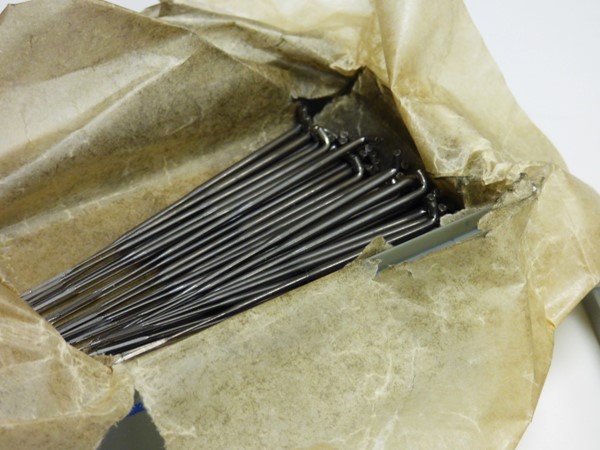
5) needle are wrapped in bundles within the box

close up of one of the needles6) close up of one of the needles

For part of the surface decoration on the iris flower, I used crown needles individually and in groups of 2 or 3 held together with a small rubber hair elastic.

using crown needles to add detail to the Iris petals, note the shallow angle I was working at7) using crown needles to add detail to the Iris petals, note the shallow angle I was working at

Why would I want a crown needle and what do they do?

When you want to affect the surface of your felting, you can try the crown needles and/or you can change the angle that you are inserting the needles. A very shallow angle, (almost parallel with the felt surface) will keep the barbs from going through a thin petal or 2d picture.

With a crown needle, there is a reduced distance the needle needs to travel to engage the fiber and secure it into the web.  This reduction in range of movement may reduce some of the strain on the body during the movement of felting, especially if the movement is slower and involved a more careful insertion of the needle. That said you will further reduce your likelihood of muscle fatigue or injury if you also remember to take (Stretch) breaks or let your bladder help remind you to take breaks by drinking liquids like ice tea or water. It’s not a good idea to ignore your bladder when it asks you to stop felting!

Gauge vs fiber size

As the gauge of the needle gets bigger, say a 40 crown vs a 46 crown the fiber diameter/fineness that will be most effective with the needle will change. A 46 crown needle will work better with finer fibers. Conversely, a larger courser fiber may not engage or be grabbed effectively by the finer needles and barbs. Fine needles will also leave less surface distortion than a larger needle. Sometimes if you are getting large dents when using fine needles, it may be more a matter that you just need to keep felting until the entire surface is evenly compacted, all at the level of the original dents. That said a finer needle and/or a shallow angle of insertion will also reduce the dented texture on a surface.

Conclusion

Depending on the project, you will likely have a couple of favourite needles you keep picking up. It may even be the same needles you gravitate to over many projects. So why, if you don’t already have crown needles, mite you want to consider adding another needle type to your collection? Their ability to work at a shallow depth gives them an advantage over other needles whose first barb placement is farther away from the needle tip. Crown needles can be very useful in portraiture, very thin structures like petals or butterfly’s or adding detail to your wet felted vessels, hats or garments. Basically any time you don’t want fiber added to one side to show on the other. (This may also require a very shallow angle of insertion.)

A Crown needle may not be the needle you reach for the most in your needle felting but when you want to work superficially, it is an excellent option to consider adding to your choices of tools.


If you are still curious and want to know more about other needles that are available in the industry you may enjoy looking through this PDF from Groz-Beckert.

https://www.groz-beckert.com/mm/media/en/web/pdf/Felting_and_structuring_needles.pdf


possibly for my next post; Mr. Mer has been digging through the fiber Bernadette brought in to a library day to see if I could find some acceptable (to Mr. Mer), Mer hair.

5 by 7 Needle Felted Ocean Picture

5 by 7 Needle Felted Ocean Picture

I seem to have been obsessed with water pictures for a while now. And today is no exception. I’ve been doing a lot of tiny images, so I moved up to 5×7 inches for this one. I have to pat myself on the back for actually measuring my piece of felt instead of randomly cutting a piece and then not having a frame that will easily work. Yay Me.

The felt I am using is from The Olive Sparrow. Monica has great service and great products. I think I might be able to felt this a bit more if I tried but not much. It is pretty solid and has the right density. It will hold its shape but isn’t hard to needle into.

I started with a nice blue sky. This is merino from World of Wool.

Then I added some wool from a wonderful art batt I got at the little fibre sale Jan and I went to, in April I think. I thought Jan did a post about it but I can’t find it. Anyway, I bought it because it made me think of the ocean. I love the name of their business.

I just used a small corner of this batt. I think I will make another using the sparkly stuff near the top.


I have it about half needled down, it’s fairly well stuck but I can still reposition it.

thin I just tucked the loose edges around the back to get a better look at it. I am not sure I shouldn’t straighten up the thicker white line. but I kinda like it not straight too. the ocean isn’t always in straight lines. I am not sure.


That’s as far as I have managed to get. It needs some clouds or birds or something to break up the sky, to make it more visually interesting. I think maybe a small sail in the water in that lighter blue on the left maybe. Not sure how big, a boat or a sailboarder? Maybe I should make a few sizes and try them out.

Caustic Lino Block Etching and Online Exhibition

Caustic Lino Block Etching and Online Exhibition

My local group met before our summer break and tried some caustic lino block etching. I have wanted to try this technique for a while but hadn’t gotten my nerve up to be playing with caustic substances (100% lye). Then I found some instructions that seemed straightforward on this blog. (I am just giving the basics here, click on the link for the full instructions if you want to try it.) We followed the instructions, didn’t have any chemical disasters and etched our blocks.

I decided to do some small samples to test out the process before the group meeting. I already had some small lino blocks cut, I think these are about 3″ x 4″. I transferred the design with pencil and tracing paper, then painted on the resist area using Golden GAC 200 medium and let that dry.

Here’s the set up with the blocks in place. You can’t use anything plastic or the lye will eat it.

Here’s the mixture of lye and wheat paste that is applied to the lino blocks. The areas that are not covered with the GAC 200 resist will be etched away. The trial run, I left the lye in place for about two hours. Then the goop is cleaned up and the lino blocks cleaned with a toothbrush in soap and water. Then I used a standard blue ink pad to print these as I didn’t want to get out my full print making ink setup.

Here’s the resulting prints. Interesting, they look so different than the usual hand cut lino blocks. Once the group was here, we repeated the process and etched four more blocks that were 4″ x 6″.

Here’s Louise’s block on the left and the print on the right. I love the organic feel these prints have.

This is Paula’s block and resulting print.

Poppies for Sally in her block and print.

And mine is based on tree rings. I’m thinking about this as a theme for my upcoming art and design class.

I thought this process was relatively easy compared to carving a block and you can really get some fine details and a very different look than carving. I will definitely be doing more etching of lino blocks. Next I will have to try and print with these on felt and see how they come out.

Recently, we had our in person exhibition in La Conner, Washington for the class I have been participating in for nearly three years. Many of you don’t live close enough to attend but we are also having an online Meet the Artists event that anyone can attend.

You are Invited to an Online Exhibition and 

Discussion with the Artists of the

Bachelor Buttons Level 3

Advanced Experimental Stitch Class

Join Tutors Gail Harker and Penny Peters at a free online venue 

Tuesday July 19– 10:30 am – 12:30 pm  PDT

If you would like to attend this free event, you do need to sign up in advance. You can sign up here:

https://gailcreativestudies.com/portfolio-item/level-3-stitch-online-exhibition/

Join us online  (no fee) to view our Level 3 Advance Stitch student’s exhibition of creative stitched artwork. It will truly have you dreaming of wonderful possibilities there are for people just like you.  

Each of our participating artists will have a chance to talk about their experience working through this coursework, in spite of pandemic conditions!  There will be time for questions and answers with the artists.  

The event will be starting at 10:30 am PDT (West Coast US Pacific Daylight Time) and run until 12:30 pm PDT. To convert to your time zone, go to: https://www.timeanddate.com/worldclock/converter.html


Getting in a Spin

Getting in a Spin

Creative Fibre in New Zealand are hosting a series of workshops next weekend, one of which is a beginner’s spinning workshop with Pat Old. She is quite the celebrity in NZ spinning circles but I’m not sure if that is also true internationally…. have you heard of her before?

I dithered about signing up for this class because one of the prerequisites was that you need to bring a wheel in good order, bobbins and lazy Kate. I wasn’t sure how much I wanted to learn to spin and buying all that equipment up front was quite an investment, so I put out some feelers to see if anyone had a wheel they would like to sell. I was (and still am) keen to make art yarns so was ideally looking for a wheel with a jumbo flyer. It took a few weeks of asking around but a friend from Auckland Fun Felters came through for me, she had an Ashford Traditional and best of all, it was already fitted with a jumbo flyer! 🙂

I took delivery of my new toy at the end of May and have been watching far too many Youtube videos ever since 🙂 These are my first efforts….

Autumnal colours spun from a Merino art batt full of textured bits and pieces, probably a bit ambitious for a first go but I was pleased with the results:

Aoifa says it makes a very nice pillow…

After reading Ann’s post on FFS a few weeks ago I had a shock of inspiration and added some orange to the singles I planned to ply post dying with purples and blues:

This is the plied yarn:

After plying I had some “single” left over on one of the bobbins so thought I would have a go at chain-plying (apparently it’s not very PC to call it Navajo plying any more). This method produces 3-ply yarn and in theory you can line up the colours on a gradient dyed yarn so you loose the stripy, “barber-pole” effect. I succeeded in places but definitely need more practice!

I am really enjoying spinning with Polworth (a Merino-cross breed that is better suited to the wet NZ climate), it is a lovely, soft wool. I crocheted this cowl but was not keen on the hot pink.

So I over-dyed it with blue:

One month into my spinning journey, a beginners class in Auckland came up so I toddled along with a friend (Margaret) who was curious but not really interested in taking up spinning (she couldn’t knit or crochet). They gave us some mystery brown and white wool to play with, I am pleased with the results but it is very coarse, too coarse for anything wearable so I am crocheting it into a bowl.

Margaret ended up buying the wheel she had been practicing on in the class (from the same person who sold me my wheel, I am starting to imagine Shirley has a house full of wheels that she has to climb over to move between rooms) 🙂 Margaret is also learning to crochet now she is enjoying spinning – another convert to the wonderful world of fibre!

I have also been playing with making slubby and chunky yarns and then dyeing it:

I found a few books on spinning at the library, the first one I read, Hand Spinning by Pam Austin was a bit disappointing, it didn’t cover anything I hadn’t already learned from watching YouTube videos. Frustratingly it mentioned a limited selection of art yarn types but didn’t offer any information on how you might spin them.

I found Spinning and Dyeing Yarn much more useful, jam-packed with technical, how-to information and lots of drool-worthy photos of beautiful yarns by different artists to give the reader inspiration and something to aspire to. For me, I was very taken with the art yarn chapter – I had no idea there were so many different species of art yarn and for each one there is at least one page explaining how to create it yourself.

I have only just started reading Yarn-i-tec-ture but I find the concept behind it intriguing, that you can spin a yarn with exactly the properties (stretch, warmth, shine etc) and colours you want…. Can’t wait to see if it delivers on that promise 🙂

I had to share these with you, there are several of them along the Wellington waterfront, they were very popular for selfies so I only managed to get photos of two of them but they are so cool I just had to share. Something for me to aspire to on my learning to knit journey! 🙂

Following several requests, I have posted my Concertina Hat and Snail Hat tutorials on Etsy. If you enter code FAFS30 (before the end of July) you will receive a 30% discount at check out. Alternatively, if you prefer a more interactive learning experience, the full online course, including the “taking it further module”, will be starting again in October, for more information and to sign up for notifications when registration opens please follow this link. Or for the bag class this link.