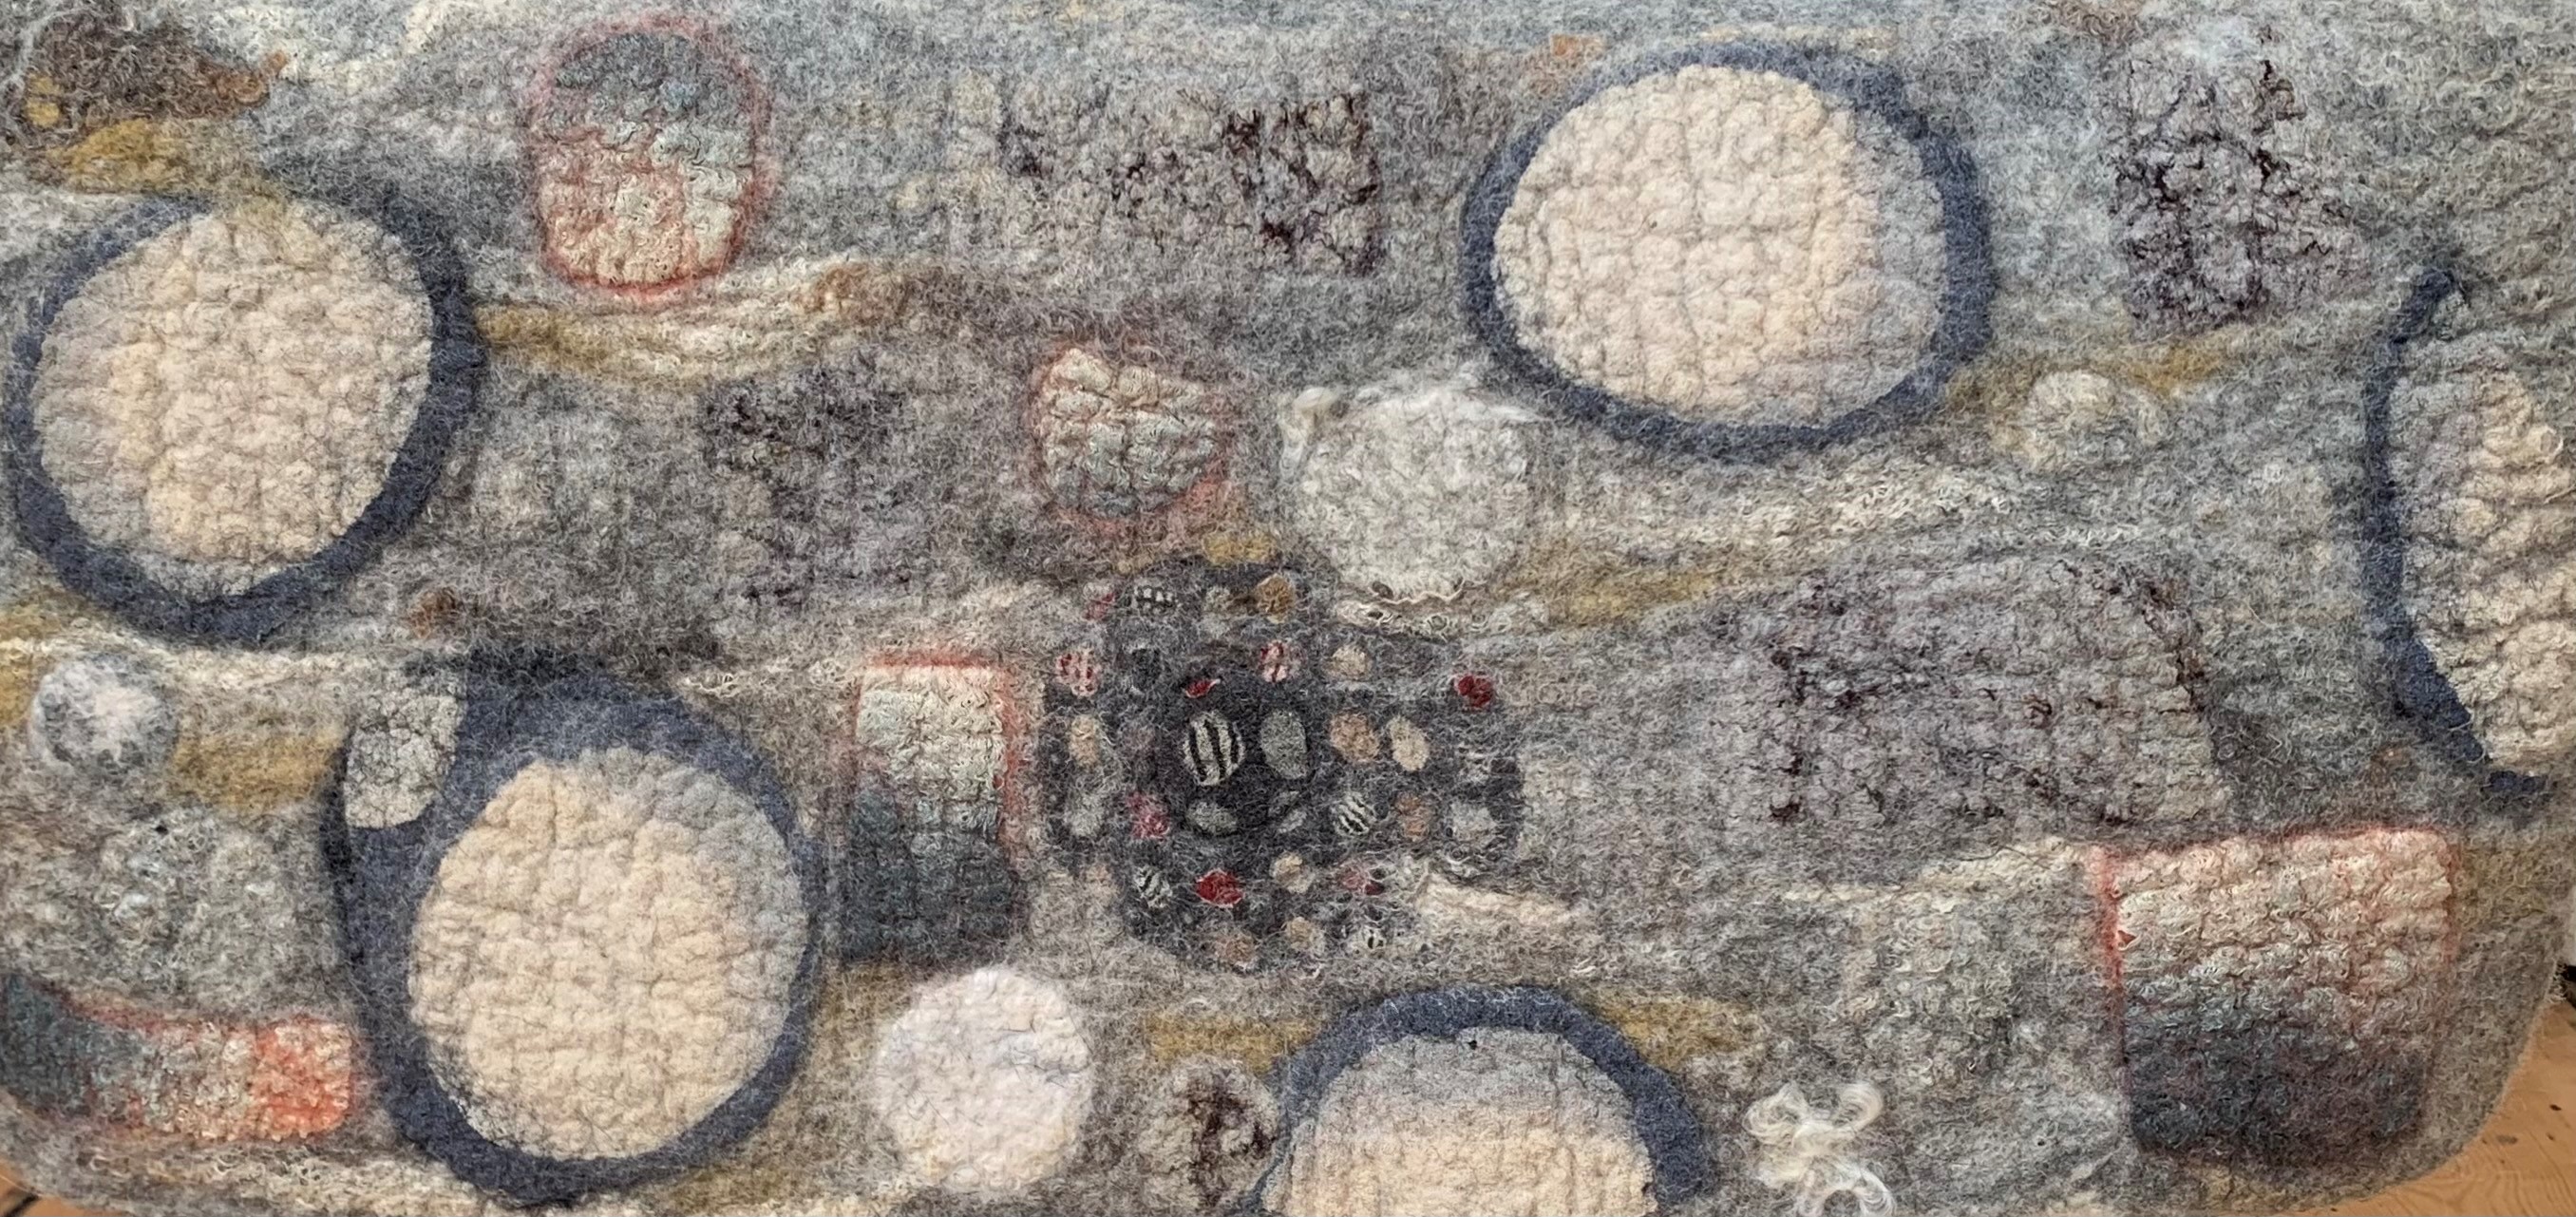
I simply had to develop one of the pieces from my play with multiple resist further. This particular piece intrigued me, and after we spent time together ie me staring at it for a considerable time, I knew where we were going. The centre felt like something had fractured, a cell broken apart. Having recently lost both my parents it felt like a metaphor for my grief and the feeling I was going through, emotions of pain and detachment. These became the red, pain, anger, hurt. The white, detachment, cold, an emptiness. And do our journey began.
To the original felted piece, I added some shaped prefelt which I added with a couching stitch. This gave me the raised effect. I then added beading from the centre of the “cell” out to either side. Throughout the whole piece, I chose a palette of white red black and grey ( there is a little exception to that but I will go further later ).
I wanted to use a material other than felt for the background of the piece and decided on mixed media. As a base, I used calico which I coloured with acrylic paint. As I turned out I needn’t of done this as I covered the whole piece in materials. I knew from the very beginning how the piece was going to turn out but wasn’t sure of the materials I was going to use to achieve the textures I wanted. So I had a play. I got several different materials and heat treated and used my embellishing machine to see the effects I could achieve.
For the red area, I decided upon prefelt with red satin added with the embellisher, heat treated tulle, crocheted wire and beads.
Arranging composition
In the white area, I decided upon prefelt embellished with satin I also heat treated a mixture of materials lutrador, plaid plastic bags and plastic netting (from a cheese sac) doing this gave the texture of ice which is what I wanted to achieve.
Developing the white area
For the other surrounding area, I cut up an old silk dress that had wonderful shades of grey. These were added with the embellisher around the edges. It had many shades of grey going to black so I could shade the composition. It did take the whole dress to complete it.
The base layer was now laid down so next I added the beading As part of the white area I wanted some raised beading so I beaded small clusters of beading on the net and glued the back. When dry I cut them out and arranged them on the piece.
In these little parts, I added only a couple of golden seed beads. My little sign of hope I suppose.
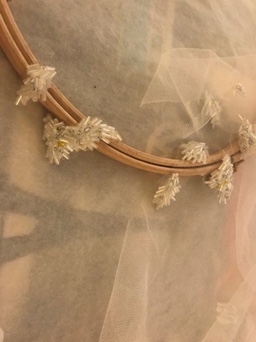
In the red area, I added beading in shades of deep red and dark green also many sequins which reflect light wonderfully. wire crocheted flame-shaped pieces were added radiating out into the grey area. I also embroidered with daisy chain stitch.
And so our journey ended. I have never worked on a piece that felt like a part of me more than this. Because of the lockdown here I am unable to get it framed but it will be. Then it will go on my wall
I haven’t properly picked up my felting needles in quite some time. I can’t tell you why, but my mind just hasn’t been “in the right place” to make anything particularly unique.
Things changed when I got commissioned to make a mushroom sculpture. It was just simple yet challenging enough for me to see if this would finally open those creative doors. The client wanted something similar to what I’d made before, so all I had to do was look at an old photo and start felting. I’m not copying something that needs to look exactly like something else, but it’s also not mindless felting. Perfect.
This is the old mushroom she saw in my online shop and wanted another of (sorry the resolution isn’t the best):
I really enjoy looking at past work because I’m often surprised at the fact this is mine. Do you get that feeling with things you created a long time ago? I am particularly chuffed when I get that “oh, that’s pretty” feeling before it registers it came from my brain.
Now, for the new sculpture. I gave my client a few fabrics to choose from, but she went for the same as the first one. Not surprising, as she really liked the original item and was very motivated to have a mushroom like it.
I started with wire wrapped in wool to make the stem. The top was created with leftover wool felted into shape, then I sewed the fabric to the top and some tea-stained gauze to the bottom.
The base looks very messy, so I’ll be adding some wool to cover it.
Then comes the fun part: assembly!
I chose some hand dyed mohair locks, plus some natural Wensleydale ones and put it all together. After that, I sewed the beads and stones here and there. Here’s the finished item:
The finished object is just different enough for me not to feel I made a complete copy, and the familiarity helped make the felting process easy enough for my Lockdown Brain to not feel too flustered.
Finally, not related at all, but here’s a photo of a lovely Edinburgh sunset for your enjoyment.
I am not as far along on my challenge as Ann is. She was showing hers off last night at the social (on Zoom). I hoped you might be both curious about my research progress and may find inspiration for your own challenge. I am looking at Art Nouveau, which starts before our challenge period but extends through to 1910. It draws influence from the arts and crafts movement, craft revivals and the introduction of Japanese prints to England and Europe.
Art Nouveau, “ornamental style of art that flourished between about 1890 and 1910 throughout Europe and the United States. Art Nouveau is characterized by its use of a long, sinuous, organic line and was employed most often in architecture, interior design, jewelry and glass design, posters, and illustration.”
in Architecture one of the earliest to use the art Nouveau style was Victor Horta who’s most famous town home in Brussels predates the challenge, but Hôtel Tassel is a particularly good example of the organic fluid style of Art Nouveau with structure and patterning inspired by nature.
1-5 Victor Horta; Tassel house Brussels. Exterior 1893, Railing details, Staircase, Stained-glass.
Another example of this style is in commercial illustration, (for which I have a particular fondness) was the work of Alphonse Mucha. He was a Czech painter, illustrator and graphic artist, living in Paris during the Art Nouveau period. His distinctly stylized and decorative posters often encompass organic flowing lines. He often used circles or arches to highlight his subject and embellished them in lavish flowing fabric, flora and hair. He is most famous for his Theater posters, particularly of Sara Bernhard. He also did other commercial art designs and large murals for the exhibition of 1900. He produced portraitures in New York while getting backers for his work the Slavs but this is just after our challenge time period.
I purchased prints of his while I was at University and again after graduation. I only have one of them up at the moment, Media, since I have many bookshelves and little wall space. In grade 13 I was one of 2 girls who read the part of Medea in English class. The teacher suggested the boys should be careful of both of us since we both seem to have enjoyed reading the role.
in Laurel of 1901 and some of the top decorative elements of the Pen 1899, you can see the arts and crafts inspiration from the textiles and wallpapers of William Morris.
10-11 William Morris; 1896, 1897
In Art Nouveau, I also get to see some of the Norse art of the Urnes and Oseberg style. this may be why I am so captivated by its flowing linear quality.
11.1 Urnes Style Norse art on Stave church
While I have been delving into hours of looking at the amazing graphic linear design I also was finishing off the main guild library lists for 2021; Topic, Magazines, Author and Title, submitted the outline for the armature study group and am finalizing the supply list for it.
Then I got a message reminding me I had promised to get a photoshoot done for the armature study group sign up page. Ooops, OK change of plan where did I put the wire, oh yes in the white bucket beside the computer desk! I re-piled my partly cleared desk with various packages of wire, so much for cleaning up my desk. Now, how can I display all that in an aesthetically pleasing manner? Mr. Mer volunteered again (I suspect I will never convince him he should be a fisherman after this.)
I used my chair as the backdrop and draped a throw Glenn gave me over it. I selected the 11 gauge steel (grate for quadra-dents not so much armatures), the 12 gauge aluminum and 20 gauge floral wire. I suspended the 11 gauge wire with a piece of kumihimo I had just finished since it was too heavy for even a Mer-man of his excellent physique to lift.
I suspect all that looking at all the Art Nouveau may have unexpectedly influenced the photoshoot! I had not been thinking about it at the time I set it up but see what you think.
Here are a couple of shots from the photoshoot.
12-13 Mr. Mer Posing with Armature and Quodra-dent wire
I pulled one of the photos and stuffed it into “PhotoPad” which is a free photo editing software and started to play using the Cartoon edit feature I got this.
14 Cartoon edit from PhotoPad
With a bit of stretching of the image, it changed to this.
15 added stretch to JPEG to create proportions of the theatre posters of Mucha.
When I played around in Microsoft Word, I did a bit of artistic photo editing and got this.
16 Microsoft effect “Photocopy” with increased contrast and saturation.
I have gone from 3D felt to 2D flat, like the prints by Mucha. I’m not sure this is it. It’s a bit too stylized and abstract but I like the flow. Is that frothing sea foam crashing behind him? There is definitely something here. I will think about this for a while. Now I wonder where this will take me as I continue to consider the first challenge of the year.
Lyn and Annie have set us a challenge for this quarter to make something inspired by the decade 1900 – 1909. The challenge is here If you would like to see it and maybe you could join in. first-quarter-challenge
They gave us examples of what was going on and what caught my eye was the aerial photography. It made me think of some wonderful works by the fibre artist Chris Cullen of As theCrow Flies. https://www.facebook.com/cbdasthecrowflies/. She uses mostly recycled knits and yarn in her amazing pieces. she sells mostly through galleries but does commissions through her Facebook page. for sale at https://www.facebook.com/Blue-Bramble-Gallery- in St Ives, and https://www.facebook.com/a2gallery.wells Also from Spring, Baxters Gallery in Dartmouth.
These are 2 of Chris’s recent pieces
I have in the past thought about doing a piece inspired by her amazing work. Lyn and Annie have given me the push I need. I thought I could do something similar in felt for my own farm. First a prototype. This is a flat piece and not of my farm but just a farm. I used an old sweater that I ran through the washer then dismantled and ran through a couple more times. I wanted a nice sturdy base.
I did this picture by needle felting into a square cut out of the sweater. I have one of the little 6 needle holders that I used for most of it. Then switched to a single needle to put in the details. It is done in a very minimalist way with
The sweater piece.
The background and the road and the start of a field.
Added the fields and the house and barn.
Then some sheep of course.
I folded all the wool
Lastly used some green curls to make the trees.
It was a lot of stabbing, too much stabbing. I think I will try to do all the main features like roads and the fields by lightly needling them into place and then wet felting them. Just adding the detail and features with needle felting. The next one will be more 3D. I have some ideas for the house and barns. Have you started thinking about his challenge? We would love to hear about it on the felting and Fiber studio Forum. Here’s the link to the place to post pictures. https://feltandfiberstudio.proboards.com/thread/4247/2021-first-quarter-challenge. or use the Forum button on the left to get there.
Life has gotten in the way of posting this week. I woke up this morning and realized I had forgotten to write my post for the week. If you are reading this on our website, perhaps you will notice that we have made some changes. Our theme that we were using was out of date and there were issues that kept developing here in the background that needed to be fixed. So Ann took on the challenging task of changing the theme.
We have tried to keep everything looking similar to what we have had in the past but we’ve done some editing and pruning in areas that we thought were not getting much use. Have you looked at all the information that is available here? I often notice online that beginners are asking questions about what different fibers look like, what the results of embellishment fibers in felt look like etc. We have tons of photos of different types of fiber. All you have to do is go to the menu at the top and look under Fiber or Other Fibers. There is a drop down menu and sub menus with galleries so you can see samples of a variety of fiber.
We also have free tutorials available under the heading Tutorials on the menu. Again, just look at the top for the menu and there is a drop down list with a variety of topics such as dyeing, fiber preparation, mixed media, needle felting, nuno felting and wet felting.
So I hope you’ll take a few minutes to explore what’s available here on our site. If you find any links that don’t work, we’d appreciate it if you’d let us know so we can fix them. Thank you Ann for taking on this huge task and revamping our site!
It’s the new year and here we are in England with what I’m calling the ‘new abnormal’: all non-essential shops closed; travel only if necessary; people working from home wherever possible and, for many of us, very limited direct contact with people outside our household.
If you’d asked me a year ago if I’d have liked a long stretch of time with few commitments that I could dedicate to felt-making, I’d have jumped at the chance. Be careful what you wish for.
Towards the end of 2020 I had several events to aim for so was able to focus on making things for those. Here are a few of my favourites: a succulent holder, nuno felt vase (with glass interior) and needle felted mince pie.
I have plenty of sales and exhibitions booked throughout 2021 but no way of knowing whether and when they will take place. I have notebooks full of ideas but feel I need to find some focus to direct my efforts and get the creative energy flowing.
I really enjoy learning new skills and developing my felt-making in different directions. So, I decided at the turn of the year to sign up for some online workshops. I’m mostly self-taught as a felt maker but now I’m asking myself ‘why do I want to reinvent so many wheels?’. I’ve long wanted to take Fiona Duthie’s workshop ‘Fibre + Paper’ so when I saw she was running the workshop in March 2021, I eagerly signed up. I then find myself tapping my toes impatiently and thinking ‘I don’t want to wait ‘till March!’.
Fortunately, in February Fiona is offering another class I’d like to take ‘Ink on Cloth’. Yep, I’m in for that too. Still the toe-tapping: ‘what about January?’.
The Felting and Fiber Studio to the rescue: Teri Berry was offering her bag making class starting 7 January. Perfect! I’m in for another class. Well, you can’t say I lack enthusiasm!
While I’m waiting for the class to begin (yep, still with the toe-tapping) I decide now is the time to retire an old friend. One of the first things I felted for myself about 9 years ago is an iPad cover. I carry my iPad mini with me everywhere and the cover is worn out. It has done a great job – it even outlasted the first iPad – but the corners have rubbed away and it’s looking very shabby.
I may have mentioned before (more than once) that I’m an avid charity / thrift / op shop enthusiast and have built up an impressive collection of second-hand fabric, mostly scarves and mostly silk. I have a dig around and fish out a very fine small silk chiffon scarf with leaf prints. Left – front, right – back, middle – action shot! I’ve carefully controlled the shrinkage so it fits snugly: it slides out when I want it to and not when I don’t.
I enjoyed working with the silk so decide to make some more samples. One issue with fabric of unknown origin (and often even with fabric of know origin) is that you can’t be sure how it will felt. Here’s the ‘before’ and ‘after’ of each sample.
Some kind of velvet devore?
A woven cotton or linen?
A silk and cotton mix – I assume the background is silk and the slub lines are cotton
Definitely 100% silk (it still had the label in)
All are interesting. I chose a similar wool colour to the background silk colour as I want to focus on texture and print. I particularly like the leaf print one and will definitely use that at some point.
Next, my patience (!) has been rewarded and the bag class is starting. First is an animal theme phone or glasses case. I consult the interweb for animals that have big tongues and decide on a gecko. I’m rather fond of geckos, though I’m not sure I’ve ever met one.
I’m pleased with the result, although admit it looks rather more like a frog or an alien. I was going to trim the tongue but decided to leave it as it is. I’ve taken to calling it my alien frog bag. I made it to fit my phone but it’s actually a bit big so I’ve now added a thin green leather strap with some Chicago screws. Next time I’m invited to a ‘BYO alien frog bag’ event, I will be all prepared.
On to the next, bigger bag, with integrated straps and internal pockets. I have a fair quantity of nice natural grey Corriedale top and decide I’ll use that for the outside. I’m on a roll with recycling the silk scarves so select a few with similar colours. I’m not sure grey will be the best background so, in an unusual fit of sensibleness, decide to make some samples.
I prefer the lighter colour behind them. The bag will be fulled very hard and I think I may completely lose the silk. Little lightbulb moment: why not prefelt the silks with a light colour wool to help preserve some of their colour?
I prefelted some pieces of silk. I even got a bit jazzy with the one with large spots, with fawn Corriedale and charcoal Merino.
On the left: the bag laid out with (nearly) all the surface decoration ready for wetting down. I did move things around a little afterwards but forgot to take a photo. On the right: the flap detail of the final bag
Finished bag
It’s not perfect (eg I put 2 pockets inside but they are on the front wall of the bag instead of the back and it’s a bit wider than I intended) but I do like it and will enjoy using it.
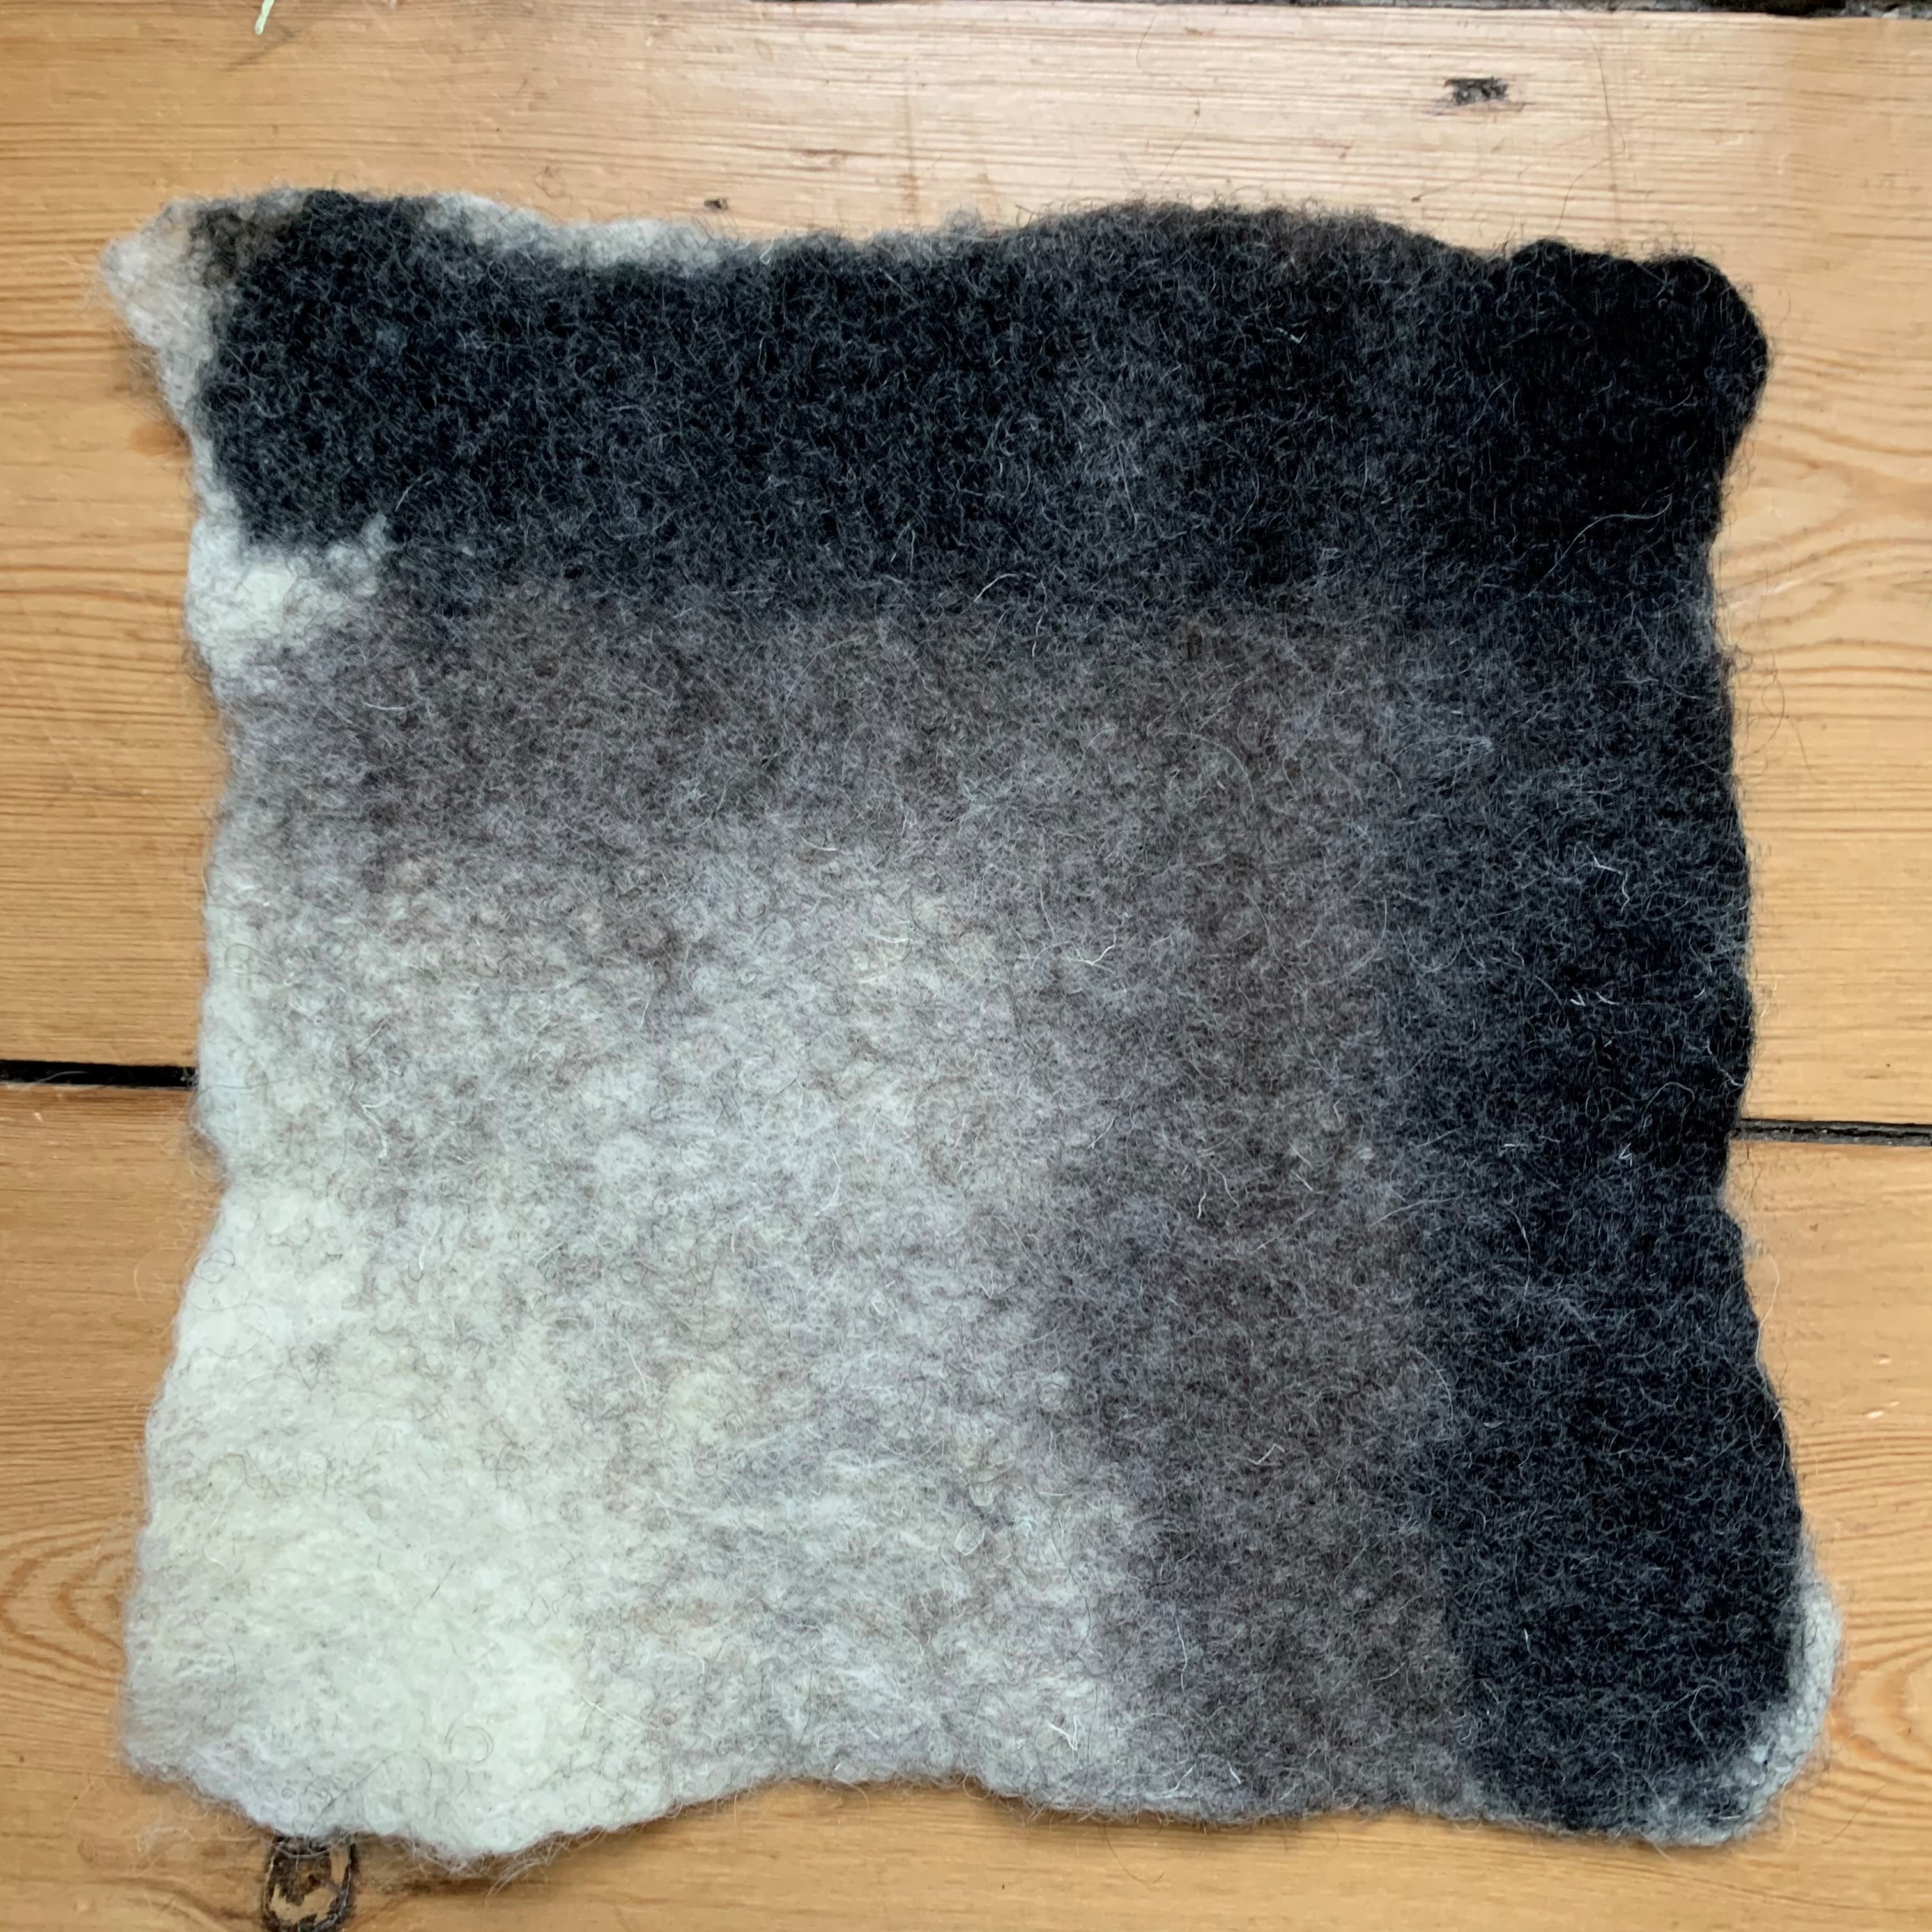
So, what next? The third bag is a backpack. I’m wrestling with myself over whether to use wool I already have or wait for some I’ve ordered to arrive. I have a studio full of wool but want to use a medium or coarse wool for durability and don’t have much of any colour or breed in sufficient quantity. I made a sample yesterday of potential wool candidates but am a bit underwhelmed. There’s a black dyed Perendale batt, grey/brown Finnish top, light grey Swaledale top and natural white batt (can’t remember the breed) but I’d have to mix them and that’s a lot to have going on.
I decided too to make a paper template of the finished bag to help me work out the resist and stop making bags bigger than I intend. Ha, ha, I do hope I don’t start calling this my toilet seat backpack. And that brings me right up to date.
All being well, I will have the backpack done to show you in my next blog spot in March, along with some makes from the Ink on Cloth workshop.
I’m enjoying the learning and Teri’s class is excellent. The instructions are clear and detailed. She has been positive and encouraging and very quick and generous in responding to my extensive questions about clasps, straps, bag design, wool breeds….
Are you struggling to find focus, or maybe finding new ways to learn and different things to try? I hope you’re able to do a little fibre work and I wish everyone a peaceful, happy and creative 2021.
Thank you Ruth and Ann for the invitation to the group. My name is Bernadette and fibre has been part of my life for a very long time. I started spinning and weaving in my late teens at the University of Regina. Since the pandemic there has been a lot of time available to really enjoy more indepth experiments with fiber.
There must always be purple! It’s my favourite colour and how I start every dye session.
I searched my stash and found loads of unwashed fleeces from so many different vendors and shepherds. There was mohair and silk, cotton, alpaca, linen, the list is pretty complete. Wool alone has so many breeds. They fascinate me with the variability of colour, texture, and spin characteristics within a breed and even within a single fleece. These past months allowed me or rather forced me to wash, sort, and dye several fleece from my stash. So with hand on heart I made the solemn promise that “I will not buy another fleece until these are all done”. I lied.
This rambouillett comes from Hutterite colonies in Alberta. These are extremely good farmers and the fleece shows it.
So I washed, dried, and dyed as many fleece as possible over the summer, Then as the weather cooled down, the wool has been either left in locks or hand processed into roving from wool combs, hand carders or from the drum carder. I’m starting to experiment with blending wool and other fibre. Over the summer I joined Jan and several other guild members in the Flax Project. Friends and family were worried there would not be enough raw material available for me and gave me fleeces, or sent me information on great resources for interesting materials. It was a gong show to say the least. I will be sharing the final results of the pandemic experience as the year progresses.
Writing and sharing my experiences is very new for me, so I hope over the next eleven months I can show you what my near geekery looks like. Being called a fiber geek no longer bothers me, its who I am. If there is any one thing that specifically interests you please let me know and I’ll do my best to help you.
Mr. Mer had so much fun with last weeks’ stretching and mirror blog that, if you don’t mind, he would like to do another one. But he was very insistent that he needed to hit the wool before the next shoot.( He wanted to increase his bulk, especially in his upper arms and quads. I am not sure why a mer-man needs quads but ok, fine. I did some quick colour blending with the hand carders to help him out.) Unfortunately this past week in Ottawa has been overcast with grey clouds, drizzle and today, more snow. So not the best weather for colour blending but I did my best.
While I worked, I figured I should explain to him why we can have problems with the muscles in the neck and into upper shoulders.
Colour Work
“Think of your head as a bowling ball balancing precariously on a short Dowel. To help keep it from falling off there are two sets of cords at the front and 2 sets at the back.” I said as I brought wisps of the green colours from his fishy parts up to integrate it with his low and mid back. Then as I continued to explain, I added a yellowed skin tone base and more definition in his arms.
The front cords are called SCM (Sternocleidomastoid) which is one of my most favorite muscles in the whole body!! You have one on either side of your neck and they are amazing! Their name tells you where they are going and where they have been. They attach on the skull at the mastoid process, It’s a bump behind your ear, then head inferior to split and attach to the superior medial clavicle and the superior border of the Manubrium which is the top bone of the sternum. But wait, this muscle gets even better! When you use (Contract) only one of the two you get Ipsolateral contralateral rotation!!! Is that not the coolest thing ever!!! Ok that means that it tips your ear towards your shoulder and then rotates your chin in the opposite direction. Now you see how cool it is!!
Balancing with the two front cables (SCM) are the 2 back cables called Levator scapulae. They’re cool too. They are the elevators of the scapulae (shoulder blades). The inferior attachment is to the superiomedial scapula and the superior attachments are to the transverse processes of the upper 4 cervical vertebra. Think of them as like the Darth Vader of muscles. They can get the Suboccipitals or upper traps in trouble then look all innocent and claimed they didn’t start all the unhappiness.
Levator scapula is located under the upper traps muscle, which you can see draping over the upper back and shoulder.
The felting needle indicates the area of the superior attachment to the transverse processes of the upper four cervical vertebrae.
The felting needle is a little high but is trying to indicate the inferior attachment which is to the superiomedial scapula
Today we are going to look at Levator scapulae. Which is used when you stare (it stabilizes your head); at your artwork, the computer, a good book or where your needles are heading so you do not stab yourself. The longer you work without remembering to take a break, the grumpier they tend to get. Luckily, there is a stretch for them. Think of it as “visually checking to see if your armpit smells”. You are just looking out of the corner of your eye. You don’t have to get your nose into your armpit (that would be very uncomfortable). You may have to adjust the position a bit depending on the section of the muscle that is tight. Some patients find it feels like the correct stretch when they are looking out of the corner of their eye towards their thigh rather than their armpit.
Now if Mr. Mer will stop hamming it up with dramatic death scenes we can break down the stretch for you.
Pre-stretch consideration
Make sure you move only in comfort. A feeling of pulling is fine but not a feeling of pain. If pain starts, back up just a bit on the movement. My teachers suggested it was preferable to do the movements separately, tip and then rotate. Add the pulling with the arm if needed. Hold the stretch for about 30 seconds but stop if it is uncomfortable.
Step 1
Mr Mer has been felting with his right hand and has been finding tension building in the Right Levator scapula so he tips his left ear towards his left shoulder. Make sure both shoulders are down and relaxed (they will sometimes try to help by coming up. That isn’t really helpful) If you need to keep the shoulder from cheating sit on your Right hand or hold on to the seat of the chair with it.
Step 2
While keeping your ear close to your shoulder rotate your head so you are peeking out of the corner of your eye at your armpit. Sometimes you will find the feeling of the stretch by looking more at your thigh that is ok too.
Step 3
If you feel like you would like a bit more intensity to your stretch, you can use the hand of the arm you are looking towards and gently rest it on your head. If you feel like you would like to increase the stretch try a gentle pull diagonally, down towards the thigh.
Adjust the angles until you feel the tugging of the stretch from the top of the shoulder blade to the upper neck. Sometimes you feel the edge of upper traps on the top of the shoulder. It’s still a good stretch but you’re one muscle over from the one you are looking for. Keep adjusting ear tip and head rotation and add a bit of a tug until you find that “AHHHH” spot.
Mr Mer says he is feeling half relaxed and will do the other side after the blog is done. “Don’t forget to use your Mirror to check your shoulder isn’t trying to be helpful and sneak up while you are doing your stretch”
Sometimes in the planning stage of a project we can spend a lot of time web surfing, looking at information for what must be only minutes but strangely seems to have been hours when I consult the clock! Mr. Mer and I hope this stretch may help if you too get lost in lots of great idea generating hours on the computer!
These last couple of weeks in the Wet Felt Makers group on Facebook people have been making in interesting and new to me type of scarf. It’s called a french scarf.
Arlene Toth shared it with the group and shared the youtube video. It is part of a video from a fibre festival a year ago. The teacher is Elena Nayemova. https://www.youtube.com/watch?v=Ho5B-bOHKwE The instructions start at 28:58 in the video. It is in Rusian. You can probably figure it out by just watching her make it but If you want to and you are on a computer not using the Youtube app you can use a translation future on Youtube. It’s nowhere near perfect but it helps. I will explain that at the bottom.
The scarf in the video is very lacy and mostly yarn, very decorative. I wanted something warmer so used much more wool. After seeing how small the ones using the dimensions from the video were turning out I sorted out my own sizing that I thought would work and had a go. If you are petite then the smaller dimensions would probably work for you but I am Rubenesque so that isn’t going to work for me. I picked purple and orange, my go-to colours. I used orange and gold silk lap bits on one side and some yarns for decoration on the other.
You can wear it in different ways.
The part that goes behind the neck is a bit short I think and maybe the rectangular part too. I added some to both parts and had another go in red this time, using silk hankies and silk top
For this one, I used silk hankies on one side and silk top on the other. I like this one better. I pulled the piece through farther so it hangs down to wear it out. I am not much for big bows. If you want to fold it into a triangle and poke the corner though I wouldn’t add the extra length to the rectangle part. Here are different ways to wear it
This slideshow requires JavaScript.
The other thing I realized while taking pictures is that you can give the large piece a twist in the loop so you have both sides showing
I wanted a winter scarf inside my coat. It worked wonderfully even though it’s not really cold here yet. I hope you give it a try.
Translation on Youtube. You have to be watching Youtube in a browser and not on the app for this to work. Rather than write it all out, I will give you the link to Pat Spark’s blog post about it, as she explained it very well. https://sparkfiberarts.blogspot.com/2020/05/blog-post.html
The last time I updated you back in early November about my slow stitching project, this is what it looked like. I had started adding some leaves to the foreground trees.
I have been continuing my slow stitching over the holidays and it has been nice to sit down for 15-20 minutes a day and just do detached chain stitch in different shades of yellow, yellow-orange and orange. Ignoring any drama of the holidays or other issues that arose for a few minutes, calmed my mind.
Here’s how the trees are looking. I think that I will be adding a bit more orange but than I’m going to go back to the yellow shades.
Here’s what the full piece looks like now. It is definitely taking shape as a landscape. As I look at it in a thumbnail format, I can see that it still needs more dark values for shadowed areas but I like the progression. It’s interesting to me how the slow progression makes me look at it more closely and how the different colors affect each other. It’s been an interesting project and I imagine it will continue through most of this year.
What are your thoughts on a slow moving project? Do you get a Zen feeling or perhaps you are impatient and want to move on to a different project?