My Year End Round Up and A Big Thank You
Each year towards the end of the year, I like to go back and review what I have created throughout the year. That is one reason that I like blogging. It helps keep track of what I have done and many times, by the end of the year, I have totally forgotten some of the things that happened at the beginning of the year. Does that happen to anyone else?
One of my themes this past year has been to “use stuff up”. My studio room is filled to overflowing and I need to get some of that stuff out of there. So many pieces were made to work on that goal.


These are some of the pieces that I created in the first quarter and used stuff up each time.


I completed my Level 3 Art & Design class with Gail Harker Creative Studies Center and we had our graduation in March. I really enjoyed this class, a lot of work, but fun!


I had two sessions of my online classes this past year and want to thank all my students for such a great job. It’s always fun to see what others create from online classes.


Another thing I experimented with this year was differential shrinkage with fiber layout and prefelt.


These were great fun and I plan on continuing with these experiments and perhaps adding some free motion machine stitching into the mix.

I did an experiment with Sulk Sticky Fabri-Solvy with machine stitching wool pieces together. I have also tried it as a pattern transfer with hand stitching and found it to be way too sticky to use with hand stitching. It makes me want to never hand stitch again! So I will stick to machine stitching with it.
 This fall, my publisher reworked my original felting book into a new book called First Time Felting.


I reworked this still life into a new piece as I wasn’t happy with the original. This was part of the using stuff up movement 🙂

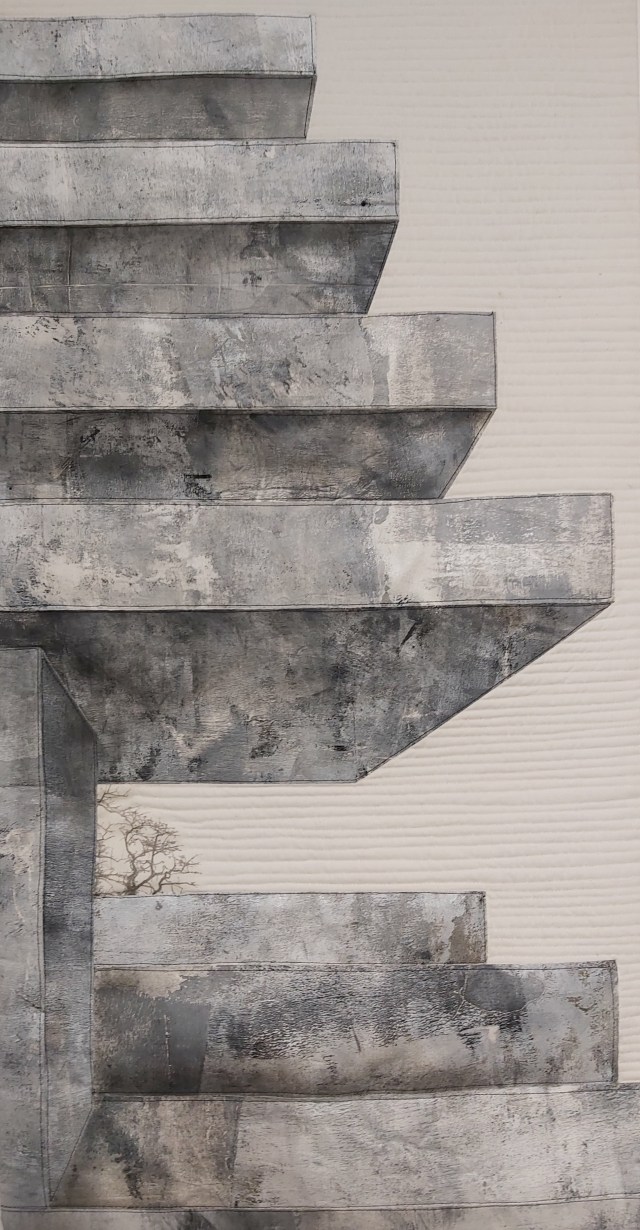
This past fall, I was ‘poked’ by one of Antje’s post to create a fabric collage landscape. This was inspired by a lake in Glacier National Park and I really liked the result even though it took quite a while to complete. I will probably do more of these types of collages as I have tons of dyed fabric to use up. So the theme of using stuff up will continue into 2020.


I thoroughly enjoyed Lyn and Annie’s quarterly challenges this year. Thanks for the challenges and I look forward to next year’s challenges.

And just to make things exciting, I started a new two year course with Gail Harker, Level 3 Stitch. I have been doing tons of color studies. You can see those on my personal blog Permutations in Fiber.
I would like to thank all of our contributors this year for all of your wonderful posts. We will be continuing with guest contributors in 2020 and if you have something to contribute, just let me know. You can also join our free forum to share your work. We love to see and hear about what all you felt and fiber artists are creating.
I would also like to thank everyone who gave to the “Zed Needs Your Help” campaign. We raised over $1,500.00 US and I am so grateful to all of you who helped out either by a donation or by purchasing an item from Felt by Zed. It was heartwarming to read all of your comments and to feel the love from our fiber community. Zed was overwhelmed by the response and will be writing a thank you to everyone soon.
Here’s wishing you a happy and creative year in 2020.


 7
7


 11-13
11-13
 14-15
14-15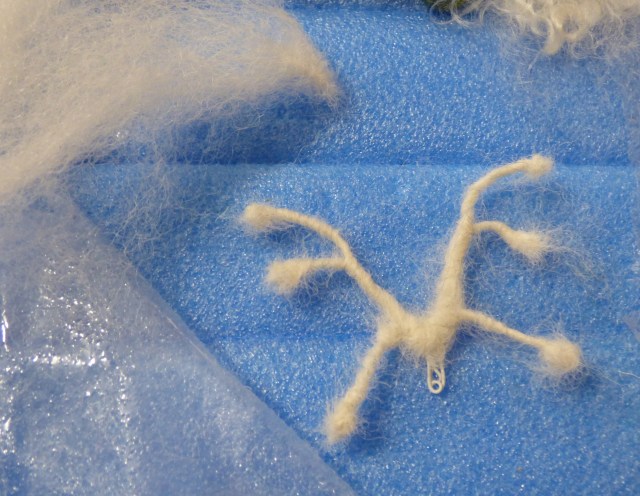 16
16 17
17

 20
20 25
25

 35-37
35-37