Browsed by
Tag: yarn

Fourth Quarter Challenge

Fourth Quarter Challenge

What happened to the other 2 Quarterly challenges?! As Ruth said, this year we’re focusing on felting techniques. My first thought (rather obviously, most of you will think) was embellishments. I’ve blathered on enough about embellishment fibres in the past year, so I thought maybe something we can get for free or even which might usually get thrown away. So I settled on ‘Threads and Yarns’. They might be ‘free’, but also it might not be something everybody just saves as a matter of course, so I thought giving you a few months warning will help you prepare well in advance.
So, what kind of things was I thinking of? The everyday things we use in felting and fibre art, nothing special, nothing we have to go out and buy, all we have to do is not throw it away. Things like sewing thread, long bits, short bits, natural, synthetic, even silk:

OLYMPUS DIGITAL CAMERAEmbroidery threads and floss:

OLYMPUS DIGITAL CAMERAHow about all those annoying threads that unravel when we tear some fabric, and have to pull off to neaten it? The bits of cotton:

OLYMPUS DIGITAL CAMERAThreads unravelled from gauze, scrim or cheesecloth:

OLYMPUS DIGITAL CAMERAShiny and sparkly organza:

OLYMPUS DIGITAL CAMERAThe stuff that refuses to unattach from our hands after tearing silk:

OLYMPUS DIGITAL CAMERAAnd any other scraps of threads unravelled or unwoven from fabrics and scarves we’ve torn, dismantled and deconstructed to use in our fibre art:

OLYMPUS DIGITAL CAMERAAnd then there are yarns. Any yarns … bought, made, natural, synthetic; neat, chunky, plied or arty. Big or small, it doesn’t matter if it’s a foot or so, or the odd few inches left at the end of a project.

OLYMPUS DIGITAL CAMERAYou might even have a pile of knitting you unpicked, save that too!

OLYMPUS DIGITAL CAMERAOther things which come to mind are bits of twine and garden string, that raffia stuff you get wrapped around flowers, the tassels cut from the ends of scarves. All you’ll need now is some envelopes, bags or tubs to save them in and something to label them so you don’t lose track. And I’ll try to come up with a few uses for them in the next 9 months! 😉

And the Winner is… Plus a Few Small Projects

And the Winner is… Plus a Few Small Projects

Drum roll please…… the winner of the December Green dyes and Silk Scarves is Maureen number 28!

Congratulations Maureen!

Please PM on the forum or send me an email to feltandfiberstudio@gmail.com with your full name and mailing address.  I will have your prize in the mail asap.


When you have an opportunity to use the dyes and scarves, please share your results with us on the forum or write a blog about it. Just let us know you’d like to do that. We hope you enjoy using them!

Thanks to everyone who participated!

Before I had surgery I felted a couple of small things.  The first was using the roving I had dyed for the 3rd Quarter Challenge to make a pod with cuts showing other colors underneath. I had used a lot of coarse fibers and decided I liked the rugged look so I didn’t shave it.

20150716_152736 20150716_153335 20150716_152805 20150716_15275520151210_110954

The next was a gift for a friend for her 70th birthday.  Another pod, but slightly larger.  I made some batts first. I used sparkly yarn as well as silk and milk protein for embellishments.

20151003_13023120151007_145056 20151007_145047

If you look closely you can see the sparkly yarn inside.

20151007_145109

Then to get into the holiday spirit I made a poinsettia flower with the intention of embellishing it later.

I used very thin prefelt, cut out the leaf shapes and used layers of saran wrap to separate them.

20151030_165533 20151112_113028

While I’ve been recuperating from surgery, I’ve been working on some small projects.  I finished the poinsettia by adding beads and adding stitching to the leaves and petals.

20151115_130411 20151114_141015_edited-1It’s now hanging on a wall to add a little holiday cheer to the house.

What have you been doing for the holidays?

Wine Anyone?

Wine Anyone?

I wanted to try making a gift bag for wine in felt.  I first made a resist using the wine bottle as a model.  But I wasn’t sure about shaping the bottom.

2015-04-21 13.59.16

The base layer was black corriedale.  Then I used a layer of merino.  And finally I made a batt using forest green, a heather purple, sage and black bamboo for the last layer.

2015-04-15 16.09.08

For embellishments and design I made leaves from a nuno prefelt and used 100% Peruvian wool thick and thin yarn, locks and needle felted grapes.

I finished fulling the bag on the bottle, but because of the narrowing of the design it’s not an easy in and out for the bottle.

2015-04-21 11.19.22 2015-04-21 11.18.57

2015-04-21 11.18.48

2015-04-21 11.18.16

After it was semi dry, I cut holes at the top to thread some yarn through to tighten it around the neck.  Then I turned down the top and sewed extra leaves on and wound the excess yarn from the  closure around a small dowel to emulate the ringlet vines on a grape wine.

Also, the bottom ended up having “wings” so I tucked them under and sewed them to  the bottom. There was a hollow in the bottom of the bottle so it worked out well.

side finish front finish

2015-04-22 14.38

back finish

It was a little hairy so I shaved it.   Next time, I would only use two layers and redesign the shape.

Even with some problems, I think it will make a nice display on a bar.

Have you made anything similar?  Do you think it needs anything else?

Felt over Wire

Felt over Wire

A couple of years ago while thrift store shopping, I came across a cute little wire baby buggy.  I set it aside hoping for a reason to use it.

2015-03-09 15.48.48It is 5″H x 5″ L x 2.5″ W  (12.7 cm x 12.7 cm x 6.35 cm).

I made a resist with a 30% shrinkage rate added two layers of merino per side which I thought would be a nice thickness to cover the wire.

Her is the outside layer done and stretched over the form to dry.

2015-03-09 15.52.54There seemed to be plenty of extra felt around so I could turn it inside except for the very front of the buggy top.

I made the second layer  and inserted it inside.

2015-03-23 15.02.18That was a little tricky since it was a tight fit for my fingers so I used my trusty scoop and crochet hooks to get it in position.

It was a tight fit and there wasn’t enough felt to overlap the front of the buggy top.  I had planned to do a blanket stitch to join them but the cluster of wires on the top made it impossible to do that.

I wrapped the front with some roving I rolled into a rope, then basted the stitches together, but I didn’t like the way that looked. 2015-03-27 15.57.55

So I glued the layers together both on the top and sides then pulled out the basting.  Not a great plan either since I burned my fingers with the glue gun even though I was using a cuticle stick to push into place.  If I had more pink roving, I would have made a resist using more over the buggy top and perhaps made a double resist for inside and out in one piece. But I had to work with what I had.

For the inside, I placed a piece of cotton batting on the wire as a mattress.  Then I proceeded to wrap the wheels with white yarn and stitch on some lace around the bottom and top of the buggy.

top view   front view

side 2side view

I still have to clean it up a bit then I’ll send it off to my daughter in law for the baby’s room.  I thought it would be useful to store qtips or scissors, thermometer, etc. on her dresser.

Have you ever used a wire structure with felt?

Introduction to Wet Felting at The Fold

Introduction to Wet Felting at The Fold

A couple of months ago while shopping at The Fold in Marengo, IL, owner Toni Neil asked me if I’d be interested in teaching a wet felting class.  Many of the people who shop there are knitters, crocheters and spinners and she said they were curious about the felting. I agreed and we settled on November 1, class size and I provided her with a class description and supply list along with a list of the items I would be supplying.

I always think when taking a beginners class it’s nice to come home with something you can either use or show people, so I chose to make a place mat.  In preparation, I made a couple as examples and gathered some other samples to show how embellishments can be used.  I also brought along, yarns, prefelt, and some silk for embellishments.

2014-11-02 14.40

I provided a pool noodle, bubble wrap, a template, a piece of polyester curtain fabric for each student and gathered up my samples and other tools to discuss as we worked. In addition, I printed out flyers for the forum, a resource list and a general step by step guide to basic wet felting for future reference.

preparation

The class was held in Toni’s kitchen at The Fold which was comfortable for four people. Unfortunately, they had to turn away a fifth, but I don’t know where we would have put another body.

I was surprised to learn that a couple of the ladies had come from as far away as Beloit, WI and Highland Park, IL which is an hour and half away.  The other two lived closer to me.

layout 3_edited-1

The kitchen was nice and bright.  So sunny, pictures were a little hard to get.

laying out lay out 2

The one thing I learned is that they would have preferred to not have choices as to design.   However, I’m never one to squash the creativity of a group and as it turned out they helped each other and while they followed basic designs they added their own creative touches.

Toni M (not the owner) finished first and was pleased with her first project and decided she liked her organic edges.

Toni

Dana brought some beautiful Churro yarn she’d purchased from New Mexico and made her mat a bit more abstract with a lovely turquoise background.

Dana

Carolynne purchased her roving and yarn to match at The Fold with the intention making an additional five mats of the same design which featured the stripes and abstract yarn design.

Carolynne

Since Candace had just purchased all the merino sheep from The Fold, she chose to feature a sheep on her design that she cut out from prefelt and used yarn for a fence, silk for clouds and some roving for grass.

Candace and sheep

They were all pleased with their place mats.  We worked hard, but had a good time.  Now these knitters, crocheters, spinner and weaver have a new tool in their fiber kits!  I hope they will continue to experiment and join us on the forum.  For more information on The Fold check out their website http://www.thefoldatmc.net

I haven’t taught a class in a long time.  I was tired, but a good tired and had fun meeting new people and sharing my passion with them.


A Day in the Life of a Fiber Mill

A Day in the Life of a Fiber Mill

Last Friday, Cathy (Luvswool) and I took a lovely drive out to Belvidere, Illinois to tour the Illinois Wool and Fiber Mill.

Nestled in the midst of farmland, we were surprised to turn into a  homestead driveway. I guess we were expecting a huge factory, but it was a quaint store and small facility crammed with custom made machinery.  The idea for the mill started when Jane Zeien’s family purchased two ewes  for a 4 H project.  The family enjoyed working with the sheep and began raising Cheviot, Hampshire, Shetland and Cotswold sheep. They decided to expand their services to help promote the industry.

The Illinois Wool and Fiber Mill can handle everything from washing fiber, blending, picking, carding, pin drafting, custom dyeing, preparing batts and spinning.  All types of natural fiber are welcome  unwashed or washed.  And no order is too small and each fleece is processed individually.

Jane greeted us and led us into her workspace and into wool heaven.

We were surrounded by fleece waiting to be processed in a variety of  breeds and blends and piles of roving in a potpourri of colors and blends.

The picker has a big enclosed space behind it where the fleece piles up ready for the next step.

PickerThe carder dominated the center of the room.

front of carder carder back


Batts can be made on the carder by changing out the parts on the back of this machine shown here making roving.

This is the pin drafting machine.

pin draftingDepending on the job finishing the wool can be done on the spinning machine, then the skeining machine.

Spinning Skeining machineWhen the tour was over we visited the shop where everything is related to sheep from skins to finished good by Pendleton and Woolrich along with handmade items, books, roving and yarn. If you want to learn more about the mill visit their website http://www.ilwoolfibermill.com/

Of course, we both bought some new wools to play with. One of my treasures was an English Merino wool batt.

Eng Merino batt

Here are Cathy’s new treasures —

Cathy treasures


Summer Blues

Summer Blues

When Cathy (Luvswool) and I went to the Midwest Fiber Fair a couple of weeks ago, in our conversations I mentioned I had an indigo dyeing kit I’d like to try.  With some discussion on the forum about the smell indigo produced, I wanted to try to do it while the weather was still nice outside.  Neither of us had used indigo before, so, I invited Cathy to join me in a day of dyeing.

I didn’t have a plan for what I wanted to dye or any specific projects in mind to use the dyed materials.  But Cathy came well prepared with plenty of roving and fabrics to dye.

To save some time, I had set up the buckets for wetting and indigo along with the plastic coverings before she came. It was an overcast day to begin with with a nice breeze across the yard.

set upWe followed the instructions, mixing the indigo, then the chemicals and stirred it in then let it sit for an hour.  But there was no bloom as described.  We reread the instructions and stirred again; then decided to skim the top and begin.

After the first batch, we returned the runny bloom back to the bucket and let our fabric oxide.  It all looked fine, so we continued the process with the rest. Once the first batch was fully oxidized we tag teamed and I washed and rinsed while she dipped the next batch. Strangely enough after the first batch the bloom began to grow.

With a brief break for lunch, we managed to get everything into the pot we both had to dye along with the breaks for letting the pot sit after stirring.  It was a busy day with the dyeing, rinsing and washing. And the day got hotter and sunnier as we worked.

Cathy had spent the evening before rubber banding a large piece of cotton gauze.

Cathy tied corks

Cathy cork cloth

She also brought along a big pile of Domestic 56s roving, some kid mohair yarn, nettle and lace table cloth, miscellaneous bits and pieces of fabric.

Cathy domestic Cathy yarns rovingcathys laceI dyed two blouses that were old, but stained, a very old handkerchief with my name on it, yarn, mulberry silk, pencil roving, thick and thin yarn, a linen doily, some merino and cheviot roving.

sleeveless blouse


silk and thick n thin stuffI had wadded up some cotton voile and rubber banded it all around.  The end result is the piece draped on the chair.  I like the random patterns it produced.

cotton gauzeCathy brought some corks with her, so I used the corks on a piece of silk gauze.

silk n corksShe also dyed some old thrift store “lace” bedspread pieces, an old linen pillow case, a piece of muslin and a cat mat.  

Since it was getting late in the afternoon and Cathy had a long drive home, we packed up her goodies and she finished rinsing and drying some of her items at home the next day.

We were pleased with the outcome of our “Summer Blues” and the opportunity to give some old items new life and others some pretty blue color.

The Midwest Fiber and Folk Art Fair, August 1-3, 2014

The Midwest Fiber and Folk Art Fair, August 1-3, 2014

by Guest Artist/Author Cathy Wycliff (Luvswool)

We, Marilyn (Pandagirl) and I (Luvswool),  had never attended a “fiber fair,” so there were expectations and then the reality of the Fair.  We had planned for many months to attend the annual Fair and met there early Friday morning with great anticipation. The advance program showed photos of sheep, fiber, workshops, art exhibits, bags of fleece, etc., and the Fair delivered all of that except for the sheep. One of the organizers explained to me that August is too hot for sheep, and I guess that makes sense. So, the only live animals were a lonely llama and a couple of angora rabbits. Still, it was an enjoyable experience.

The Fair has been held for 8 years in Grayslake, IL, a far northwestern town in the extended Chicago metro area, and it’s a Fair that celebrates the work of many hands. We saw spinners, felters, and knitters demonstrating their crafts, and there were many workshops offered during the 3-day fair. There were a couple of folk singers and a few food vendors outdoors, but everything else was contained in an air-conditioned building. The majority of the indoor vendors were geared towards knitters, with many beautiful displays of hand-dyed, hand-spun yarns and goods. Neither Marilyn nor I are knitters, so we headed first for a walk around to scope out the lot.

IMG_5785

First stop was the Art Exhibit, which displayed fine fiber art–among them, my own display of five fiber wall-hangings. There were other fiber wall hangings, sculptures and “vintage” handbags (crafted from vintage patterns but otherwise entirely new).

IMG_5781
Cathy Wycliff’s Exhibit

(Cathy had a very prominent display!  It was the first thing to see on our way in.  Very exciting! — Marilyn)

Next up were the vendors, which included some crazy rag rugs, lots of beautiful yarn and bags of alpaca fleece. There were also felted hats  and you’ll notice I didn’t snap pics of the roving, since I was busy buying it. Marilyn and I purchased some fibers we have not previously felted with–including Navajo churro, 100% Organic Polwarth, white Falkland and I bought some black Blue Faced Leicester with silk. Since there was so much yarn, I did pick up some white wool boucle for embellishment, as well as silk hankies, which I have never used.

IMG_5786 IMG_5787IMG_5789

As we neared the end, we were able to view the judging of alpaca and llama fleece. Two judges followed a quality control checklist and had to concur on all points.

IMG_5788

Then it was goodbye to Princess Athena, the lonely llama,  and our day at the Fair came to an end. We would love to attend another fair, but next time would like to see sheep–sheep-shearing, sheep-judging, sheep fleeces, border collies herding sheep, etc.  Maybe there’s a trip to New Zealand in our future!

IMG_5790
Bye! Thanks for stopping by.
The Four Day Dye Experiment

The Four Day Dye Experiment

I recently read some new instructions for dyeing using citric acid and salt. Well not new,  I took a class a couple of years ago where the instructor used similar instructions. Normally, I use vinegar for dyeing.  But I like to experiment.  I have also been wanting to try some new fibers and have never dyed something I’ve already felted.  So, I decided to combine the experiments.

I made samples using Cheviot, Romney, Icelandic, Texas Mohair locks and Domestic 56’s.  On each sample I put a piece of silk Habatoi, silk gauze, thick and thin yarn, mulberry silk and prefelt. I was going to make a placemat out of them, but they all shrank differently, so I have to rethink what to do with them.

felted samples
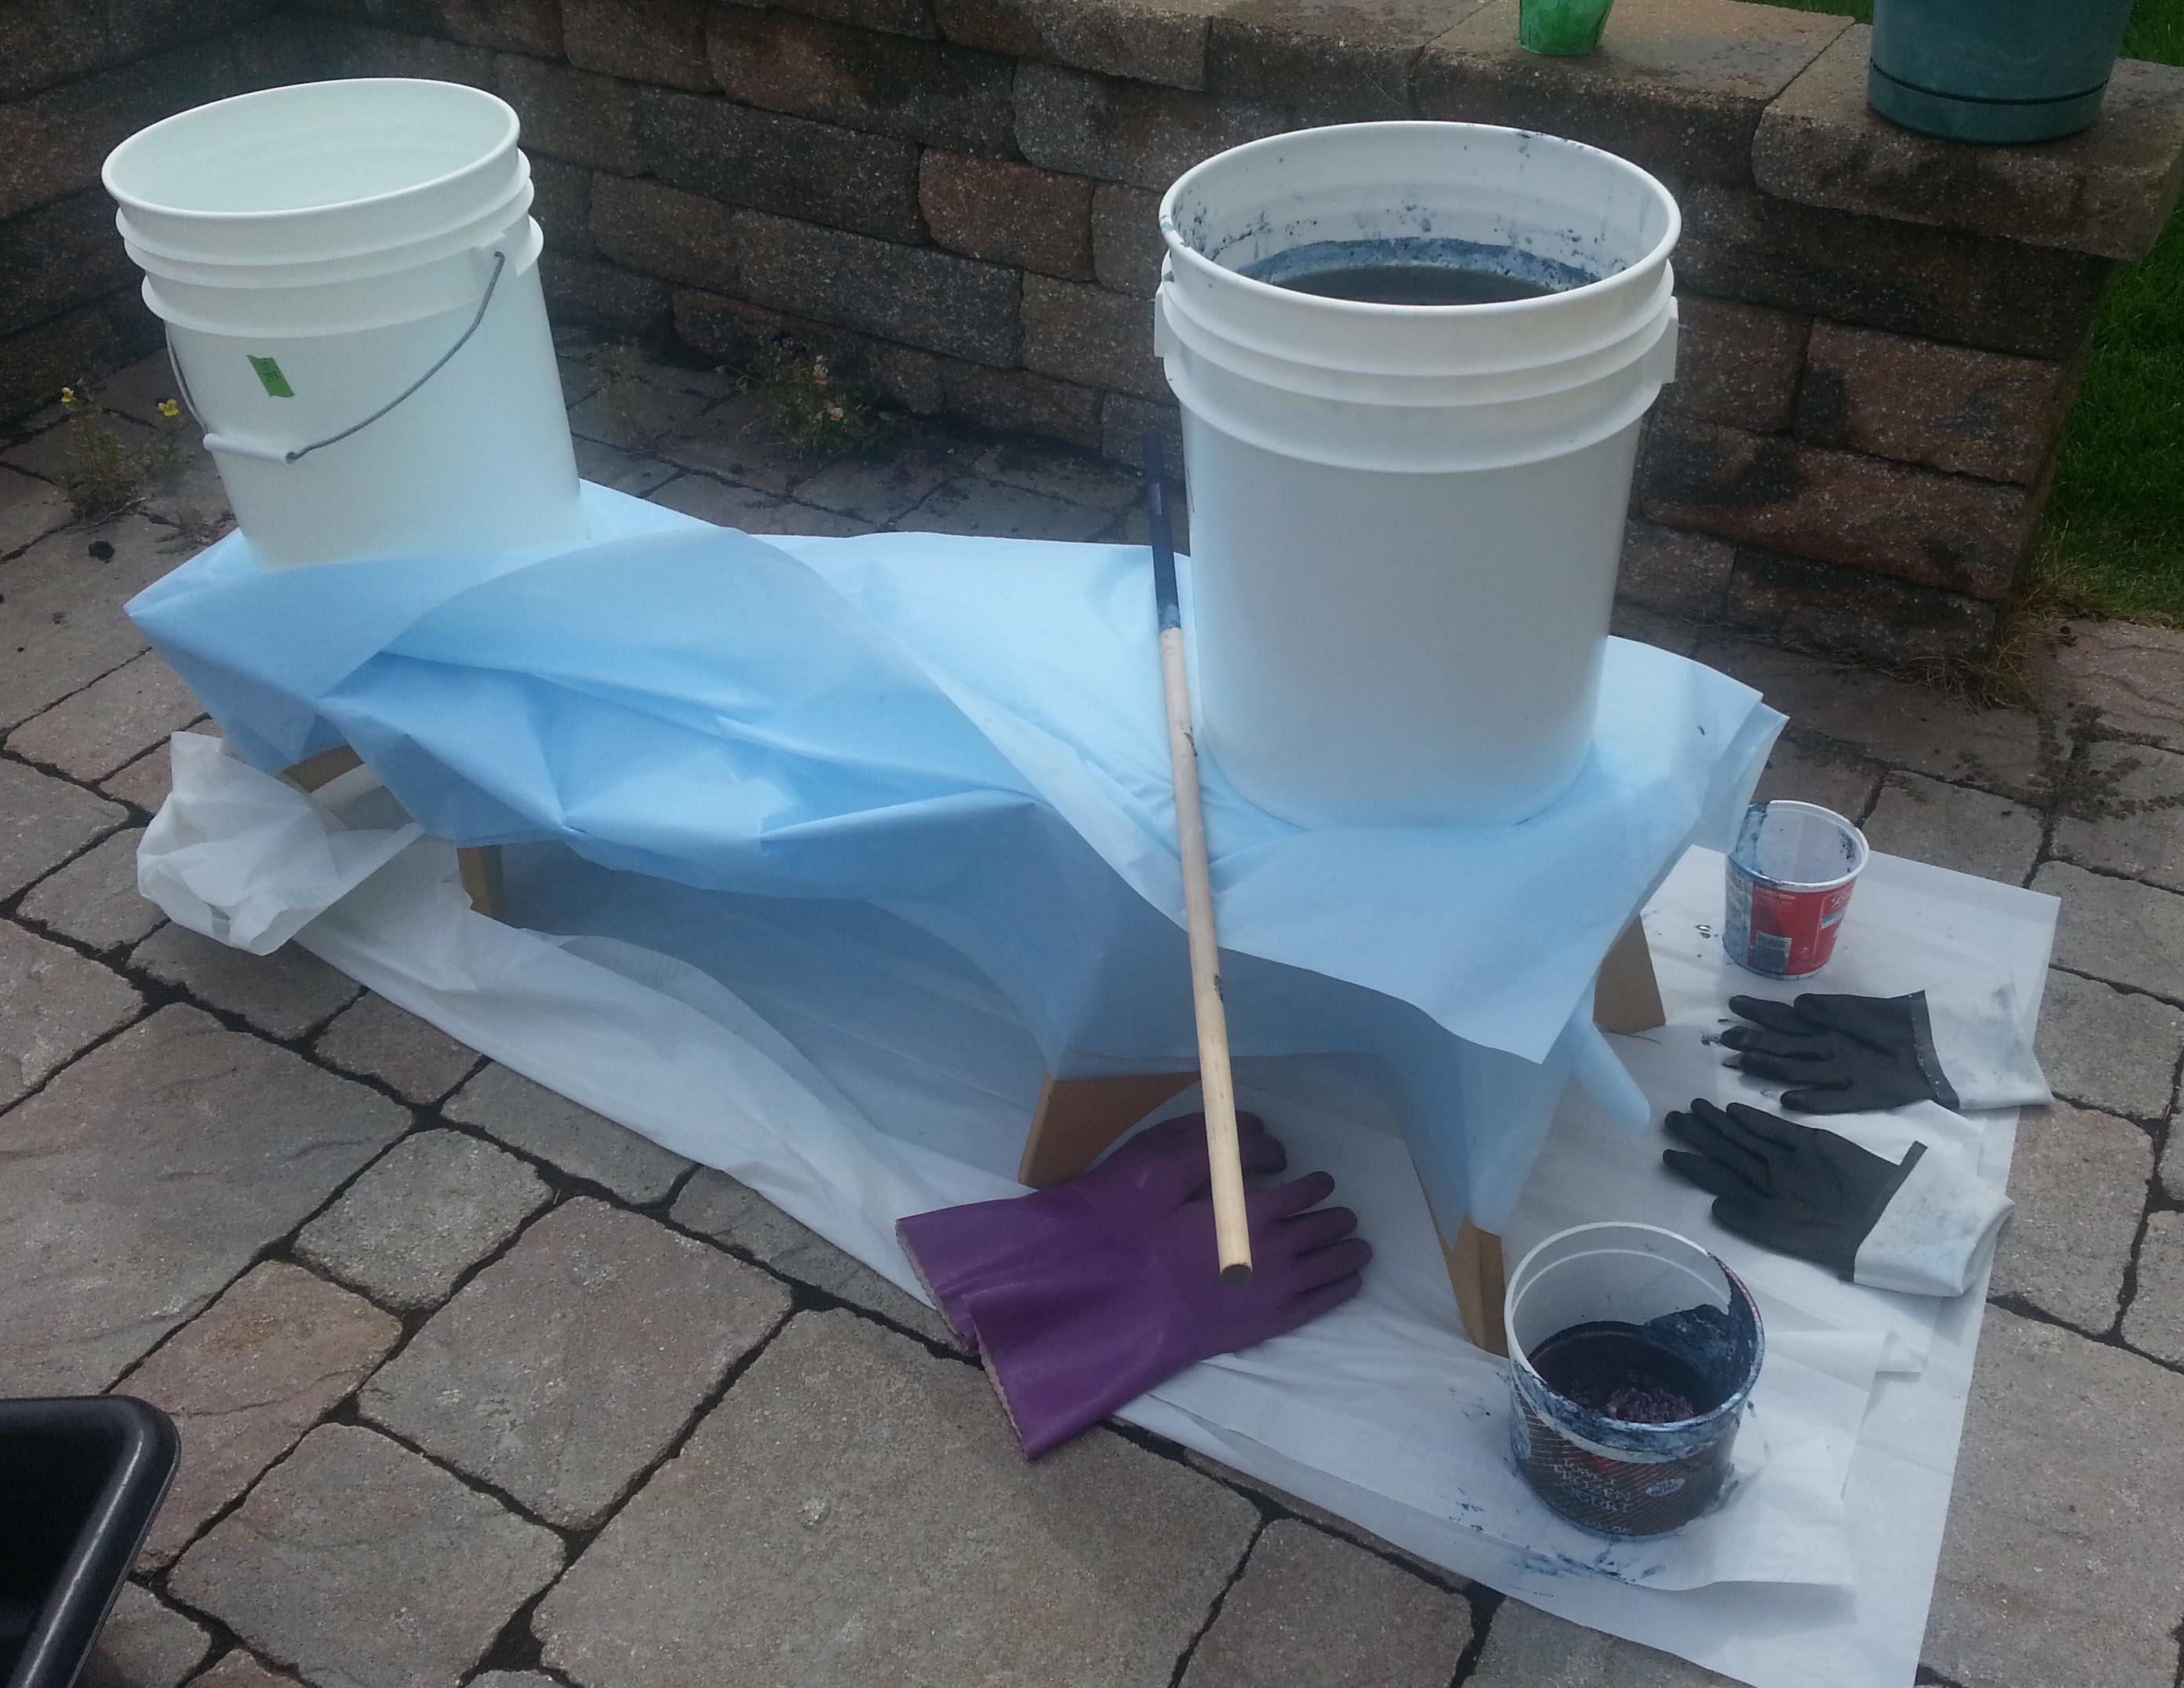
According to the instructions, I had to weigh the fabric to dye (before soaking in synthrapol).  I had a large pot so I put together some Merino, silk habatoi, wool yarn, and wool thick and thin yarn along with my samples.  All total 128 grams.  Next, into the soak, then on to mixing the citric acid and salt solutions.

After a thorough search, I couldn’t find the citric acid I thought I had. Whoops.  Well, it should still work with vinegar, right?

1 gram of fiber= 1 milliliter of dye.  Then depending on the Depth of Shade desired the amount can be multiplied by 1 through 5 (light to dark.)  When I filled the syringe with 120 ml of dye, it looked like a lot so I decided just one DOS would be enough to start. Normally, I would use a tablespoon of dye.  If I wanted a darker shade, I could add more dye later or overdye it.  I used my own dye stock that I had on hand.  After getting the fiber and dye bath up to temperature (185 degrees), I let it simmer for 30 minutes and checked it.  The water was still very dark.  I added more vinegar and let it simmer for another 15 minutes. No change. Another 15 minutes, then I added more vinegar and turned the heat off and left it until morning expecting it to be exhausted.

day 1 B
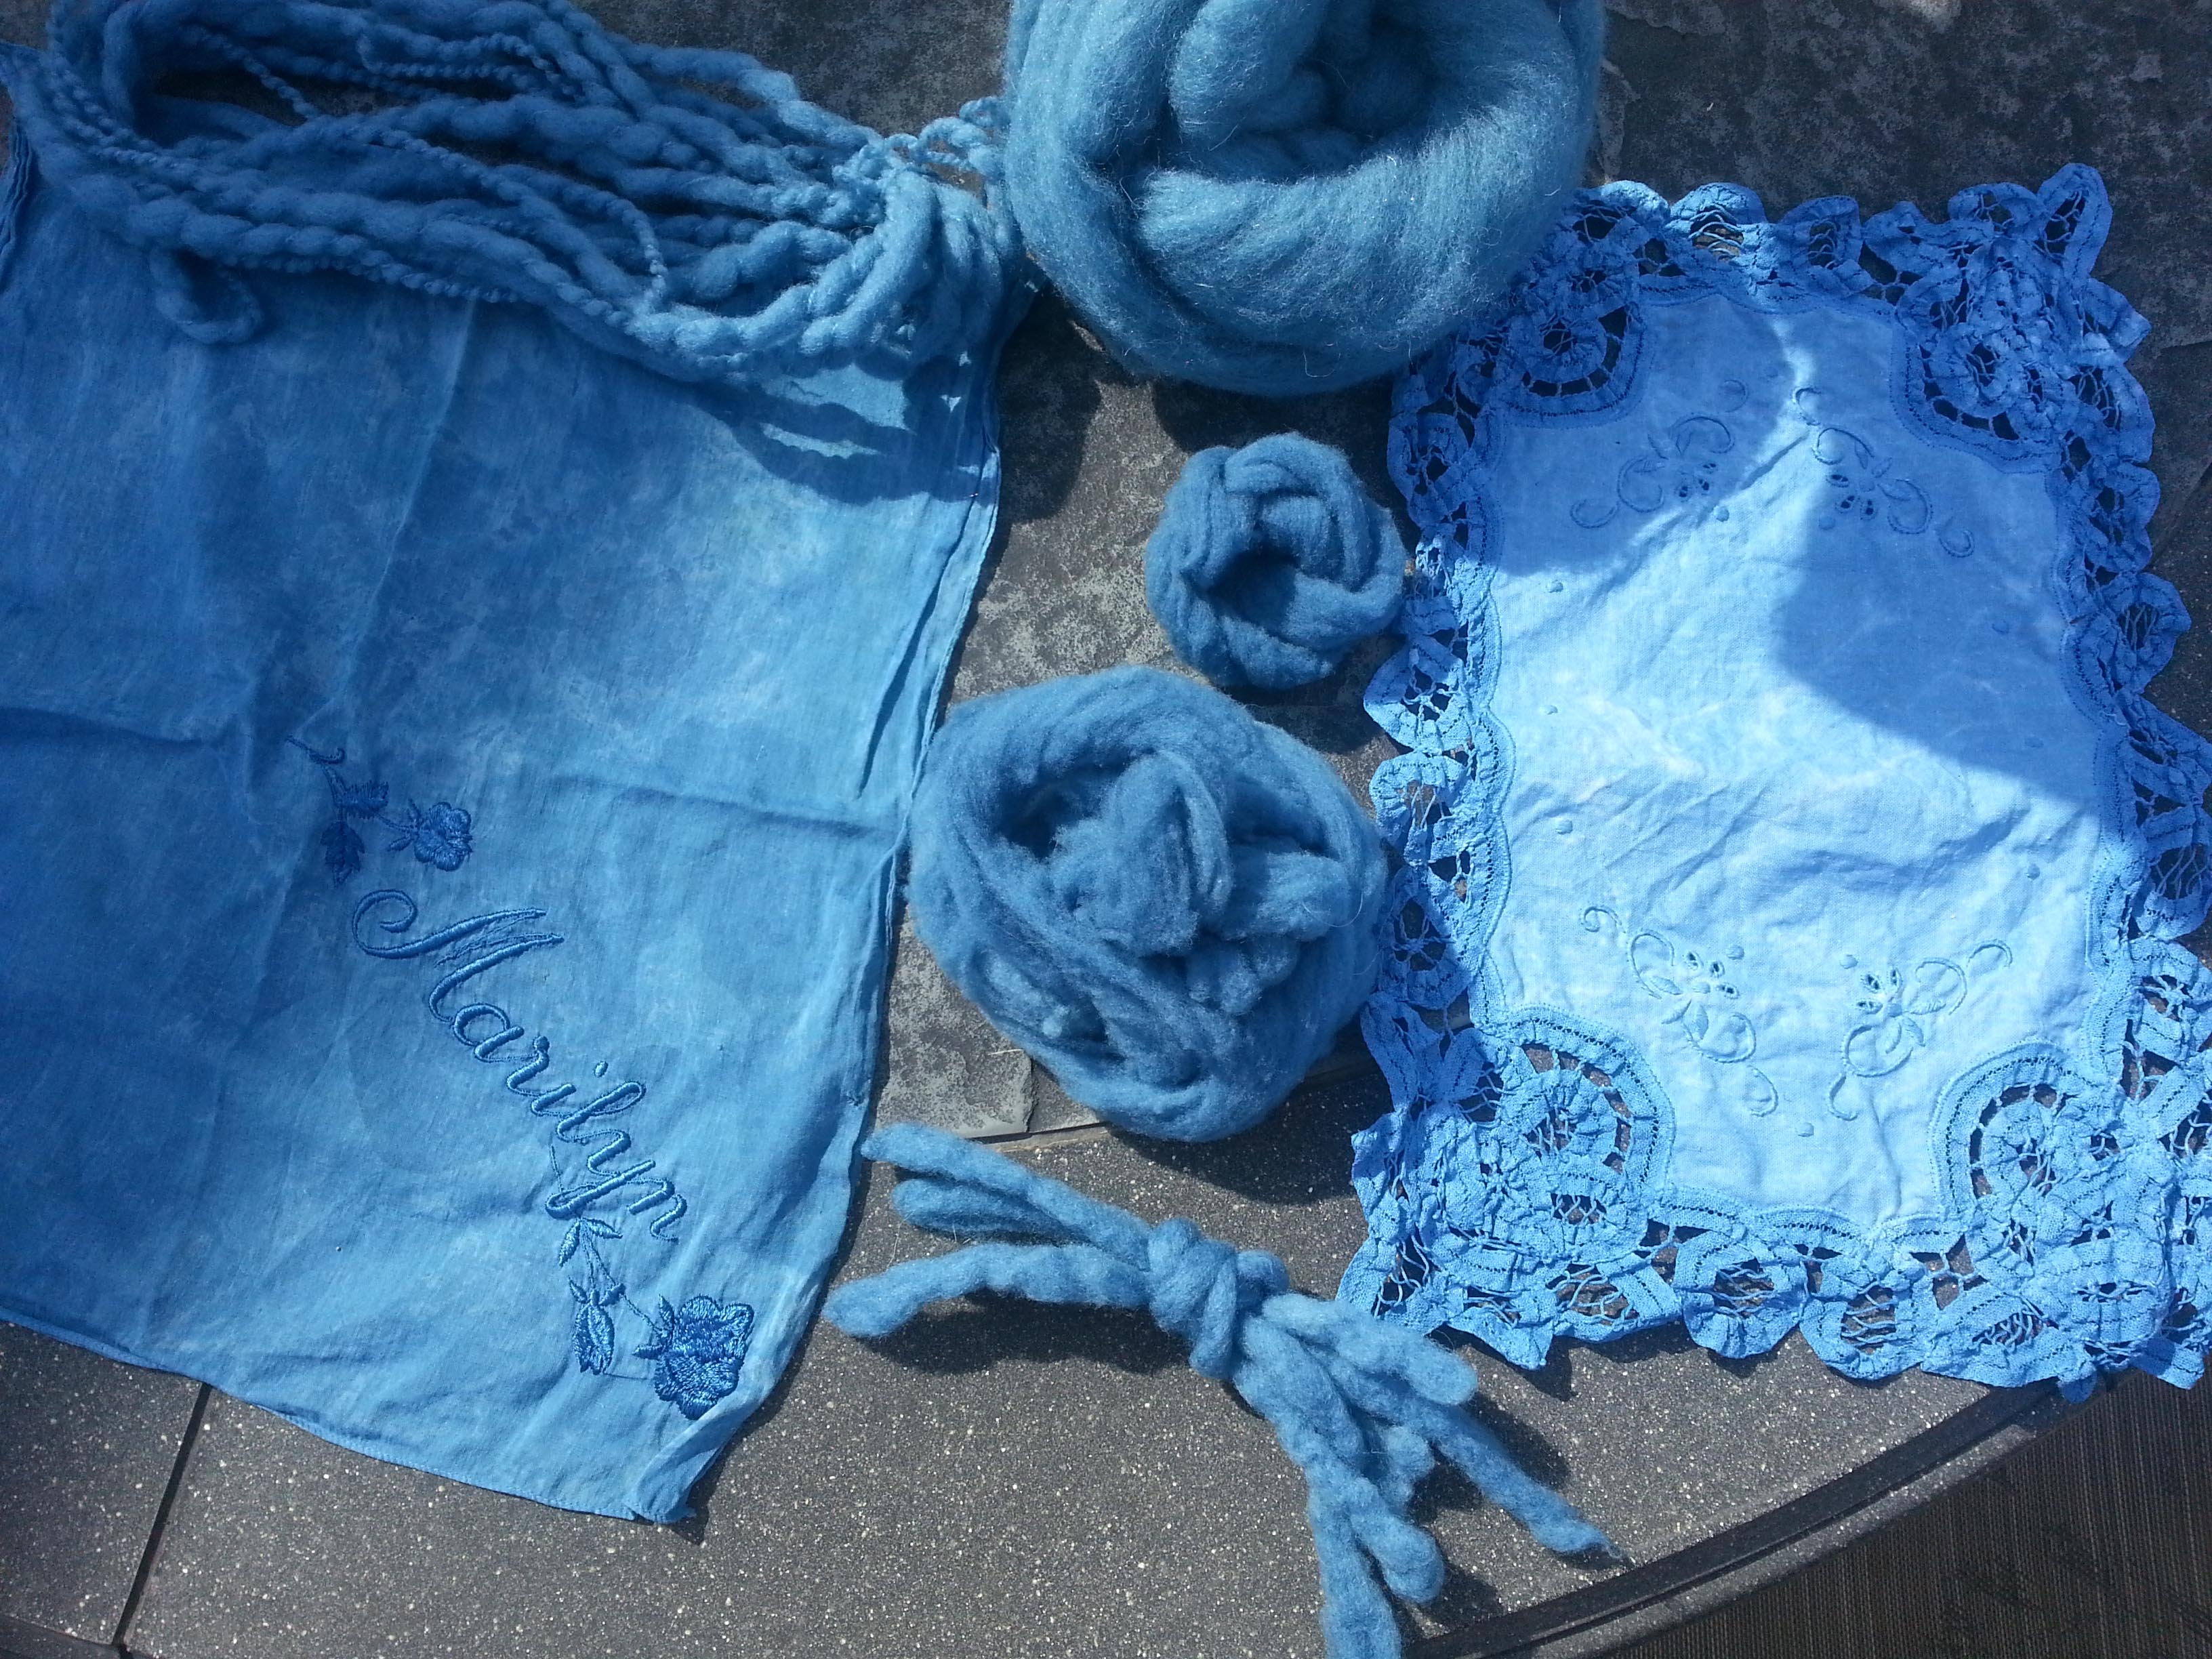
Surprise!  Beautiful colors, but plenty of dye left.  I removed the fibers, rinsed and rinsed then let them dry.

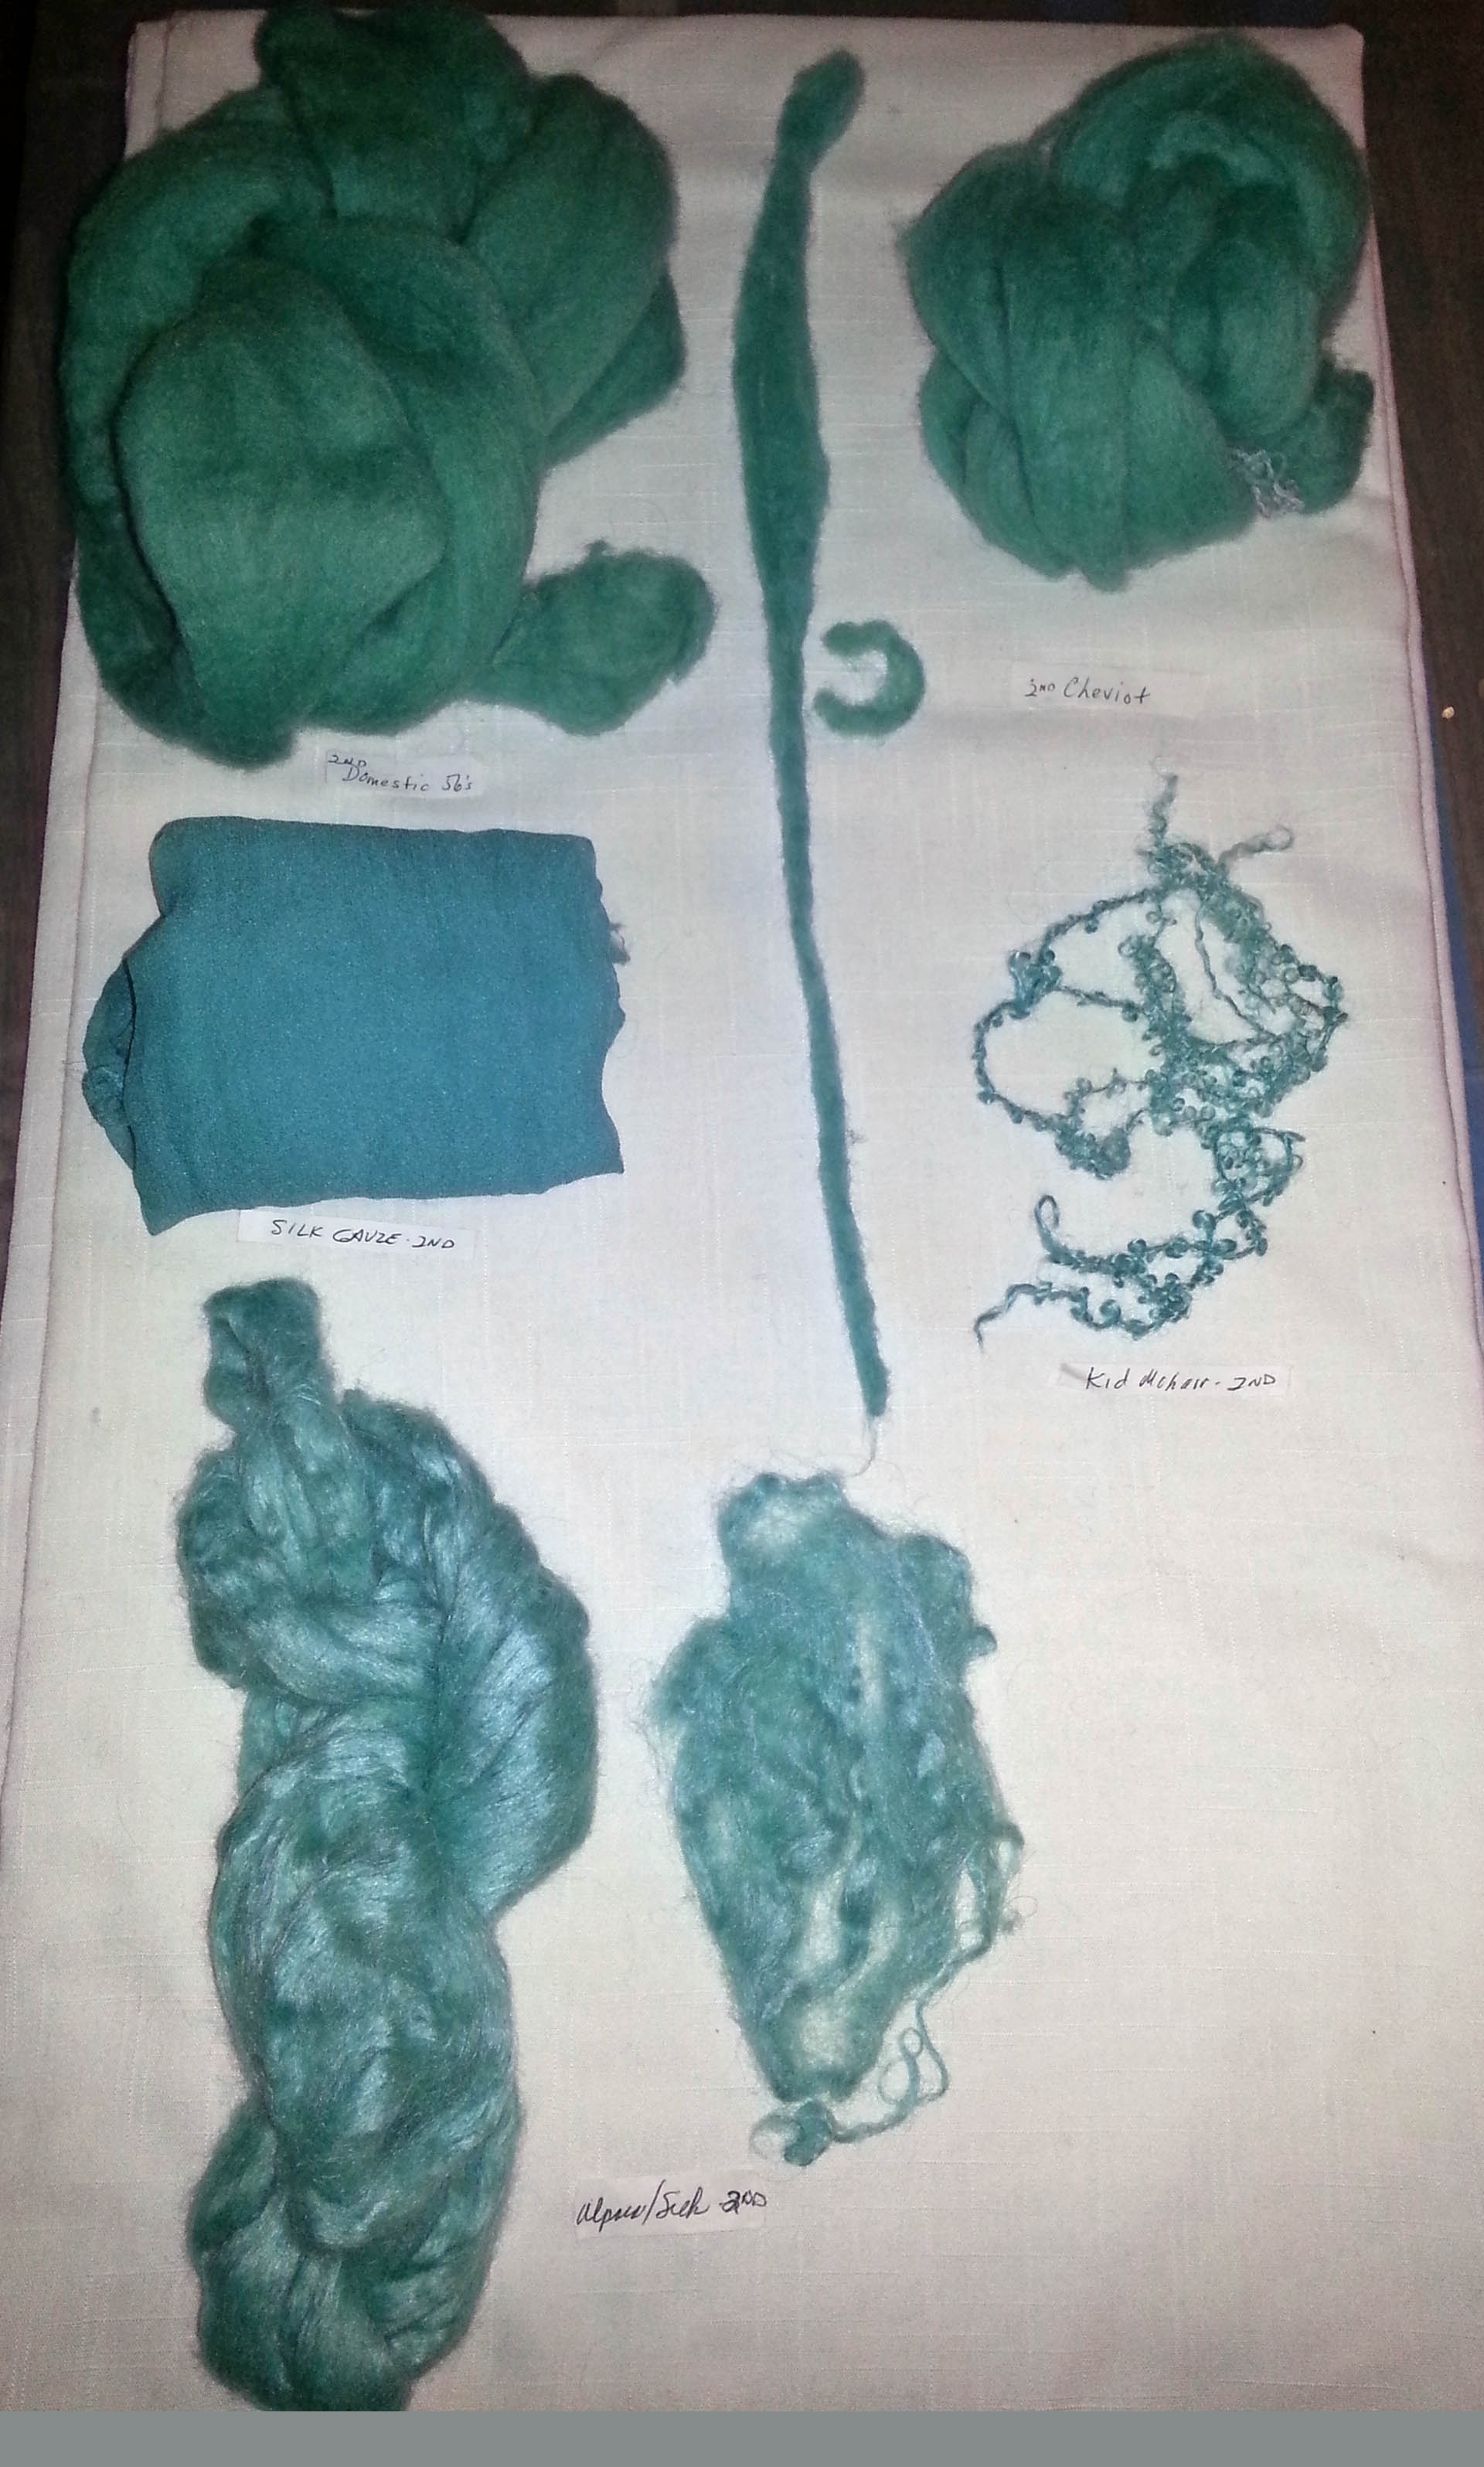
Back to the dye pot.  I decided I probably didn’t need more teal fiber, so I added a couple of teaspoons of yellow.  Then put in some Domestic 56s, alpaca/silk, kid mohair yarn, Cheviot and silk gauze after soaking in vinegar. I repeated the dye procedure.

day 2
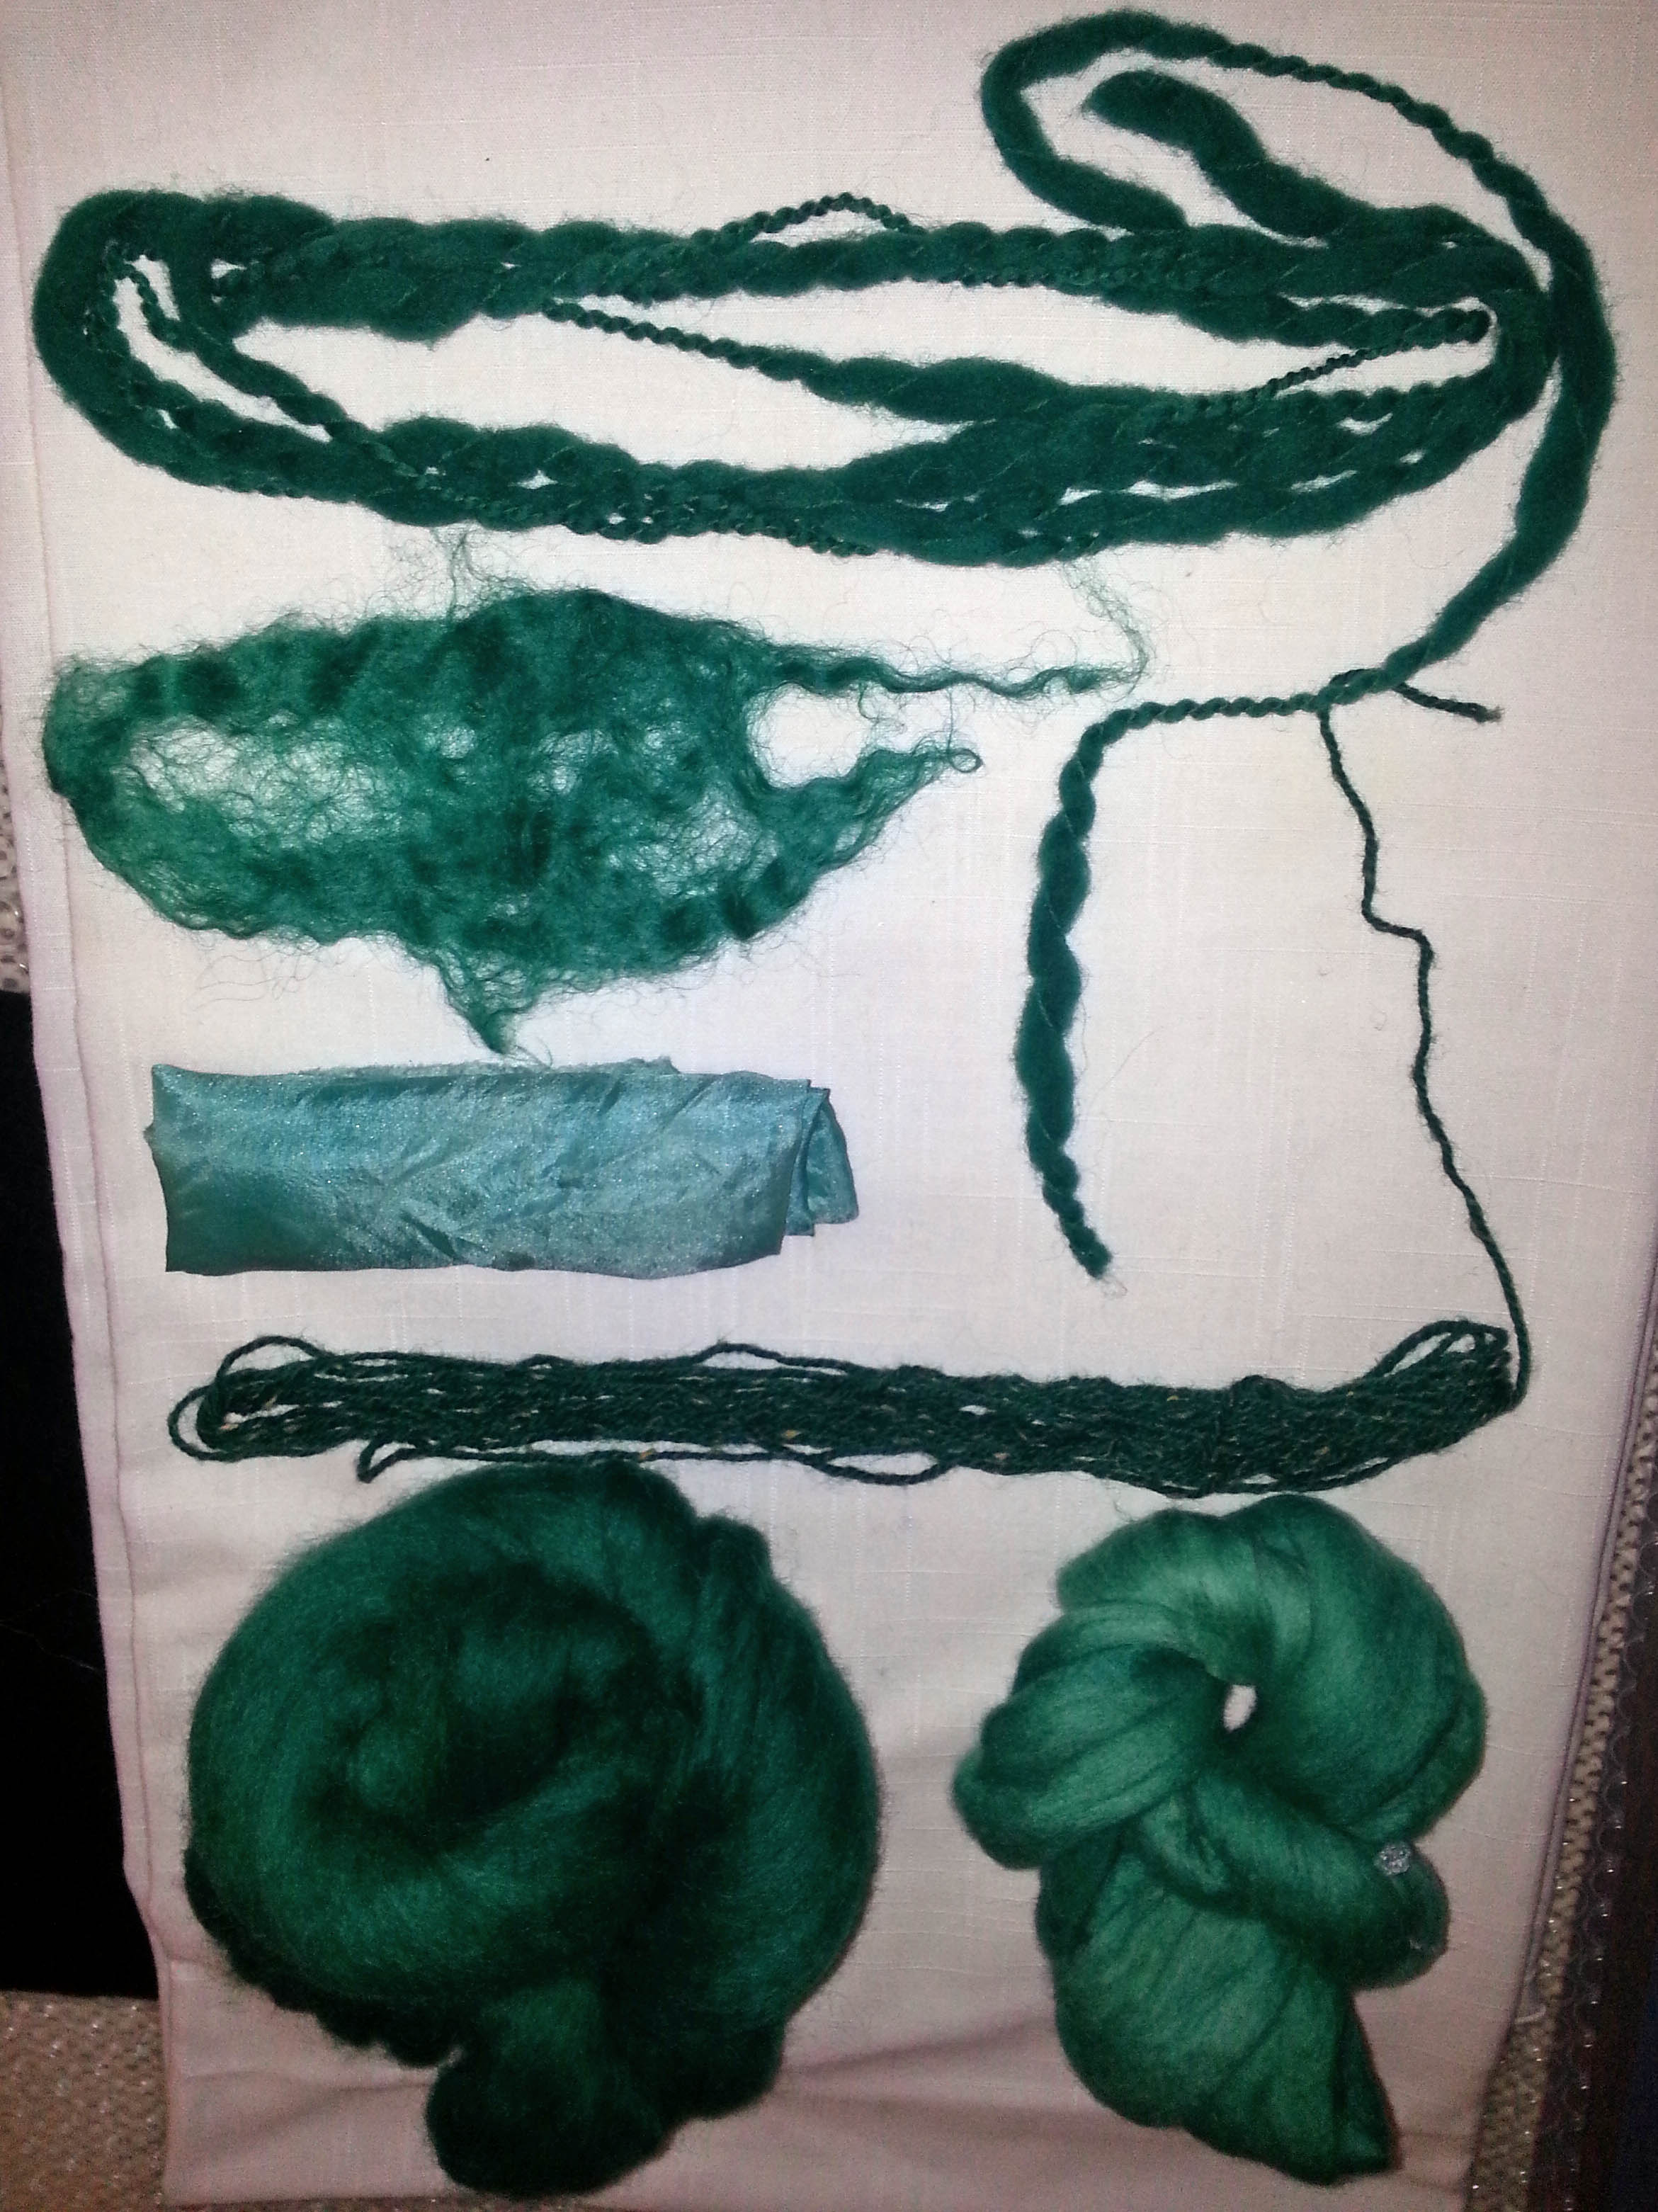
Staring at the dye pot the next morning, there was still plenty of color left.  So, on to day 3 with Domestic 56s and Cheviot.

Day 3bOkay, enough, right? Dont laugh. I had to see this through.  Day 4 included thick and thin yarn, wool yarn, a piece of felted Wensleydale, silk habatoi, Romney and Merino. I expected some pastel colors the next morning. No.

Day 4Finally, the dye bath was exhausted and I had the biggest surprise of all. The Romney was darker than the fibers on the first day.  It’s a good thing I like teal.

4 days

I finally realized my mistake — my prepared dye mix  is 1 teaspoon dye powder to 8 ounces of water which is double the concentration than what the instructions were for making the dye solution.  (1 part dye powder to 100 parts water — i.e. 5 gm dye powder to 500 ml of water.)  I didn’t pay attention to the dye solution instructions because I had already had some made.  My bad.

I haven’t given up.  I have citric acid now but will try a much smaller amount of fiber and the right amount of dye solution.  But now on to make some batts and start a new project.


Inspiration, etc.

Inspiration, etc.

Usually, I find inspiration in nature or another artists work.  But recently I saw an ad in a department store flyer for a bedspread that caught my eye.   I kept going back to it until I finally I cut the picture out and laid it on my work table.

It stayed there for a while and I kept asking myself what about it that kept drawing me back to it.  I didn’t need a bedspread, but there was something about the colors and design I found intriguing. The design looked as if the colors were painted with a brush and there were uneven lines like paint dripping down the wall.

I was in the process of trying to come up with a design for a book cover and thought I’d use the design elements I liked in the ad for that.

I measured meticulously for the the book cover allowing for fold over sides, shrinkage, straps, etc.  With my template finished, I laid out my design.  I really wanted to emulate that brush feel, so I even used a comb to separate the fibers.  For the paint squiggles, I used mohair yarn I had dyed.

white cover layoutHowever, once it was done I realized I couldn’t use it for the cover.  I would distort the design to cut the straps.  So, plan B — a pillow.  I had a pillow form that would work just fine.   The felted piece was a little too large so I wet it and threw it in the dryer.  Perfect. But now I needed a back.

The white wool I used was more of a light cream color, so I didn’t want to make a white back.  I had enough dark blue.  Again, I wanted to try to recreate that brush stroke.   I made a smaller template and proceeded to lay out the second side.

side by sideSince the finished piece was the right size, I didn’t have to put it in the dryer.  Consequently, it is smoother than the white side which is fine.  I sewed the pieces together and now I have a reversible pillow with two different textures and looks!

pillow front


pillow back


The brush stroke design wasn’t exactly what I wanted. The felting process tightened up all my careful combing, but I learned a lot and will try again.

I really liked the dark blue color and  wanted to dye some new thick and thin yarn I purchased to use on another project.

Of course, even though I have a variety of thick and thin yarns this dark blue wasn’t one of them.  I found this new Ashland Bay yarn and just love the texture and novelty of the twist.

undyed thick and shinThe Midnight Blue acid dye on my shelf was just what I wanted.  I thought.  Next to the dark blue it looks purple.  The silk cocoons I threw into the dye pot turned a light purple and the wool batting is a medium purple.  It’s a good thing I like purple as well.

midnight blueNow back to the drawing board!


%d bloggers like this: