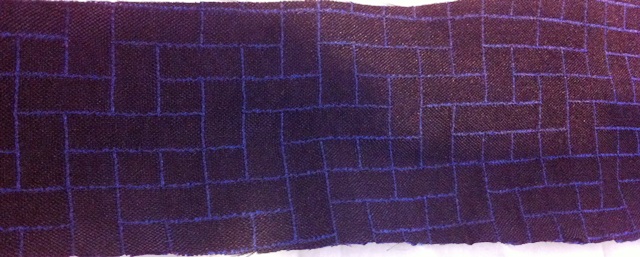
On our felting week end Maureen decided to do scarves. She wanted to try out some 50/50 merino silk that she had. She laid out the wool quite thin and rubbed it into prefelt.
Once it was prefelt she spun the water out of it and started cutting it. She made slits that she then stretched out and started fulling. You stretch and full, stretch and full and end up with great holes.
Next was into the dye pot. Although the scarf turned out great, it did not show off the silk. Usually the silk and wool take the dye a little differently, with this blend I was all one. We decided that it was because the it was to well blended.
Maureen did 2 more scarves one in the same style and one solid. Sorry the pictures of them did not turn out.
Diane hasn’t done a lot of dying so Diane and Maureen dyed some silk chiffon. The silk was twisted and dyed with several colors.
On the last afternoon I decided to make a bag for my mothers birthday.
The inside of the bag will have a red stripe. I used a combination of commercial prefelt and top. I also added some Blue Faced Lester wool to add some strength and stiffen it.
This is the outside. There is black next to the resist and the white on top. I wanted the black to migrate through the white and make a light gray. This is the finished bag. its reversible.
Diane decided she wanted a new shopping bag. She started out huge and did many layers of prefelt and wool.
Here she is fulling it
You can see it did shrink but just after this she gave up and said she will put it in the washer at home to see if she can shrink it more. At this point it is a large sturdy basket.
This is our group shot. We were very busy. You can see Maureen’s two scarves on the left.
The one on the right was one Maureen had made recently, added just the balance the picture. And finally that was the end of the weekend. We needed to go home and rest.
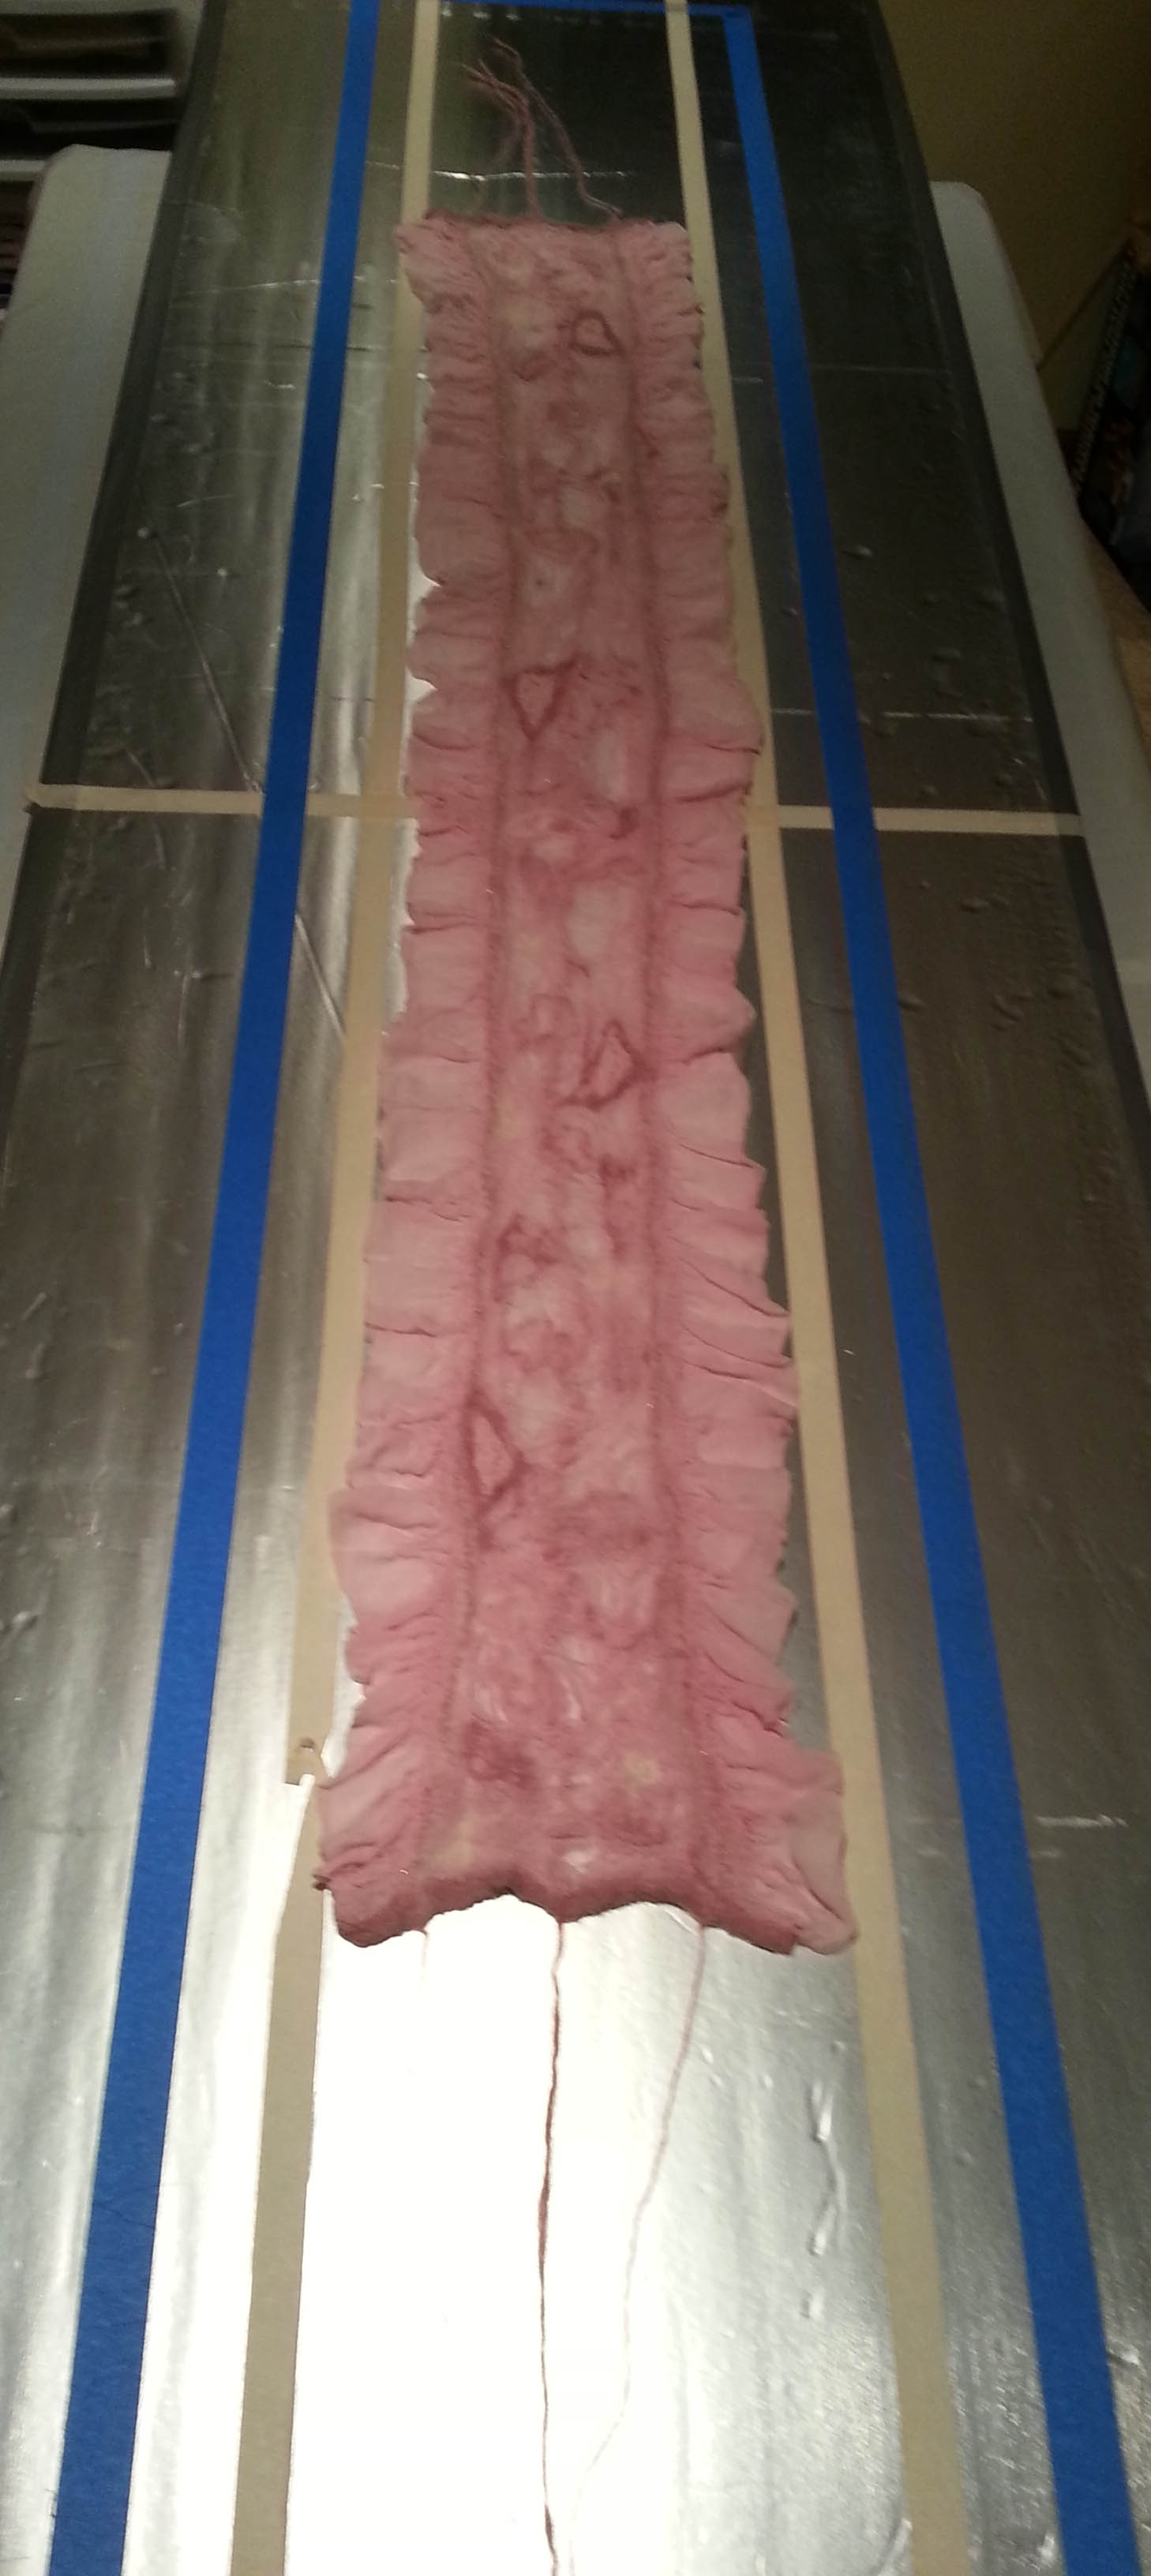
I personally like the feel of silk. So, I decided to learn to make a silk ruffled edge on a scarf. This was an experiment for the ruffle and using a few other techniques with different fabrics and yarns. While I’m not a pink person, I thought if this turned out well I’d give it as a gift or sell it.
Before starting, I decided to make the scarf two-sided. So, I had to use flipping boards which I marked off with two colors of tape. Blue to show the outside lines of the ruffle and regular masking tape for the place to join the edge of the silk ruffle and the inside design area.
I used a piece of hand dyed pink chiffon. The chiffon shrank a little with the dyeing process, so I allowed for some more during felting. The piece measured 20 1/2′ by 86″ (52 cm x 218.44 cm) to start with before folding over 2″ (5.08 cm) on each side for the ruffle. I used a ruler and iron as I went along . To make sure the silk edge stayed down, I used fabric glue along the edge. This dissolved during the felting.
The flipping boards are from insulation board I bought from the local hardware store. They were kind enough to cut it in half lengthwise for me. I covered the edges in duct tape to protect them from water damage.
I carefully laid the silk open edge up following the lines on the board. I put wisps of pink and white roving lengthwise along the ruffle edges careful to have a little over each side of the raw edge. Because the wool will shrink lengthwise it gathers up the material on both sides creating the ruffle. I used some pink mohair yarn in a design down the middle and left fringe hanging on both ends. I covered the raw edges with wisps of wool.
I used some tencel in addition to random wisps of wool for ruching and two different yarns to decorate the first side.
When the first side was done, I very carefully rolled plastic wrap (out of the box) over the first side. I cut it off with a scissors a little longer than the design. Since the wrap as not as wide as the design, I had to overlap a second layer in the center to cover the width. Rolling the wrap helps keep the design in place and creates less static than trying to pull a piece off and laying it over the design. Using my hands, I gently pressed down along the design to remove any air bubbles. You could also use a rolling pin or foam noodle.
I covered the plastic with bubble wrap bubbles down. Then I placed the second board on top being careful not to disturb the design. I secured the boards with panty hose tied tightly in three places along the board. Then I carefully flipped the boards. It’s best to do if you have help, but not necessary if you have enough room to do so without juggling it around. Any kind of ties would work as long as you can secure them tightly without disturbing the design. I just had an abundance of old pantyhose.
My table is shorter than the boards, so I made sure the boards were centered over the table. The last thing I wanted was for the scarf to go sliding to the floor. After removing the ties, I used a chop stick to gently lift it slightly to make sure the design hadn’t been disturbed and lifted up slowly. Any static can cause the silk, wool and decorations to shift.
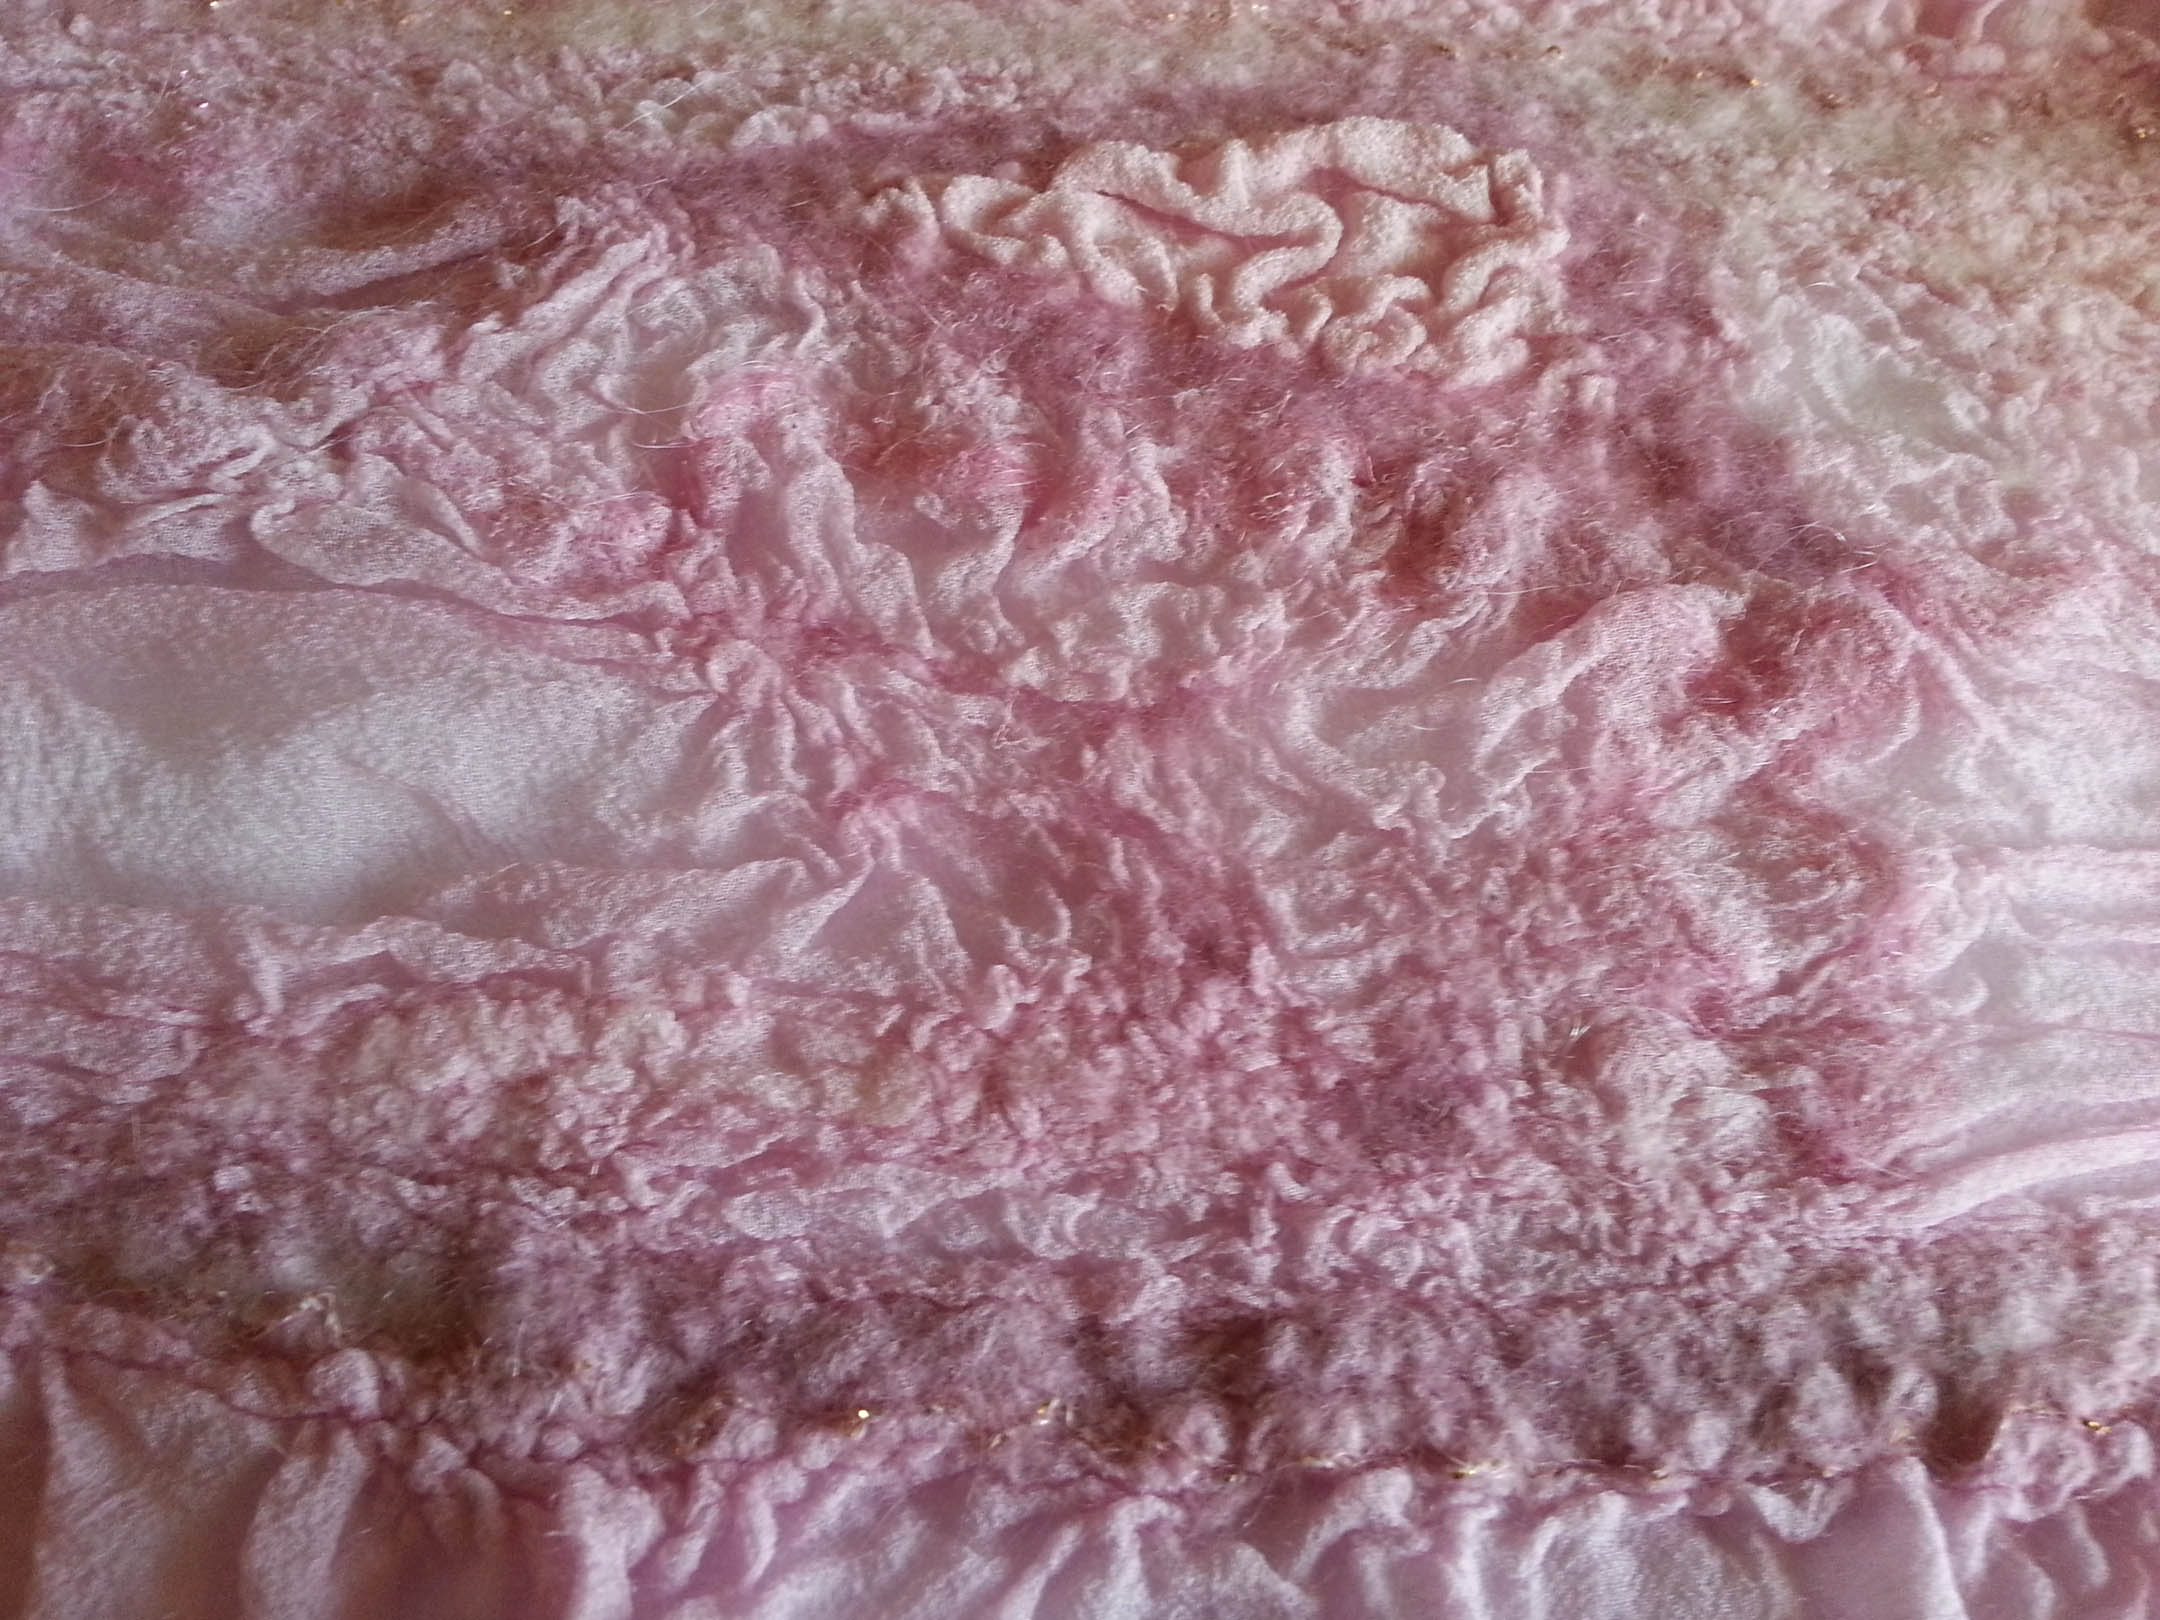
On the second side, I used pieces of silk gauze and a sparkly open weave fabric (different shapes with wool under and along the edges) and a pin/gold mohair yarn along the center of the ruffle seam on each side leaving fringes on each end. I covered the raw edges of the ends with wool and used some of the pink/gold yarn across.
When I was satisfied with the design, I covered this side with netting and began wetting it down with room temperature soapy water (for me this usually turns cold quickly since I work in a cold basement.) For this project, I used a sprayer with a few drops of Dawn dish soap being careful not to over wet it. Then I used a foam roller and rolled over the scarf to help disperse the water more evenly. I checked for dry and overly wet spots. I used a sponge to pick up excess water and applied more water to dry areas.
Then I began rolling, starting at one end using a foam pool noodle cut to size. I rolled for ten minutes, unwrapped and started the roll from the opposite end. I did this several more times check to see how well the fibers were starting to felt on both sides and everything was evenly wet. I started with light pressure and increased a little more with each roll. When I thought the fibers were starting to felt, I flipped it over, removed the plastic wrap and started again alternating the direction of the rolling and increasing pressure.
There were a few spots of the dark pink yarn in the center that weren’t sticking, so I re-wet those areas with soapier water and continued to roll. Now, I would just run the soap bar over the netting and rub.
After I finished rolling, I used hot slightly soapy water to full on the glass bead board rubbing in all directions, but particularly lengthwise along the ruffle lines. I flipped it over and repeated the process. Then I took it to the sink and ran it under hot then cold water while scrunching it up and throwing the wet scarf in the sink. (I can’t help myself, I love that part.) I let it sit in a vinegar water bath for 15 minutes, then rinsed and laid it out on towels to dry.
The next day I measured the scarf. It was 9″ x 55″ (22.86 cm x 139.7 cm) without the fringe. The shrinkage was approximately 36-38% in each direction. There were a couple of spots that needed attention so I needle felted them down.
Side 1Side 2
I learned several things with this project. The more wool you use along the ruffle line, the more ruffles you’ll get. The ruffle didn’t shrink much, so the next one I made used a narrower ruffle and more wool along the ruffle seam and I got a much better ruffle. I didn’t use that as an example because it was black and it would have been hard to see. The pink was good to use for a first time because I could see where I had the design on the back side. While I was satisfied with the ruffles and ruching, I wasn’t in love with the scarf. But it was an excellent learning experience. I hope this process will help those of you who would like to try a ruffled silk scarf.
Last week end a friend Dianne Lemire and I went down to our friends Maureen Harding’s place for a felters weekend. Another friend Susan came on Friday to felt with us. It is so much fun to spend a week end with other people that love to felt.
I wanted to make a new little purse to use at shows. First I did a black one with a nice blue silk inside and a pocket. For the design on the flap I balled up some peices of orange silk and wound them up with thread to keep them in a ball.
I used a piece of black prefelt to cover them. Then some silk roving to make them look more like a swirl. I used a scrap of commercial prefelt but you could make a piece of your own. Once it was dry I cut the tops off the raised peices to reveal the bright colour underneath.
This is the inside with the pocket and you can see I added an orange nuno swirl that is hidden by the front flap.
Black is great but I decided I needed something brighter as well so I went with a multi coloured roving in orange.
I added a pocket to this one too. Here you can see I forgot to add soap to the water and it sits on the wool in beads. I think its a cool picture.
I used the flat glass “marbles” that they sell for decorating instead of silk balls this time. You can really see the out line of the marbles on the inside of the flap
I made a long snake to use as a strap. It is long enough to wrap around my waist or use as a shoulder bad depending on what I am wearing. I will put some grommets in the ends and 2 on the back to thread the rope through.
The holes I cut to reveal the marbles are not very big. I think I will probably enlarge them. I will post a picture when the grommets are in and the holes are bigger.
I will show you more form our felting weekend in my next post.
Last time I showed you my necklace with the balls inside. http://wp.me/p1WEqk-1WL Next was cutting some of the ball out.
At this point I still like the idea of a necklace but have no idea how to sting it. To me it needs a chunky chain or something to go with it. I suppose I could make some felt snakes for it but I like necklaces to sit fairly high so It would need a clasp and I don’t know how to do that. I decided to make it into a bracelet. I added a nice button that matches the inside of the bubbles. I did a blanket stitch around the buttonhole to stabilise it.
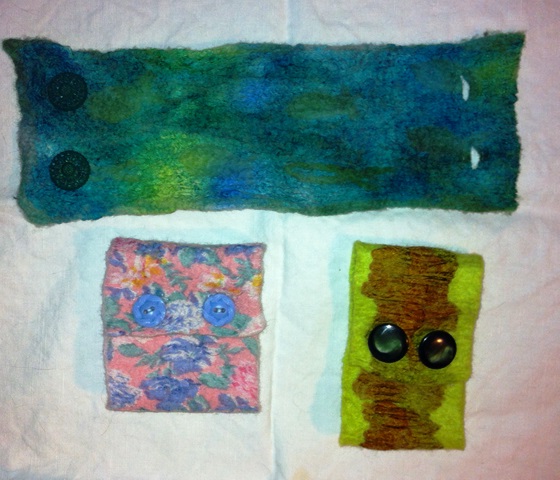
While I was in the mood I finished up 2 samples for a class I am teaching in May. This is a 2 hour class so it had to be small and fast. This is a class I don’t get paid to do so I am sort of testing out an idea too. I am thinking of proposing it as a class at an upcoming fiber event. I am writing instructions for it and thinking maybe I would make up some kits to sell.
The one a the top is an older one and the other 2 are the new ones. I don’t much like the pink and blue flower on but everyone I show it to likes it so I guess it’s just me. I think it’s because I don’t much like the fabric and it doesn’t have much texture and that’s what I like about nuno felt.
We would like you to meet one of our sponsors and a friend of mine Maureen Harding of Dreamspin fibres. We met a few years ago at a fiber conference and became friends. We live far enough apart that we only get together a few times a year but we always have a great time felting and trying new things. She doesn’t mention it here but she has a sale on select fibers at the moment.
Q-4 Three types of fibre you can’t live without?
Merino, silks, silk fabric but other fibres depending on the project
Q-3 Have you always been a felter?
I’ve been felting for 15 years, before that I was spinning and knitting.
Q-2 Two tools you use all the time?
Pool noodle and plastic window screening. (and ball brause)
Q-1 One fibre art technique you love the most?
I have to say felting. But also enjoy spinning and knitting
What is your business?
We sell wools, prefelts, fabrics for nuno felting, a few felting tools, mostly for felters.
Why and when did you start selling fiber?
It was an outgrowth of my interest in sheep and wools. Initially I raised sheep, learned to spin, learned to felt, and started buying other fibres wholesale for my own purposes. After a while I started selling fibres at fibreart venues and would make up articles to show what can be done with the fibres. People started asking me if I would teach them how, and this led to doing workshops in felting.
What kind of items do you sell?
As well as fibres for felters, I also sell felted articles such as nuno scarves, felted hats, and felted bags at various shows throughout the year.
What do you think makes your business different from similar ones?
We pride ourselves on our fast service, orders are made out the same or the next day. We offer free shipping on orders over $100 in North America. And we are always happy to offer assistance and advice over the phone, or email.
We have a guest post today from Cathy (Luvswool on the forum) about Nuno Felting.
***
CATHY’S NUNO FELT PROJECTS:
Following are my three attempts at nuno felting, none of which has been very successful. I am posting here, hoping to get some recommendations. Any advice offered will be welcome. While I understand it’s difficult to compare processes–you will not know exactly what kind of wool I used, what temperature the water was, the quality of my silk–still I hope the photos will help explain.
After having watched numerous videos and studying books on nuno felting, I purchased some silk scarves (silk gauze) from an Etsy shop. These scarves were approximately 12 x 57 inches and particularly recommended by the shop owner for nuno felting. I wanted to make a scarf that looked light and lacy with some silk showing, so I used wisps of Merino wool and some silk hanky pieces which I lightly placed on top of the peachy/orange silk scarf, just one layer. (Sorry, no “before” photos)
After following the nuno felt instructions carefully, I ended up with some of the pieces felted and some not, as you can see from above photos. Not a good start. Figured it could be the silk quality or the water temperature? Not enough wool? I set the project aside.
Project #2 – I had some silk scraps from vintage Japanese kimonos, and thought I should do some samples before attempting another “real” project. So I used white and red Merino wool on top of silk, lightly nuno felted to make “pre felts”. Silk scraps literally peeled away when I lifted the corners to check on my progress.
Project #3 – I purchased a remnant of beige silk chiffon from a nearby shop, Vogue Fabrics, which has an amazing selection of fabric, including lots of gorgeous silks. Huge remnant section so I did not need to break the bank. Clerk did a “burn test’ so I was assured to be purchasing silk, not synthetic fabric.
I used three layers of wool, not being sure this was actually Merino, since I bought this on ebay and the seller was unsure what type of sheep’s wool. It felt a bit rougher than the soft Merino I usually use, but nothing to lose, right? Although I did not photograph my first go-around, there were approximately 20 “holes,” that is, I could see the beige chiffon through the wool (nickel to quarter size holes), and it did not look good. Underside after nuno felting:
Next I needle-felted the same wool, along with some light green Merino wool, onto the holes.
Then I wet-felted the entire piece. After rolling, I rinsed in hot and cold water, fulling (throwing in sink), vinegar dip & cold water rinse.
Now it looks better, but I still do not consider it to be a successful nuno felt project.
Project #4 — Here is my piece of light green silk gauze (as purchased from Etsy shop mentioned in Project #1) ready to be nuno felted. Awaiting your suggestions and comments!
For once, I didn’t leave it until the last minute to start on my piece for the Studio Challenge! I was hoping to take photos of the whole process of making the batt for the top layer, but I’ve moved all my stuff downstairs and it’s really dark so the photos didn’t turn out. For anyone who’s forgotten, this quarter’s challenge is ‘Autumn’. The oranges, rusts, yellows and reds associated with autumn are one of my favourite colour themes, so I have a nice collection of embellishments in these colours. I made a piece large enough to make a book cover out of and have plenty of felt spare to make closure flaps and straps:
I don’t usually add wisps over my surface embellishments, but I wanted a look of them being more ‘submerged’ and part of the surface than on it. Some yellow cotton gauze:
A red and yellow piece of silk:
And a dyed lock of Bluefaced Leicester:
I also nuno felted my new fabrics this week. I only managed to get a clear photo of this one so far, it’s very dark again today. This is a nice patterned grey/blue and pink georgette fabric.
It didn’t attach very well in some places, it’s a bit ‘slick’, but where it did attach, it rippled nicely:
Christmas is coming so I am still working on fingerless mitts for my guild sale the first weekend in November. One of my scarves made the poster.
I decided to try an experiment with a couple of pairs of Mitts. I wanted to make long cuts to reveal another colour. I wrapped some shrink tubing and some regular tubing like you might use in a fish tank in some wool. I gave it a quick felt to get the wool tight around the tube. I thought this might be the best way to keep the fibers where I wanted them. I placed them between the layers of the mitts.
It worked really well. After I cut the felt and took the tubes out I steamed them and opened up the slits. They are purple and pink and pink and purple but the cameras seems to think the purple is blue. I think it is because the wool of the table is so yellow.
This is what they look like on. Sorry the pictures are bad I had to take it on my own arm.
They turned out really well . I think I could have used less wool around the inclusions. I think I might felt them more next time too.
the other thing I did recently was make a matching set of hat and mitts. I added some silk to both, scrunching it up to make it very textured. One small part didn’t stick down properly on the hat and will need a couple of stitches.
I have more hats on the go and need to do some scarves before the sale but I think things are going well so far. Have you tried anything new recently?
Our guest writer today is Terriea Kwong who has very kindly written a tutorial for us about eco printing onto silk.
********
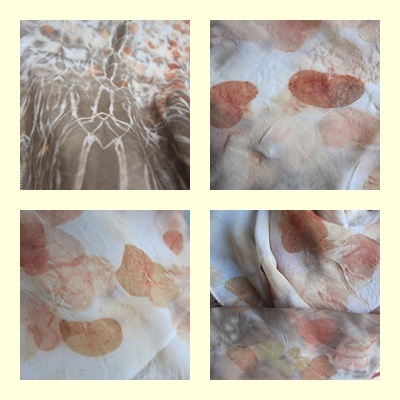
This is the basic and simple way to do prints on silk chiffon.
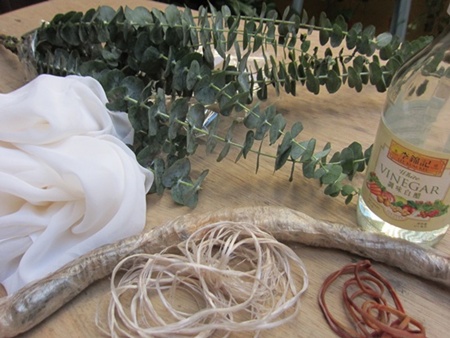
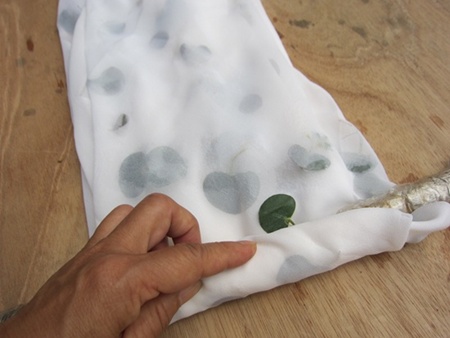
1. Materials used : eucalyptus cinerea leaves (silver dollar), 100% silk chiffon, vinegar, paper core roll, string and rubber bands. Well wash the fabric before use. Can be used when it’s wet or after it’s dried.
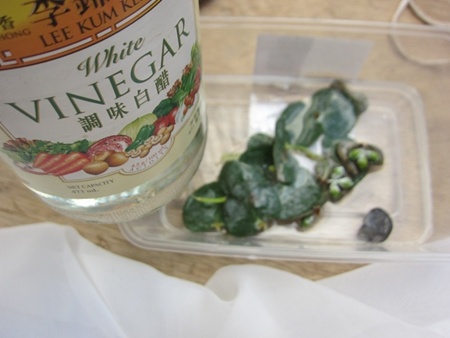
2. Before putting leaves over the chiffon, dip in vinegar water.
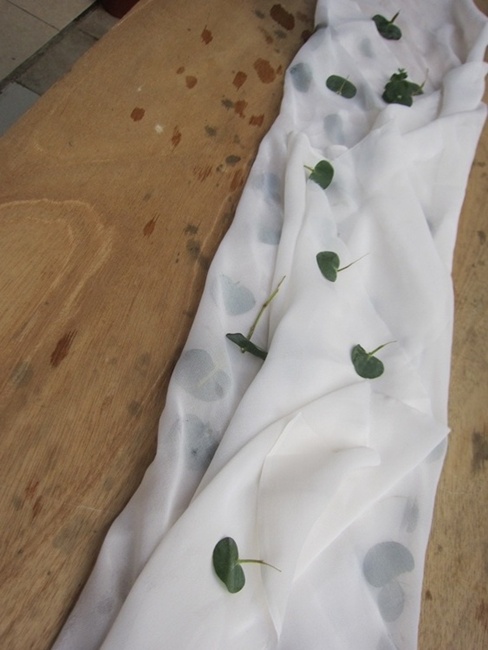
3. Put the leaves over chiffon, 2-3 folds diagonally, put a little more leaves over it.
4. Then half fold it.
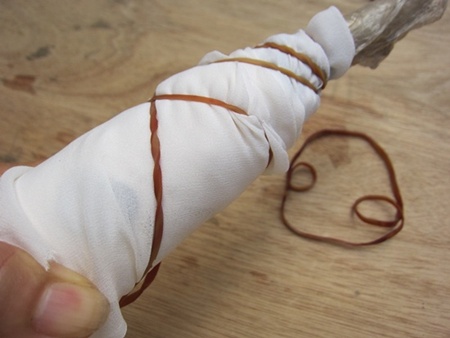
5. Roll up with the paper core roll tightly.
6. Bundle with rubber band, then tie with string.
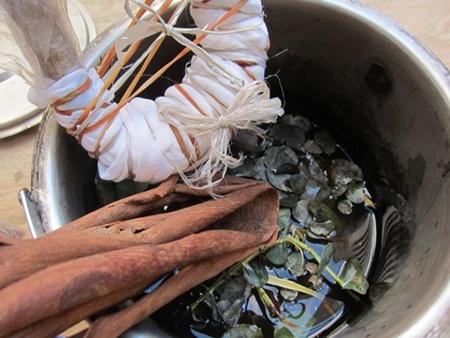
7. Boil with some eucalyptus barks and the same sort of euc leaves (silver dollar) with 1/4 cup of vinegar.
8. After 1.5-2 hours boiling, unbundle it. The dye pot can be re-used.
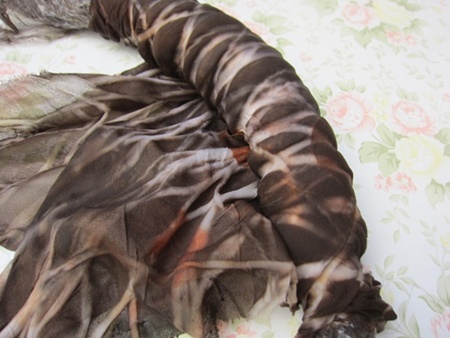
9. Dark when it’s still wet.
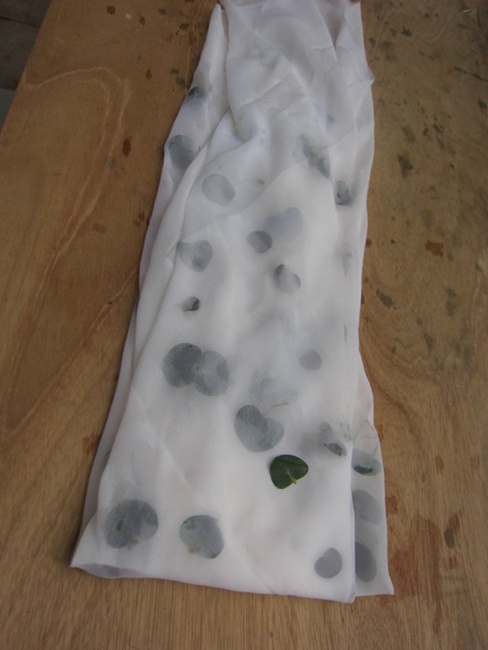
10. Remove all leaves.
11. Dry in shade, then rinse and dry in air.
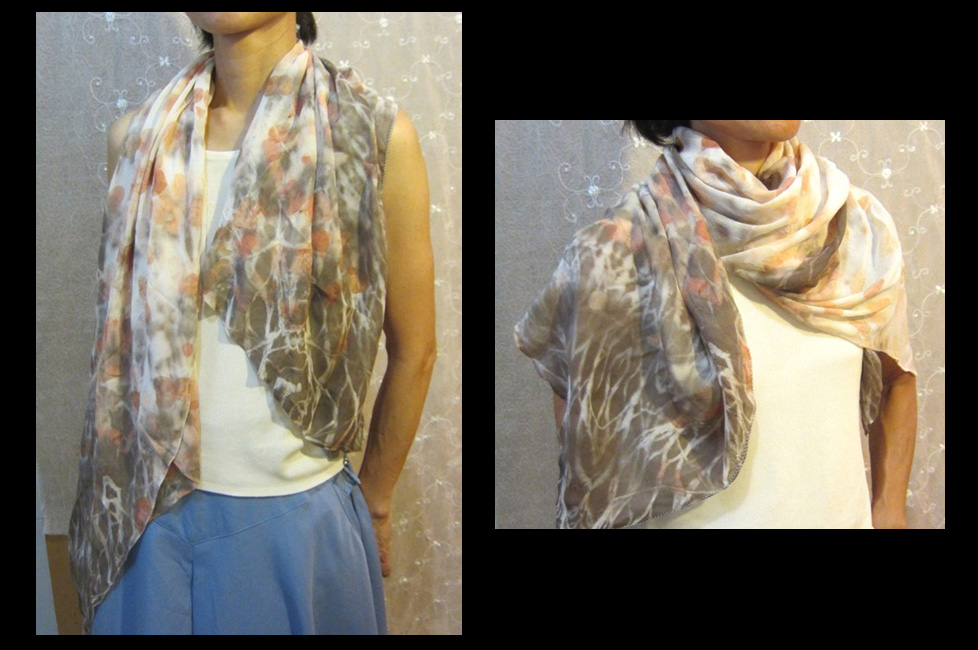
12. A scarf is made.
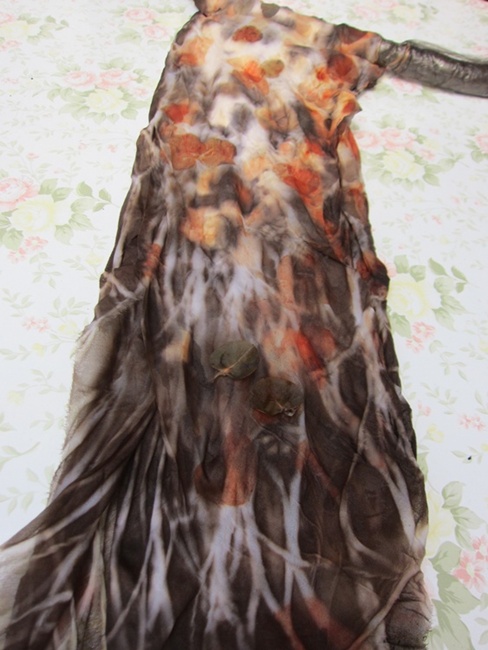
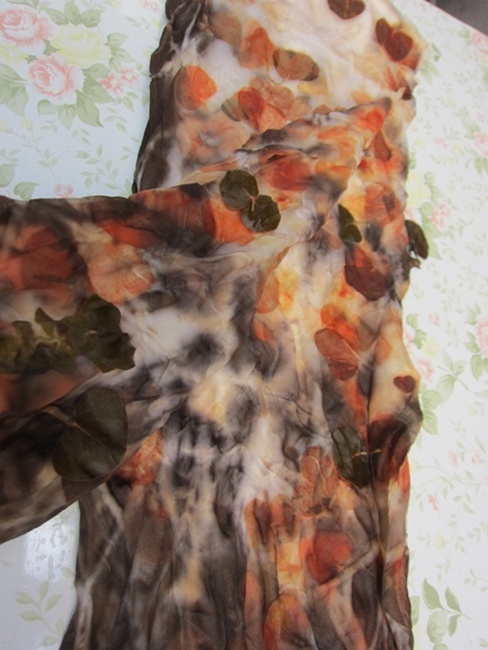
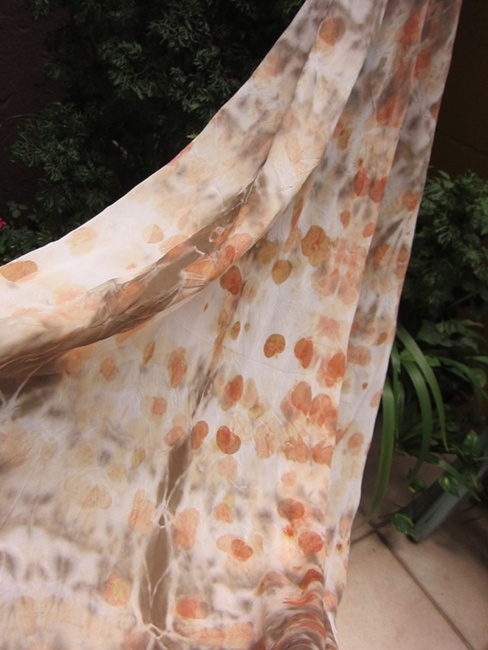
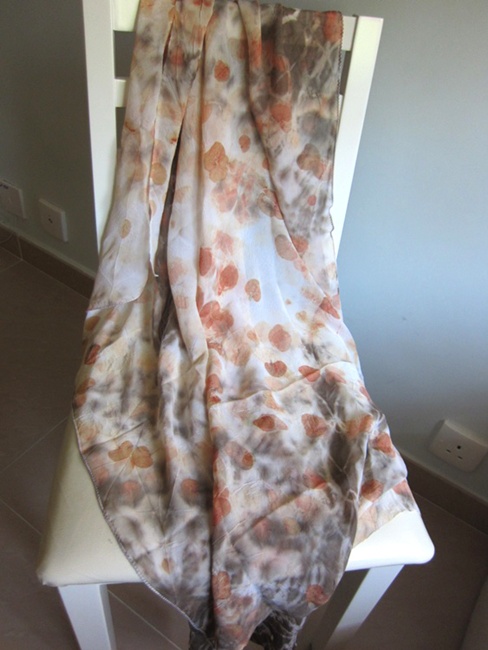
Tie lines and shades of eucalyptus leaves prints:
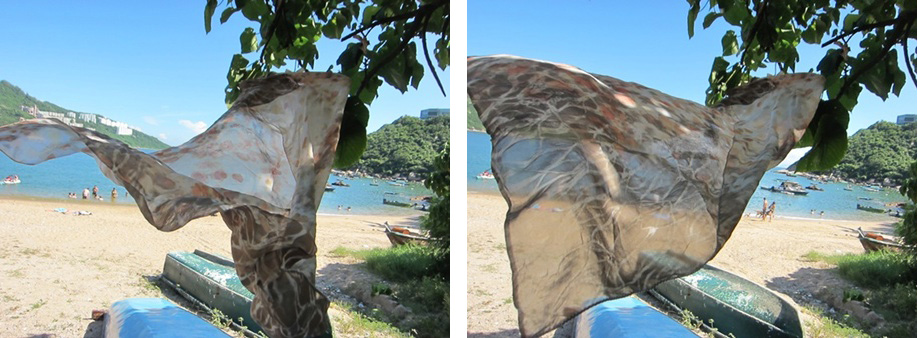
Soft and airy scarf:
This is silk chiffon, so color is a bit soft:
I’m pleased to share with like-minded and workshops can be arranged individually. Contacts via below:
Thanks a lot to Terriea for this excellent guide to eco-printing and dyeing 🙂 Terrie gets great results printing and dyeing, here is a gallery of some of her other work:
Every quarter on the forum we do a challenge. http://feltandfiberstudio.proboards.com/thread/622/second-quarter-challenge I thought I better get on with it myself before the challenge runs out. I challenged people to try nuno felting or to try it on something they hadn’t before. I decided to try some fabrics that I wasn’t sure would work, to see what would happen. There are lots of pictures. I did shrink them so I hope they don’t overwhelm anyone’s computer connection.
For all the pieces I used merino wool in a contrasting colour so I could see how the wool migrated better.
The first is a polyester knit that is like t-shirt material. It feels a lot like cotton.
this is what it finished like. It worked really well. I think because it is a soft knit the fabric fibers could easily move out of the way letting the wool through.
This one is from a poly knit dress more like the polyester we used to wear in the 70’s.
It worked fairly well but it is heavier material and the wool didn’t come through as much.
These next two are different sides of the same silk fabric cut from a woven silk jacket. it was a pretty little jacket but small and out of date. The texture of the fabric is great, quite 3 dimensional. This is the right side.
I think it worked really well.
This is the wrong side.
It didn’t felt as well, I do not know why the fiber would not travel through fabric as well in this direction but as you can see not nearly as much wool migrated to the top.
Lastly is a mystery fabric. it is cut from a blouse. Both sewn into the seam together. one said 100% silk and the other said 100% polyester.
It did work very well but you can’t see its shine much at all. You do see it more in person.
There is still time to join in the challenge. Try something new or show us something old you tried that worked or didn’t. I think the failures or things that went sideways are sometimes the most interesting.


 The inside of the bag will have a red stripe. I used a combination of commercial prefelt and top. I also added some Blue Faced Lester wool to add some strength and stiffen it.
 This is the outside. There is black next to the resist and the white on top. I wanted the black to migrate through the white and make a light gray. This is the finished bag. its reversible.