Making a Shell
After seeing Helene use some prefelt ribbon, I decided to give it a try too. I am thinking of differential shrinkage to get the shape of a shell. I thought it might work well with a spider conch shell to make the ridges.
I got my ribbon from the Olive Sparrow in Toronto. She doesn’t have it on her Etsy, but if you contact her, she has it. You can, of course, make prefelt and cut strips. But this is a fast and easy way to get going.


I made a 2-part resist so there would be an overlap on one side.

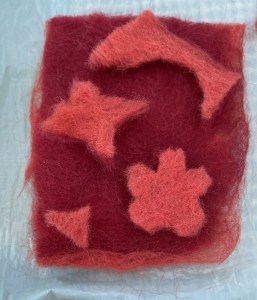
I made the inside pink, then added strips of the prefelt ribbon.

I added some blue for the outside. Sorry for the really bad picture.

Then of course the was lots of rubbing. I am using a rubbing tool from Moose Hill. It has a nice weight, not too heavy like others I have tried. I like to start gently. It does have a nice, wide handle, so it’s easy to hold and press down when that is what you want. Jan used my phone to take many of these pictures for me. She took about a dozen of this one, complaining that I was not smiling. Seems I do not smile when I am working.

Once it had shrunk a little, I cut out the resist and removed the non-spined side of the extra resist. If I left it, I think there would have been too much to curl inside for the middle of the shell. Then of course, fulling and shaping.


It wasn’t long into the fulling when I knew I had not used enough prefelt to get the differential shrinkage I wanted. I suppose I should have known better. But often that’s the way. You need to be reminded of what you already know.
Still, it didn’t turn out so bad


When I got home, I fulled the ridges in some and then clipped it all into shape to dry. As you can see, this made the base of the folded part pointy, and that remained after I took the clips off and let it spread out.

I wet just that part and fulled it back to round in a very short time. I had been anticipating a fight with it. I had tried to shrink this part more before clipping it with no success. This just reminded me of how, sometimes, it is easy to get more shrinkage after it has rested or dried and is rewet. I have no idea why that works, but it does.
After it was dry again, I was not happy with how the top with the points wanted to curl around instead of standing out, so I put a couple of invisible stitches at each end to hold it in position.


And finished. I like the finished shell, even if it didn’t go the way I planned.


I may give it another try over the summer, but as spring slowly arrives here( we had a little snow again the other day), I find I have lots of ideas and more energy to do things. I have things to make for the guild sale in the fall.