Cuffs and Stuff
A couple of years ago a friend alerted me to the wonderful Australian magazine simply called “Felt”. It’s only published twice a year but I look forward to it eagerly as it’s always crammed with interesting photographs and articles including artist profiles and project tutorials.

One of the artists featured in the latest edition is the Canadian born feltmaker Christianna Ferguson. Christianna’s work is very colourful and textural and, as well as teaching and exhibiting, she also creates what she calls “more functional art: scarves, purses, cuffs, tea-cosies and wearables.”

So, having read about her work, when I turned the page and saw the tutorial for making her fabulous little Nuno felted and hand embroidered cuffs I had to have a go!

The fasteners are particularly cute and make an interesting feature but I struggled to get them as firm as I would have liked. For an added twist I’ve included some hand stitching and a bead to my fasteners. I added some hand embroidery to my green cuff but wasn’t happy with it…..looking back at Christianna’s examples I can see that my stitching wasn’t subtle enough! I much prefer the grey one which I left plain.

The good thing to come out of this exercise, having made two in this style, is that I’ve been reminded how much fun cuffs are to make. I designed several Nuno felted & free motion stitched cuffs for my sales tables last year and this has encouraged me to get on and make more.


I also got thinking about other possibilities and how much more sculptural I could make my cuffs. The next set are based on the design of one of my bangles, using a felt ball as the fastener and keeping the little beaded element.


They were all fun to make but I’ve come to the conclusion that I prefer the irregular shaped, Nuno style with the stitched edging (from last year) so I’ve come full circle! These are two I started this morning…..

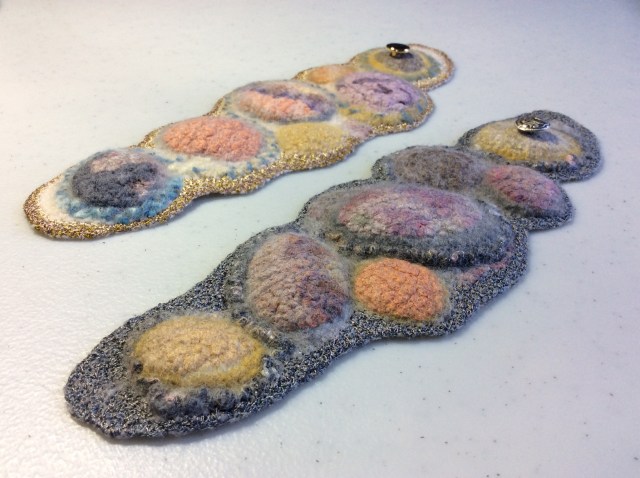
And this is them finished. Christianna said that when she makes hers “each cuff feels like a little piece of abstract art” and I couldn’t agree more. Although I love creating larger pieces of work there is something very satisfying about making these little cuffs and ending up with a totally unique, wearable item.


