Browsed by
Tag: merino

New Felted Hat in Progress

New Felted Hat in Progress

If you are on the forum you may have seen the resist for this hat in the daily dose of fiber thread for this month. daily-dose-fiber-october-2017

I used wool in 3 layers because I wanted most of the shrinkage to be around. I wanted some height to play with.

After I cut it open I worked the edges and the rest as normal but near the end I also cut the top part of the right hand curled brim. I worked those edges to get them sealed. the rinsed all the soap out and let it dry because I was out of time for a few days. Today I finally got some time to work on it some more. I wet it all down and popped it onto a regular hat block and twisted the two long cut pieces around each other and then curled the ends around some tiny “pool noodles” I over exposed the picture trying to get the twist to show but the wool is just to dark.

Then I put in two sloped folds and pinned them with the little double pins. I found them after spending half an hour trying to fined my T pins that I gave up on finding. I am sure they are somewhere that was logical at the time but isn’t any more. I am not sure how that happens but it happens to me all the time.

It is now drying. The hat is sitting on another flat toped hat block and the pop bottle is holding the rim up so it dries in a better position.

When it is all dry I will take a picture of it again and show it to you.

Have you been working on any new designs lately?


Nothing Spooky Here

Nothing Spooky Here

Update on Maneki-Neko:

I took Lyn’s advice and made the whiskers from wire.  Here is the new look.  I also decided to put her on a pedestal to see out the window rather than sitting on the windowsill.  I found an old pot and turned it upside down, but I’m thinking gold may be better.  Although, when she’s in the window you can’t see the pot.


I recently realized I needed to carry on my tradition of giving each grandchild a pumpkin wall hanging.  I have a new grandson, Ken who arrived early in April.

But I didn’t really have a nice orange to make the pumpkin.  So, I made a batt using hand dyed Corriedale, a funky orange pink merino, bright orange coarse commercial fiber, gold merino, hand dyed Domestic 56s with Logwood from Cathy and a touch of white.  You can see the batt in the back.  I think the color turned out well.  I also used the merino/silk mix for the stem that I had used in the Edo challenge with the Sakura branches.

I had made a sketch of how I wanted the pumpkin to look.  A bit different than his sister Lisa’s girly pumpkin from last year.

Of course, I got into laying it out and cutting the prefelts and forgot to take pictures.  But here is Ken’s dried pumpkin.

Then after a little shave.

Now I guess I’d better start thinking about the upcoming holidays.  Did you do anything for Halloween?

Pandagirl’s Maneki-Neko for 2017 3rd Quarter Challenge Part 1

Pandagirl’s Maneki-Neko for 2017 3rd Quarter Challenge Part 1

I’ve still been in the mood to explore the Edo Period.  I remembered when my oldest son was in high school and brought home a Japanese exchange student who gave us a little kitty statute to bring prosperity to our home.

Of course, when I looked for it I couldn’t find it, but found plenty of pictures on the Internet.  It is technically called Maneki-neko which means “beckoning cat.” Of course,  there are many stories behind the cat.  You can read a few of them here:

https://www.tofugu.com/japan/maneki-neko/

There are also different meanings and results for different colored cats.  I chose black since it helps with good health (or getting rid of evil spirits).  Different writings have different meanings.  I did see one for green for good health, but I just wasn’t ready for a green cat.

Normally the traditional white cat brings wealth and prosperity and is seen in Asian restaurants and shops.  There is also confusion as to whether it is Japanese or Chinese.  It was the Japanese in the Edo period who developed this character.

I knew it was going to be a bit more complex than just making a resist for a pod.  Since I didn’t have a particular size in mind, I just made a resist I felt I could get enough detail on and manage.

I used prefelts for the first layer and merino wisps for the sides.  I also added needle felted noses, cheeks and prefelt and cotton batting for the one arm. Then added three layers of corriedale putting the eyes under the last two and prefelt for the ears.  On the back I also made a small tail using needle felted Jacob wool.  Not much of it is visible on the wet cat.

Then I added some silk with throwsters waste to add a little bling.

Then I fulled it and stuffed it with bubblewrap to give it some shape.  I did forget to open the eyes.

I rewet it and opened the eyes. So, next I will have to add all the details needed to finish.

Stay tuned!

Pandagirl’s 2017 3rd Quarter Challenge Part 1

Pandagirl’s 2017 3rd Quarter Challenge Part 1

It took me a while to decide what I wanted to do for the challenge of the Edo period in Japan.  I was drawn to the simple scrolls with flowers and branches.

https://feltingandfiberstudio.com/2017/07/07/3rd-quarter-challenge-2017/

I scoured the museum sites and Pinterest.  I’ve been to Japan during Sakura (Cherry Blossom) season and particularly love the trees and flowers so it wasn’t too hard to narrow it down.

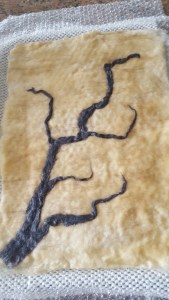
Since the scrolls seemed to be pale yellow, I made a batt backing then made another light batt using the Osage hand dyed merino and corriedale as a background. I added some darker fibers randomly to give the effect of lines in a scroll.

I had some left over merino/silk scraps from a scarf I had made for my son years ago.  They were supposed to be tassels, but I didn’t like them and cut them off and saved them.  But they make perfect tree branches.  Here is my first layout.

But something was off.  It didn’t feel right to me.  So, I rearranged the branches.

Next was to make white prefelt for the flowers (commercial wasn’t white enough) and cutting out the shapes in several sizes.  This was not an easy process. Here it is a wet look. The neat thing about the layout is that the branch can be down or up.

I didn’t want to felt it too hard.  But I may have to steam it before or after I add either hand or machine embroidery for details.

Actually the photo shows more texture than with the naked eye.

How do you like the branch, down or up?


2017 Second Quarter Challenge

2017 Second Quarter Challenge

At the beginning of this quarter, Ann had posted about this quarters challenge theme being early Celtic.

https://feltingandfiberstudio.com/2017/03/31/second-quarter-challenge-3/

I thought a lot about it and had several ideas, but wasn’t sure I could pull them off.  One of them was a pod with spirals.  Lyn got to it before me, but of course as she said, everyone does things differently.  So, I did.

I had some Llama yarn I hand dyed years ago in several colors.  I decided to use that for the spirals.  I made a little bit larger pod than usual in order to accommodate the design.  I laid one layer of Merino on each side, then two layers of Corriedale and a final layer of Merino.  I felt this would give the pod some substance.  Here is the start of the topside design.

Full design wetted down.

Bottom (I ran out of turquoise so I used yellow.)   I had actually had a yellow spiral on the bottom, but forgot to flip it over before starting the topside design so it ended up being cut out.

I did a lot of rubbing to get the design to stay, but the Llama was not cooperating.   It was felting to itself and not the Merino.  Frustrated, I let it dry out then needle felted the design in place.  That did the trick, but the Llama shed everywhere and blurred the design.

I tried shaving and shipping tape it but wasn’t helping.  So, I grabbed my tweezers and embroidery scissors and sat for an hour pulling long hairs out of the design.  There is still more I could have pulled out but goal was to get the black to look black and set off the design.

Much better.

I kept looking at the pod thinking it was out of shape, but it finally occurred to me it was an optical illusion because of the design.

As for the Llama, I thought I had used it before and if I did I didn’t remember it being problematic.  I don’t think I’ll be using it again.

Have you done the challenge yet?  You can post your work on the forum any time, but we’ll be announcing the next challenge soon.

Happy Valentine’s Day

Happy Valentine’s Day

I know its a day late, so I hope everyone had a good Valentines Day with their loved ones.

I decided this year to make my granddaughter, Lisa, a little heart purse.  She likes to put things in containers and take them out.

I used a heart shaped resist and two layers on each side. I know it’s not a perfect heart shape. Its hard to get sharp corners.

20170209_165749

When it was dry, I used some white bamboo yarn and couched her name on the purse.

20170210_122231

I added a ribbon for a handle with a bow at the top.  Inside I sewed the ribbon down the sides to give it a little strength.

20170210_124157-1

20170210_124131

Then finally I put in a little box of chocolates with a Beagle on it.  While she probably won’t be able to eat the chocolate, she’ll get a kick out of the dog which looks like her doggie sister Koyuki.  Sorry about the dark picture it looked much lighter on my camera screen.

20170210_124256

I’m working on my challenge piece which is taking longer than expected so I needed something short and sweet for today.  😉

Did you do something felt related for Valentine’s Day?

More Natural Dyeing with Cochineal

More Natural Dyeing with Cochineal

This is the last of my summer experiments with natural dyeing.  Cochineal are those little scale insects that are picked off of cacti.

cochineal

I’ve seen some really nice results using cochineal such as Nada’s experience she posted on the forum this summer.

As with my previous experiments, I used small amounts of silk habatoi, silk gauze, silk mulberry, wool yarn, and merino and corriedale rovings.  They were pre-mordanted.

The cochineal had to be ground.  I used a wooden mortar and pestle, then put them in a blender, then made it into a paste before adding boiling water.

The mixture was then left overnight before adding to the pot. (This was divided into three parts first to use with different modifiers.)

The first pot I used only cochineal.

20160625_155500The second I modified with cream of tartar.

20160626_153605

The last I added iron.

20160626_153855

After each batch was removed from the pot, I left it “cure” for two days.  Since I didn’t have both the a lot of room to spread them out I left them bunched up hence the lines. They also dried much lighter as you’ll see.

20160626_153611-1

This was cochineal with cream of tartar.  You can see the little bits of bugs on them.20160628_112634Once they were cured, I rinsed them out and hung them to dry.

20160628_112751

Cochineal only.

20160629_120347

With cream of tartar modifier. A nice bright pink.

20160701_155219

With the iron modifier.

20160701_154915

While the results were not exactly what I expected, I believe because the bugs weren’t finely ground I got lighter colors.  I may over dye the first batch when I find an electric grinder.  If I had to order cochineal again, I’d look for powder.

Have you done any natural dyeing lately?


Natural Dyeing with Cutch, Rhubarb and Indigo

Natural Dyeing with Cutch, Rhubarb and Indigo

This summer I’ve been playing with a lot of natural dyes with the help of Cathy (Luvswool).  This is the third in my series of natural dyeing experiments.

As with the other dyeing sessions all the silk and wool rovings were mordanted with alum potassium sulfate.  I used the same silk habotai, silk gauze, silk organza, merino and corriedale roving and wool yarn as I did in my previous experiments.

I started with cutch which was in powder form.

20160629_131153

The colors for silk and wool were pretty much the same gold peach except for the the organza which seemed to soak up all the color.

20160630_112547

20160701_155539

I decided that I wouldn’t use a modifier with the Cutch because I had enough browns and goldens.

So, I moved on to rhubarb liquid extract.

20160702_123135

The resulting colors were also in the peach/gold family.

20160702_142739 20160703_115005

A couple of years ago Cathy and I had an indigo dyeing day.  I had a piece of dark crimped silk left over and decided to use this as a modifier for the second rhubarb batch.

20160630_113531

I thought perhaps I’d get a muted green, but here’s what I did get:

20160703_115958 20160907_124311-1

There is a hint of green, but it’s not obvious in these pics. the silk gauze and habotai closest to a light turquoise.  The organza is dusky turquoise blue.  The wool is more of a baby blue.

Here is the indigo silk piece after being used as a modifier.  Still a nice indigo color.

20160907_124630-1

Have you done any natural dyeing this season?

Playing with Natural Dyes Part 2

Playing with Natural Dyes Part 2

I’ve been trying out different natural dyes using similar materials.  This time I tried alkanet roots and logwood with and without iron.

Here are the alkanet roots before preparation which took two days to get ready to use.

20160629_115247

The logwood also had to be prepared ahead of time.

20160629_115247_edited-1

Again, I used mordanted corriedale and merino roving, mulberry silk, wool yarn, silk habotai and silk gauze as I did in my previous post  https://feltingandfiberstudio.com/2016/06/28/playing-with-natural-dyes-part-1/

According to some of the charts I saw on the colors to expect from the alkanet roots, it could be anything from gray to deep purple.  I had also read it was possible for blues or even red.  As you can see from the pot, there was a light purple tinge to the water. The dye liquor was definitely dark purple but then it was diluted with the water.

aklanet only pot


The result was a silver gray.  For all the experiments I leave the pot to cool overnight to get the most color.  This was a lot less than i expected, but its a pretty color.

alkanet

The next step was to add iron to the pot with another set of materials.

alkanet with iron wet alkanet with iron

The top picture is wet, the bottom is dry.  So, I now have silver and gold colors.

Next was the logwood. From all the pictures I’d seen and roving Cathy had dyed in Arkansas I thought I would get some type of purple.  It looked pale in the pot.

logwood pot

So, I was surprised when it dried and it was more of a taupe color. But surprises are half the fun!  Then I added iron and did another batch.

logwood side by side logwood iron top wo bottom

The darker ones on the bottom are with the iron and its more of a charcoal color.

Again, these are all experiments and results can vary depending on water, temperature, etc.  While I had a little different expectations, I’m not unhappy with the results.  I can always overdye.

What have your experiences with natural dyeing been?


Batts and Roving

Batts and Roving

The last time I did a World of Wool order, I got some Botany Lap Waste. If you’ve not heard of this it’s basically a huge bin they have at WoW, where they put the left over tops from the ends of carding runs, and when you order some they grab 500g out of the bin and you get what you’re given, but it is cheaper than Merino or blends and sometimes you get a lot of the luxury fibre like yak, alpaca etc. This time it seemed I got the ends of someone’s bizarre order of various greys, including what looked like natural grey Merino blended with trilobal nylon (why?!) I don’t know why they can’t have a ‘neutrals’ choice for browns, greys etc. The rest of my bag was a kind of dyed steel grey Merino,  some green Merino which looked like it was their Gooseberry shade, and some pinky pale lilac I didn’t recognise. I carded them all up into batts then put them through again with other Merino to make some blends. I put the lilac through with various shades of purple and a few blues. Then I used a diz (a brass picture hook with 3 holes) to make roving:

OLYMPUS DIGITAL CAMERAI made another batt with the same colours, but added some orange, pinks, yellow, red, and some brighter blues:

OLYMPUS DIGITAL CAMERAThis is what the roving looks like unwound:

OLYMPUS DIGITAL CAMERAI put the gooseberry batt through with some green shades and light/bright blues. I meant to make roving, but forgot, so I might put it through the carder again. One side:

OLYMPUS DIGITAL CAMERAThe other side:

OLYMPUS DIGITAL CAMERAI put half and half gooseberry and grey through the carder, and made roving:

OLYMPUS DIGITAL CAMERAWhen I was putting the batts and blends away in my Workshops Supplies tubs, I discovered some other odds and ends from when I did MakeFest last year. I might blend some of these greens with half the gooseberry batt I forgot to card:

OLYMPUS DIGITAL CAMERAI found some gorgeous (even if I do say so myself!) texturey batts I’d forgoten I’d made too. I might have to save these for when I get a spinning wheel to make some texturey yarn!:

OLYMPUS DIGITAL CAMERA