Browsed by
Tag: free motion machine stitching

Stitched Nuno Felted Paper Fabric Lamination Pieces

Stitched Nuno Felted Paper Fabric Lamination Pieces

I finally got around to adding some machine stitching to the nuno felted paper fabric lamination  pieces that I showed you here and here.

Stitched BearHere’s the bear. I started out by just outlining the bear but it hardly even looked like a bear. So I densely stitched the bear with dark brown thread. The background I just added some stitching in the trees with a grey green thread and the fallen tree with two colors of brown thread. The stitching holds the paper fabric lamination part down to the felt since it didn’t stick down during the nuno felting. I plan on making this into a photo album. I have to buy the inside photo album part before I can finish this as I don’t know what size to make it. I will show you the finished album when I get it done.

Photo FeltedThis is the before stitching photo. I definitely think the stitching helps to define the image.

writing in stitchOn the newspaper piece, I decided to stitch words of all the ways you can get your news these days. I used phrases such as twitter feed, news apps, 24/7 cable news, email alerts, search engines etc. Now I have to decide what to do with this one. I am thinking of making a wall hanging perhaps called “Death of the Newspaper”. Because it is small, I think it needs some type of background. Red would be a nice contrast so I looked in my stash of hand dyed fabrics and only came up with two pieces that were even close to red. Much more magenta than red though.

Choice of Background Fabric


Here’s the first one. It isn’t really big enough and seems much too pink for me.

Dyed Burlap + Newspaper?The second one is burlap and I like the color better although it is still very pink. Perhaps I should add more newspaper to the piece? So I put it on a recent paper. Now I’m thinking I need to make a larger piece of laminated paper fabric with newspaper and organza. Hmmm… What do you think? Any ideas or suggestions for me?


Nuno Felting with Fabric Paper Lamination

Nuno Felting with Fabric Paper Lamination

A couple of weeks ago, I posted about doing fabric paper lamination with my local surface design group. I used three of the pieces that I made to nuno felt the fabric paper on to wool. The process worked just like any other nuno felting. The important part is that there is plenty of organza around the image that has been laminated. The images themselves block the wool migration so you need to make sure that there is enough surrounding fabric for the wool to adhere around the image.

NewspaperI laid out the wool and then added the image on top. On two of the pieces, I added wisps of wool around the edges. This is the ink blot newspaper image on black short fiber merino.

PhotoHere’s the bear photo laid out on white merino. I thought I might make this into a book or photo album cover so I made it double the size of the photo.

FossilsAnd here’s the last one of fossils laid out on natural dyed wool (I think it is walnut but could be barberry.) I then felted as usual.

Newspaper FeltedHere is the result on the newspaper image.

Texture of NewspaperFrom this angle you can see the texture.

Photo Felted

Here’s the bear. The problem with the photo is that it is such a big section that doesn’t felt, just the edges are adhered. But it has possibilities, don’t you think?

Fossils Felted

This is the fossils after felting. I love the texture created with the organza, so organic.

Close Up of FossilsHere’s a little closer look. There was no real change in the fabric paper lamination part with the nuno felting.

Free Motion Machine StitchedI decided to add stitch to the fossils. I free motion machine stitched around the edge of the fossils with a dark, burnt orange thread.

Close Up of Stitched TextureThe fossils are now much more prominent with the stitching added.

Front of Phone SleeveI then made the fossil piece into a phone case. I obviously didn’t plan this in advance as the pattern isn’t well centered but I think I will add a button and loop at the top to keep the phone from sliding out. Anyone who knows me well will laugh at the idea of me making a phone case. I just got this new smart phone because hubby got a new one and could get a second phone for $10. I never use my cell phone. At least this one I have been leaving it on but since I don’t give out the number, no one ever calls. But now it will be safe in my bag 🙂

Back of Phone SleeveHere’s the back of the case. The sides of the felt were a bit wonky thus the wonky seam.

Stitch Closer ViewAnd one last close up. I really like how this technique worked and I think I will be doing some more of these. A couple of other people tried out the technique as well. Take a look at Teri Berry’s post and Kim Winter’s post where they tried out my idea for combining fabric paper lamination with nuno felting.

Fourth Quarter Studio Challenge – Autumn Scarf

Fourth Quarter Studio Challenge – Autumn Scarf

When Zed announced the 4th quarter challenge, I had already done some eco-printing on a couple of felt scarves. So I thought that this one would be the perfect project for the challenge. I wasn’t really happy with the results of the eco-printing and the scarf needed something more. So I took my mobius scarf which just happens to be a challenge piece from the “twisted” challenge and did some free motion machine stitching on it.

Natural Dyed, Free Motion Machine Stitched Felt ScarfI decided to use a variety of types of leaves and four different colored threads. Two of the threads were multi-colored threads and the others were red and orange to add a bit more color to the scarf.

Close Up - Free Motion StitchingI stitched aspen leaves, maple leaves and several other leaves that I had previously studied in my sketchbook.

Free Motion StitchingI always like to be able to refer to a photo or a sketch while I am free motion stitching.

More StitchingIt takes a bit of practice, but I love to stitch on felt.

Fall Leaves - Free Motion StitchingI’m not sure I “love” this scarf but I guess it looks better.

Free Motion Machine Stitched LeavesI think the orange and red thread is a bit bright. I might have liked it better if I just used the tan/brown thread. And then it would have been monochromatic too!

Free Motion Stitching on FeltBut it is finished and is my entry for Zed’s challenge.

Natural Dyed Felt Scarf with Free Motion Machine StitchingNow to see if I really wear it. I guess I’ll at least wear it for our cold autumn that we’re having here in Montana.

A Little Stich Practice

A Little Stich Practice

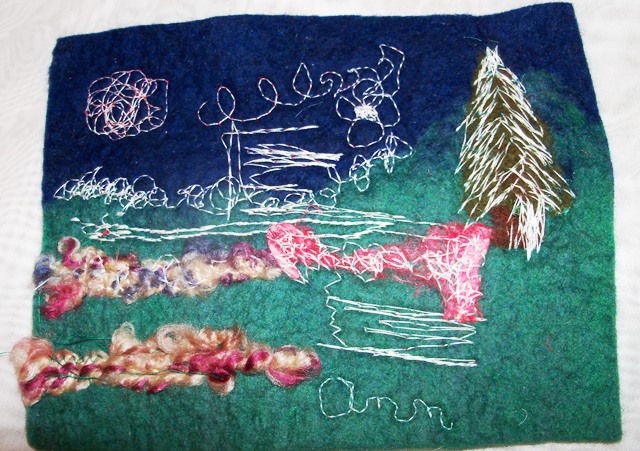
I finally put the free motion embroidery foot on my Sewing Machine.  I did a small sample to see what different movements did.  I used contrasting thread so I could see what I had done better. As you can see I did a few things. I tried to sew down some loopy yarn. this was hard. The yarn moves and you can’t really pin it very well. Its to easy to run the machine over the pins.

machine stitch sample

The solid red, with lots of stitching is a piece of silk  carrier rod. I tried moving the felt at different speeds and having the machine sew at different speeds.  Fast machine and slow hands seemed to work best so far. You can see near the end I was getting better at controlling what I was doing and managed to write my name. I like the way the stitching looks on the tree best, well the green part anyway.

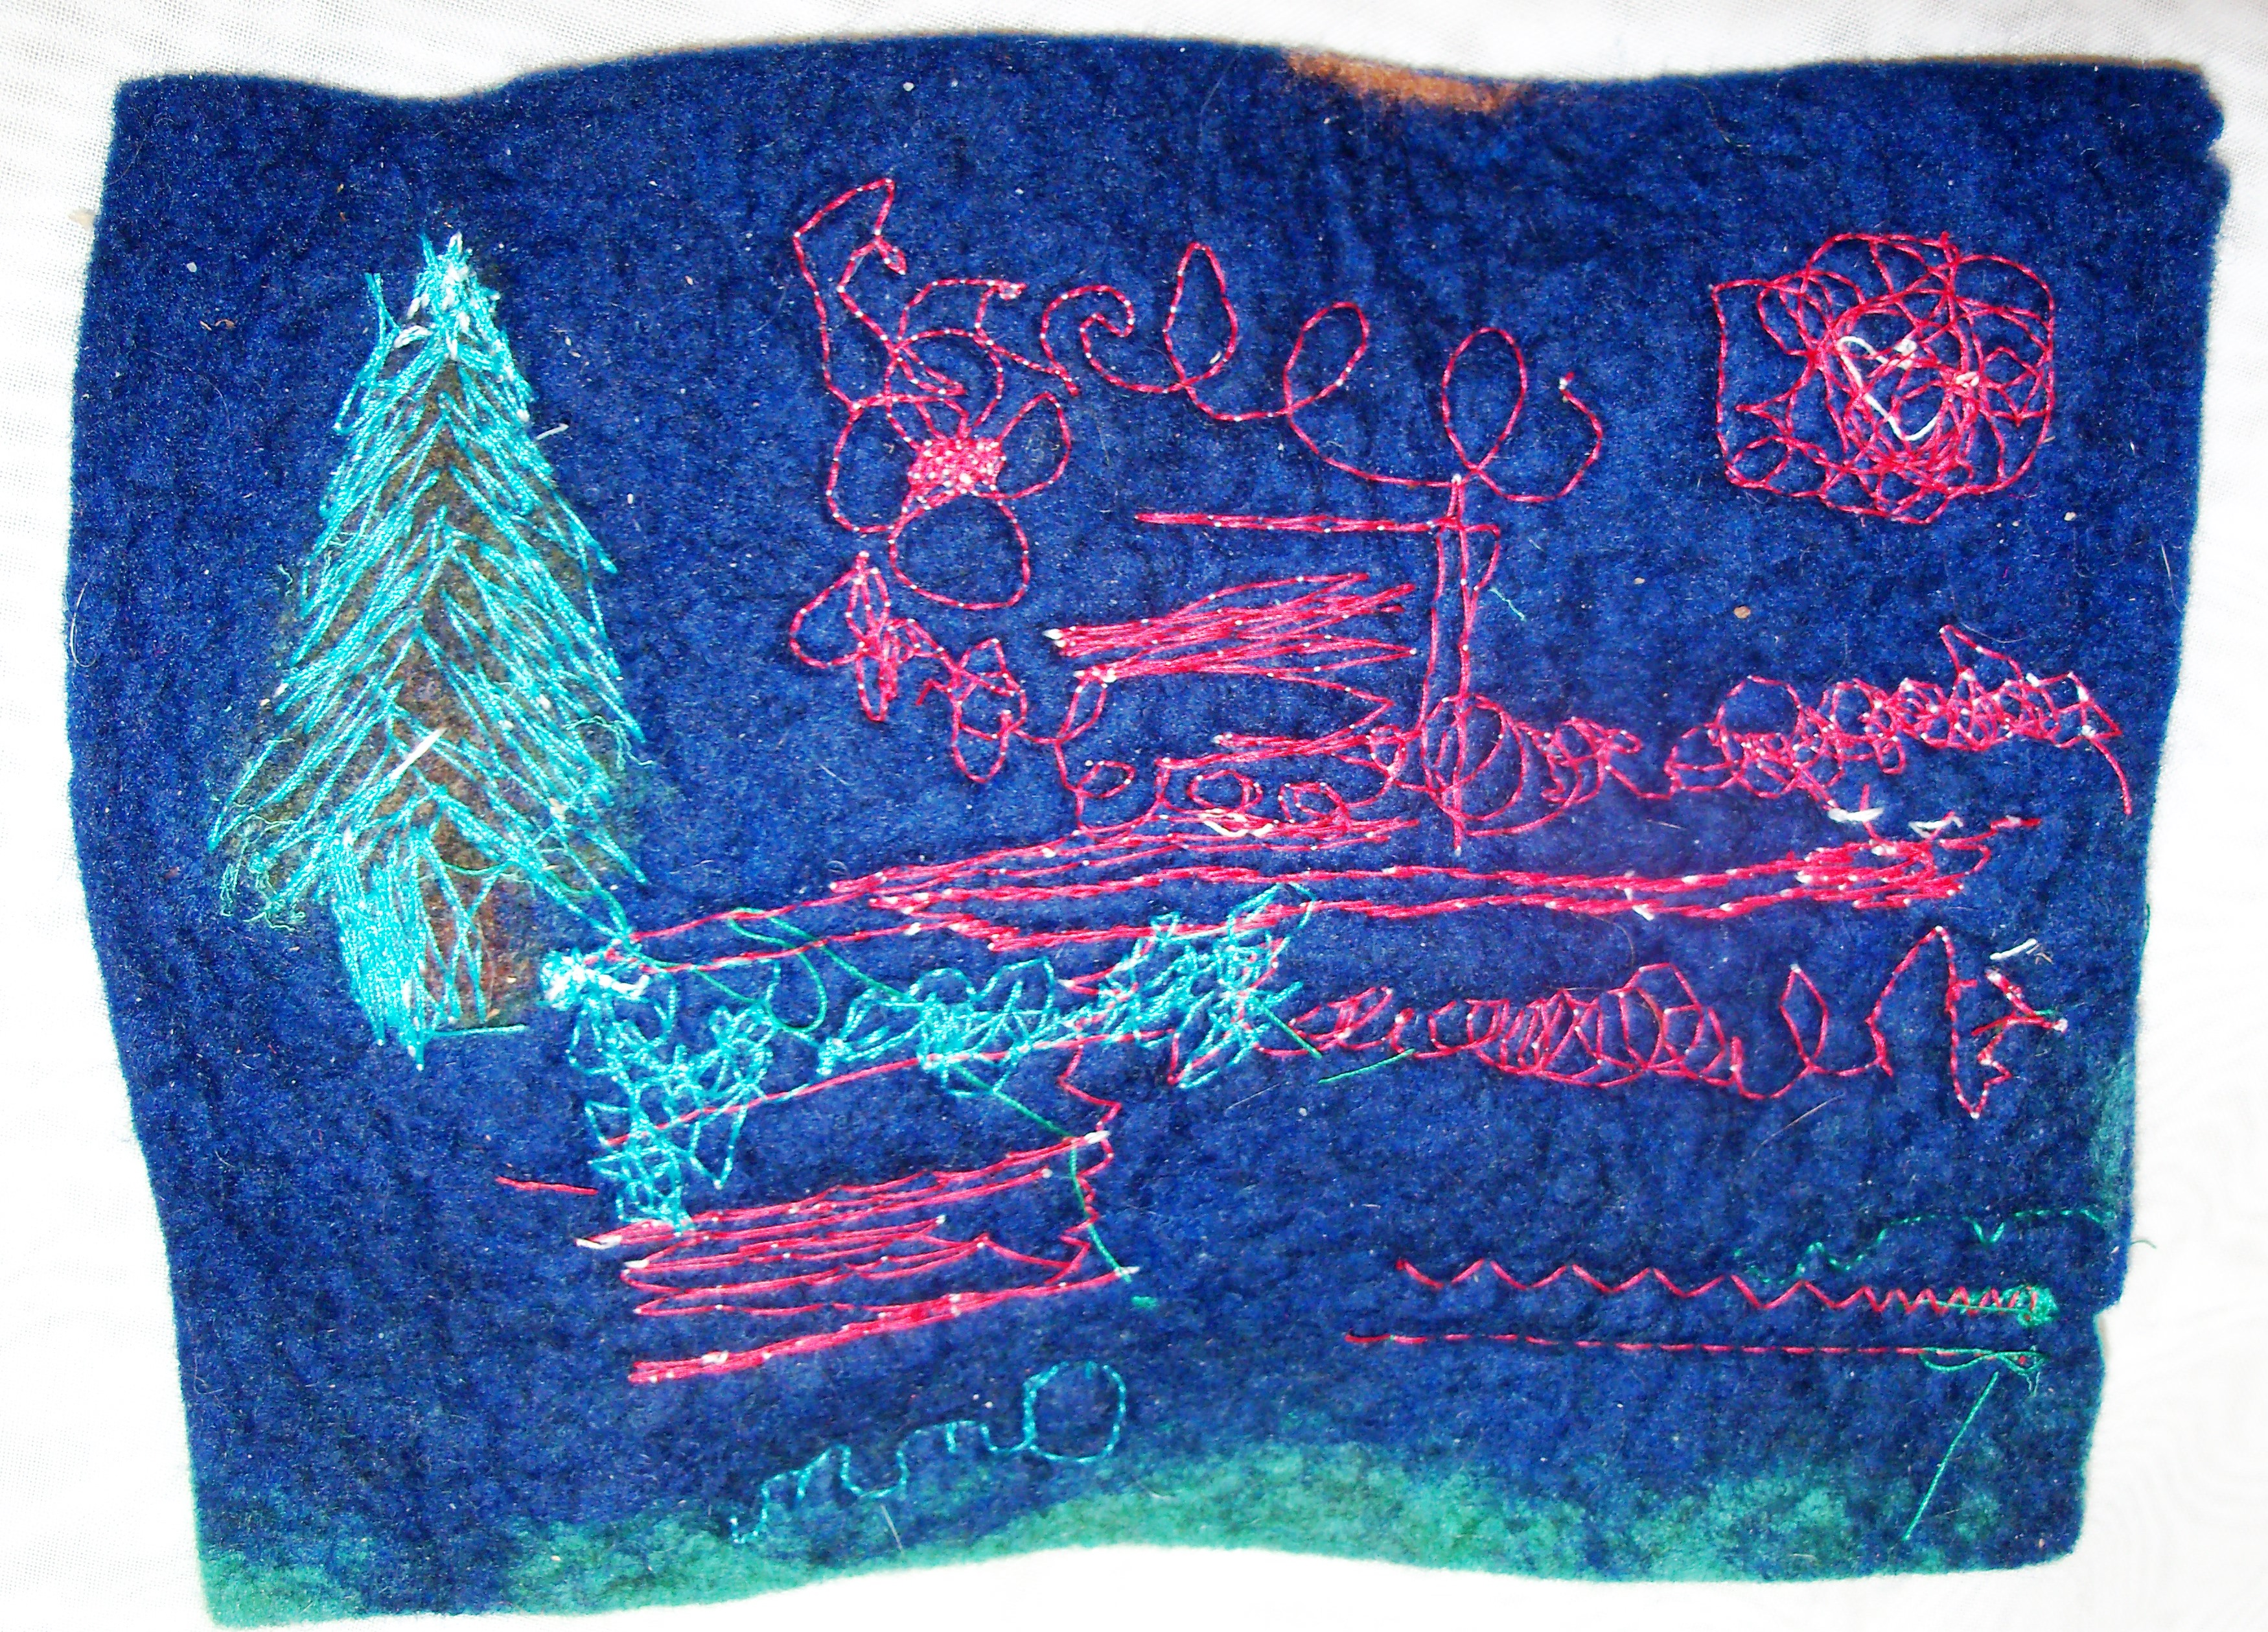
Here is a shot at the back side.

machine stitch sample back

The machine stitching looks so different than hand stitching. I think the combination of the two will be great. But for now I need to practice my machine stitching. Anyone have any tips or suggestions about machine stitching?

Felt Boots Progress

Felt Boots Progress

I have managed to  finish the first stage of my felt boots. They are now felted. You saw the tongues already. http://wp.me/p1WEqk-16m.

Next I had to make the loops so I will be able to lace up the boots.

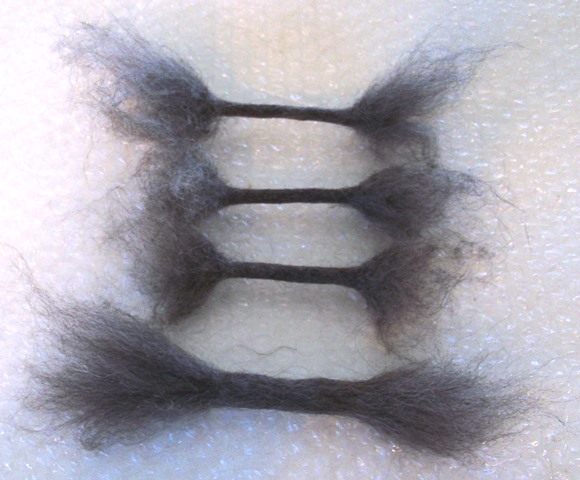
loop barbells

First you make short ropes with fluffy ends

loops felted together

Then you have to felt them into another piece of felt. then I can cut them out to sew them onto the boots.

Then onto felting the boots.

resist on top

You do not wrap all the sides around the resist.

insert tongue

You have to insert the tongues.

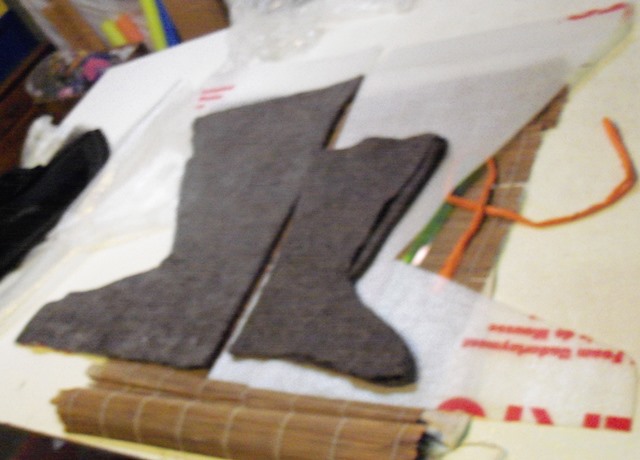
boots cut apart

Here they are cut down the middle and you can see me working the back so there will be no ridge.

one boot shrunk

Here is one after fulling bedside the unshrunk boot.

finished stage one

and both boots done, on top of one half the resist.

leaves

I have started to make the embellishments.

Have you tried anything new lately?

around the web

around the web

felting around the web 5 small 400

http://www.peaceindustry.com/page.php

Recycled Knits and Fabrics combined with Felt Scarf by Sassafras Design

Heather’s Red and Yellow Scarves

http://mjuliarossi.blogspot.ca/

Have you been following Liz’s journey with her students for Holocaust Memorial Day?

http://www.feltinhand.com/gallery.htm

http://woollove-functional-fiberart.blogspot.ca/2013/01/under-big-top-scarf-part-1-of-2.html

knitting around the web

http://vimeo.com/54243073

stitching around the web

http://www.wendyfeldberg.ca/galleries.html

Nell’s Textile Art Gallery

mixed media around the web

Simple Directions for Covering a Lamp Shade with Felt

Acrylic Leaf Printing for your Art Journal Pages

Shrunken Books Tutorial from Maggie Grey

http://cornit-felt.blogspot.ca/2012/06/about-our-roses.html

dyeing around the web

http://wendyfe.wordpress.com/2013/01/10/eco-prints-to-start-the-year/

Looking Forward into 2013

Looking Forward into 2013

Like last year I chose not to make a resolution per say but to choose a word.  I could easily make the usual resolutions that would be good for me like loosing weight and getting more aerobic exercise. Although these would be good things to do I know they are not likely to get done. I like to eat and I hate exercise.  A resolution to make myself miserable is not one I want to make.

This year I chose  two words that go together. Explore and Perseverance.

Explore

I want to do more “art”. I want to do this with felt. I love to make scarves and hats and other useful things but I would like to make things that are just to look at. Thread painting and free motion embroidery are one of the ways I plan to do this. I love the way stitching looks on felt. So I want to explore some of the possibilities of this to make pictures to hang on the wall and maybe later to wear. This is where perseverance comes in . It will take much effort in my busy life to do this. Not only to find time for felting but to find time to do felt that doesn’t  have a material end. I find it hard to make things that won’t generate income.  I want an end product some one might want to buy. I am getting better at doing things for my sanity with no “real” benefit. I anticipate much self talk about not thinking about the end product but enjoying learning how and being creative. You  know, all that stuff about it’s the journey and not the destination.

persevere

I am sure I will be distracted along the way but that’s OK. I am an older ADD person. I am from the generation where they told you to smarten up and buckle down and your just not trying. It’s taken a long time to come to terms with. This is the way I am and it is a good way to be. I have insatiable curiosity so I like to look down all the side streets( allies, paths, through the door, over the fence….)  along the way. It takes longer to get to the end of the road but it is a much more satisfying trip.

From Here to There
From Here to There

I hope you find what you are looking for this coming year and I hope you enjoy hearing about how we are getting along and what we are doing through this Blog and our Forum.

looking back at 2012

looking back at 2012

Back in January I picked a worked for the year, Breath. I think I managed to do that more or less. Stopping to think about what I want to do. I tried some new felting things and learned to use a serger. Signed up for some new shows. I went to the medieval fair all dressed up and had a great time. So I did breath and do some things I have been wanting to do for a while.  I still haven’t worked on complicated resists much but I am still thinking about it.

Dressed up for the fair

It’s been fun and educational doing this blog with Ruth, Karen and Zed. Through the forum I’ve got to know some friends better and meet some new friends. All in all despite some sad times this year it has been pretty good and on track.

A Peek Into my Homework Sketchbook

A Peek Into my Homework Sketchbook

For my class homework this time, I am working on sketching botanicals and then stitching them on various fabric bases with free motion stitching on the sewing machine. Some are supposed to be black and white and some painted after stitching. I thought you might like a  peek into what I’ve been doing.

This slideshow requires JavaScript.

Surface Texture Challenge – From Studio Journal to Finished Piece

Surface Texture Challenge – From Studio Journal to Finished Piece

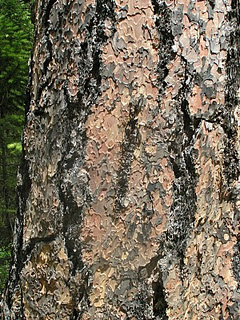
Here is one of my many photos of bark. This type of bark has flat looking pieces that resemble puzzle pieces. The pieces gradually flake off and I collected a bunch of these off the ground. I love the different layers and colors that result. Many times, I work in a studio  journal when I find an inspirational source. Over the last several years, I have played around with these bark pieces.

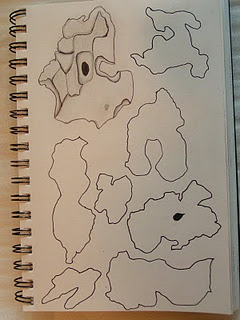
Here I have sketched the various shapes of the bark. Most are multi layered like the sketch in the top left hand corner. I just shaped the overall shape of most of the pieces. I made several different stamps and a few stencils of these shapes.

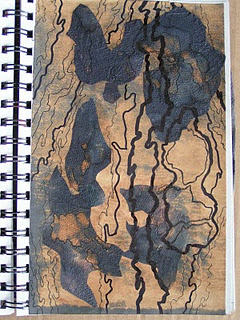
This is a collage that I did in my studio journal with pieces of discharged paper and stamps. I also added the linear components to give it the feel of bark on a tree. This has been in my studio journal for two years and I really haven’t done anything else with it. This past weekend, I decided I was going to try a technique that I have been thinking about for a long time. Because I had this challenge to work on, I finally got this idea in motion.

I took two pieces of water-soluble fabric and sandwiched some wool and viscose fiber between them. On the top piece of water-soluble fabric, I had traced some of the imagery from my paper collage. I then free motion stitched with zigzag stitch over the lines and shapes. I ended up not putting in as much detail because it shrunk so much with the stitching. And it would shrink more with the next step.

I then took the free motion design and added it into a felted cover I was making for my new Kindle. Since the fabric is water-soluble, it would wash away during the felting process and just leave the stitching. When you stitch directly on felt with the machine, it gives a quilted effect. I was trying to add machine stitching without getting that quilted look. I also want to be able to add machine stitching easily to 3D felt objects. It is hard to get a three-dimensional felt to fit under the sewing machine.

Here is the result. It was a bit dark when I was taking the photos so sorry for the quality. (Click on the photo so you can see the details better.) I loved the result! The stitching is completely attached as the fibers it was sewn to, felted right in with the rest of the fibers. And the stitching is right on the surface, it worked perfectly. The darker lines in the middle were yarn that was couched down by machine stitching. The machine threads are shiny in comparison with the felt and add a very interesting texture as the thread didn’t shrink but the wool did. I will definitely be trying more of this technique.

Here’s the Kindle sliding into the top of the cover. I made the cover fairly thick so that when I put this in my bag, it won’t get banged around so much. That shows a little bit of the way I tend to work. Have you tried anything yet for the surface texture challenge? Do leave a comment and let us know.