A cover for my visor mirror

A cover for my visor mirror

I bought a new to me car. The visor mirror cover was glued shut for some reason. When we tried to unstick it, it just came right off. Maybe it had fallen off so they glued it back on? I don’t know. The result is when I put the visor down I have the mirror. Even though you are not really looking at the mirror, it is distracting while driving. Must be because I am so beautiful I can’t resist looking at myself. LOL It is actually very hard to take a picture of a mirror and not be in the picture.

My thought is to make a felt cover for it and velcro it on to hide the mirror but I could still remove it if I needed the mirror.

I measured the mirror and a small amount around it to get the finished size I will need. I think I will add a little more.

Then I thought why not try Ildi’s method of felting with outlines and wet wool? I have some pencil roving and lots of wool and it’s a good sized to try it out. Here is a link to one of Ildi’s posts so you can see what I am talking about. https://feltingandfiberstudio.com/2022/06/27/felted-rug/

So far I have measured and done a couple of sketches of possible designs. these are smaller than they need to be but that is the size of the paper. I will have to find one of the larger sketchbooks to do a final design and then try to use the computer and the printer to enlarge it for shrinkage.

Aaaand, that is as far as I am. The plan is to have it for my next blog post, but we all know about the best laid plans of mice and men. I have my fingers crossed. It’s going to be a busy week.

Tree Specimen Book Continues

Tree Specimen Book Continues

I haven’t shown my tree specimen book since March. The main reason for this is because I got a bit discouraged. The book has plaster coated pages on canvas that were meant for sketches. But the pages are very rough so I needed to get more gesso to apply on top. I also decided to get some charcoal to use for a bit more “rough” sketching.  I got my supplies, painted all the canvas pages with gesso, let that dry for a while and then tried a sketch.

Handmade book open to a page with a sketch of a pine branch in charcoal.

The pages are still very rough and are difficult to sketch on. I was disappointed with my sketch and really didn’t enjoy the process. So that discouraged doing any more sketches. The book sat for quite a while with nothing added.


Then when I was painting other things, I had leftover paint. I hate to waste paint so I decided I would start painting the canvas pages. Then I could add more on top and there wouldn’t be that intimidating white page (that I didn’t like the feel when sketching).

Handmade book open to a page with a print of a tree and definition of tree collaged on top.

I showed you this one before but I added the definition of tree to the bottom. The fun thing about this book, is that you can keep adding as you go.

Handmade book open to a page with a print of a thicket of trees.

Here’s another print of a thicket of trees that I added.

Handmade book open to a page with a print of a tree stump and cut out leaves.

And this one is a print of a tree stump and some little blue leaves that I got from one of my friends. Thanks Christa!

So I haven’t given up on my book. I’m not sure it will ever be “finished”, but that’s OK. I will continue to add bits and bobs as time goes by.


Just Playin’

Just Playin’

The last twelve months have, as my Irish granny would have said ‘put manners on me’.  Cataracts, which were a ‘by the way’ diagnoses in my late 40s finally and quickly caught up with me.  Eight increments of sight deterioration over a three month period!  No more night driving, reading became a challenge and my creative curiosity disappeared.  And so, the waiting game began.  I am currently recovering from surgery on eye number 2.  What a difference it has made and while it will be some time before I get my new glasses, I can function without them for the first time ever! Also, life in all its facets is so beautifully colourful.

So why do I mention it in my post.  It feels awkward mentioning it as I am a very private person.  Awkward, but necessary.  Many of us go through times in life where we lose our creative mojo.  Initially, I found myself angst ridden and questioning my abilities.  The feeling never really went away but I had to find a way to go with the flow and tap away at bits and pieces for a while.

So now that the eyes are fixed I have started playing.  Nothing too serious (well except for my last piece but more of that later).  I am now a week and a half after the operation and here is what I have made over the past week.

Sample 1:

First up, a bit of a back story.  I have committed to a felt swap later in the year.  The theme is brooches so I thought I should start thinking about this.  I used to like felting with basic resist shapes and distorting them so I thought this might be a starting point for this experiment.

First of all, I cut a 15cm square resist and rounded the corners.  Then I covered both sides of the resist in eight thin layers.  I started and finished with a rich orange colour and sandwiched in between were two layers of mustard and two layers of green.  I used 16 micron merino which I purchased from Leiko Uchiyama https://www.leikofelt.com/merino/.  Leiko’s fibre is hand dyed and the colours are sublime.  She is based in Ireland and ships worldwide.

Sample 1 fibres laid out and wet down 8 thin layers

I made a prefelt in the usual way.  I wanted the prefelt to be strong so I kept working it until it started to distort the resist.

solid pre-felt shrinkage has started

Then I made a small incision on one side of the resist, extracted the resist and sewed the raw edges back together with some nylon thread:

Sample 1: repairing the hole which was cut to remove resist

Then it was time to play with the square shape.  I brought the edges of the square to the front of the piece and I started playing and shaping it.  Once I was happy with the shape I handsewed them to hold them in position. Then I worked hard at felting the edges together and to the flat back side of the piece.

Sample 1: working on manipulating the shape


Sample 1: working on a pleasing shape


Sample 1: Shape has been secured with stitching and fulling begins

Once it was felted, fulled and rinsed, I removed the threads and started cutting. Lots of cutting!

Sample is fully felted, stitches are removed and cutting has started


I got a bit scissor happy! I sliced through a little at a time

Here is the finished piece.  I have popped it on top of its original resist to give it perspective:

Sample 1 finished piece laid on original resist for size comparison

Here is a close up of the piece. The inch ruler underneath gives some perspective on size.   Do you think it would make a suitable brooch?

Sample 1: close up of finished piece

Sample 2

Next up, a flower.  This year sees the 20th anniversary of the founding of the Irish felting group Feltmakers Ireland, by our esteemed member and incredibly creative Elizabeth Bonnar.  There is a celebration planned for later in the year where members will focus on making pink flowers.  I thought I might take this down time to make at least one.  But I wanted to play and not produce my usual style of flower.   I wanted to make a three layered flower but I also wanted to do some free  motion embroidery on each petal.  I decided to make the three layers separate, felt them to my satisfaction then attack them with the sewing machine.  I cut out a template for the petals (small, medium, large) and then cut these shapes from prefelt as a foundation.  I laid different tints of pink merino  on top and finished it off with some tints of pink viscose.  Once this was wet felted and fulled, my work with the sewing machine began as I did free motion stitching on each petal.  After that, I needle felted the layers together and added a central yellow disk which I needle felted and then cut back the fibre until I was happy with the dome shape. Here are some photos I took of my progress.  I was really getting into it so forgot to take photos as I went along (maybe the mojo is returning):

Sample 2: prefelted flower petals and the start of the layering of the lighter colour pinks


Sample 2 is ready for wetting down


Sample 2 has now been fulled


Sample 2 dried and ready for free motion embroidery


Sample 2 with free motion embroidery completed


Sample 2 Layers are joined together and central disk has been needle felted into the flower


Sample 2: view of finished flower (still damp so not fully shaped).


Sample 2: view of finished flower (still damp so not fully shaped).


Sample 2: view of finished flower (still damp so not fully shaped).

Sample 3

My last piece this week is a personal piece I felt a compelling urge to complete.  When I left the hospital I was given instructions and bits and pieces to help the eyes heal.  Among these were non woven swabs which I found were really soft and well aerated.  I have no idea what they are made from but I reckoned they would work nicely on felt and I had lots left over.  So I made a bowl using two layers of undyed merino.  I wet this down, and then placed the non woven fabric on top, cut the pieces to size so that they fitted around the curves.  I then felted it in the normal way.  I cut a hole in the piece and removed the resist.  Then I sealed the raw edges.  When it came to fulling the pot I threw it quite energetically as I wanted to get additional texture on it.  Then I dried it.  There was nothing particularly spectacular about the result except that it was really soft and tactile.  I did not take any photos of this process as it was just the result of some personal urgency.   Using the 3cm hole at the back of the pot as an access point, I did some free motion embroidery stitching on my sewing machine.  It was as close as I will ever come to performing keyhole surgery!  It was challenging but I am pretty pleased with the result,  Again, the ruler at the bottom of the photo gives size perspective:

Sample three: small bowl covered with free motion machine embroidery


Sample 3 rear view featuring 3cm hole through which the embroidery was worked

Back to the question of creative block.  I don’t know if it is lifted but I think two things are helping me at the moment.  The first is making that commitment, whether it is to a person or a project, the second is keeping things small and manageable, that way I can handle complexities if a notion hits me on how I might enhance a piece.  Oh yes something else too, I have started to consciously seek not to be too precious about these pieces.  I have thrown paint and ink on pieces and woven stuff through them.  Not always producing happy little results (to paraphrase the artist, the late Bob Ross) but the process is freeing.


Have you had issues with creative block?  I appreciate that it is a personal journey to find what will work to free yourself up.  What may work for me may not necessarily work for someone else but if you would like to share your journey I would love to hear from you.  Together, we may be able to help others free themselves up and immerse themselves once again in this beautifully creative world we occupy.

hugs

Helene x

The Bull

The Bull

We have three public houses in Sturminster Newton (at one time there were 11 in our small market town!) and The Bull Tavern is one of the oldest. The building consists mainly of a 3 roomed 17th Century cottage with an attic room, built of old timber infilled with wattle and daub. Some additions were made in the 18th Century. Records show that the cottage was definitely an alehouse by the late 1700s. Apparently there was a slaughter house at the rear and a Pound where straying animals were kept until collected – upon payment of a fee of 1 shilling (which must have been a fortune when you consider that a married man’s weekly wages at the Town’s Workhouse were all of 9 shillings and a single man’s only 6). Part of the C18th additions was a stable block (which eventually became a skittle alley and later part of the restaurant of the pub). It is rumoured that the horses stabled there were used to help get carriages and carts up the adjoining steep hill leading to Sturminster Common and the small community of Broad Oak.

The building, known to Thomas Hardy (one of our famous inhabitants) as The Old Bull Inn,  is shown on the earliest known map of the area dated 1783, as being part of the Pitt-Rivers Estate.  You can learn more about the Pitt-Rivers family here: https://www.dorsetlife.co.uk/2012/04/sturminster-newton-and-the-pitt-rivers-family

About 18 months ago, after our then favourite landlords moved from the White Horse Inn in Hinton St Mary, the pub was closed for refurbishment. Hinton is a village about 1.25 miles away, where the Pitt-Rivers manor house is situated.  We used to walk there 3 times a week – our exercise with benefits – but since the benefits had disappeared we decided to patronise The Bull – for our exercise of course.  The only trouble with that was that it’s uphill on the way home whereas it was down hill from the White Horse.

During that time we had come to enjoy the chats with Marianne and Lance, the Bull’s managers.  Lance being the very good chef, and Marianne “Front of House”.  Early in January 2021, they announced that on Christmas Day they had got engaged.

One of my felt paintings – commissioned by a mutual friend –  had been given to the White Horse landlords as a wedding present a few years ago, and Graham, my husband, suggested that I do something similar as a wedding present for Lance and Marianne.

Felt picture of sepia tint image of old public house
My interpretation of an early image of The White Horse, Hinton St Mary

Although The Bull itself is a very interesting building, I wondered if I should do a picture of an actual bull for them. No date had been set for the wedding at that time, but I thought I should at least start collecting reference pictures, both of the pub itself, including some of their Pub sign and of some animals. I thought about breeds that might have been around in the 16th Century – White Park Cattle and black Gloucesters; and also looked at Herefords since that was the breed on the Pub sign.

image of Bull Tavern sign with hereford bull above image of the public house
The Bull Tavern and it’s sign
image of black bull with winners rosettes and image of large white bull
Gloucester and Park White Bulls
image of hereford bull head, image of bull grazing, image of bull in field
3 Hereford Bulls. I eventually picked the one at top left.

In the end I decided on a Hereford bull. After a lot of thought and manipulation of pictures, and also starting on a background field for the bull to stand in, I still could not come up with a layout that I was happy with. One idea was to surround the image of the bull with cameo pictures of nearby local landmarks – the water mill and the mediaeval bridge – with perhaps an image of the pub itself as well.

Then, just after Christmas 2022, Marianne said that they had set the date for the wedding – 10th June 2023.  Now I had to get my ideas together and get on with it.  The picture would need to be simplified if I was going to get it done and framed in time.

It was about then that my picture of the horse on the hillside in Devon was finished and it occurred to me that I could use a similar method of producing a figure with more depth.

image of felted horse on background of trees and stream
Detail from my Glorious Devon picture showing the horse added to the finished landscape.

  I finally decided upon a cameo type picture of the bull’s head and shoulders and I would use the background which I had made back at the beginning of this saga.  I would paint (with wool) the shoulders and neck and outline of the head on to a piece of flat wet felted core fibres.  With a separate face and ears, and a further separate set of horns and the nose on another piece.  I would cut all of the pieces from the backing when these were substantially finished.  I would fix the torso and neck onto the original background and layer on the face and ears, horns and nose, then I would do the final titivating and framing.  I made a start and here are the initial progress pictures:

This slideshow requires JavaScript.

As I said earlier, it was intended that this picture would be a wedding present for Lance and Marianne, but at the beginning of April this year, they told us that, because of various unforeseen difficulties arising out of successive pandemic lockdowns (which included them catching Covid between lockdowns so having to shut the pub again)  they had decided to give up the tenancy of the pub.  They had obtained a job, with accommodation, managing a Touring Caravan Park in Cornwall.  Marianne was leaving almost immediately and Lance would stay on for a couple of weeks, with his last trading day on the 19th April.  So the picture was going to have to be a leaving present.

That caused a bit of a panic at home as you can imagine, so I had to get my head down and finish it NOW!  These were the final steps;

This slideshow requires JavaScript.

I managed to finish the picture and, with Graham’s help, I mounted it in a deep box frame in time to hand it over to Lance on the 19th, when we went in for a final lunchtime meal.

So here’s the completed and framed picture – my entry for the 2023 Third Quarter Challenge – Something Special About Our Town.

image of felted bull head and torso on a field and sky landscape in wooden box frame
Finished and framed.
Dose the twisted needle twist as it goes into the wool?

Dose the twisted needle twist as it goes into the wool?

Recently I was asked more questions about needles. (I do love finding out about needles, how they are used in industry and how we use them by hand. I hope you still have a bit of curiosity about them too, after all my enthusiastic chatting!) To answer the second question, I still want to get my hands on a forked needle (how can I be fair in my investigation if I don’t actually get my hands on one?) A quick review, In industry there are two types of structuring needles. Structuring needles are not technically felting needles (since they don’t make the felt) but are used to create surface texture on non-woven material.  One is the Forked needle, and the other is a crown needle (which we have chatted about before. If you don’t remember that chat you will find it here; https://feltingandfiberstudio.com/2022/07/19/a-question-about-crown-felting-needles/)    Since I have not had success locally finding a fork needle, let’s turn to the other question about needles. It involved one of the Needles found in the group of needles which do make the industrial Felt.

Does the twisted (also called a spiral) needle twist as it goes into the wool?

Ok, this is a question about mechanics, and how the needle works.  So let’s review the parts of a triangle needle and compare that to the twisted / spiral needle.

diagram of parts of a regular felting needle and a spiral felting needle1)Parts of a regular felting needle and parts of a spiral needle

We can see that all the usual parts are present with a spiral / twisted needle. The difference is in the working part. you can see both clearly have a triangular cross section in the working part but the spiral/twisted needle has that triangular shape rotating in the cross section through the working part.

diagram of a twisted needle close up2) Twisted Needle showing close up of working part

Let’s have a quick review of what shapes are most common in the cross section of the felting needles most often used by hand needle felters. Our most common shape is the triangle, but the 3 and 4-sided stars are also quite available. While some are not as common, there is a spiral or twisted versions of each of the three main shapes.

Common Cross sections of working parts of main felting needles3) Common cross-sectional shapes of felting needles

Let’s go back and look specifically at the spiral or twisted shaped needle. If you look at the cross-section of the spiral at various spots, you can see that it is a triangle rotating around a central point.

4) Cross sections of a twisted needle across section of the working part   5) Looking from the tip up the needle through the segments shows how the tip of the triangle changes position up the length of the working section. (i have updated diagram 5 to more clearly show the location of each edge.)

As you know with all needles, the barb is located on the edge of the needle. With most needles, the barbs are located vertically, one above the other, along each edge. There will be one, two or three barbs per side depending on the specifications for that needle.

The exceptions, for vertically stacked barbs, at present are; the Crown needle (which only has one barb per edge), the fork needle (that has no barbs and a cylindrical shaft) and the spiral needle (whose barbs follow the curve of the needle’s edge).  The last exception to the vertical barb rule, is more of a technicality; the conical needles has barb aligned vertically but because of the taper in the working part, it will engage fibre laterally (we can chat about that further in another note. If you are curious?)

So as the spiral/twisted needle is inserted into our felt how is it engaging the fibre it catches in its barbs?  it is grabbing segmentally as each barb enters the web of fibre. It will create more of a circular Spiral of engagement rather than the three barb points a regular triangle needle will engage.

Here are two ways to visualize how the needle’s barbs are grabbing the fibres as they enter the web. As you know the barb will engage (grab) the fibres it encounters which will be at or close to the surface of the felt web of fibres. For clarity of the diagram, I have had the barbs that are deeper in the web engaging with fibre closer to the barb. If I had more correctly illustrated the crossing fibres, which the barbs are affecting, all the fibres would be at or near the surface layer(and the diagram would be a confusing-looking mess!)

diagram of how barbs on sides 1 to 3 interact with fibers as the needle is inserted6) How each barb distorts the web in a different position as the needle is inserted

I am hopeful you can see the spiral engagement of one edge, then the next, then the third. I have added colours (Red, Purple and black) to the edges to try to make it easier to see how the spiralling of the triangle shape interacts with the order of the barbs as they encounter the fibres.

Here is another way of looking at the order of engagement of the barbs around the centre of the needle.

Diagram the order of barb engagement as the needle is inserted into the felt7) The order of barb engagement


A few more particulars about Spiral Twisted needle

If you read the technical details on the Groz-Breckert site, (one of the needle manufacturers, this one headquartered in Germany) you can find that Spiral/twisted needles are available in:

  • gauges from 38G to 42G
  • Length of 3 or 2.5 inches
  • Usually has 2 barbs per side, but only one barb style is common
    • has a modified barb arrangement (spiral location around the needle)
    • the needle placement gives higher fibre engagement
    • the needle is a bit stronger from barb placement (in the felting machine, both the “machine direction” (8%) and to a lesser degree “cross direction”(4%).)  It may be a bit less prone to breakage with small vector changes if used by hand!  it would still be better to try to go out at the same angle that you inserted the needle.
    • it is listed as having more chance of splitting fibres when using microfibers (we should be ok we tend to take our frustrations out on natural fibres such as wool, silk, alpaca, dog or cat hair)
  • Fiber transport is listed as “Substantially Higher” for a twisted needle, rather than a regular (triangular) needle (of the same gauge and barb shape).
    • It can move about 10% more fibre than a standard felting needle with the same barb dimensions. (It is More Aggressive when compared to the same gauge and barb style of a standard needle)
  • Uses industrially are; Automotive sector (visible areas such as trunk lining and other non-woven surfaces) and Filtration fabrics.

Doer Needles from China sample of 38G Spiral needle8) Doer Industries (China) 38G-222 Triangular Spiral (they also have 40G-222 with the same barb spacing.)

Hand Needle Felting Uses;

  • Good fibre movement(more than a Triangle needle of the same gauge and barb type)
  • Good for compacting fibre or generalized initial sculpting. You may find it a bit aggressive for fine detail at larger gauges. Try a finer gauge if you find it more aggressive than you desire.
  • Used on a sharp angle (surface work), good for catching loose fibres that need embedding
  • Good with short fibres will grab and embed them quickly
  • If you require a 42G needle but don’t have the patents that such a fine gauge requires, a 42G Spiral needle may be for you. (it’s a little bit faster!)

Watch for;

  • May not be as effective when multiple needles of this type are used close together (held together with an elastic or some holders with close spacing) you may find with medium to longer fibres you are trying to engage the same fibre with adjacent needles

Let’s consider the question, “So, Dose the twisted needle twist as it goes into the wool?” What do you think so far?

I know you will remember that the needle itself is descending in a straight line, it is not moving other than in one vector (up and down in this depiction). There is no rotational component of insertion necessary. The movement of the needle descending into the fibre is creating the spiral engagement (grabbing) of the fibres. So technically, the needle is not turning in a spiral but the engagement of the fiber is interacting in a spiral. Each barb has not rotated but descending in a straight line. The fibre cot by the barb is also descending in a straight line, but as each barb above it engages fibre it will be grabbing a bit that is offset from the barb below it. This gives an illusion of spiralling while engaging a more even amount of fibre surrounding the needle than a regular triangular needle would (with barbs stacked vertically in 3 spots). So the answer would be “the needle no but the fibre looks like it is from the surface but is actually not.” Well, now you are likely disappointed after such a long explanation. But there is one more thing to consider.

That being said, it is possible to turn a needle as you insert it into the felt. Rotating the needle can be used to grab flyaway fibre, or catch something that is loose on the surface. It involves rolling the needle between the thumb and first finger. This is not a good long-term technique since it is engaging little muscles that get tired more quickly than larger muscles and can be strained easily when compared to larger muscle groups. Instead of spinning a triangle needle trying to grab fibre, you may find that a Spiral/Twisted needle is a bit easier to engage loose fibre.

I hope this gives you an overview of the spiral or twisted needles. Their a bit more aggressive than an equivalent triangular needle,  so they may be helpful for finer gauge work if you are not patent. I hope, if you get the opportunity, you will try them for 2D or 3D felting.

PS; the needles will work without having to know all the details of how they work, but knowing may give you creative ideas and inspire you to use them to solve challenges while you’re felting. Even better, I did not add any exam questions at the end!!!


Summer tree Finished.

Summer tree Finished.

Thankfully I have friends with grey wool. Jan and Bernadette found me some grey in many shades so I could complete my picture. I explained to both that I only needed a little bit, a handful would be more than was needed. I just needed it for a few rocks on my picture

Picture of wool

picture of me taking a picture
I didn’t take any progress pictures of the rocks. I was busy poking and talking.

And finally the finished picture, or so I thought. when you take a picture, you can see so much more sometimes. I really don’t like the roots over the rock. I had tried putting a rock in front of the tree but that looked worse. So, I will take the roots off and continue from there.

I managed to take the roots off and played with the rock some more and now I think it really is done.

Calling Down from the Branches

Calling Down from the Branches

This is the final installment of my large nuno felted autumn landscape, it is finally finished and I have even stretched it over stretcher bars so it is ready to go the framer next week. It is my entry for the 4th Quarter Challenge  of the year long tree challenge. I’m way ahead this time. Yay!

In my last post, I was trying to determine how to handle the ground and prevent the background trees from “floating”. I decided to try leaf litter on the ground. I used the same fabric and paper that I used for the leaves on the branches. You can see on the left hand photo the first attempt. I had some leaves that were already cut out but these were much too big. It made the ground move forward since the leaves were the same size as the foreground tree leaves. Not the look I wanted. So I cut the leaves into tiny pieces and scattered them about. I didn’t want to bore you with all of the time I took arranging the leaves. You can see the progression from left to right. I had taken over 10 photos of this progression but thought I would show the first, middle and last photos. Perhaps you can tell a difference that way! Once I had the leaves where I wanted them, I glued them down with an archival gel medium. I don’t usually use glue but these pieces were so small, I thought that was the best option.

Next up was to determine the color of the “matte”. This is the fabric that I stitch the nuno felt down on to hold it in place for framing. I decided to go with the darker grey fabric. Then I stitched along the edges of the nuno felt to hold it to the background fabric. Normally, I would then lace the fabric over matte board or foam core but this piece is big and I decided to use stretcher bars instead. The stretcher bar frame is 23″ x 34″. I wrapped the fabric around the stretcher bars and stapled it in place. The hardest part of that process is getting the nuno felt landscape in the right position since you staple from the back side.

Nuno Felted Landscape with Autumn Birch Trees and leaf litter on the ground.

Here’s the piece on the stretcher bars ready to be framed. I will use my usual slim black frame. Did anyone notice anything else that was changed at the very end? Calling Down from the Branches is now ready to go to the framers and then off to the gallery.

A new life for a coat.

A new life for a coat.

Another clothing post from me this time.

I found this coat in a charity shop. It is a long/mid calf length coat from a UK/British designer, the label has ‘Out of Exile’ on the tag inside the coat. I was not aware of this design label, but on checking with Mr Google, this brand does make desirable items of clothing and, are expensive to buy new. I paid £5. The coat had a good weight, and is probably a viscose mix fabric. Please excuse this photo, it is the only photo showing the coat length that I managed to keep on my phone. I probably need lessons in photographing black fabric!

This coat is destined for No 1 grand daughter – she loves dark/black clothes and loves a ‘Goth’ image. I showed the coat to my daughter and she liked it too, and agreed that grand daughter would love it.

When I inspected the coat, I could see very little damage. There was a little tear at the back, and the buttons were a little loose. The damage looked to be easily fixable. No 1 grand daughter loves a hood, so I did have to think about how to make and attach one, I do have a large hood on my raincoat, so I made a pattern from that.


To repair the tear at the back, I used a piece of ‘grunge’ red cotton fabric. I cut a diamond shape and stitched that to the coat using a blanket stitch also in red embroidery floss. The coat is unlined, so I used a little black interfacing at the back of the tear. I cut two more diamond shapes of the red fabric and attached one to each pocket flap using a blanket stitch. I loved the effect of the three patches on the coat.


The coat has beautiful black shiny oval shaped buttons, and all were intact – no marks or scratches seen. I restitched the buttons using the red embroidery floss, and then restitched the button holes using the same thread. I added some black stabiliser to the rear of the buttons for strength. There was a little weakness there, but no tears were visible.


Fabric for the hood was very troublesome to find. Who knew that there could be so many shades of black? Anyway, I did find some that I was happy with – a dress from the charity shop, that had a lace overlay. I used the lace to make a outer layer of the hood, same pattern as the hood. I am so very happy with the coat and it’s new look, even though the photos don’t do it justice. I managed to salvage enough lace to attach a little frill to the cuffs as a finishing touch.


I am sorry that some of my photos are not of better quality, the model was less than enthusiastic on the day, and occasionally she is just not keen on modelling clothes for her Mum.

I do love mending clothing, and trying to fix a problem area on an item of treasured clothing that has been well made, rather than consigning it to the waste bin. Thank you for reading.


Summer knitting (but Summer isn’t cooperating)

Summer knitting (but Summer isn’t cooperating)

They tell me it’s Summer already. To be honest, I haven’t noticed… I know most of you reading after this post is published might be complaining about how hot it is, but I can inform you I’m currently writing this with a jacket on.

Ah, Scottish Summer…

I had lots of lovely knitting projects in mind for the warmer months of the year, two of which involved making some season-appropriate tops to wear when the sun was out. This would be my first time knitting something Summer-specific and I was very excited about the prospect.

Have I mentioned “Ah, Scottish Summer” yet?

Anyway, since there’s no view to wear these lovely makes anytime soon, I thought I’d share them anyway so you can at least boost my ego and tell me they’re lovely. Ready?

Ripple Halter by Jessie Maed Designs in neon yellow, on a hanger against a white door
Ripple Halter by Jessie Maed Designs

In another blog post where I mentioned being brave enough to unravel my knitting without a lifeline, this halter top appeared briefly. I finally finished it! Just in time to enjoy it on a hanger instead of on my person… (this is knit in merino wool but it’s still too cool for the current weather, at least for me!)

My other fun knit is not quite finished yet… but my brain being what it is and hating an unfinished project, I can’t move on to another until this one is done – even if I know I won’t wear it anytime soon.

Gelato Tank Top on a hanger against a white door
Gelato Tank Top by Gabrielle Vézina

Note the knitting needles on the bottom! The white strip is some leftover yarn I used as a lifeline in case I wanted to frog the whole thing back (which I will, because I want a couple more rounds of stocking stitch before the edging).

Closeup of Gelato Tank Top lace front panel

I mainly knit this tank top for the front lace panel, which I thought looked fun. The yarn I knit it with is a linen blend, very soft and perfect for warmer weather.

Some of you might be reading this and saying, “But Leonor, you can wear these with a jacket, what’s the problem?” And you’d be right, that’s definitely an option. However, considering how windy it’s been in Edinburgh, I’ll want to button up the jacket, which will hide the layer underneath.

I guess I’m just grumpy this Summer has been nothing like I planned and want some commiserating 🙂

What about you, any fun plans for the season? Share them with the in the comments section so I can live vicariously! And, thanks for reading.

Safty First; a look at wool

Safty First; a look at wool

I am still not up to the next step in the phone-carrying project, mega-stega-blob (fibre layout and wet felting come next). No, I am not just avoiding getting wet! I have tried to do non-offensive activities beyond lying down, watching movies and reading my audiobook (mostly not all at the same time). Monday I got to the guild studio and worked on the library (the books felt heavier and more tome like than usual.) Tuesday I pulled photos then pulled weeds, while sitting and started my blog chatting with you! Since I am still waiting for a few items from Aliexpress to arrive, (they may be in a literal slow boat from China) I think I should consider a few other aspects of the topic they will cover. (Ooh I’m being verbose, cryptic and obscure! I am defiantly feeling better!)

Recently I have had a few different questions about aspects of safety. I want to chat about how to keep you and your needles safely not attached to each other, by stabbing, poking and other forms of impalement. I have been making a chart of the different types of options and want to also test them, with Ann, with the enthusiastic needle felting tools we both purchased last winter. The chart is underway, but with more possible safety items on their way, let’s wait on that aspect of safety.

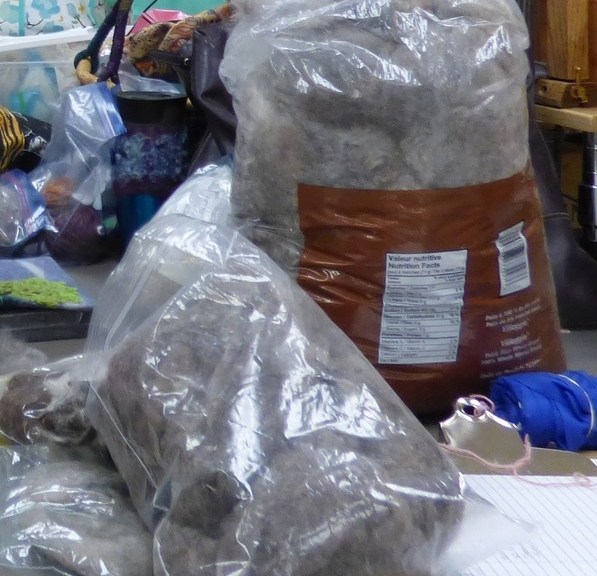
Instead, let’s turn from the sharp pointy blood-inducing excitement of needles to something softer that can also be dangerous to felters. Wool (and other fibres).  What could be dangerous,  concerning or even caution inducing about wool? It’s so soft and fluffy! It has that lovely sheepy aroma when it’s fresh off the sheep. Sometimes it’s even still warm if it’s really fresh off the sheep.

skirting a fleece. 2 sets of hand pick through part of a fleece sitting on a table. skirting dirty raw wool at the OVWSG studio.

Ok you can get muscle aches or strains washing it, wet wool is quite heavy and moving big bins of water around can defiantly get painful. When I phoned my doctor to mention my tetanus shot was due and I was about to wash a bunch of dirty sheep fleece, she had me come in the next day to get my booster.  (This was near the start of covid when restrictions were most enthusiastically applied, so I was very surprised at how insistent she was that I should come into the office and have the tetanus shot before working with dirty wool.  I would rather be safe than sick or sorry. Even if it means getting the other kind of needle.)

Most of us avoid any thoughts of buying aromatic wool, tetanus or the fun of skirting a fleece by just purchasing prepared fibre, usually even pre-died.

So if you are avoiding working with raw wool in your endeavours, have we avoided all potential problems with wool? No, but don’t rush off to throw out your fibre horde of fabulous feeling fibres and colours!!  The precautions for wool are quite specific and can be mitigated. As you probably remember I love anatomy, physiology and pathology.  I know not everyone is quite so excited about how it all works or how it all can go wrong!  So I will not get into the details of alveoli to capillaries’ oxygen exchange (whew, I bet you are breathing a sigh of relief and thankful there is no exam at the end of this post!!)  You are likely already aware but I do want to mention a bit about the historical problem with the wool-to-yarn industry.

For many activities or professions, there is a pathology associated with it.

  • Tennis has Tennis elbow (lateral epicondylitis),
  • golfers can get golfers elbow (medial epicondylitis) or
  • Weavers can get Weavers bottom, (a false bursa on the ischial tuberosity). Weavers get their pathology from many hours of rocking side to side while sitting on a hard loom bench.

By the time of the industrial revolution and the introduction of large mills, we see a rise of a pathology with wool (Wool Lung) and a slightly different one (Byssinosis) associated with breathing in cotton dust or dust from other vegetable fibres such as flax, hemp, or sisal. This was exacerbated by working with the fibres in enclosed, poorly ventilated areas (the mill buildings) for long periods of time (working for years, at 6 work days a week).

The pathology wool lung is neither as cozy nor warm as it sounds. (Wool lung sounds like someone kindly wrapped your lungs in a soft fluffy blanket of wool.) The way the pathology works is that small airborne particles lodge in the lung. Over time these partials make breathing increasingly difficult and interfere with the lung’s ability to bring air into the body. A similar problem can develop with breathing in dust from other vegetable fibres.  If you are a weaver look under the loom after you have woven a tea towel with tow linen, (for non-weavers, you probably have a lot of dust and bits of broken fibre under the loom to clean up.)

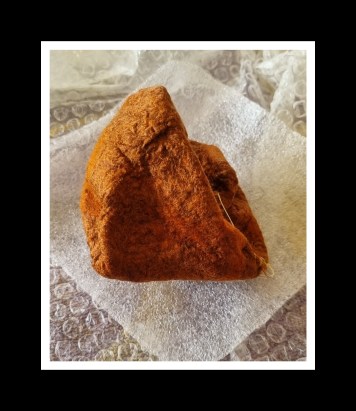
There is another potential problem with wool, (even if you skip working in an early industrial mill, and avoid raw fleece processing), is the nature of the fibre and its ability to get airborne. Think of it as the quality of fluffability. Finer fibres, shorter fibres and older brittle fibres that can break into even smaller pieces will all become airborne more easily than courser, heavier, and longer fibres.  I have found that I have the most airborne fibre particulate from older dry short fibres. Fine fibres that attract static can also be problematic.

Grater fluffatude: Fibers and parasitical are more likely to get airborne.

  • Finer,
  • shorter,
  • older fibres that are dryer and prone to breakage,
  • dusty fibres

less fluffiness: are Less likely to get airborne

  • course,
  • longer,
  • less fragile fibres

In my stash, I have many types of fibre. Some are brand new and recently acquired and some are quite old, second-hand acquisitions or appreciated gifts of often unknown age. I have a few bits in the fibre stash that are brittle and quite suspect but are just the colour I wanted. So if I don’t want to just avoid using fibre that I suspect may have nefarious plans for my health, there are ways to keep us safer. (Re; not wanting to throw away fibre may require Fiber AAA: I have trouble throwing out wool, I know it’s a problem but the first step is to admit it is a problem.)

Most fibre we use is not a problem or is only mildly so. If we have decided to keep a fibre we know or suspect is problematic, that the fibres are likely to get mobile and try to end up in our lungs, what should we do to reduce this possibility?

There are a few things we can do to mitigate getting fibre, dust, and bacterial content from the fibres, into our lungs.

Keep the fibre from getting in the lungs: (its so much nicer when wool is on the outside of the body)

  1. Protect your lungs. We all have N95 masks from the pandemic. There are also wonderful repertory masks, with even finer particulate-blocking abilities. (They are more industrial looking and are not as stylish as the blue medical ones from covid). (There is more about this at the end of the blog)
  2. Improve ventilation. This can be working in an outside studio (when weather permits), or using a good air filter if you are working in a smaller indoor studio. I would not suggest an oscillating fan near your fibre work to improve air circulation, that can go terribly wrong –think parts of your 2-D picture can decide to just wander off as the fan turns farther than you thought it was set to turn!!! I guess that mountain was not inclined to be there, (like the Frank slide the mountainside got up and left!) we will now have to add a grassy plane or maybe more sky?
  3. Label your stash, if you cannot part with something that is problematic, (but the colour, crimp, or lustre is just too good to part with) label it or leave a paper mask with the bag so you will remember to avoid getting wool on the inside of your body.
  4. Be aware of which fibres are likely to get airborne (short, brittle, older, or finer) and protect yourself if those are the fibres you need to use in your projects.
  5. Check with your Doctor, If you are going to be working with raw wool or doing fibre prep, of wool or other fibres, you may want to check your tetanus shot is up to date. We used old slightly rusty hackles when processing flax and I have never seen a sheep have a thorough bath before getting their haircut! So, I suspect the enthusiasm of my doctor to make sure I had mine was not just her wanting to stab me with a needle. (really I don’t bug her very often!)
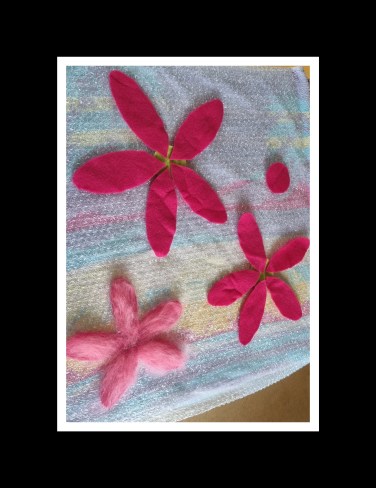
  6. Reduce static: Ann had a spray bottle to mist fibre as she used her big drum carder. This reduced static and thus reduced the amount of fly-away fibre. Misting wool, if you are needle felting, may be problematic if you get the wool too wet. Wet wool can reduce the life of the needle.  I have heard that leaving a dryer sheet, (or a piece of cloth that had been soaked in fabric softener (unscented) and left to dry will work) will reduce the static in fine loose fibres like angora rabbit.
  7. Use the weather to help you. (this is probably more of a sub-point to #6 (maybe 6.1) but it’s nice to have lots of options) Use the weather to help you keep the fibres in line. if it’s humid, as it tends to be in parts of our summers, fibre is not as likely to get airborne as it will if the humidity drops which happens in our winters.
  8. read #1 again and don’t forget to wear a mask if you are working with problematic fibres.

Masks a quick overview of options:

Dust mask, medical blue mask and fiber Dusk mask, medical mask and 3 types of fibre (Short turquoise, older dry brown top and unwashed short locks)

Masks come in various options, from large full-face and half-face air filtering masks, (they look very cool and Sci-Fi but may not be the strong fashion statement you wanted to make while working.) I have a half-face mask with the lovely double respirators but took it to a workshop and now I can’t find where it is.  If you ask Mr. Google to show you a “Half face woodworking respirator mask” you can see ones similar to what I picked up at Princess Auto on sale. There are other options that are less striking in their fashion statement in case your workspace may be visible to others. (this may be a good option if you have preexisting respiratory issues.)

I also have what used to be sold as a painter or dust mask (possibly for automotive painting?) the Dollar Store used to have them regularly. They hold the mask away from the nose so are more comfortable for some people.

"Dust mask" in packaging N95 designation “Dust mask” in packaging N95 designation

You may still have the blue paper filter masks that were very popular (or unpopular in parts of Canada and the States). I was ahead of the crowd and had one hanging by my office desk for use with old dry wool well before covid arrived.  I have since used up all the masks I had for work and for wool, stupid covid.

edge of blue 3 layer paper medical mask and short wool fiber in blue/green colour Short fibre, this particular fibre is standing in for some of the equity short but much more fly away fibre that is hiding in the basement and would not come out for the photo shoot.

Not all fibre has this problem, in fact, most do not, but if you bump into some that make your nose twitch and your Kleenex seems an odd colour when you sneeze (the colour of the wool you’re working with) then its time to grab a mask, improve the ventilation, use an air filter in your studio or use the outside studio, and reduce the static/lack of humidity.  Once the offensive fibre is well embedded in your wet or dry felting, it should not be a danger to us or others, being that it is no longer airborne. (Well, unless you are using some fabulous aroma added to your felting work and there is a lot of wool sniffing going on!) hummmm….. no don’t get distracted!

I am hopeful I will be back to the Mega-Stega-Blob soon! Have fun, stay healthy and keep felting.