Jan’s 3rd Quarter 2017 Challenge Part 1

Jan’s 3rd Quarter 2017 Challenge Part 1

My friend Jan really got into the 3rd quarter challenge. She worked on it most of the summer and fall. If you have read other posts by Jan you know she is a great story teller. So, I had to break this into 3 posts. This post and the next 2 will take you on a journey with Jan from concept to finished challenge.

3rd quarter challenge part 1 the Plan

I was instantly intrigued by the third quarter challenge. I have always appreciated the aesthetic of Japanese prints and the Hokkaido wave had been particularly interesting to me. A bit strange when you consider I really don’t like getting wet. Ok, I am a bit hydrophobic. When I look at the Wave I don’t concentrate on the impending death of the fishermen in there precariously tipped boats, the fact that mount Fuji may be plunged into unpleasant wetness at any moment but that the repetitiveness of the design on the inside of the wave reminds me of a Japanese umbrella. Umbrellas are good. They keep you from wetness. A giant umbrella in the middle of the ocean sounds almost appealing, as if you might stay dry surrounded by all the wetness.

OK, I have a theme. Now who would need an umbrella in the middle of the ocean? Hmmm. An octopus!

The Great Wave off Kanagawa also known as The Great Wave or simply The Wave, is a woodblock print by the Japanese ukiyo-e artist Hokusai. It was published sometime between 1829 and 1833 in the late Edo period as the first print in Hokusai’s series Thirty-six Views of Mount Fuji. It is Hokusai’s most famous work.

As you may have noticed I tend to do flat pictures with a bit more thickness than flat pictures usually have. So the concept of taking a print you like and using it to inspire something from it but not make a copy will not be a problem. OK wave as umbrella, and octopus holding umbrella. Other elements of the print to work into the finished pieces. The sky, the other littler waves and maybe the boats with fishermen, or maybe not the boats with fishermen. I have nothing against fishermen, I really do like to fish. But I’m not to fond of boats. They are just tempting fate. Why leave nice solid ground if you don’t have to? So let us leave the boats for a later consideration.

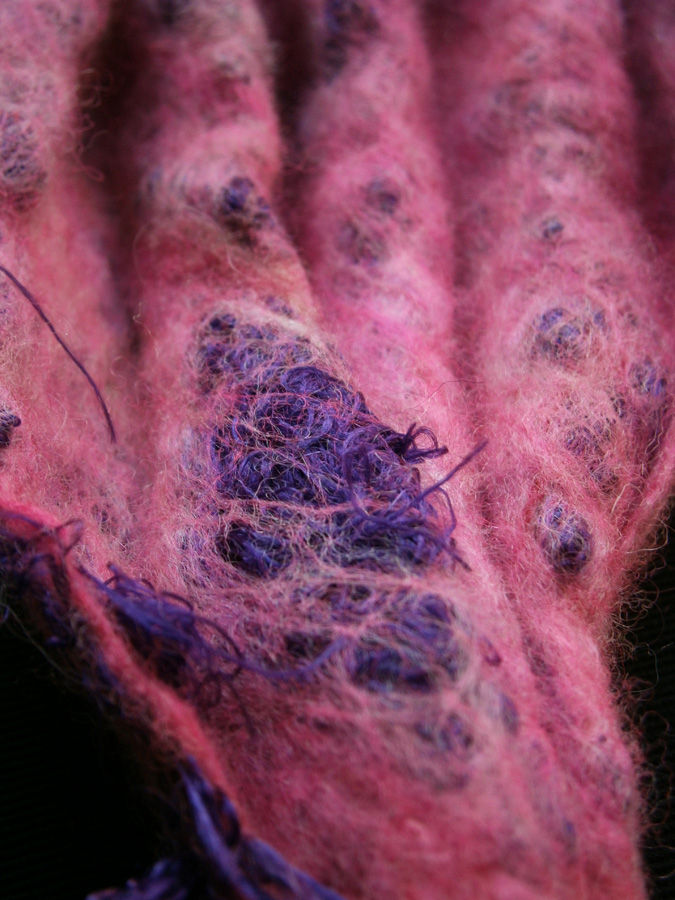
I had a plan and all within half an hour of reading the email. A quick sketch (I thought I had lost it but found it inside my new needle felting box. This is why the original idea and the preliminary execution differs quickly. I lost the sketch by putting it somewhere safe.)

Then a trip to the wonderful internet to “acquire” reference photos and do a bit of research.

I’ve got the wave (I found 3 graphics of the wave one with the fishermen very easily visible) so let’s get umbrellas.

Now for some octopuses/octopi.

Phase 1 Planning is complete.

Felted Leaves

Felted Leaves

SONY DSC

Hi Everyone,

My name is Karen, and I run Big Sky Fiber Arts, an online store specializing in wool, effect fibers, and threads for felters and other fiber artists. I love adding three dimensional elements to my own work, and I’ve had a sneaking suspicion that dissoluble fabric might open some new artistic doors.  This past week, I decided to experiment by making some needle felted leaves on dissoluble fabric.  Making the leaves is very simple, and it is a good project for all levels.

To make the leaves, I photocopied dried leaves I collected this fall.  I traced an outline on the picture of the leaf.

IMG_0620

I placed my tracing under Sulky dissoluble fabric, and I traced the pattern. I began filling it in with wool.  To make these leaves, I experimented with different wool.  Mostly I used carded Maori  (Corriedale and Coopsworth) in yolk, orange, red, and soft fruits as the fibers are short and easy to control.  I added some additional color with bulky carded Corriedale in various shades (peach melba, whirlpool, and sour cherry). I also experimented with merino.  The Maori leaves came out a bit firmer, and they filled in more quickly than the merino leaves.

IMG_0549 - Copy

I added in veins.  Where the veins seemed too prominent, I added thin wisps of wool to cover the veins. I like to use all tools when needle felting. Single needles help you to add detail (such as the veins). I like to use the needle holder with five needs when covering a lot of territory.  I use the three needle tool the most as it gives a lot of control.

leaf on fabric 2


I cut around the leaf to remove the dissoluble fabric.  I put it in a bowl with warm water for about three minutes, swirling it around a bit.

leaf in water - Copy

When the fabric was gone, I placed it flat on a towel. Rather than wringing it out, I pressed it dry with a paper towel. I then propped the leaves on, yes, measuring cups.  As the leaf dries, you can give it a little shape by positioning it as you like.

drying leaf - Copy

In the future, I might consider doing some free motion stitching on the leaf once it is dry.  You could use a mixture of half glue/half water to stiffen the leaf.  You would paint it onto the leaf, and then form it. Here is close-up of a different leaf.

leaf

I decided to put the leaves on fabric, and I wanted to couch threads and yarns around the leaves.  I choose a stiff fusible stabilizer (Pellon 71). I covered it with a batik, and then I covered the batik with a hand dyed silk fabric. I used a spray adhesive to hold the silk to the fabric.  I couched sari yarn and hand dyed threads onto the fabric. I added a layer of batting and backing fabric. I used a few of my machine’s fun stitches to add texture, and I also quilted in some regular lines.  I then sewed the leaves onto the fabric with a row of stitches down the center vein.  I may still add more stitching and beads. If you want to learn more about this method of stitching and couching threads, check out the wonderful work of Carol Ann Waugh (http://www.carolannwaugh.com/).

SONY DSC


I can think of other leaves that might be fun to try with this method, or perhaps some flower petals.

Are there ways you could use dissoluble fabric and needle felting?

Feel free to get in touch with me if you have questions!

Karen@BigSkyFiberArts.Com

Big Sky Fiber Arts

BigSkyFiberArts.com

Tidying, Rediscovering, and Inspiration

Tidying, Rediscovering, and Inspiration

I’ve been having a big tidy up this week, so haven’t had much time to make anything. And not having space to make anything is one reason for the tidy up! It’s amazing how just not putting things away properly can soon build up to one giant mess. One of the few positives to tidying up is re-discovering things. The first thing I was happy to find is a chiffon scarf I must have bought over 20 years ago. I don’t think it’s silk, but it really is nice. It looks like it was made from a larger piece:

The second small scarf I found was a silvery grey silk one which was my mum’s. I’ve thought about making a nuno piece out of it:

I bought a few large silk scarves around November last year. They’ve got sequins sewn on, and I thought I’d try one for a nuno scarf. They’re not the kind of thing I’d usually buy, but they were knocked down from £20, to £2!:

And, if you’re like me, a big part of tidying up invoves playing about with stuff you’re meant to be tidying! For some reason I kept a load of little paper hearts from the hole-punch I use on tags:

And then I found a lens from a small kaleidoscope (I used to buy them for photography!), so had to have a play. This is a soft wispy piece I made at the well being centre recently:

And this is some Kevlar fibre/thread:

One thing I did find got me thinking about Ruth’s first Quarter Challenge. Tyvek envelopes. I’ve only played around with them once, fairly recently, and just held a couple of pieces over the gas rings on the stove:

I don’t know what I’ll do with the unmelted ones yet, but they have potential!

If you have any tips for keeping tidy, feel free to leave them!

A Couple of Felted Pouches

A Couple of Felted Pouches

This week I decided to make a new pouch for my business cards. The one I am using now is getting  a little ratty looking from being in my purse for several years.

I didn’t take any in progress photos. I wasn’t really thinking about it, just enjoying the process of making something.

This is the first one, front and back and closed. It turned out well but I tiny bit smaller than I wanted.  Not bad considering I didn’t do any measuring I just cut out a resist and started.

Here it is on the resist so you can see the shrinkage

And a pictures of the nuno felt designs.

I made the second pouch bigger. I wanted some ruffles along the sides so added extra fiber there sticking out from the side. I didn’t make the extra wide enough and it almost disappeared. It is a tiny bit ruffled but not great.

and on the resist.

And a close up of the silk roses, I think I will shave them, they are a bit fuzzy.

Finally both of them with a ruler to give you an idea of size. one is about 6 and the other about 8 inches

I have a thought of making them to sell. I thought maybe I would put a grommet in the back with a carabineer clip in it. I am just not sure they will sell at a decent price. Do you like the idea? What do you think people would pay for them?


First Quarter Challenge – Mixed Media Surface Design

First Quarter Challenge – Mixed Media Surface Design

As many of you may know, I do a lot of mixed media on felt. I especially enjoy trying out ideas that are not usually considered appropriate for felt. Some work, some don’t, but I do like to see what happens. The mad scientist in me, I guess. My latest explorations are in paint pouring. You can find tons of YouTube videos about how to do this so I’m not going to go into the details here. Paint pouring is usually done on canvas or hard surfaces. But I wanted to see what would happen when I poured on felt or on cotton fabric. Would it work? Would I be able to machine stitch through the fabric or felt after the paint was dry? What else could I do with a piece of fabric or felt that had paint poured on it?

Our group got together last Friday to do a session of paint pouring. Everyone else was pouring on canvas, board, ceramic tile or some other flat surface. I had prepared a couple of canvas ahead of time by covering with felt or cotton fabric and stapling the backside while stretching the fabric tight.

Here’s the backs of the canvas and then the front sides. The dark purple one is the felt.

Normally you follow a procedure as above that Sally poured on a black ceramic tile. It’s really a lot of fun doing this because the results are pretty random with this type of pour and it is exciting to watch and see the changes that occur in the paint.

Here’s the tile after it’s completely covered. It wasn’t dry yet so it probably still changed from this photo but you get the idea.

I started with the cotton fabric covered canvas. I poured some white paint on the corners to cover completely. Corners are the last to get covered usually and I didn’t want any issues because the paint didn’t travel as well as on canvas.

Then I did a “dirty pour” as seen in Sally’s tile photos above. And it worked! I haven’t seen the dried piece yet as it is still at Paula’s house. These take a while to dry.

Next up felt! I should have done the same type of pour that I did on the cotton but I decided to try pouring the different colors separately which you can see on the left. The minute the paint hit the felt, it barely spread at all. Very little mixing of paint. So I decide to try adding more black and white paint at the edges and spreading them lightly over the surface. That is the photo on the right. Ugh. Pretty ugly and disappointing. Again, I haven’t seen it dried yet and we’ll see if it can be salvaged in some way. The next step is to take it off the canvas once it’s dry and see if it can be stitched. Hopefully, I won’t kill my sewing machine.

This slideshow requires JavaScript.

Here are some other people’s results on various substrates. We had a great time and I will carry on with my experiment once it is dry. I’ll show you the results even if they are the ugliest thing ever!

Finishing and Framing

Finishing and Framing

 Our Guest Artist today is Tracey Thompson who has several galleries interested in her work and offered to share some tips on finishing and framing with us.

So, you have created your latest pictorial masterpiece and now you have to decide how you wish to display it.  Here are a few options that I have tried, I am sure there are more.

Canvas

Deep or shallow edge canvases are very useful and can be used in a number of ways.  One suggestion is to make the piece big enough to stretch right over the sides and onto the back, then staple gun the edges of the felt to the wooden structure. Here is my 8×8 canvas example.

Then to tidy up the back I cut a piece of calico to size, ironed a neat hem and sewed it carefully to the back covering all the ugly staples, then added a D ring for hanging.

Another way to use canvas for displaying your work is simply to stick strips of double sided sticky tape onto the canvas and press your work onto the tape, this is useful if you want an organic look rather than a straight edge.

The last canvas tip I have is to again use tape to stick your piece to the canvas but this time, the work is slightly bigger than the canvas, so this creates the illusion that your art is ‘floating’ just off the wall.


Framing

Obviously your pieces can be framed, including a mount and glass. This is how I finish my pieces, choosing the correct colour mount to compliment the work, and using white wooden frames.

Another way of framing is to tape the piece to a complimentary coloured mount board and display it organically within the frame.

The last method I want to show you is a backing for a wall hanging.  Once the piece is finished, size a piece of calico for the back similar to the canvas above, and sew as before.  Then machine sew a strip of velcro (the fuzzy part) to the top of the work. Cut a slim baton and to this the loop section of the velcro is glued, and a D ring screwed midway for hanging.

The piece now has options available to yourself or the customer.  It can be hung as it is, using the D ring, or the baton can be taken off and the piece can be framed organically or with a mount as desired.

I hope that has given you a few ideas as to how you can show your work to its best advantage.

Thanks Tracey for these great framing tips!


Throwback Post – Texture

Throwback Post – Texture

We were talking about doing some ‘throwback’ posts this year, and while I was giving the site a bit of a tidy-up and adding a new 3D page over the New Year, I came across this one of mine from September 2014, and thought it’d be a good one to start with. Do you ever revisit your old work and get inspired with new ideas?

A while ago I bought a weird fluffy, knitted, tubular scarf from Poundland to try felting with. If you ever buy one, make sure you cut it over a bucket or newspaper or something to catch all the bits! I laid out a couple of layers of very wispy pink Merino tops left over from a book cover I made last year, then I added the piece of scarf, and 2 more wispy layers of wool tops. It didn’t take long to felt. This is one side of it:

OLYMPUS DIGITAL CAMERAThis is the other side:

OLYMPUS DIGITAL CAMERAAnd this is what it looked like holding it up to the sky:

OLYMPUS DIGITAL CAMERAI don’t remember how long after, but I decided the scarf sampler might make a nice sculptural piece similar to one I’d made before. I didn’t make it in exactly the same way, I concertina’d it and stitched in place, then twisted and felted and fulled more. This is the top:

OLYMPUS DIGITAL CAMERAClose up of the ridges:

OLYMPUS DIGITAL CAMERASuper close up of the texture:

OLYMPUS DIGITAL CAMERAThis is the back:

OLYMPUS DIGITAL CAMERAA close up of the back:

OLYMPUS DIGITAL CAMERAAnd a super close up of the texture:

OLYMPUS DIGITAL CAMERANow, what do I do with the other 8 square feet of fluffy knitted stuff? 🙂

More on Mittens

More on Mittens

I posted a while back about making my grandson some mittens.  mittens post He loved them but they wouldn’t stay on even when his coat sleeves were over them.  I had thought that might be the case . Mittens are usually narrower at the wrist. You can’t do that with felt mittens, no stretch.  To fix them I sewed on some bound ribbon. Threaded some elastic through and added a locking toggle. We tried them on and he tried to make them fall off but they stayed put. Success!


The Hardest part was finding the toggles. When I wasn’t looking for them, they were everywhere. I went to 2 craft stores, a sewing store, a Walmart and the big dollar chain store, in the end found them at the smaller chain Dollar World.

I made a pair of adult sized this week so I would have an adult size to show and do a different way of tightening the wrist.  That part isn’t done yet. I need to find my sew on Velcro for that. Here my daughter is modeling them for me.

and a simple over lapping to close them.

The hardest part about writing the instructions is doing the measuring to get the resist the right size. I had to redo the drawing several time because I made mistakes and I wanted it to be neat.

The instructions are mostly doing the same thing over and over in all the different spots, but as you read it, it gets confusing. I need to figure out a different way of writing it. I may make it several diagrams, pull out the thumb and the angle from the thumb to another picture so there are not so many lines. Then write the instruction once and say repeat for all the lines. I will be there to explain so it will be easier. I would like to get them clear enough to make a kit. I am going to see if I can get my son to draw the mitten using his fancy drawing program so I can easily manipulate it electronically using layers. I will have to find that free “photoshop” drawing program, I can’t remember the name of it at the moment.


Hubby’s Christmas Present

Hubby’s Christmas Present

If you have been following my blogging progress since I began, I have made quite a few pair of felted slippers for my husband. He wears them out at a very fast rate. I’m not really sure why my slippers last so much longer than his. He needed a new pair so I decided that would be a good Christmas present. Unfortunately, I didn’t start working on them until December 22nd so they didn’t quite get finished.

The template/resist that I used was again one that was originally shown here in a guest post from Nada.  I think that Nada no longer uses this template when making slippers but I really like the way the heel works on this one. I have two shapes here because I have made these for my husband before. The one on the right is the shape I used originally. The slippers turned out too wide and almost too short. I made this pair a couple of years ago and I had forgotten the finer points of how the heel works on this slipper after being cut. So I was just thinking that I needed to make the template longer and more narrow. So I used the template on the left. I was in such a rush to get these done that I didn’t take any felting photos at all. Sorry!

So here are the finished slippers. The new template did give me a better size that fit better for my husband’s feet but there was definitely an issue with the heel. Because I made the heel in the template so long and narrow, it ended up with an extra round part on the bottom of the heel. You can see it slightly in the right hand photo on the bottom slipper a little extra lump there at the heel.

Hopefully, you can see it a little better here from the bottom. I had to really work this area to shrink down the extra felt in that area. It actually gives a better cushion to the heel which isn’t bad, but the next time, I need to remember that the heel on the template should be much more wide and rounded.

I think this is the shape I would use next time. Or maybe even a bit less distance between the “ears” and the end of the heel. Do take a look at Nada’s tutorial if you’re interested in making a pair. I am still waiting for the leather bottoms for hubby’s slippers which I will stitch in place. He was very excited to get them and was really appreciate of my efforts – always nice to have a happy recipient of hand made gifts.

Die Cutting Felt

Die Cutting Felt

Today I’m pleased to welcome Tracey Thompson as our Guest Artist. Tracey has been an active member on the forum and will be showing us her Die Cutting Machine and her experience cutting felt.

A recent post in the Felt and Fibre Forum led me to comment that I had tried to cut felt using a die cutting machine.  It was given to me free by a friend because she wanted to treat herself to the next model that had more bells and whistles!

Here is the die cutter, it is a Spellbinders Grand Calibur.  It cuts beautiful images in  card stock but how would it cope with felt?

I tried both commercial felt and my own prefelt in this machine.  The results were mixed with both felts, but I think this was largely down to the dies.  The more intricate the die, the more it mashed away at the felt, sometimes obliterating it!

I then remembered that I had a quite simple die in the shape of a snowflake, and as I still have Christmas cards to make, I thought I would have another go.  This next picture is my prefelt with the snowflake die and a Merry Christmas die.  The hole in the middle of the prefelt was where the snowflake came out perfectly, and the mashed up bit at the bottom was where Merry Christmas didn’t!

So I thought I would make a simple card to use the snowflakes on.  I put down two layers of Tanzanite from World of Wool, as I wanted a night time feel as a background.

I also wanted simple decoration, so I just lay a few blue and white mulberry silks on the top.

Here it is after felting.

I then ironed a piece of interfacing onto the back to make the stitching more stable. I had cut out a few snowflakes using a white commercial felt, and I used a double silver metallic thread to attach them to the felted piece.

So here is the finished card, it is a fairly simple one but it’s one to tick off the list!

Tracey, thanks for sharing your experience with us and for helping to fill in on my leave!